


Quilt design
Quilt Editor: Arrange Blocks and Fabric
Build a block layout, draw freeform pieces or turn a photo into a mosaic.
Updated
Sep 14, 2026
Read time
4 min
Level
Beginner
Choose a design approach
Open the Quilt Editor. Use New to choose Grid, Photo Mosaic or Freeform. A new Local draft exists only in this browser until you sign in and make a design edit that saves it to your account.
- Grid: arrange blocks from the library in a measured layout.
- Photo Mosaic: upload a photo and adjust the block layout, patch size and palette.
- Freeform: choose Draw rectangle, then drag on the quilt canvas. The outline previews the piece and its dimensions. Release to add it; the new piece is selected and Select becomes active so you can move it or edit its properties. Press Escape while drawing to cancel.
Stagger an existing quilt
A Standard quilt places blocks in a row-and-column grid. Its grid controls change rows, columns, block dimensions, and Standard or On Point orientation; there is no alternate-row offset or stagger control. On Point rotates the grid; it does not stagger alternate rows.
New creates another document. Choosing Freeform there does not convert or carry over the blocks in the quilt you already have open. Freeform's Select moves drawn shapes; it is not a documented way to shift a Standard quilt's existing blocks. Keep the current quilt saved before starting a separate design.
For a brick-like layout, offsetting alternate rows by half a block is a general quilting approach, but the Standard grid cannot express that row offset through its current controls. A true staggered-grid edit requires additional editor support. For blocks already containing smaller patches, clarify whether you want to offset the whole blocks or change the patch arrangement inside them.
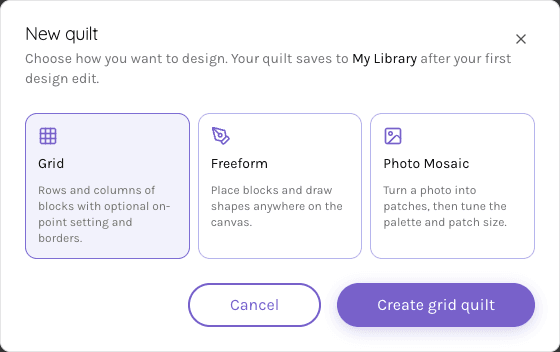
Choose Grid, Freeform or Photo Mosaic when starting a quilt. Grid is selected in this example.
View full-size imageMeasure and assign fabric
In Properties, Layout shows finished dimensions beside its heading, with block size, grid counts and orientation below. Under Borders, choose Add border. Each border has a finished width, a Corners choice and a solid color or fabric. Borders are listed from the quilt top outward, and their widths add to the overall quilt size.
In Freeform, Measurements stays above the drawing tools. Select a shape to pick fabric, name a fabric group or set its seam allowance in inches. The status bar shows quilt dimensions, placed blocks or shapes, and selection counts. Mosaic shows its configured block layout.
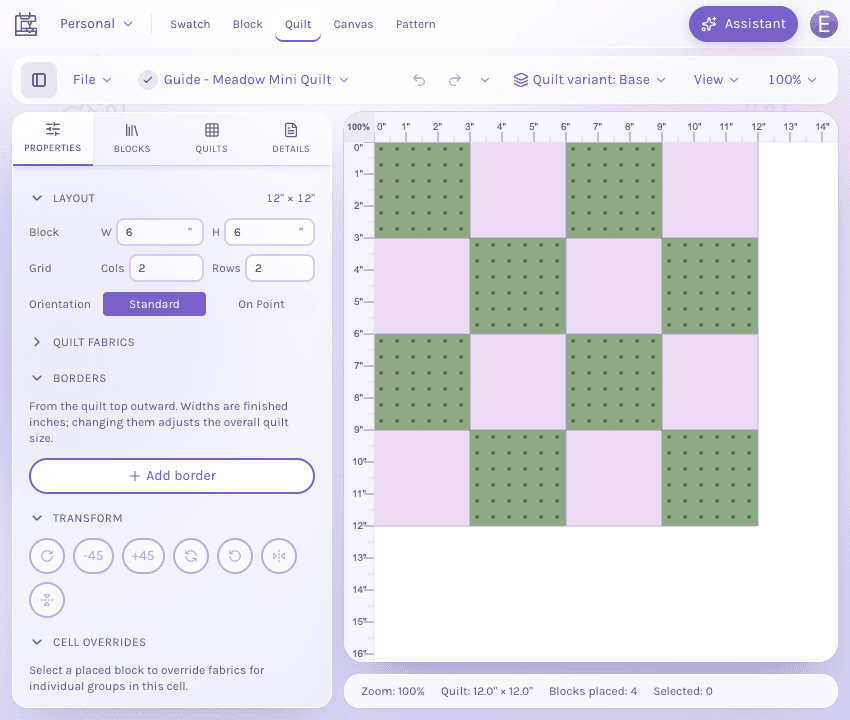
Two columns and two rows of 6-inch blocks make this 12-inch quilt. No border has been added.
View full-size imageReview block updates
Select placements to check specific blocks, or leave nothing selected to check all placements. Open the sidebar's Blocks tab and choose Block updates. Compare the offered version before choosing Accept update. Previewing does not change the quilt; close the dialog to leave an update unaccepted.
An accepted update changes this quilt. In a project it stays in your private draft until you choose Update project quilt. Keep an older block version by leaving the update unaccepted.
Save and reopen
Saved privately identifies an unpublished project draft; Shared version identifies the version shared with project members. Saving is still pending. Reopen personal quilts from My Quilts, and project quilts from their project. Learn about saving and recovery.
Find tools and shortcuts
Use File for the export choices supported by the current quilt mode. Quilt Editor help and shortcuts, in the QuiltLab menu at the top left, lists shortcuts for the visible Standard, Freeform or Mosaic canvas; a shortcut from another mode may not apply. For written instructions and a printable multi-page layout, continue to Pattern Builder.