QuiltLab
  • About
  • Pricing
  • Blog
  • Coming Soon
QuiltLab Logo

© 2025 QuiltLab LLC. All rights reserved. | support@quiltlab.co

Privacy Policy|Terms of Service|Data Policy

Search

Topics

7 posts

Quick links

  • Modern vs. Traditional Quilt Patterns: Key Differences and Design Tips
  • Color Theory for Quilters: Build Confident Palettes Every Time
  • Creating Your First Photo Quilt with QuiltLab
  • Getting Started with QuiltLab: A Beginner's Guide
  • QuiltLab Update: Advanced Pattern Recognition for Faster Block Design
  • 5 Stunning Photo Quilt Ideas to Inspire Your Next Project
  • Top 5 Sewing Machines for Quilting in 2025: Expert Reviews & Buying Guide

Getting Started with QuiltLab: Design Your First Digital Quilt

By QuiltLab Team•July 17, 2025•5 min read
QuiltlabTutorialDigital Design
Digital quilt mockup in QuiltLab with color palette sidebar

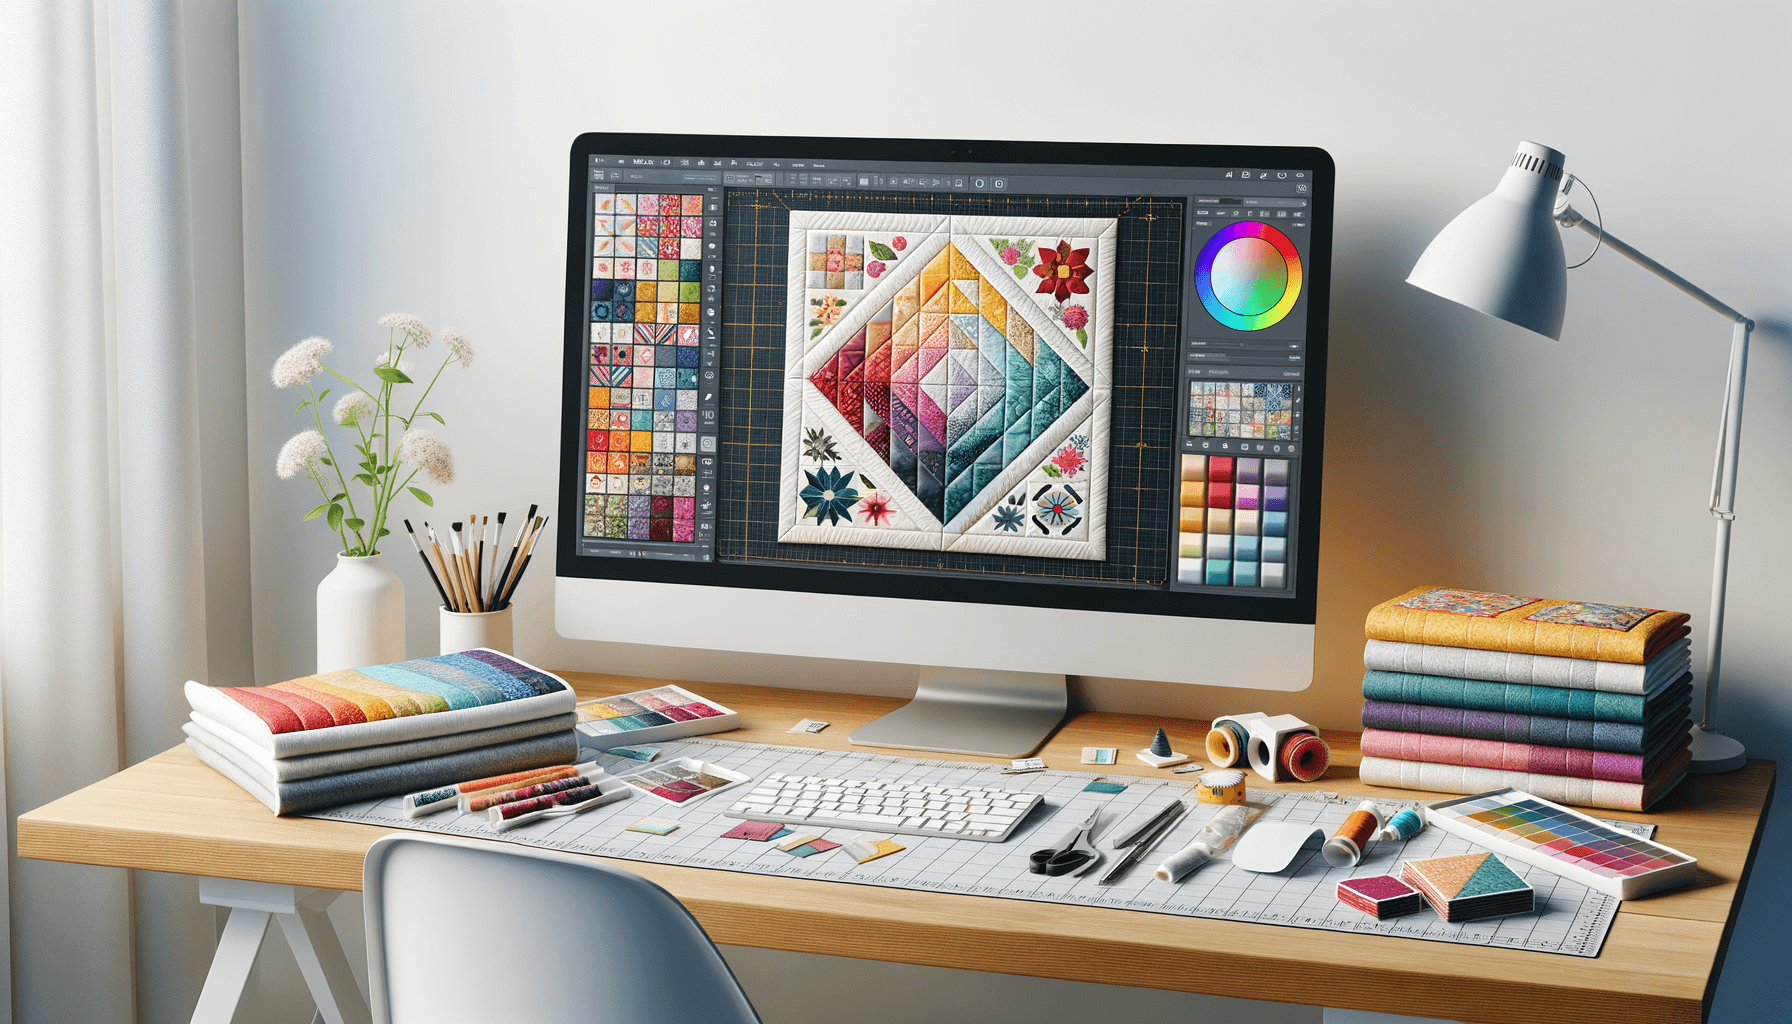
Designing a quilt digitally can feel intimidating the first time you open any software. QuiltLab keeps the learning curve gentle, but knowing where to click speeds up your success. This companion guide walks you through a complete project-from opening a blank canvas to exporting a cut list-so you can start sewing with confidence.

Watch: Beginner Quilt Design Walkthrough

This EQ8 lesson mirrors the foundational steps you will follow in QuiltLab: drafting a simple block, repeating it across a layout, and exporting cutting information. Use it as a visual reference while you work through the instructions below.

1. Set Up Your Workspace

  1. Create your account and log in at app.quiltlab.com.
  2. Open the Dashboard and decide which tool fits your idea: Block Editor, Photo Quilt, or Swatch Editor.
  3. For this walkthrough we will design a throw-size quilt using repeating blocks in the Block Editor.

Configure Project Settings

  • Click New Project -> Throw (60" x 72").
  • Name your project and add notes about inspiration or intended recipient.
  • Choose inches or centimeters; QuiltLab automatically handles conversions.
  • Set the desired seam allowance and default block size so exported instructions match the way you sew.

The National Quilters Circle has additional tips on planning quilt sizes if you need help choosing dimensions.

2. Build Your First Block

  1. Launch the Block Editor and select a 12" x 12" grid.
  2. Use the shape tools to draw half-square triangles, rectangles, or squares. Start simple: a pinwheel or churn dash builds core skills.
  3. Align shapes using the Snap-to-Grid toggle for crisp seams.
  4. Group related shapes before resizing so proportions stay intact.

Pro tip: Duplicate shapes (Cmd+D or Ctrl+D) to maintain consistent angles and speed up piecing. When you are ready for curves, explore the polygon and freeform path tools. Sewing Machine Fun provides a helpful glossary of block elements you can recreate here.

3. Choose Colors with the Swatch Editor

  • Open the Swatch Editor in a new tab and import fabric photos or pick from the built-in solid library.
  • Create a palette with lights, mediums, and darks. Rename swatches with descriptive labels (for example "Sea Glass Light").
  • Back in the Block Editor, assign colors by selecting a shape and choosing the swatch from the palette sidebar.
  • If you have a physical fabric pull, photograph it in natural light and upload the image. The color extractor will match the tones automatically.

For more guidance on building palettes, revisit Color Theory for Quilters or consult the Aurifil Color Builders program for curated thread-and-fabric combinations.

4. Arrange Blocks in the Layout View

  • Switch to Quilt Layout.
  • Duplicate your block to fill the throw-size grid (5 blocks x 6 blocks).
  • Rotate or mirror select blocks to explore secondary patterns.
  • Add sashing, borders, or cornerstones via the Layout toolbar.
  • Use the "Alternate Block" feature to drop in negative-space blocks or complementary motifs.

If you are curious about how secondary patterns develop, the Missouri Star Quilt Co. blog has tutorials showing how small rotations dramatically change a layout.

5. Evaluate Your Design

Use QuiltLab's preview tools to fine-tune:

  • Toggle grid lines to focus purely on color flow.
  • Check value contrast by enabling grayscale preview. Does your focal motif still stand out?
  • Preview quilting lines by sketching motifs on top of the layout. Draw both walking-foot-friendly designs and FMQ ideas.
  • Use version snapshots to compare multiple colorways without losing earlier iterations.

6. Calculate Fabric Requirements

When satisfied, click Export -> Fabric Requirements. QuiltLab generates yardage for each color, including sashing and binding if selected. Print or save the PDF for shopping. Cross-reference the totals with a yardage estimator like the Robert Kaufman Quilt Calculator to build confidence in your numbers.

7. Generate Cutting Instructions

Export the Cut List to see every piece size grouped by fabric. Highlight pieces you can strip-piece or chain-piece to streamline sewing. The cutting plan also notes subcut recommendations so you can slice multiple units at once.

8. Share or Collaborate

  • Invite a collaborator from your guild by sending a view-only or edit link.
  • Export a high-res PNG to share on social media or solicit feedback.
  • Save a version snapshot before experimenting with alternate colorways.
  • Use QuiltLab's comment system to track suggestions from test quilters.

9. Sew Your Design

With instructions in hand:

  1. Starch and press fabrics for accuracy.
  2. Cut pieces following the PDF plan.
  3. Chain piece repeated units, pressing seams consistently.
  4. Assemble rows, nest seams, and join the quilt top.
  5. Quilt using motifs you previewed digitally, then bind and label your finish.

Need a refresher on accurate sewing? We All Sew from BERNINA has tutorials on seam allowance, pressing, and binding techniques.

Troubleshooting and Tips

ChallengeSolution
Layout feels flatAdd accent blocks, change background value, or insert narrow sashing for separation.
Yardage seems highReduce the number of unique fabrics or swap pieced borders for solid yardage.
Lost track of versionsUse QuiltLab's version history to revert or duplicate projects before major edits.
Need more inspirationBrowse the QuiltLab Community Gallery or explore Pinterest quilt mockups.

Keep Learning

Once you have built a basic layout, try:

  • Designing a custom block with curves using the Fabric.js freeform tools. The AccuQuilt Block Library is a great reference for classic curved motifs.
  • Importing a photo into the Photo Quilt generator for a memory quilt.
  • Building a swatch library from your fabric stash so future designs start faster.
  • Experimenting with quilting plans using digital sketching apps such as Procreate or Concepts.

For a broader overview of everything QuiltLab offers, hop over to Getting Started with QuiltLab: A Beginner's Guide. Ready to explore color theory? Pair this tutorial with our Color Theory for Quilters article to make confident palette choices.

With consistent practice, your digital designs will translate seamlessly to fabric-and QuiltLab will be your favorite companion throughout the process.

Comments

Leave a Comment

No comments yet. Be the first to share your thoughts!