


Fat Quarter Cutting Layout: Plan Mixed Rectangles
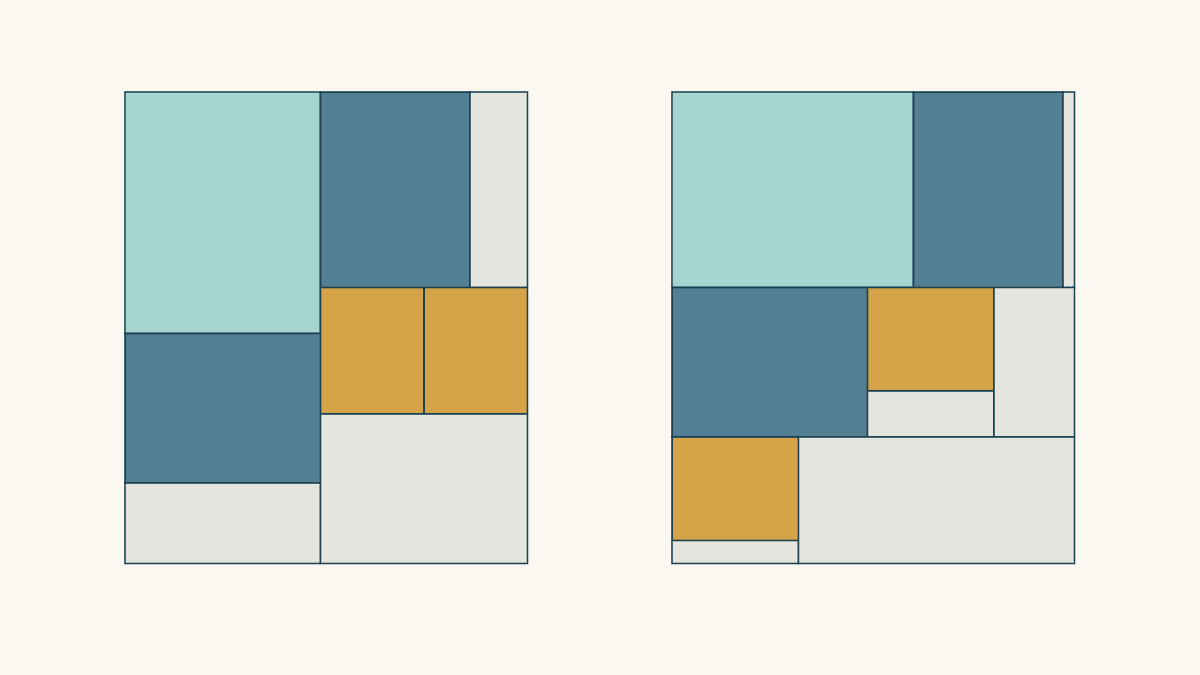
A fat quarter cutting layout should start with the usable rectangle in front of you and the exact pieces your pattern needs. When the demand includes several rectangle sizes, counting total area cannot tell you whether they fit or whether the leftovers will be useful.
This worked example fits the same five pieces into two layouts. Both use the same area, but after the cutting sequences shown, only Layout 1 leaves an individual leftover piece for a later 6 x 8-inch cut. The diagrams are original geometric plans, not photographs of cut fabric or evidence of a sewn test.
Measure usable cloth before drawing a map
The fat quarters reference explains the precut's general shape. For a cutting plan, measure your own piece after the preparation you choose for the project. Exclude selvage and any damaged or uneven edge you cannot use; straighten the starting edges as needed before relying on a rectangular measurement.
Rebecca Bryan's discussion of saving selvages at Bryan House Quilts emphasizes preserving enough usable cloth for the project. The amount removed matters, so a nominal package size is not a guarantee that every proposed cut map fits.
Here we assume a hypothetical usable rectangle measuring 17.5 inches across and 20.5 inches down. That is an input to this example, not a prediction of how much your purchased fat quarter will shrink or need trimming. Washing, starching, fabric behavior, and the condition of the edges can change your available dimensions. Use the pattern's preparation instructions and your actual measurements.
Write both dimensions on the sketch. An extra half inch available in one direction cannot compensate for a piece that is too wide in the other.
List cut sizes and allowed orientations
Our demand is deliberately mixed:
| Piece | Quantity | Cut size per piece |
|---|---|---|
| A | 1 | 8.5 x 10.5 inches |
| B | 2, labeled B1 and B2 | 6.5 x 8.5 inches |
| C | 2, labeled C1 and C2 | 4.5 x 5.5 inches |
These are cut dimensions, with the intended allowances already included. Do not add another seam allowance during layout. For ordinary rectangles joined on all four sides with quarter-inch seams, those cuts correspond to finished sizes of 8 x 10, 6 x 8, and 4 x 5 inches respectively. A different construction method needs its own cutting instructions.
For this example, the fabric is non-directional and the pattern permits the rotations shown. Rotating an 8.5 x 10.5-inch piece changes which side runs across the fabric; it does not change its identity or area.
University of Kentucky Cooperative Extension's Layout, Cutting, and Marking publication, written for garment cutting, explains why grain and one-way designs constrain layouts. That general caution applies here too: follow your quilt pattern's grain requirements, and identify the top of any directional print before rotating pieces. These two examples cannot automatically replace a map with stricter orientation rules.
Planning all required pieces before the first cut is also the approach in Kimberly Jolly's Ultimate Beginner Quilt cutting-guide introduction at Fat Quarter Shop. For your own project, put the complete demand on paper so an early convenient cut does not remove space needed later.
Layout 1: divide the fabric into vertical lanes
Place the 17.5-inch dimension across the top of your sketch and the 20.5-inch dimension down its side. Start with two full-height lanes: 8.5 inches wide on the left and 9 inches wide on the right.
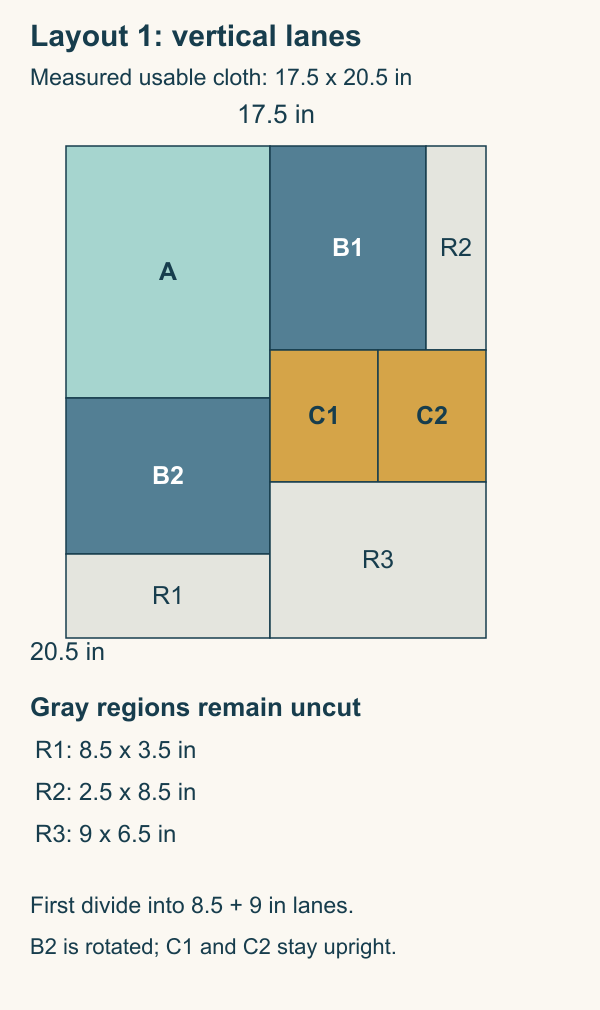
An accessible cutting sequence is:
- Separate the cloth into the 8.5-inch and 9-inch lanes.
- From the left lane, cut a 10.5-inch length for A, then a 6.5-inch length for rotated B2. That leaves R1: 8.5 x 3.5 inches.
- From the right lane, separate an 8.5-inch-high top band. Cut B1 6.5 inches wide from it, leaving R2: 2.5 x 8.5 inches.
- From the remaining right lane, separate a 5.5-inch-high band. Divide its 9-inch width into two 4.5-inch widths for C1 and C2.
- Leave the bottom of that lane as R3: 9 x 6.5 inches.
The left-lane height check is 10.5 + 6.5 + 3.5 = 20.5. The right-lane check is 8.5 + 5.5 + 6.5 = 20.5. The two lanes together use 8.5 + 9 = 17.5 inches of width.
Every cut can run across the current lane or band. You do not have to cut through a neighboring piece to reach an interior boundary. Keep each newly separated section identified so B1 and B2, or the residual regions, are not confused.
Layout 2: divide the fabric into horizontal bands
Now keep the same cloth dimensions and demand but change the order and orientations. Divide the fabric into full-width bands 8.5, 6.5, and 5.5 inches high. Their sum is 20.5 inches.
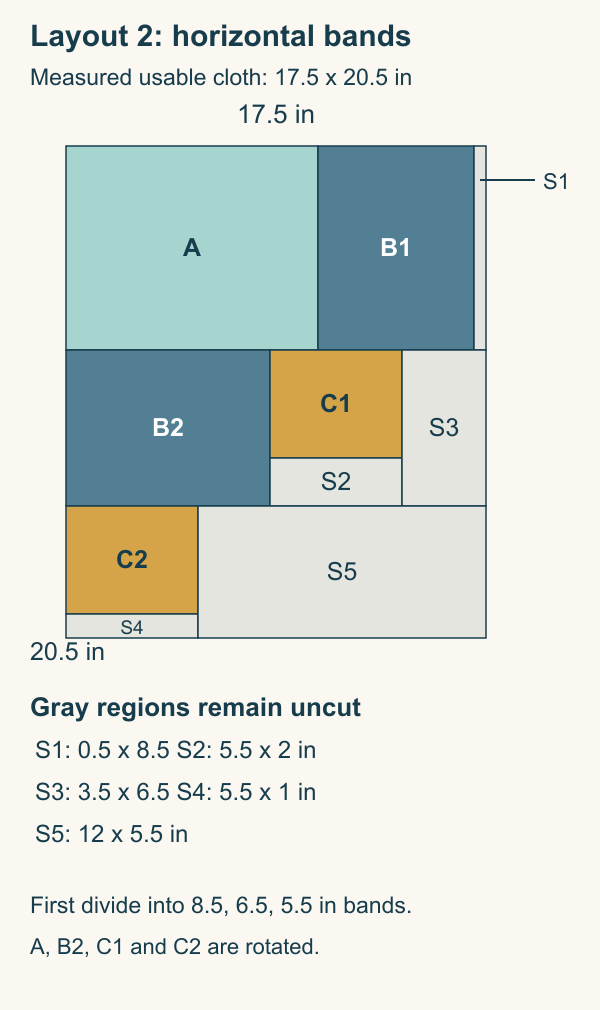
Cut the separated bands as follows:
- Top band, 8.5 inches high: cut rotated A 10.5 inches wide, then B1 6.5 inches wide. A 0.5 x 8.5-inch strip, S1, remains.
- Middle band, 6.5 inches high: cut rotated B2 8.5 inches wide. Separate a 5.5-inch-wide section for rotated C1, leaving S3: 3.5 x 6.5 inches beside it. Trim C1's section to 4.5 inches high, leaving S2: 5.5 x 2 inches underneath it.
- Bottom band, 5.5 inches high: separate a 5.5-inch-wide section for rotated C2, leaving S5: 12 x 5.5 inches beside it. Trim C2's section to 4.5 inches high, leaving S4: 5.5 x 1 inch below it.
The top widths check as 10.5 + 6.5 + 0.5 = 17.5. The middle widths are 8.5 + 5.5 + 3.5 = 17.5; the bottom widths are 5.5 + 12 = 17.5. C1 and C2 still measure 4.5 x 5.5 inches after rotation.
These are ideal rectangular cut maps. Confirm ruler placement and usable edges before cutting; an exact-fit map does not create extra cloth for a trimming mistake or a narrower measured piece.
Compare leftover shape as well as area
The usable rectangle contains 17.5 x 20.5 = 358.75 square inches.
Our five pieces use:
- A: 8.5 x 10.5 = 89.25 square inches.
- Two B pieces: 2 x 6.5 x 8.5 = 110.50 square inches.
- Two C pieces: 2 x 4.5 x 5.5 = 49.50 square inches.
Together that is 249.25 square inches, leaving 358.75 - 249.25 = 109.50 square inches in either layout. This equality follows from using the same cloth and pieces; it does not prove either plan is an optimal packing arrangement.
Suppose another part of the project requires one 6 x 8-inch cut rectangle. Layout 1's R3 measures 9 x 6.5 inches. It can hold that piece rotated to 8 inches across and 6 inches down, if rotation is permitted for that additional piece.
After following Layout 2's full-width band cuts and subsequent subcuts, you have five separate leftover pieces. None fits it individually in either orientation:
| Residual region | Size | Why a 6 x 8-inch piece cannot fit |
|---|---|---|
| S1 | 0.5 x 8.5 inches | Short side is below 6 inches |
| S2 | 5.5 x 2 inches | Short side is below 6 inches |
| S3 | 3.5 x 6.5 inches | Short side is below 6 inches |
| S4 | 5.5 x 1 inch | Short side is below 6 inches |
| S5 | 12 x 5.5 inches | Short side is below 6 inches |
S5 even has more area than R3: 66 versus 58.5 square inches. Its 5.5-inch short side still prevents the required continuous cut. Combining scattered leftover areas on a calculator does not turn them into one unpieced rectangle.
Cut order is part of this result. Before cutting, S2, S3, and S5 touch. A different sequence could preserve an 8-inch-wide x 6-inch-high window starting 8.5 inches from the left and 13 inches from the top, across those adjacent regions. The prescribed full-width cut 15 inches down severs that window. If you want to preserve connected leftovers, redraw the cutting sequence and check it before separating the bands; these placements alone do not prove that future cut impossible.
Adapt the map to your project's next cuts
Choose a layout by checking the whole cutting demand and any useful later pieces, not by the appearance of the first empty space. If your cloth is smaller, a print has a required direction, or grain requirements prohibit a rotation, redraw and recheck the map before cutting.
Record the usable dimensions, piece labels, cut sizes, permitted rotations, and cutting order. Add the dimensions of residual regions you intend to save. Our guide to writing a quilt pattern explains why explicit cutting diagrams and instructions matter when another person needs to reproduce a plan.
With the cutting sequences given, both plans satisfy the five-piece demand, while Layout 1 leaves an individual piece for the optional 6 x 8-inch cut. A different project or cutting order may favor another arrangement. Draw the required pieces, the leftovers you want to keep, and the cuts that separate them before the first cut.
Related posts
How to Prevent Wavy Quilt Borders: Measure Before Cutting
Use three interior measurements to set border-strip lengths, keep raw and finished sizes separate, and remeasure after attaching the first pair.
How to Sell Quilt Patterns: Package and Delivery
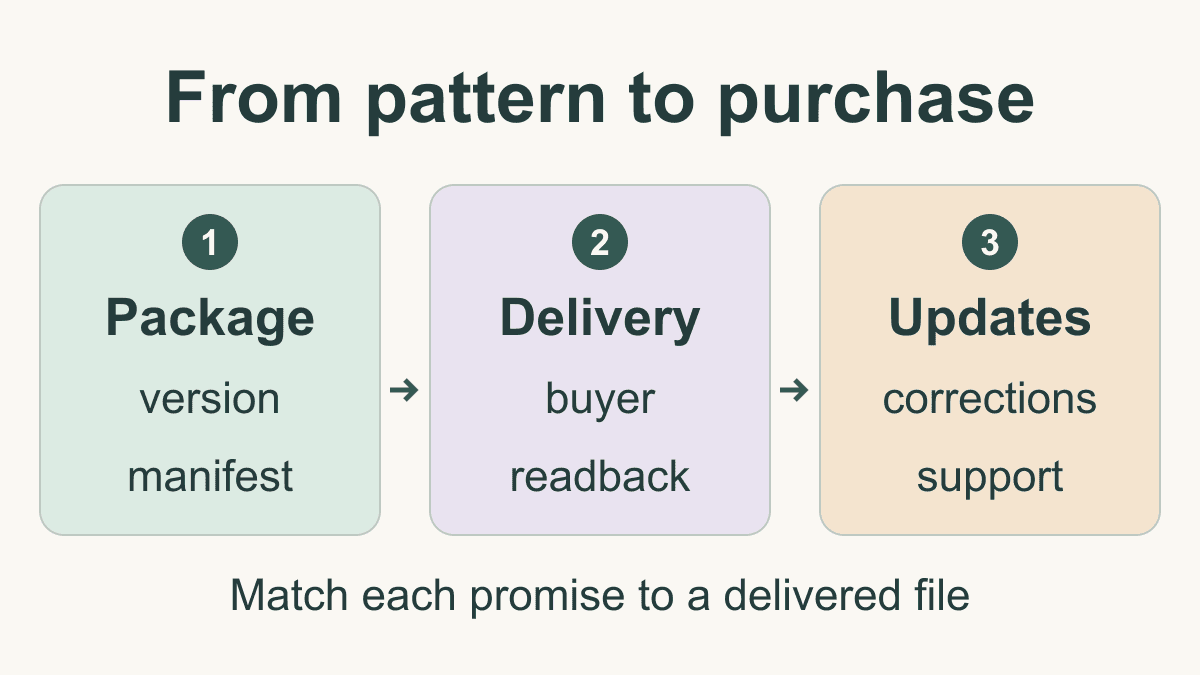
Prepare a clear pattern listing, a versioned download package and a delivery check, with a plan for access, support and corrections.
Sorting Quilt Scraps by Size: A Usable Inventory
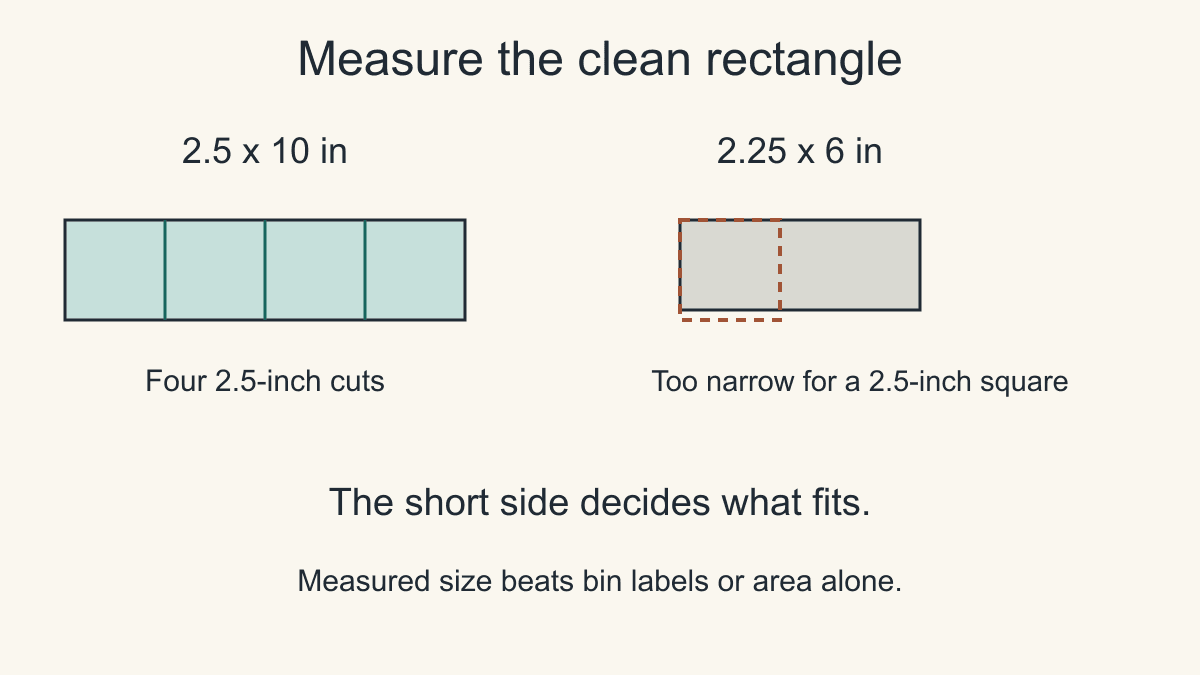
Measure clean scrap dimensions, check which units fit, and allocate a sample inventory without counting the same fabric twice.