


Walking Foot vs Free Motion: Choose a Method
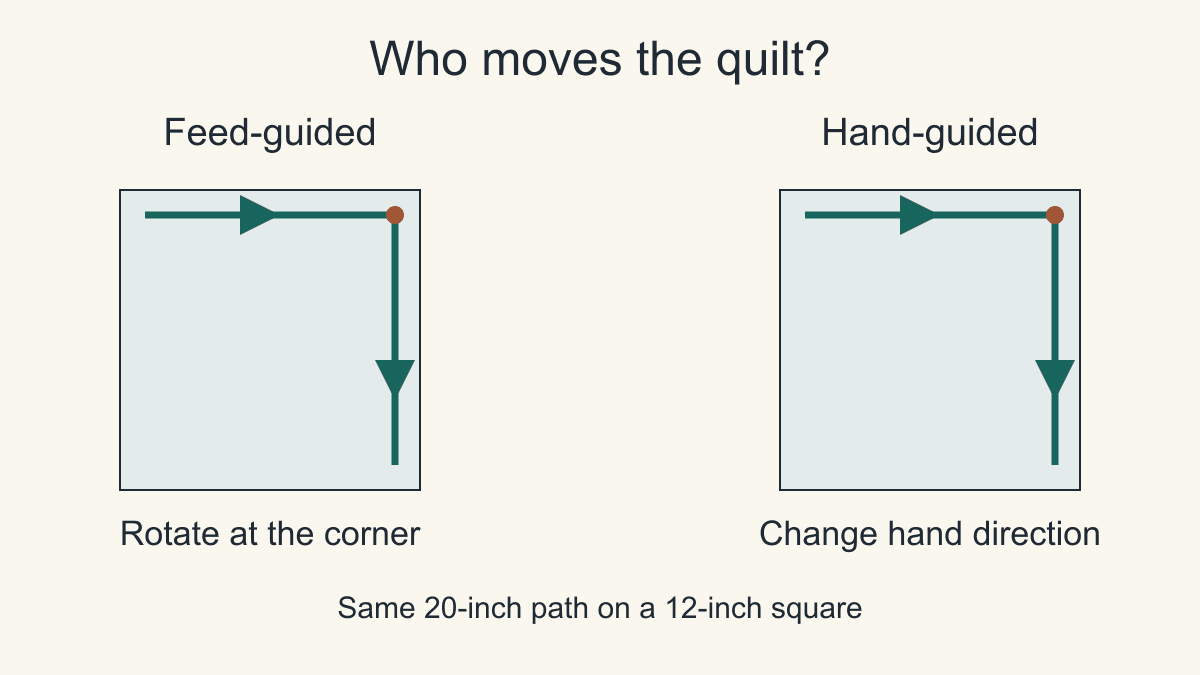
The walking foot vs free motion decision starts with who advances the quilt under the needle. A walking foot works with the machine's feeding action; in free-motion quilting, your hands move the quilt in the direction you choose. That difference changes how you handle corners, curves and stitch length.
Choose for the stitching you want to make and the control you are ready to provide. Neither method is a required graduation from the other. This comparison uses an original measured path and simple arithmetic, rather than claiming results from machines or samples we have sewn.
Compare the jobs your hands must do
A walking foot is often called an even-feed foot. It helps advance the upper layers while the machine's feed dogs advance the fabric from below. Your hands guide and support the sandwich; they should not compete with the feeding action by pulling it through.
Teacher Leah Day's walking-foot explanation describes that upper-and-lower feeding relationship and the need to turn the quilt as the path changes direction. She includes straight and gently curved paths among the method's possibilities. Even feeding is assistance, not a guarantee against shifting or uneven stitches.
In the usual domestic free-motion setup, the feed dogs are disengaged and a suitable free-motion foot is fitted according to the machine's instructions. Your hands determine the quilt's travel under a needle whose position in the machine stays fixed. Lori Kennedy's introduction on BERNINA WeAllSew explains this change in control and the ability to move in different directions without rotating the whole quilt.
| Decision | Walking foot | Free motion |
|---|---|---|
| Fabric travel | Machine feeds; hands guide | Hands move the sandwich |
| Direction change | Reorient the quilt to suit the feed direction | Change hand movement; rotation is optional |
| Stitch length | Feed setting establishes nominal length | Hand travel relative to needle speed establishes length in unregulated work |
| Main handling demand | Support the quilt and manage turns | Support the quilt and coordinate movement with stitching |
The word quilting in a foot's name does not establish its job or compatibility. A piecing foot, walking foot and free-motion foot can serve different purposes. Check the exact machine manual and accessory instructions before buying or fitting one; this comparison does not provide model-specific setup.
Match the method to the direction changes
Start with a sketch of one representative section. Mark where the stitching changes direction, where it starts and ends, and whether the quilt must be repositioned to reach the next section.
For parallel lines or a simple grid, a walking foot lets you concentrate on guiding the line while the machine supplies the feed. The practical question is whether you can support and turn the whole quilt when needed. A straight line across a small panel and a straight line across a bed quilt use the same feeding principle but create different handling demands.
Free motion becomes attractive when the design repeatedly changes direction within a small area. Your hands can move the quilt sideways, backward and forward while the needle remains in its fixed position. That flexibility also gives your hands responsibility for the travel rate.
Both methods can make straight lines. A walking foot can follow curves when you can steer and reorient the quilt appropriately; free motion does not require choosing a curved design. Avoid deciding from the motif's name alone. Examine the size and frequency of its turns, and how much quilt you would need to move at each one.
Work through the same 20-inch path
Consider a 12 x 12-inch square area. Draw a path starting 1 inch from its top and left edges. Stitch toward the right until the path reaches 1 inch from the right edge, then turn 90 degrees and continue downward to 1 inch from the bottom edge.
Each segment is 10 inches: 12 inches minus a 1-inch margin at each end. Together they give 20 inches of planned travel and one direction change. The drawing shows the path in fabric coordinates. It does not show the needle moving around the machine.
With a walking foot, orient the first segment to the machine's forward feed. At the corner, stop stitching and use the machine's appropriate needle-down/pivot procedure to hold the position while you rotate the quilt for the second segment. The important handling event is the rotation of the sandwich.
With free motion, the quilt can keep the same overall orientation while your hands change its movement direction at the corner. You still need a controlled transition: changing hand direction does not remove the need to coordinate the needle and fabric movement. The same 20-inch line is being drawn through the layers, with a different division of work.
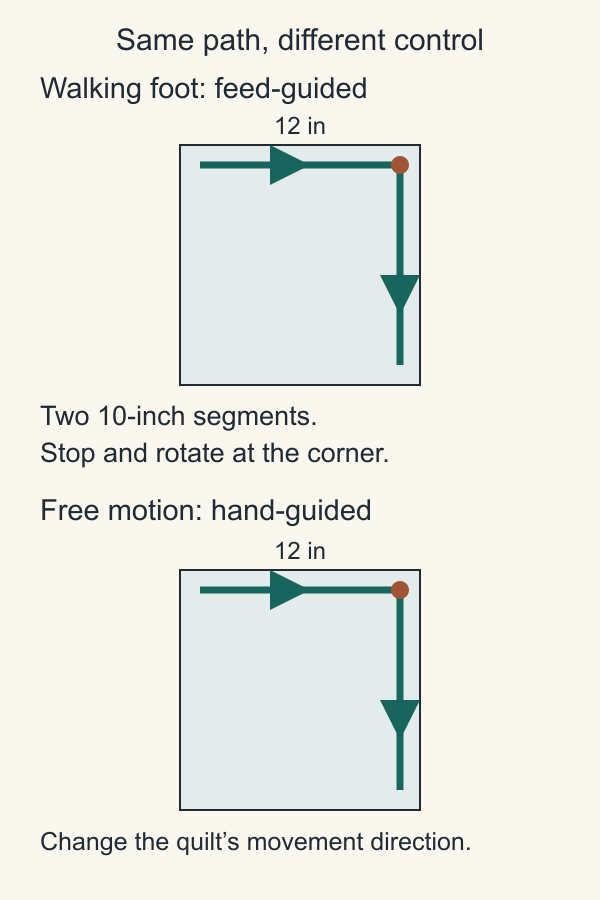
For a larger top, repeat the question at every demanding turn: Can I comfortably rotate this much quilt here, or would I rather change hand direction? A path with many corners may favor free motion for handling, while a few long uninterrupted lines may favor machine feeding. Your current control and the equipment's instructions still decide whether that preference is practical.
This L alone leaves most of the square unquilted. It is deliberately a direction-change study; it does not establish suitable quilting density for a finished quilt.
Understand what controls stitch length
In walking-foot work, the machine's feed and stitch-length setting establish the nominal distance between stitches. Heavy quilt drag or resisting the feed can affect the actual result, so a number on the display is not proof of a measured stitch length in your sandwich.
For unregulated free motion, stitch length depends on how far your hands move the quilt between needle cycles. Kerby Smith's discussion of stitching speed on WeAllSew connects coordinated fabric movement and needle speed. A stitch regulator can assist that relationship on compatible equipment, but it does not steer the path for you.
Here is idealized arithmetic with a constant 600 stitches per minute, or 10 stitches per second:
| Quilt travel | Needle rate | Approximate spacing |
|---|---|---|
| 1 inch per second | 10 stitches per second | 0.10 inch, about 10 stitches per inch |
| 2 inches per second | 10 stitches per second | 0.20 inch, about 5 stitches per inch |
| 1/2 inch per second | 10 stitches per second | 0.05 inch, about 20 stitches per inch |
Distance per stitch is travel per second divided by stitches per second. Doubling hand travel at the same needle rate doubles the spacing. These are explanatory calculations, not recommended machine speeds, measured stitches or a practice prescription. Acceleration, stops and actual machine behavior make real stitching less uniform than the model.
This control difference can help you choose. If you want the machine to establish the feed while you guide a suitable path, favor a walking foot. If independent directional movement matters more, choose free motion and allow for the additional coordination it requires.
Check the quilt sandwich before committing
Top size, batting, backing and support matter whichever method you choose. Read the batting manufacturer's exact quilting-distance and care instructions, then make sure the full stitching plan meets them. The batting guide is a starting point for comparing materials; the package instructions for your chosen batting take precedence.
Prepare a separate sample sandwich with the intended materials and thread. Use it to assess the chosen method before stitching the actual top. If you need machine setup, accessory fit or troubleshooting, use that model's instructions or ask a qualified teacher or dealer. An unsuitable foot or poorly supported quilt is not evidence that an entire method is wrong for you.
When planning how to manage a larger sandwich, also account for backing and batting overhang. Our backing and binding calculation guide treats those amounts separately from the top dimensions.
Write down the choice for this quilt
Record three things beside your sketch: the main path, its demanding direction changes, and how you will support the sandwich at those points. Then state which method supplies the control you want.
A useful choice might be: “Walking foot for long lines, because there are few turns and I can rotate the supported quilt.” Another might be: “Free motion for the direction-changing areas, because rotating the whole top repeatedly would be awkward.” You can use different methods in different regions, provided the combined plan meets the batting's requirements and you follow each setup's instructions.
If you are also comparing machines, the machine selection overview explains why accessory fit, handling space and included equipment are separate checks. Decide what movement you want to make first. That gives a dealer or teacher a concrete task to demonstrate on the equipment you are considering.
Related posts
The Best Sewing Machines for Quilting in 2026: Five Picks for Every Budget
Compare five quilting machines by workspace, included accessories and the jobs you sew, with a practical dealer test and a total-cost worksheet.
Quilting Supplies for Beginners: Buy First, Add Later
Build a first-project kit by task: what to borrow, what to check, and what to buy, with a measured six-patch practice example.
How Much Fabric for Quilt Backing and Binding?
Work out quilt backing and binding yardage from your finished size, with the arithmetic shown for five example quilts on 42-inch fabric and 108-inch wideback.