
When Is an Improv Quilt Finished?
Stop changing a composition when it answers your current design question. A before-and-after study helps separate necessary fixes from new ideas.
Chris
TutorialDesign Tips
Most of what makes a quilt work is decided before cutting: value contrast, color, block choice and layout. These posts cover those decisions with examples you can apply to your next project.
Stop changing a composition when it answers your current design question. A before-and-after study helps separate necessary fixes from new ideas.

Turn a sketch you own into a clear patchwork plan. Three colored rectangles show how to preserve a composition while extending a few straight seams.

Record what you see, what you were told and what remains unknown before changing a damaged quilt. A simple condition map organizes the questions.
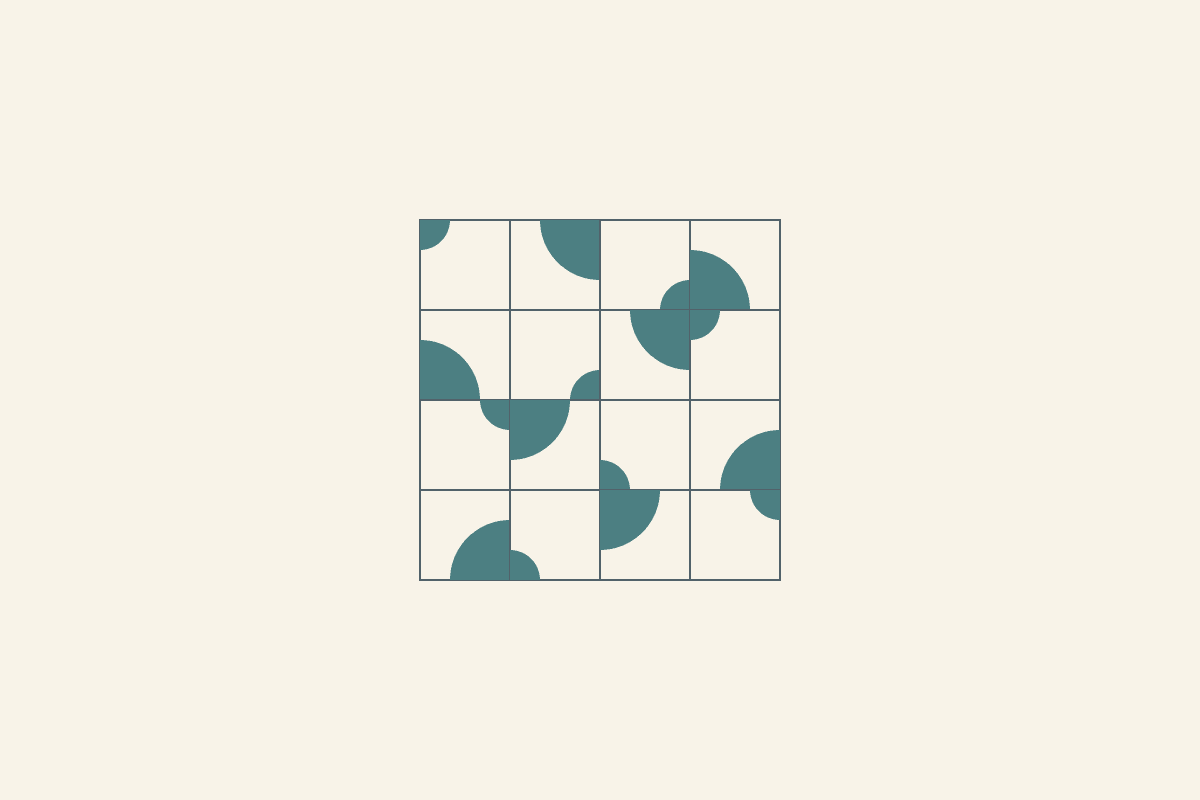
Compare two quarter-circle sizes in a twenty-four-inch composition, check where their edges meet and choose a sewing method that fits the shapes.
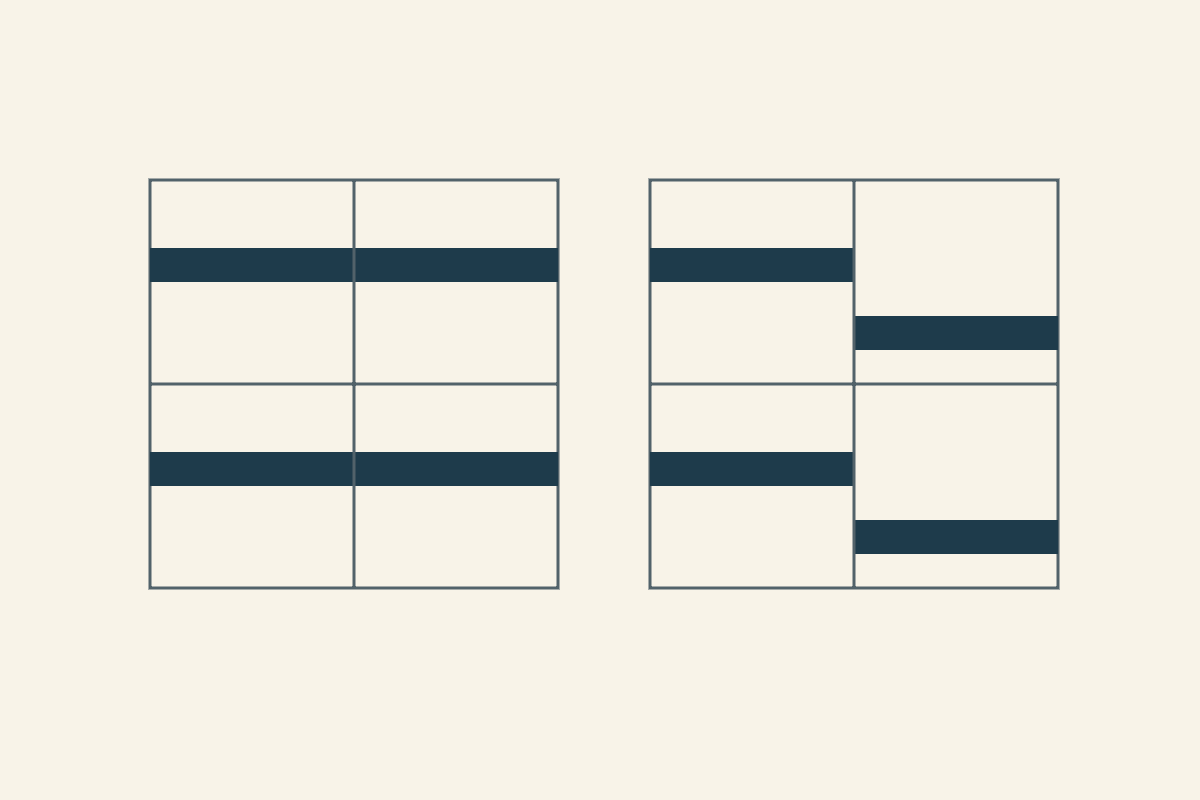
Check where an accent reaches the next section before joining. Two small layouts keep the same bars and area while changing which lines continue.
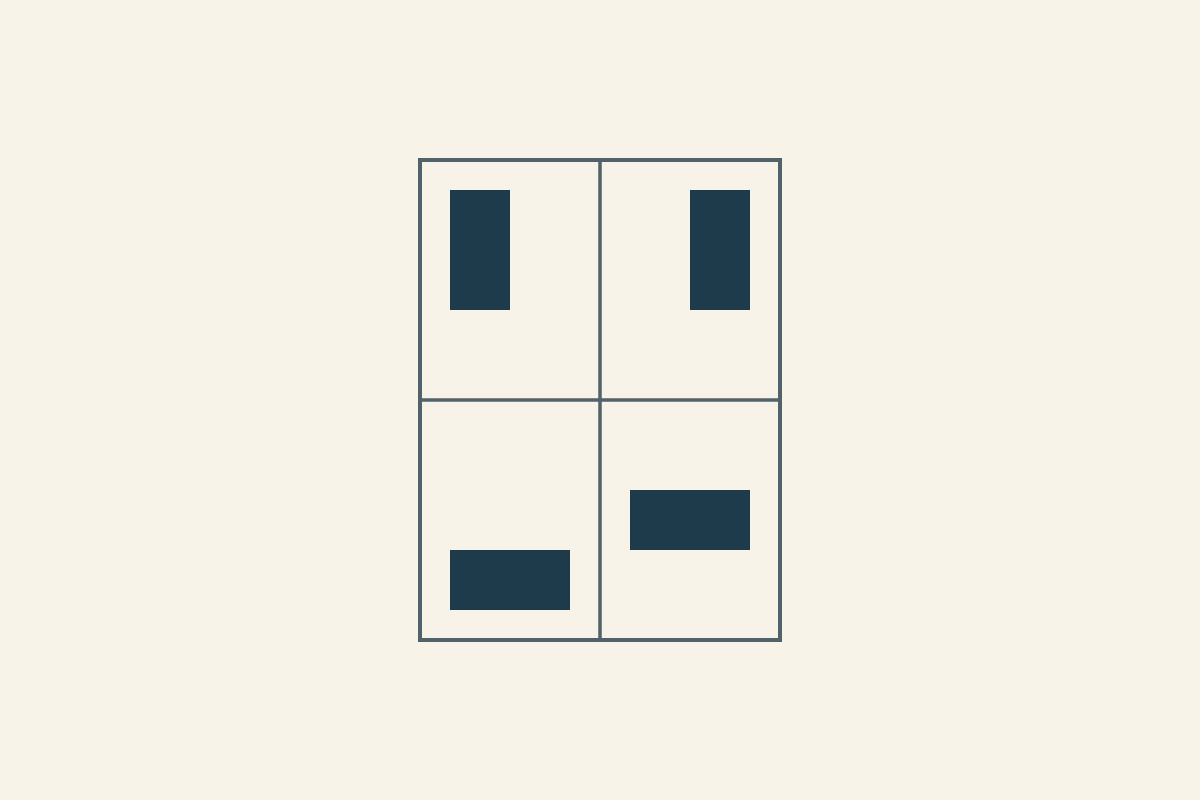
Keep the outside envelope while the shapes move inside it. Four six-by-eight units show how a small rule card can support deliberately varied blocks.

Measure the raw sections, choose where to add or trim, and count every new seam. One worked join shows why a three-inch gap needs a wider cut strip.
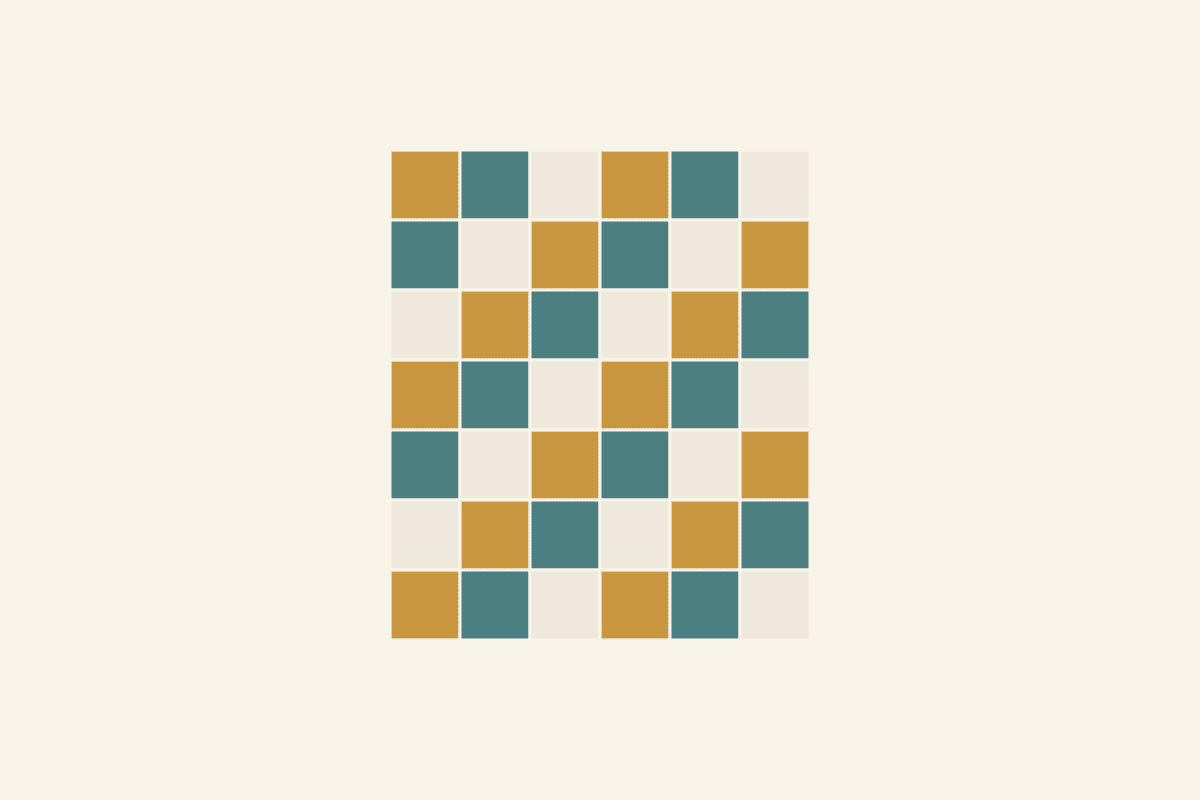
Ask the caregiver about use, size and care before choosing fabrics. A thirty-six-by-forty-two-inch study turns those answers into a gift brief.
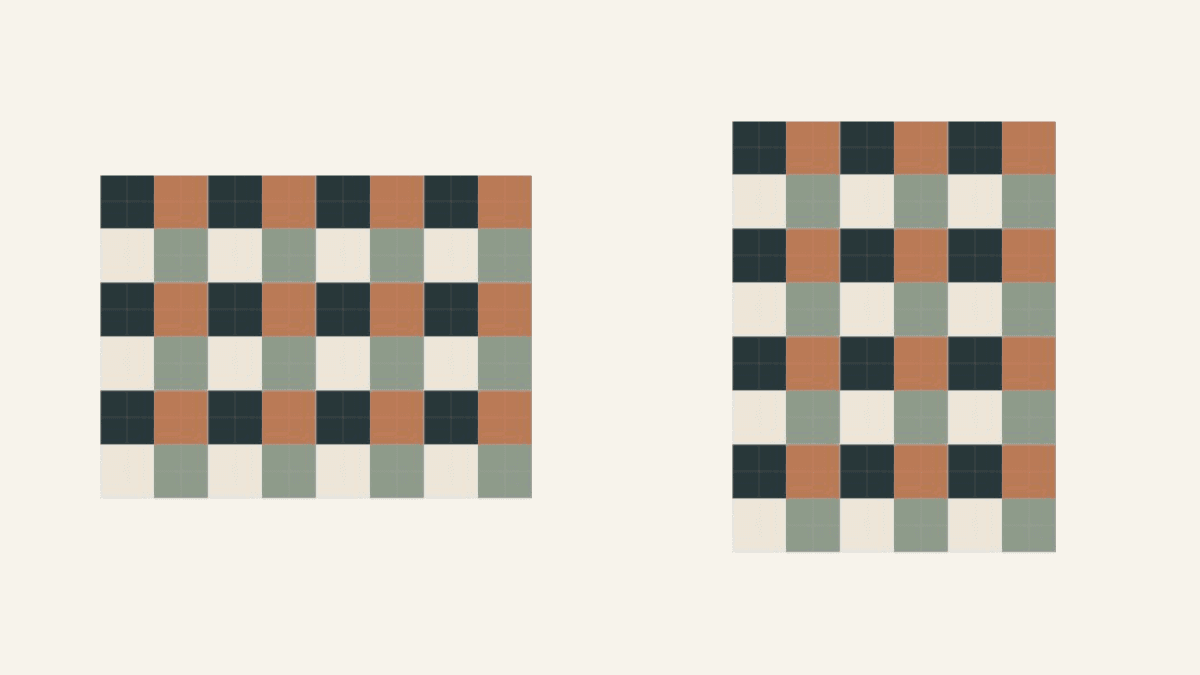
Compare one proposed group-quilt change, check its size and actual block placements, then keep the private draft separate from the shared result.
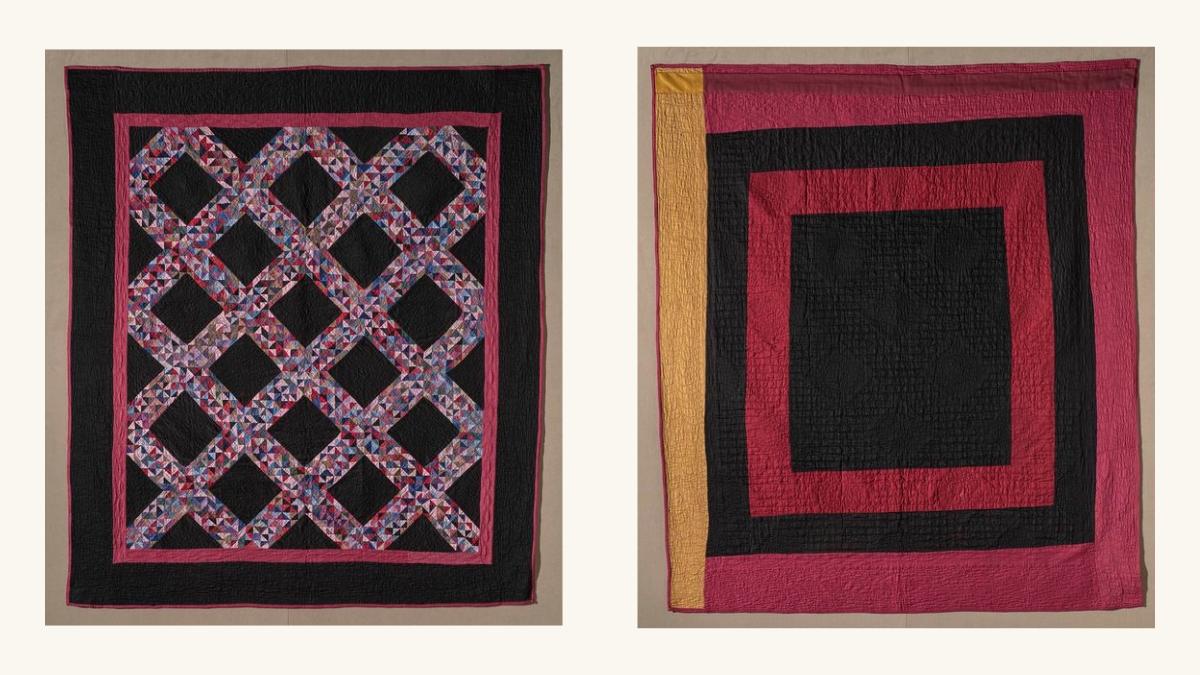
Build a whole-quilt and detail photo record. See what six licensed museum photographs show, what is missing and how to plan your own shots.
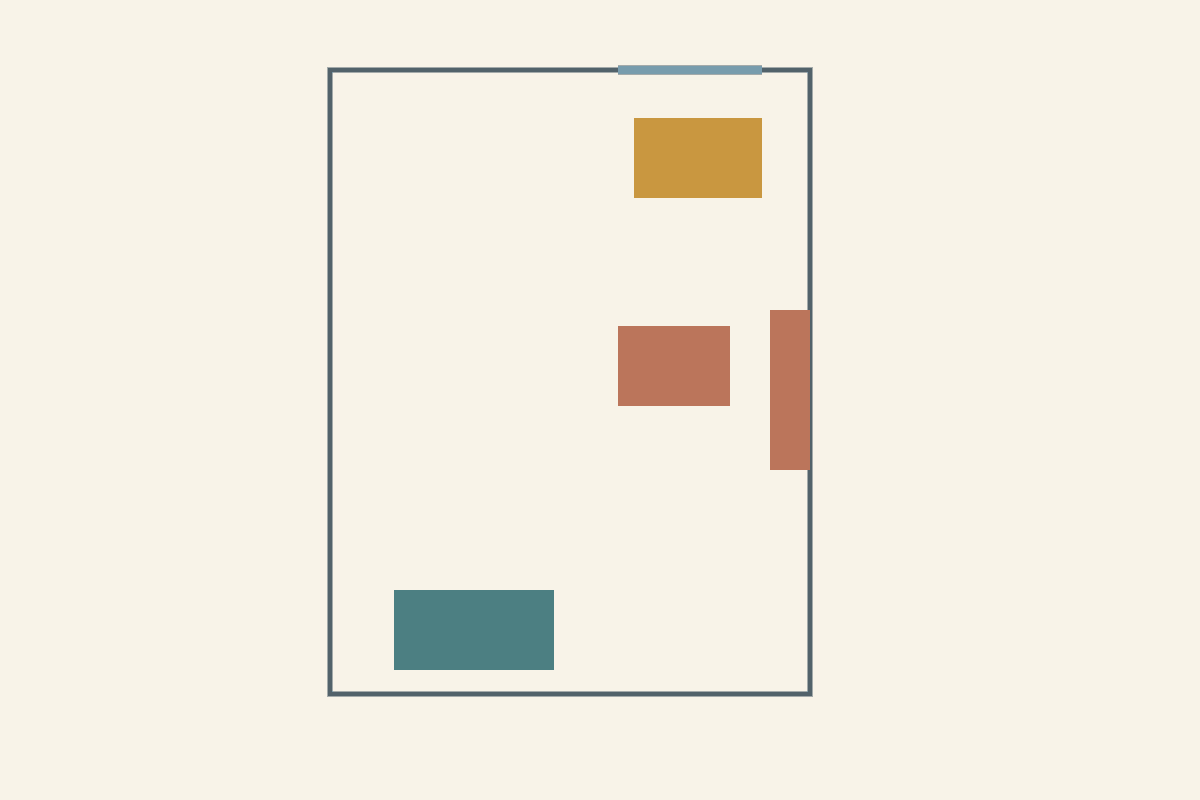
Check the finished textile's condition, support and light exposure before choosing a display spot. A room study and exposure ledger organize the choice.
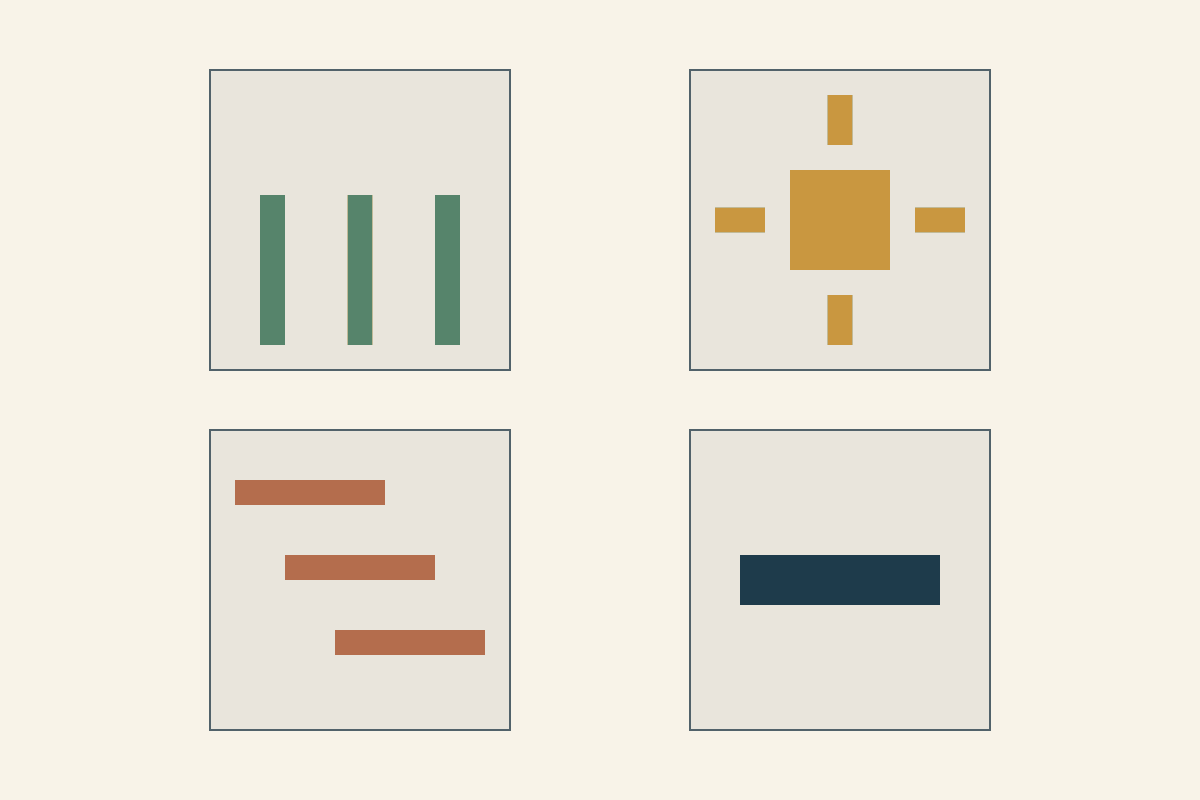
Turn a personal seasonal word into a few shapes, then compare four small layouts. Worked drawings show rising stems, rays, drifting bars and a pause.
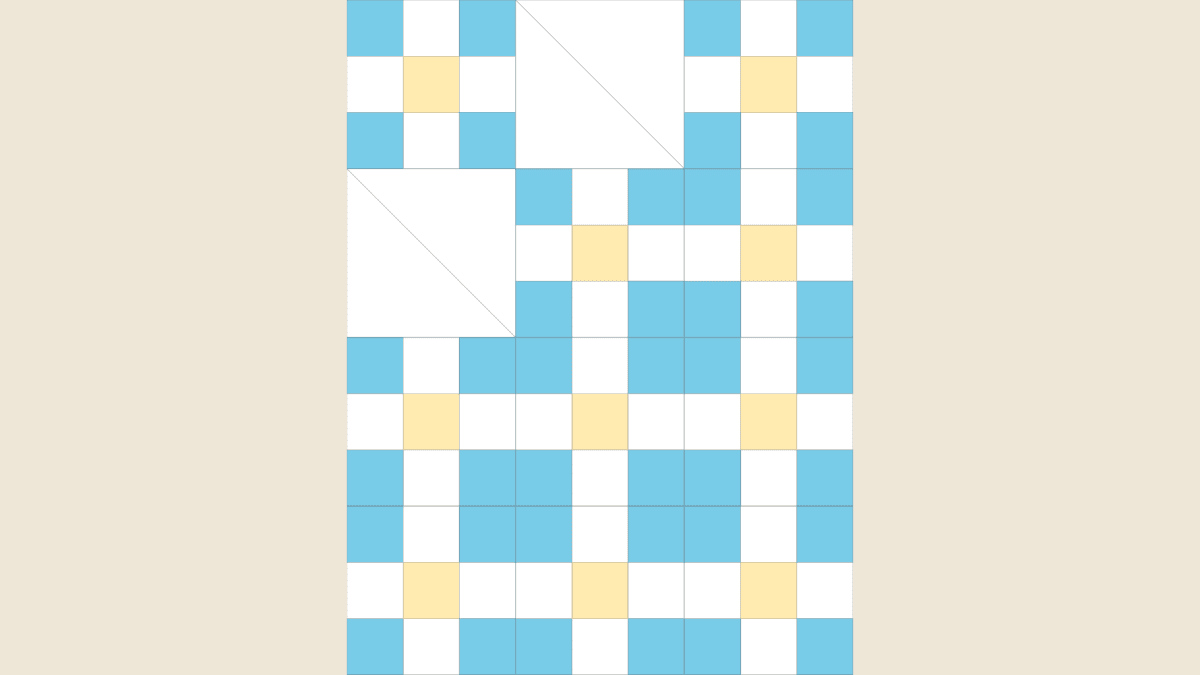
Carry a saved quilt layout into Pattern Builder with checked dimensions, a block inventory and a row map. See what the exported PDF still needs.
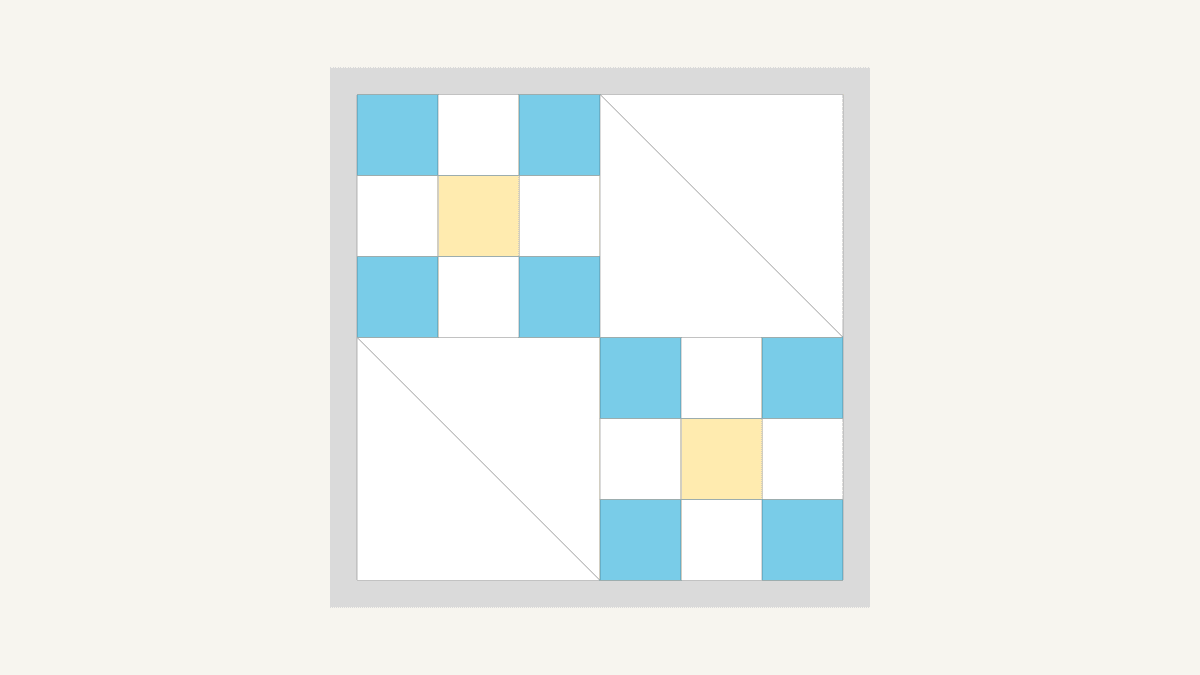
Check blocks, fabric choices, finished size and downloads after importing an EQ8 project into QuiltLab. A small project shows what to inspect.
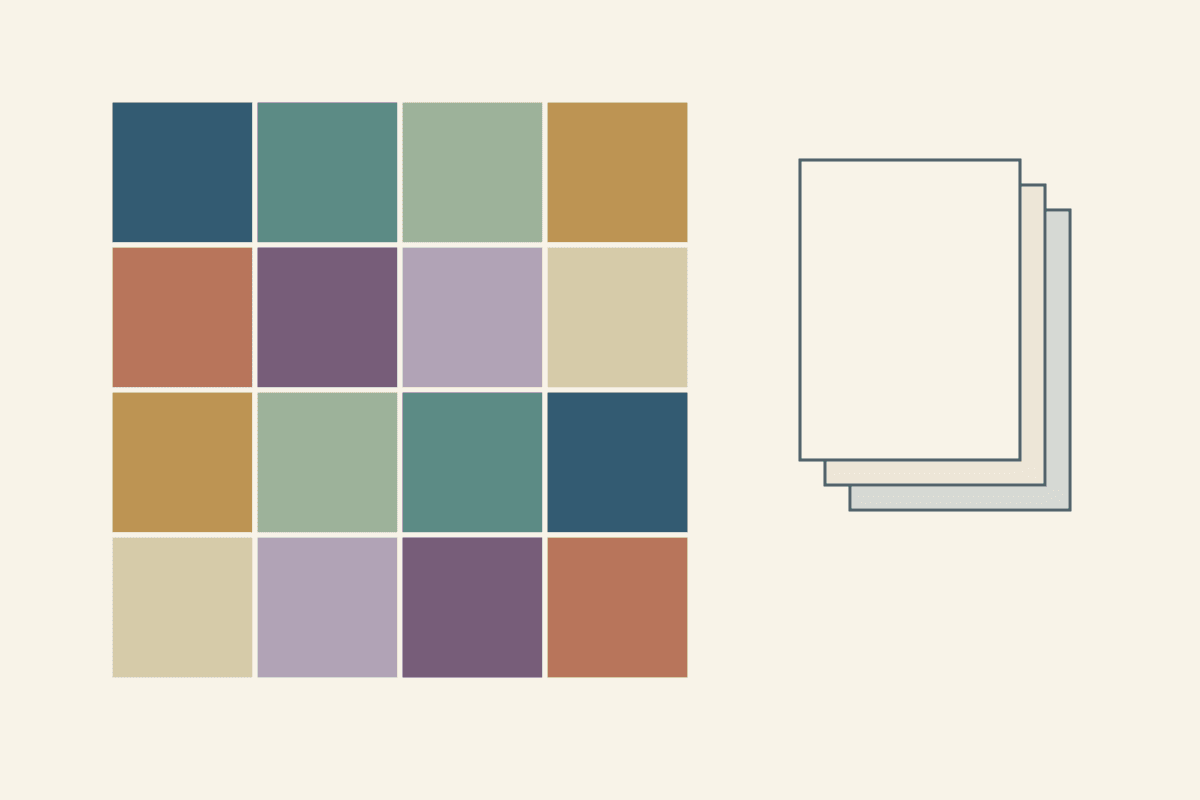
Tell contributors what to send, what may be shared and how their materials will be returned. A sixteen-entry map keeps each memory tied to its maker.
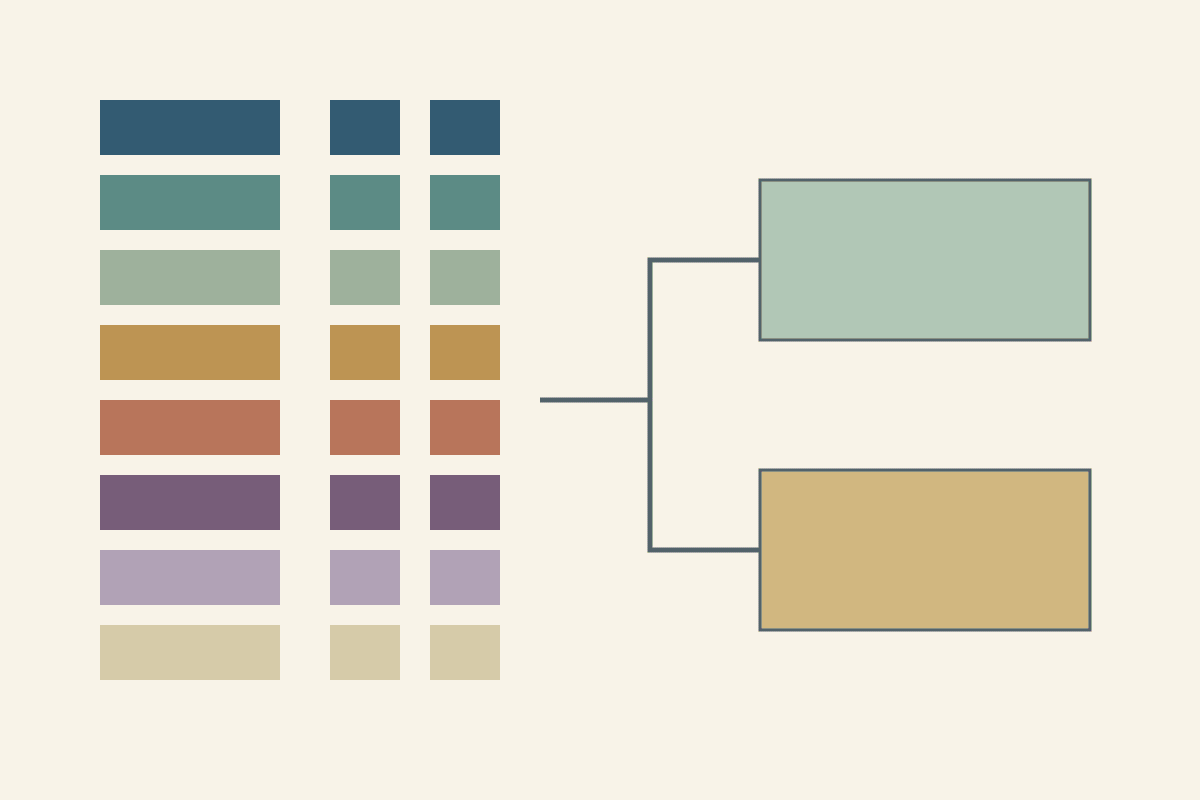
Connect contribution IDs, makers, design decisions and care notes in one record. A sixteen-unit example keeps credits separate from the head count.
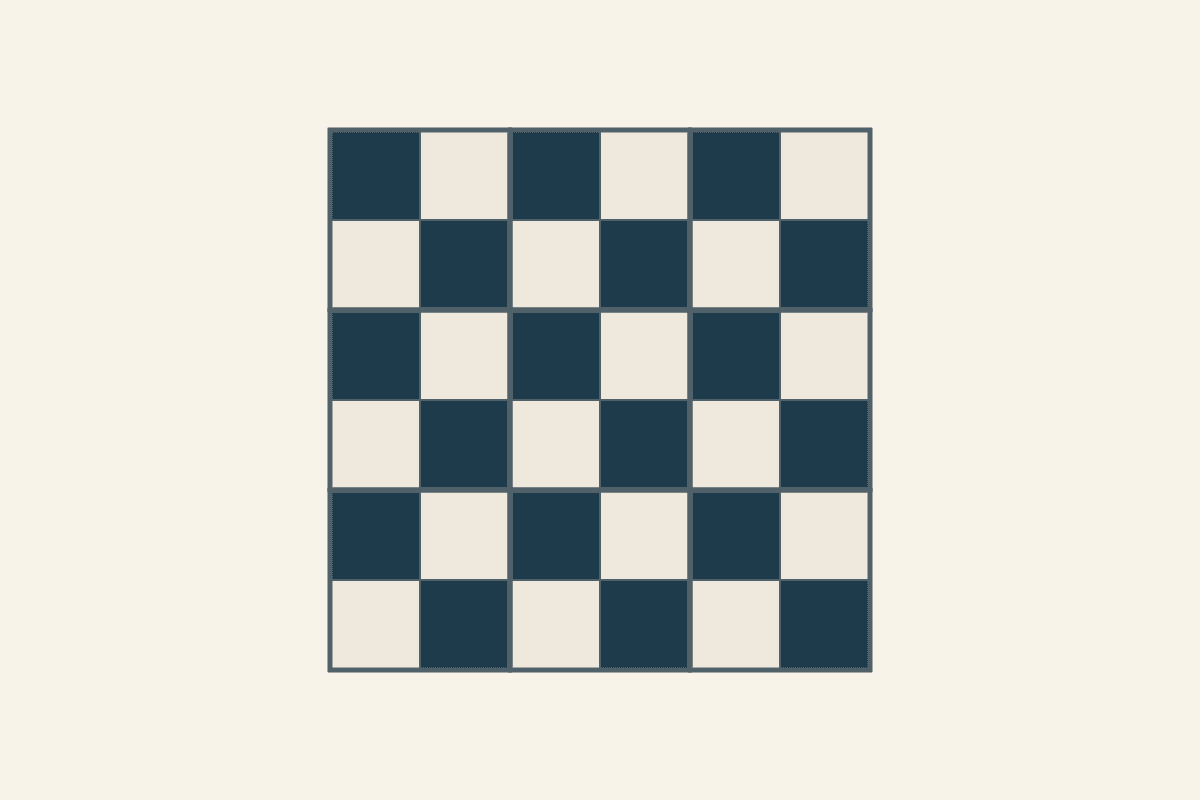
Practice four-patch intersections in an eighteen-inch mini. Check the cut squares, pressed rows and blocks before joining the nine-block top.
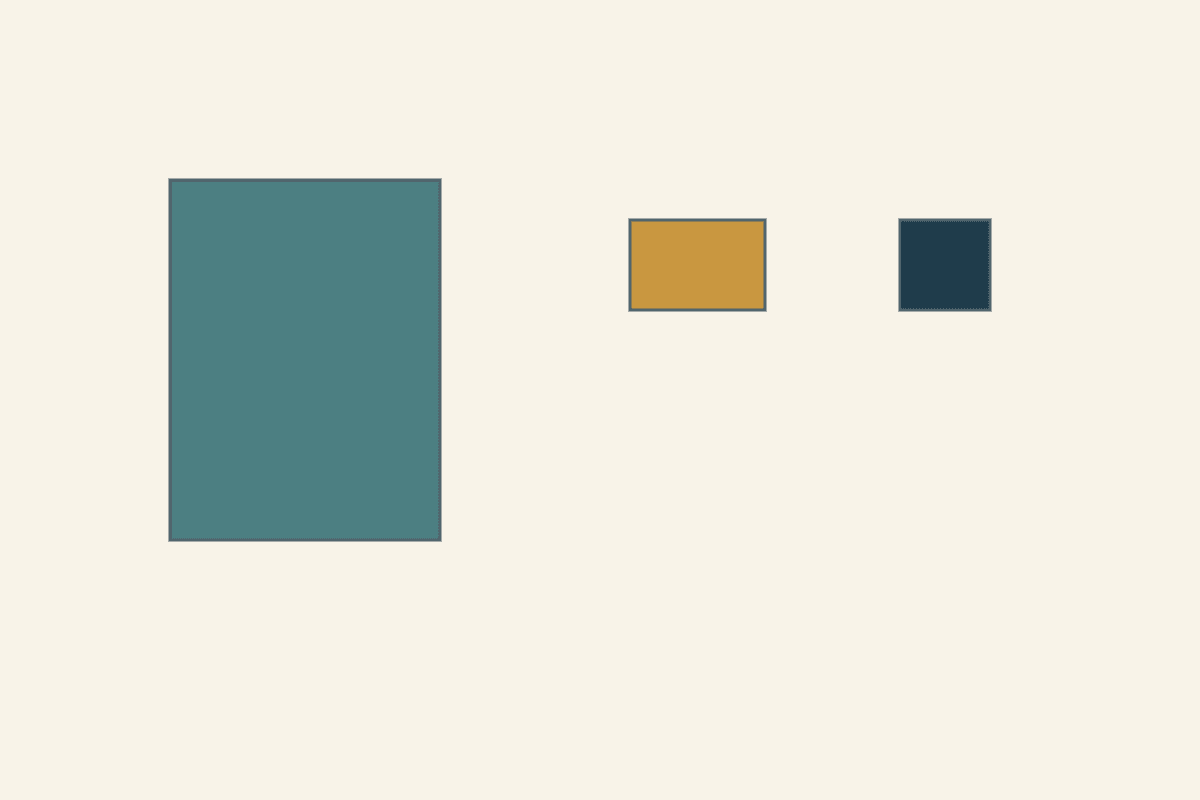
Plan the ground space, carrier and care together. Compare two folds of a fifty-four-by-seventy-two-inch quilt, then check the actual bundle.
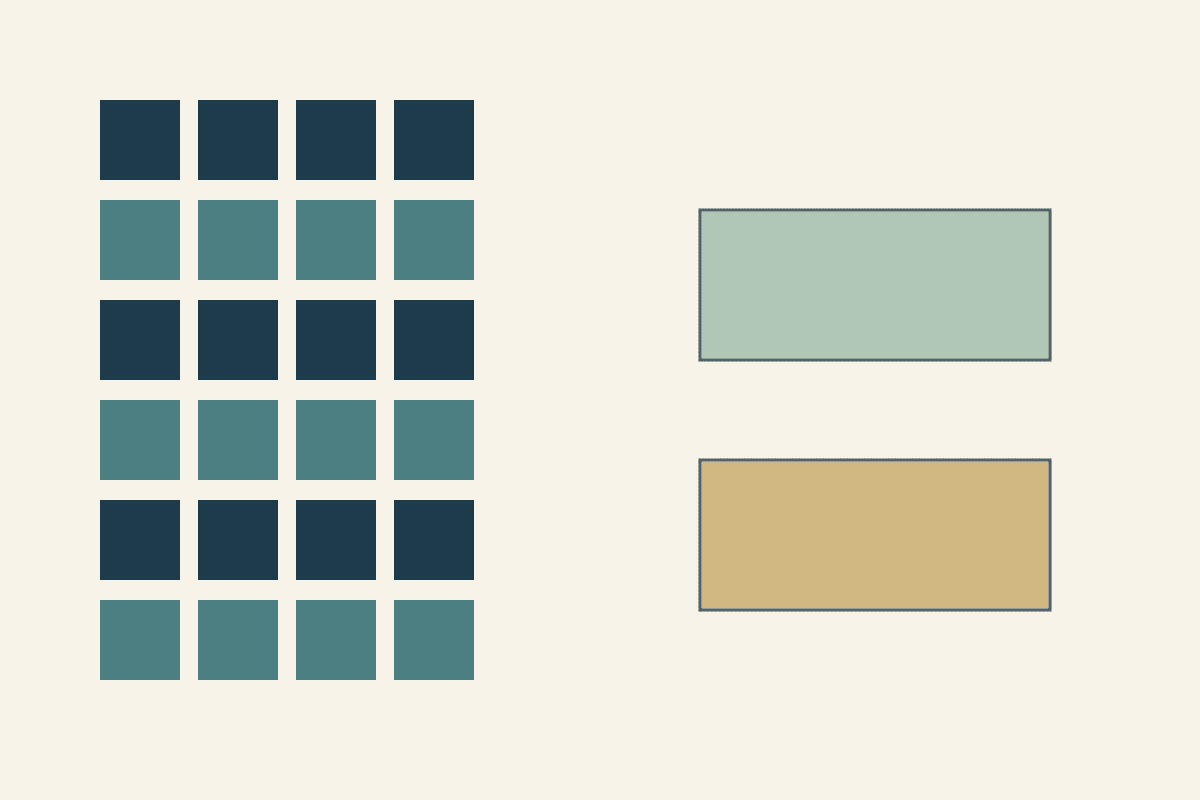
Count the work in each release and leave time after the last block. A twenty-four-block example separates six block weeks from assembly and finish.

Work backward through studio time, shipping and home finishing. A seventy-two-day example shows which handoffs move when the studio needs longer.
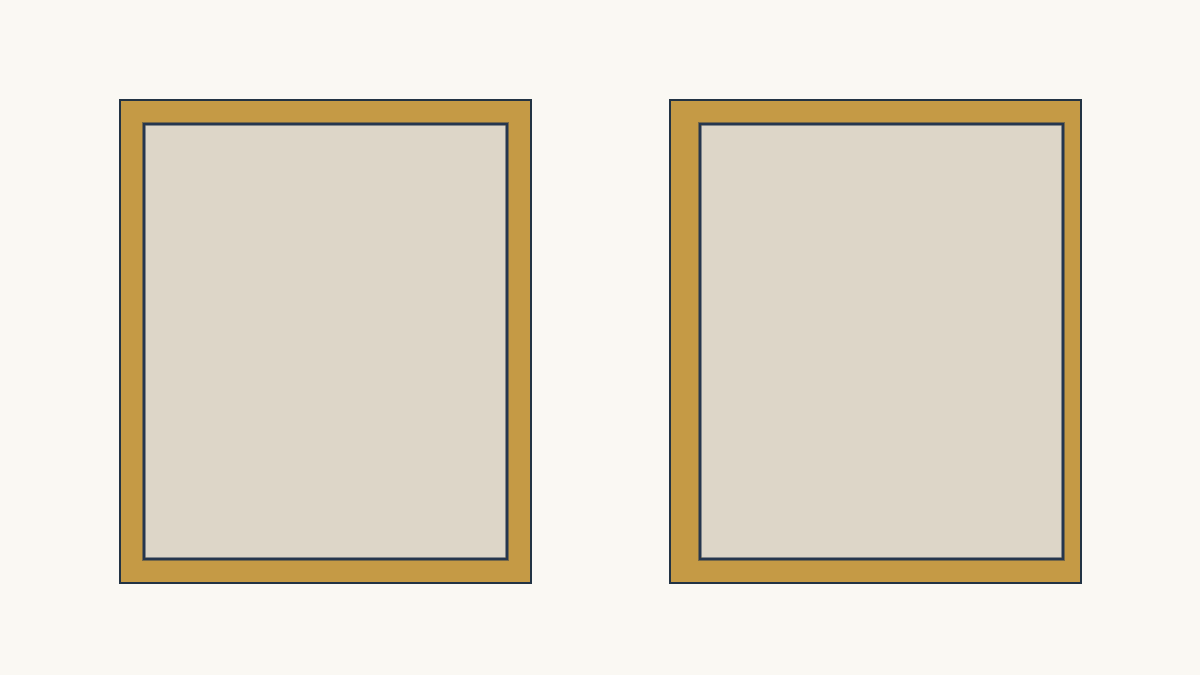
A back can meet the overall size and still leave one edge short. Audit each margin using your quilter’s actual requirements.
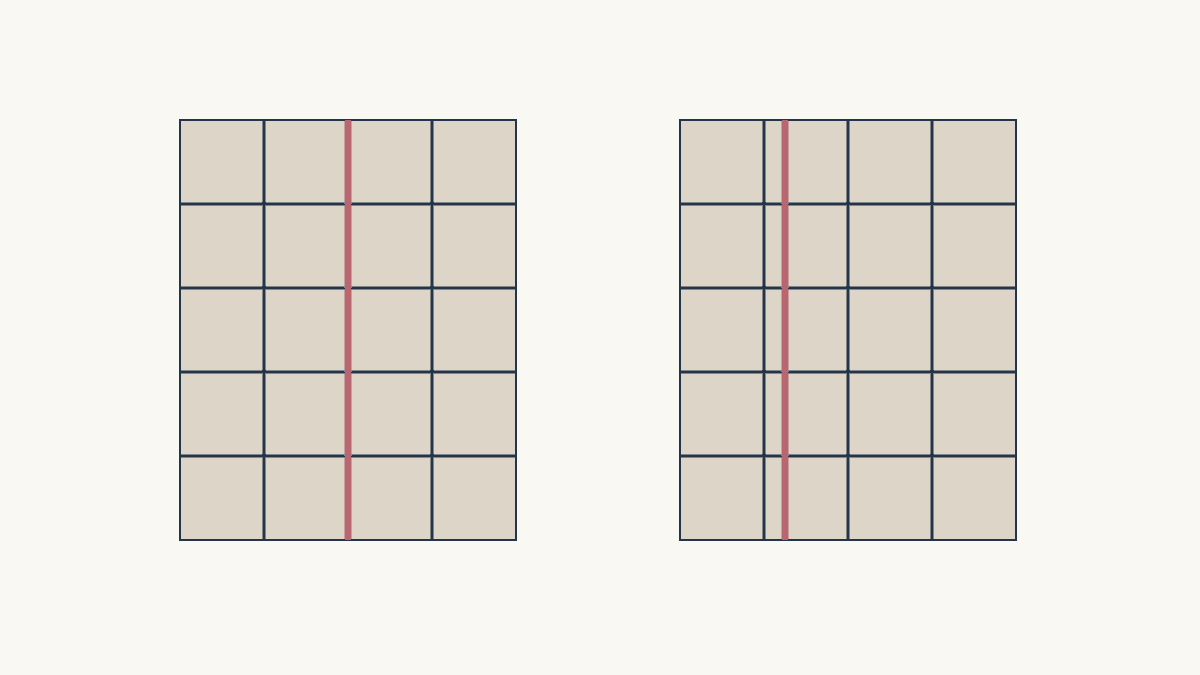
Overlay front and backing seam positions to spot long coincidences, then discuss the actual construction with your quilter.
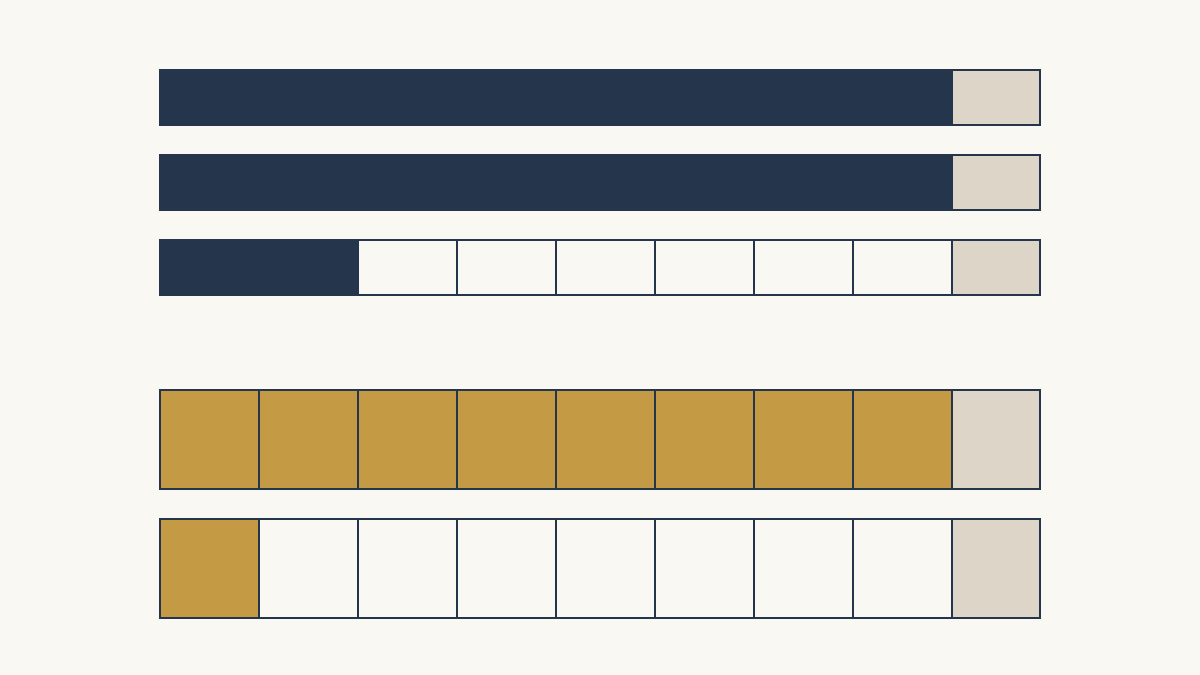
Separate strip capacity from required pieces, trace every label into assembly, and catch quantity mismatches before testing the pattern.
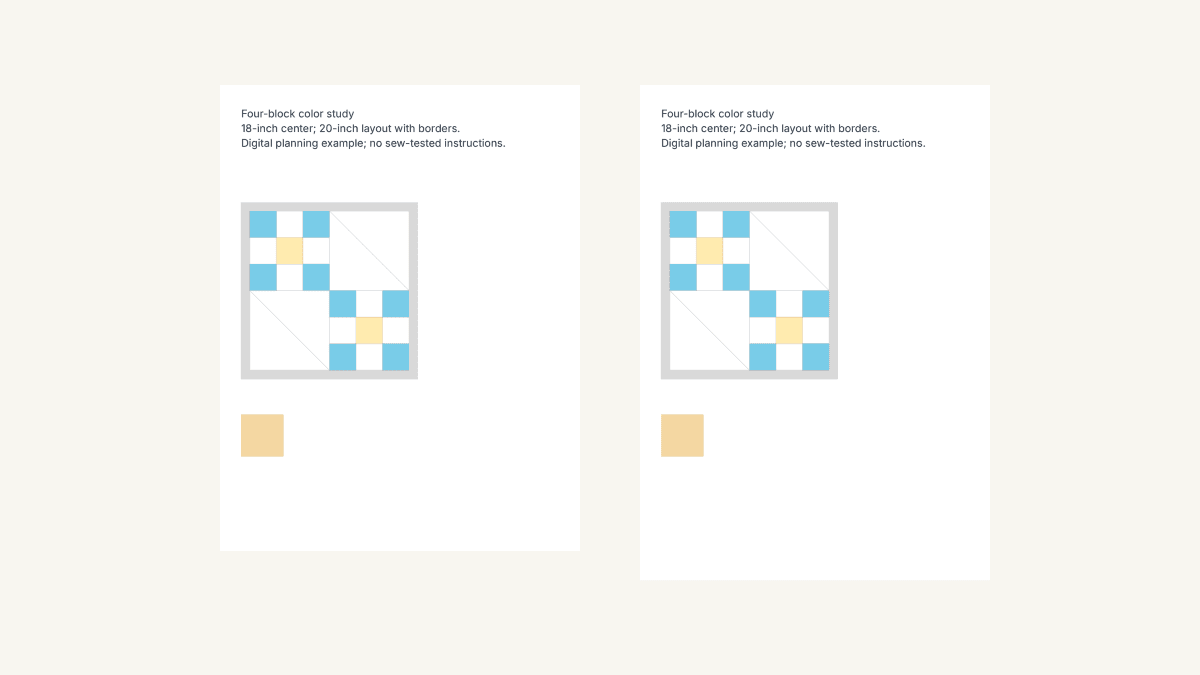
Check both paper formats, margins and every exported page. A real two-page example shows why changing page size differs from shrinking the print.
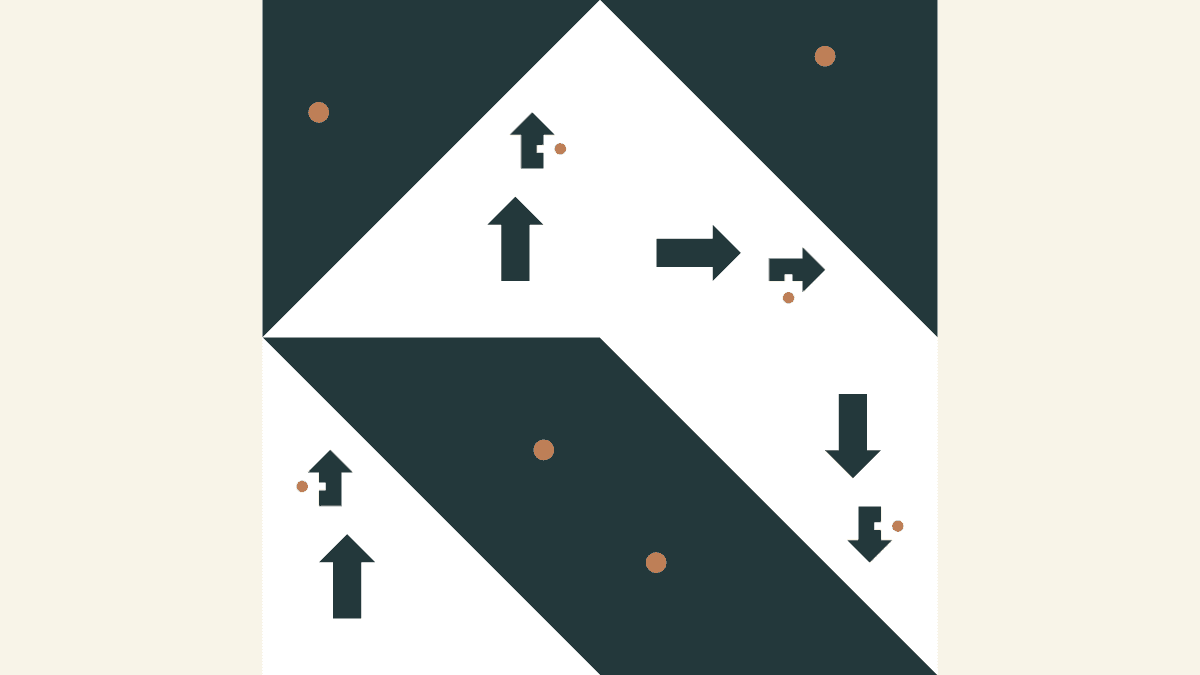
Compare a quarter-turn with horizontal and vertical flips using four saved six-inch blocks, a directional arrow and a checked point map.
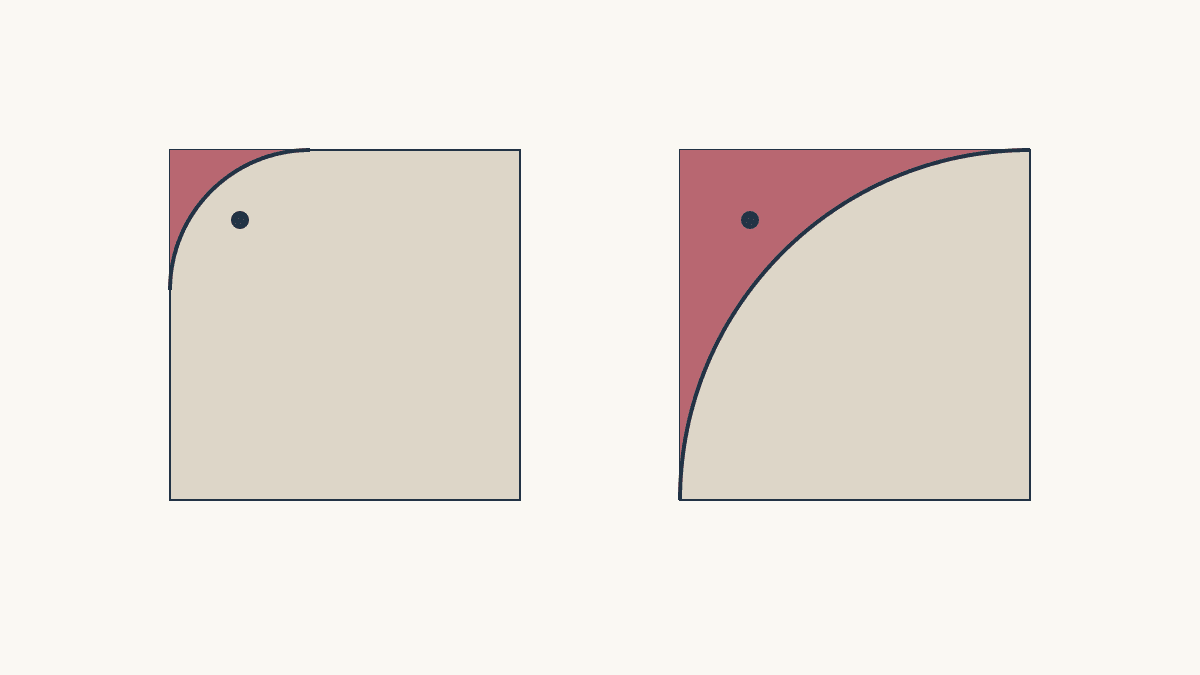
Compare two corner radii against nearby motifs before trimming, then plan a consistent curve and suitable binding method.
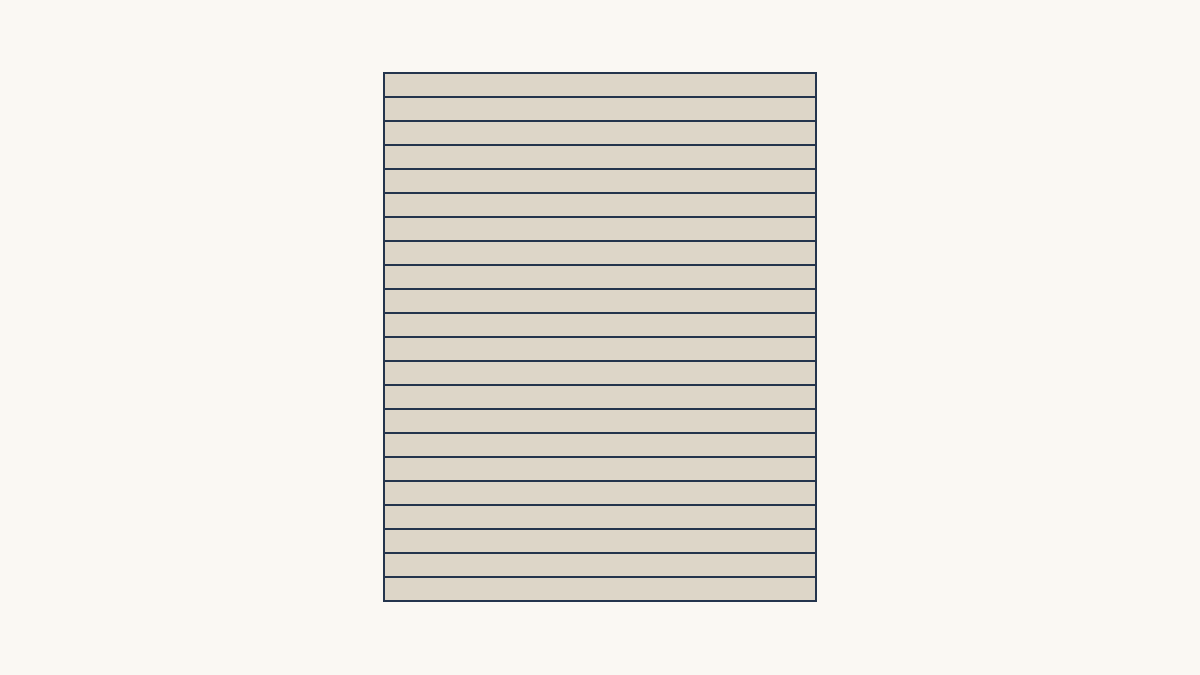
Write the coverlet’s care requirements, check the exact batting limits, and test the finished combination before calling it lightweight.
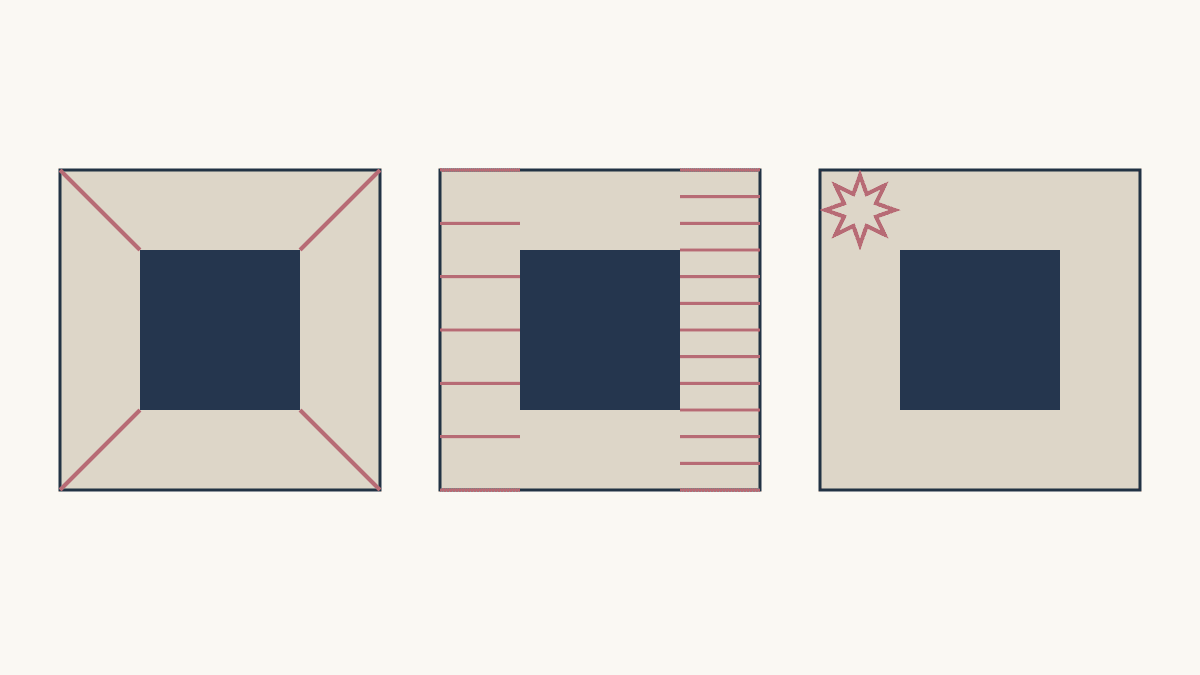
Compare three quilting approaches on one fixed quilt layout, then count the lines and check the open areas.
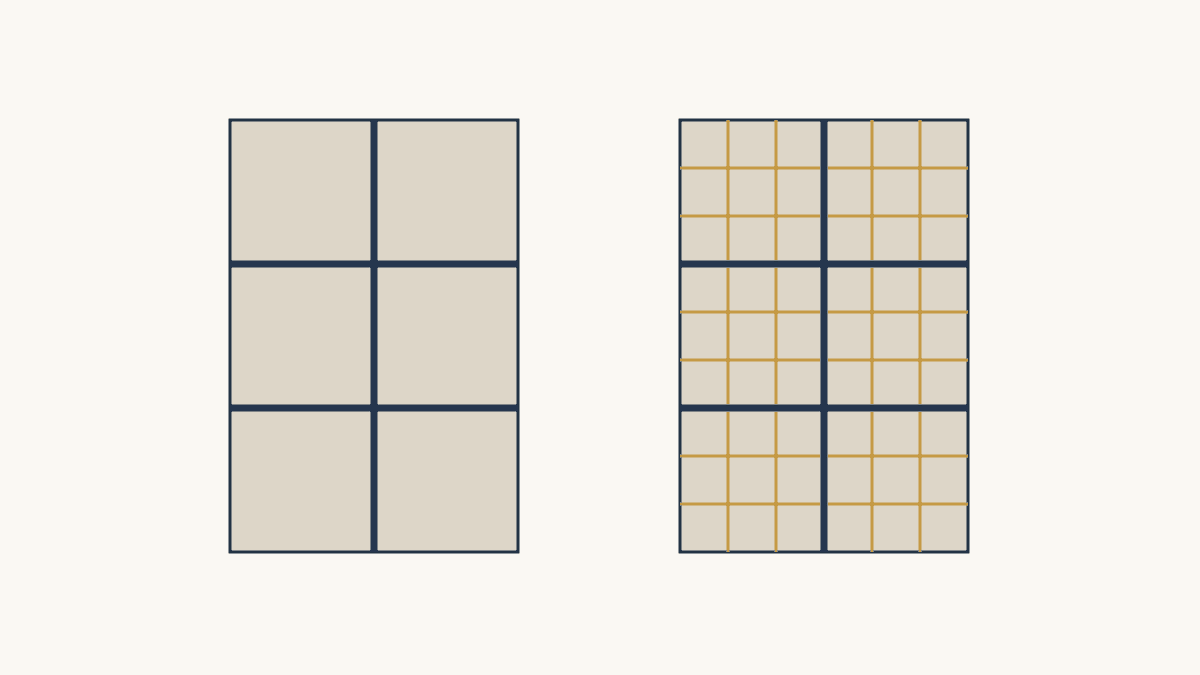
Map structural quilting separately from decorative fill, check the remaining gaps, and use the sequence suited to your machine.
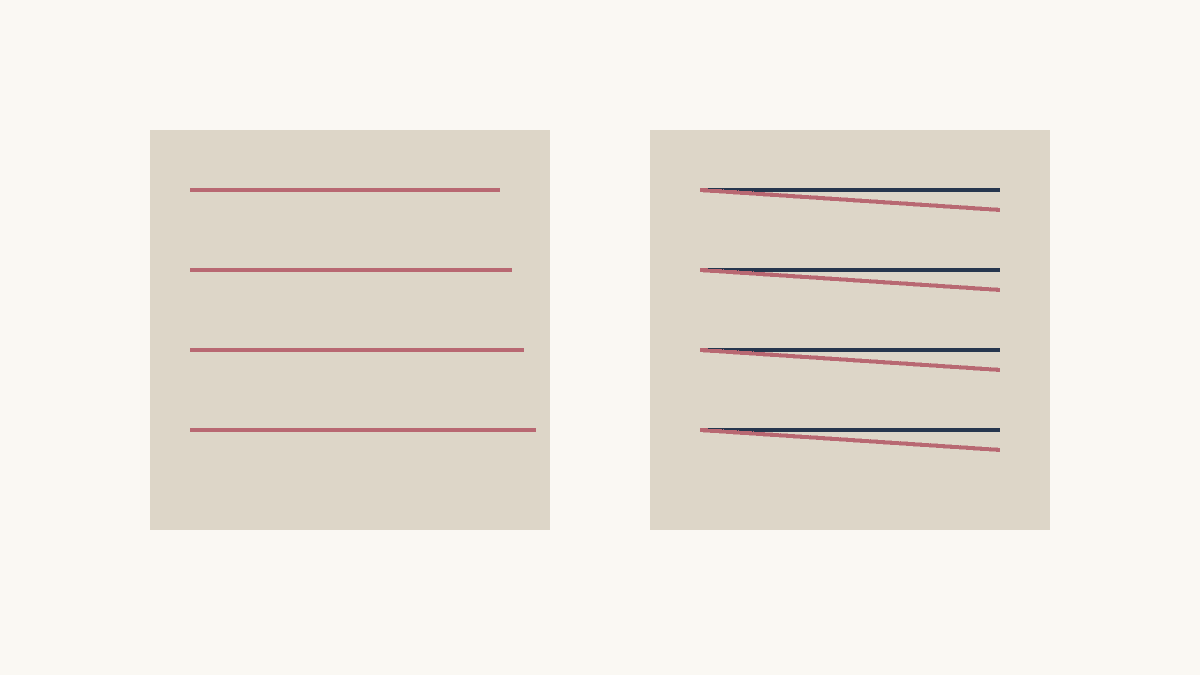
Separate layer creep from a wandering quilting line, then use a small one-variable trial to investigate the actual problem.
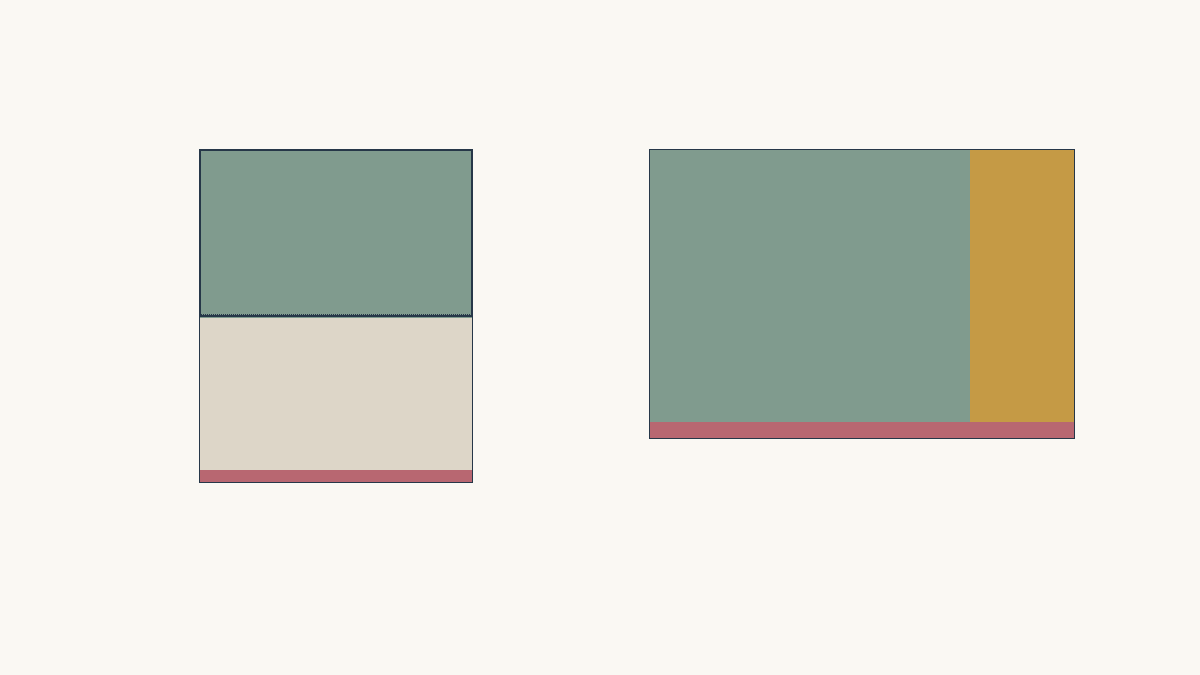
Compare yardage and usable area for one backing target, including joins, trimming and useful offcuts.
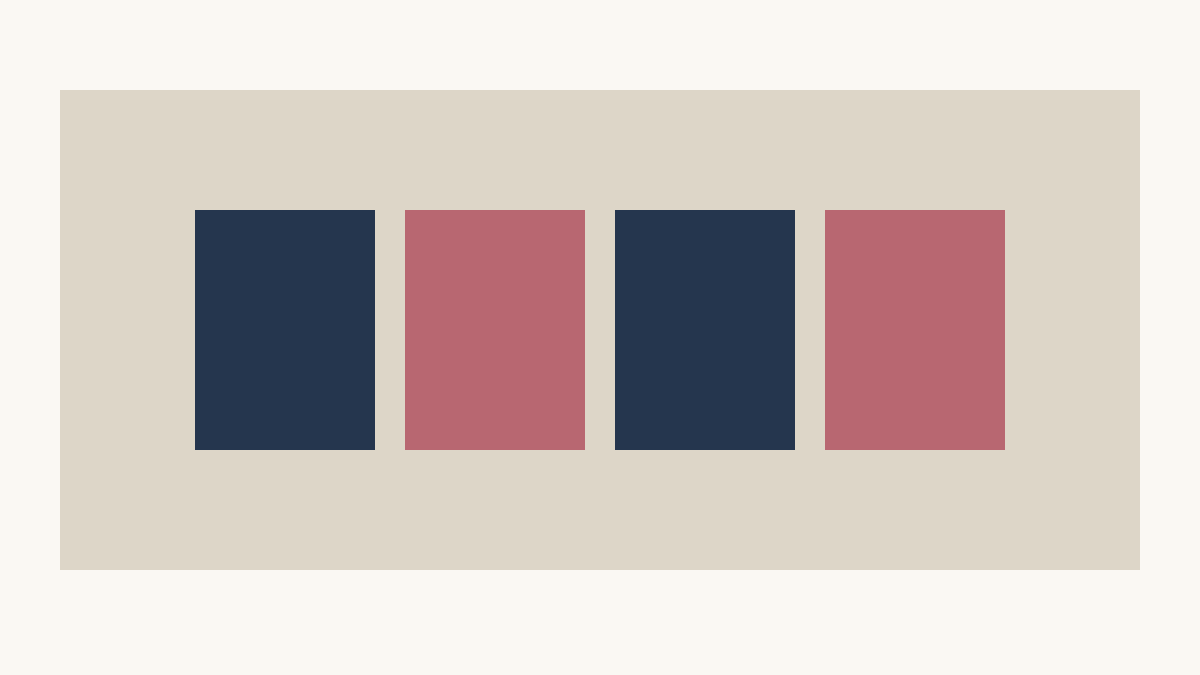
Fit the whole word on your quilt, choose readable letter shapes and fabric, and check strokes and spacing before cutting.
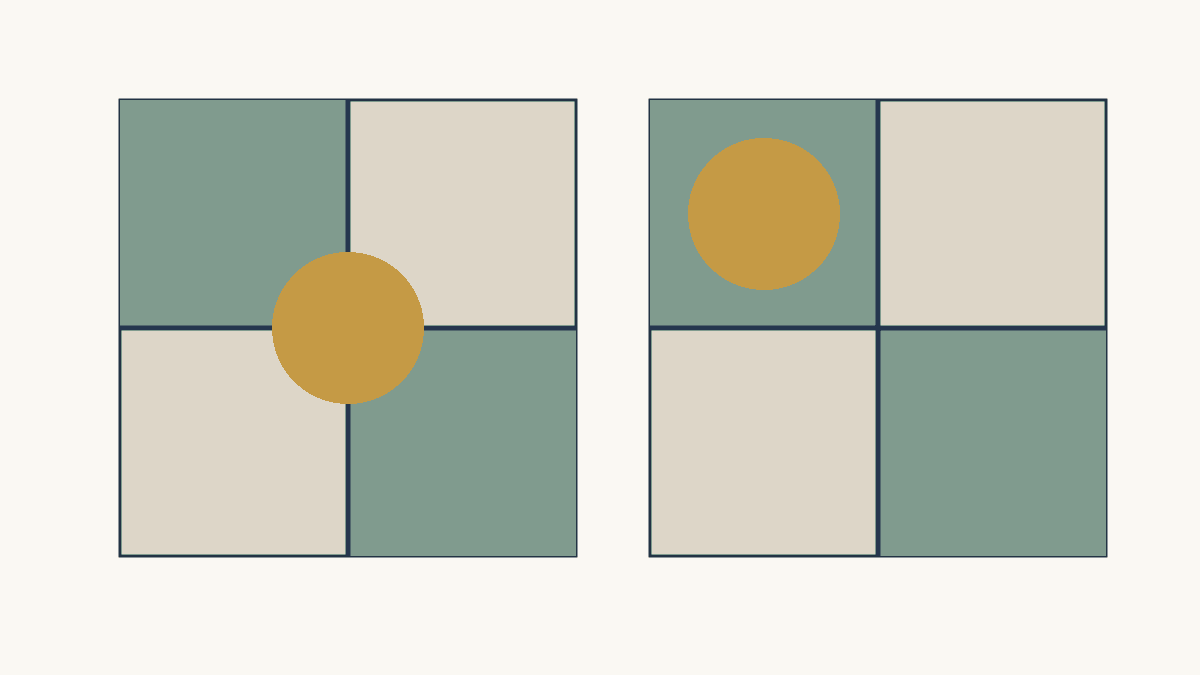
Compare an applique motif over a Four Patch center, one seam or open background before choosing its final position.
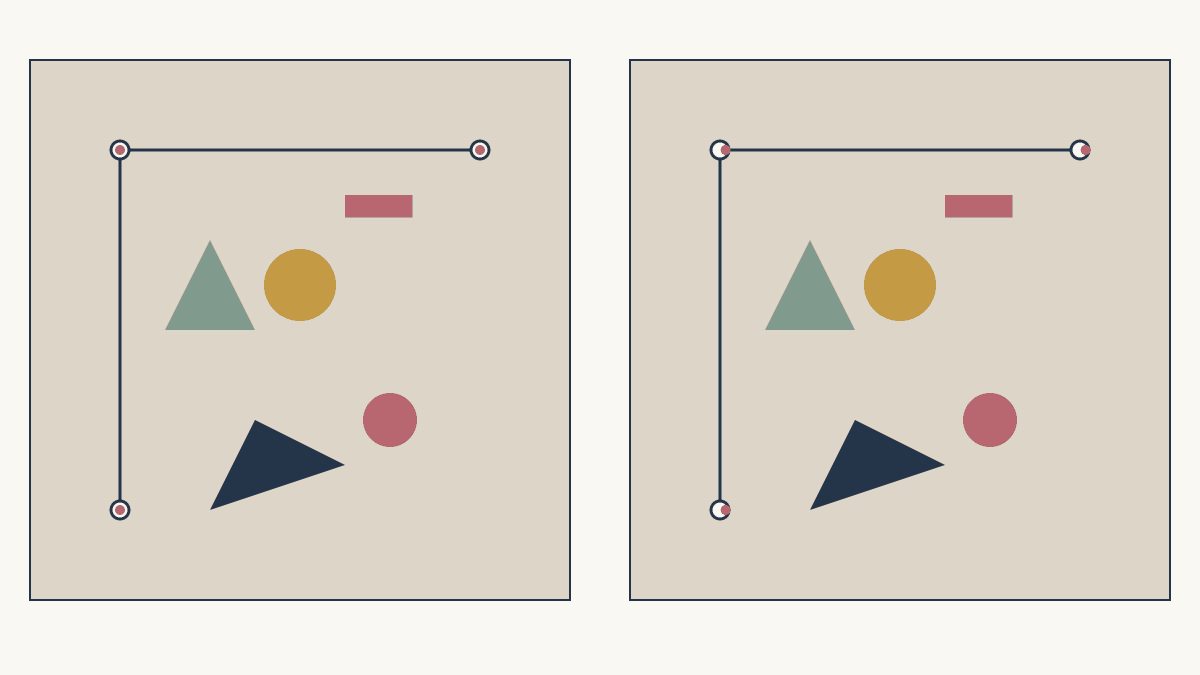
Make a lift-up applique placement guide, match shared reference marks, and spot a shifted or reversed overlay before attaching your shapes.

Match the ends, center and quarter marks of a curved seam, and see why its two raw edges can have different lengths.

Choose the right diamond angle, measure a six-point star in both directions, and keep print orientation and basting tails consistent.
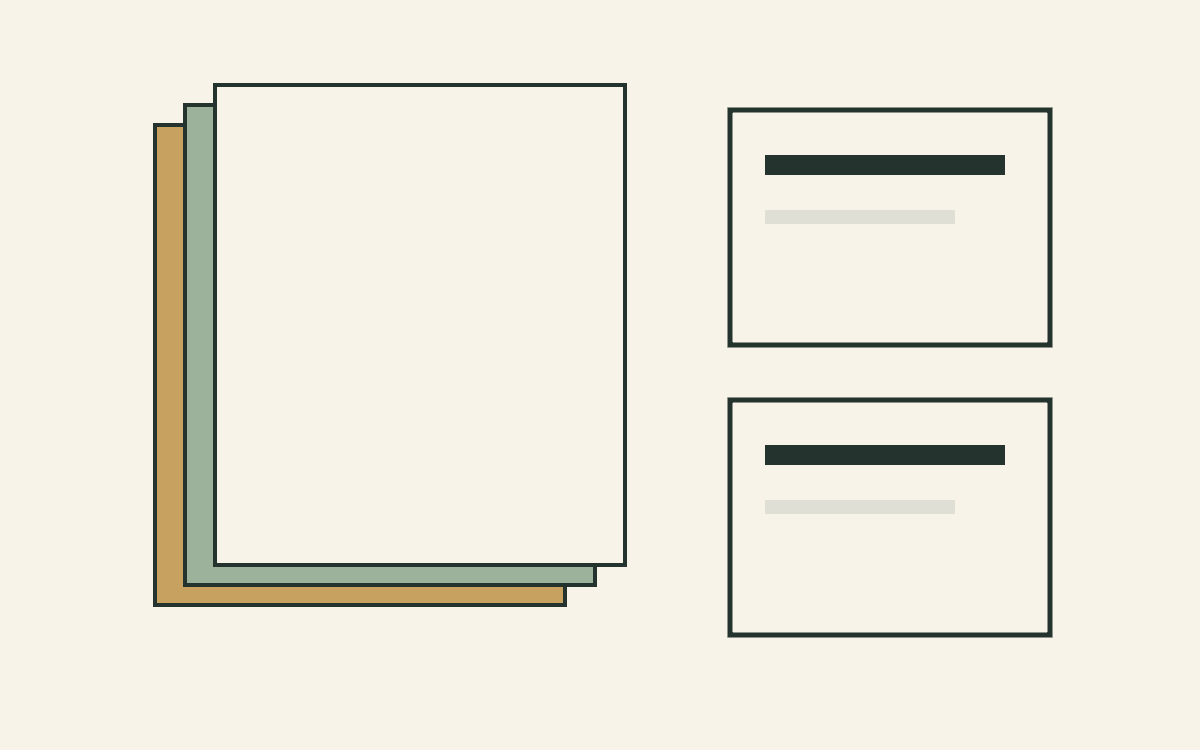
Match interfacing to your T-shirt quilt method, compare two Pellon products' conflicting documents, and check a sample before preparing the keepsakes.
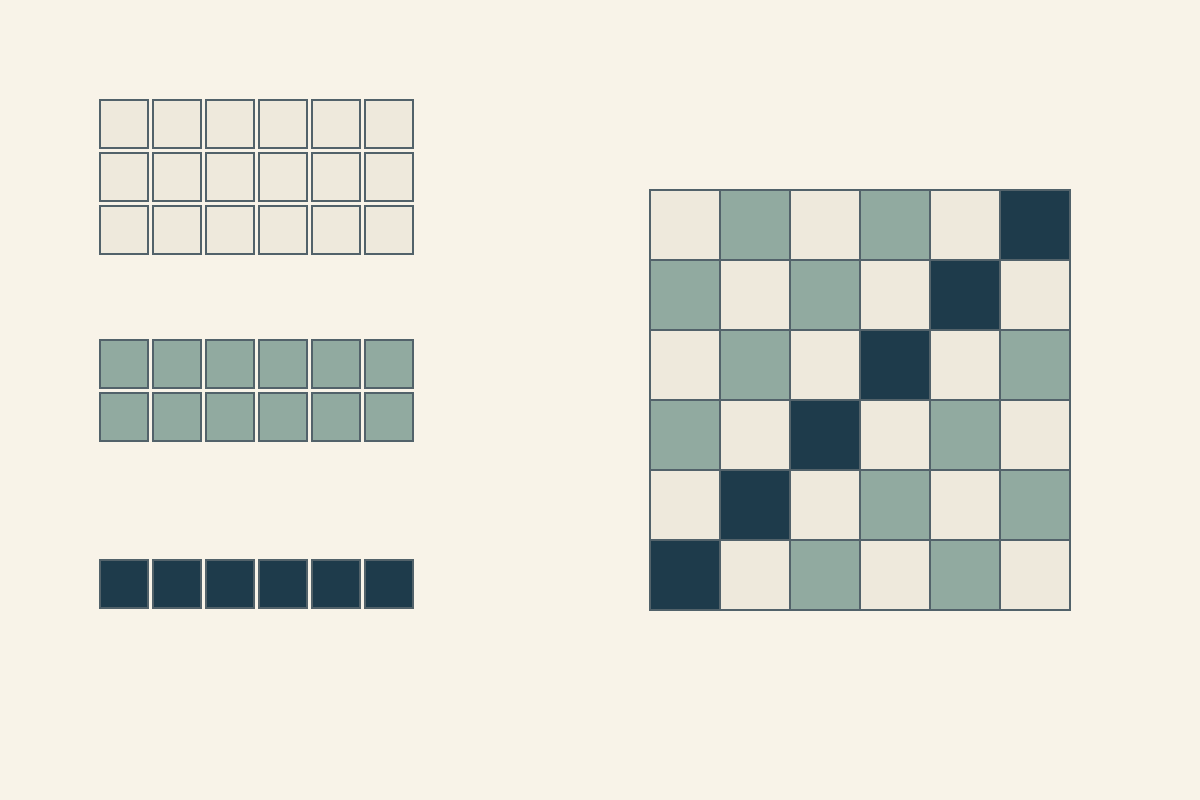
Count usable lights, mediums and darks before choosing a scrap layout. A thirty-six-piece example shows why a full bin can still be short on darks.
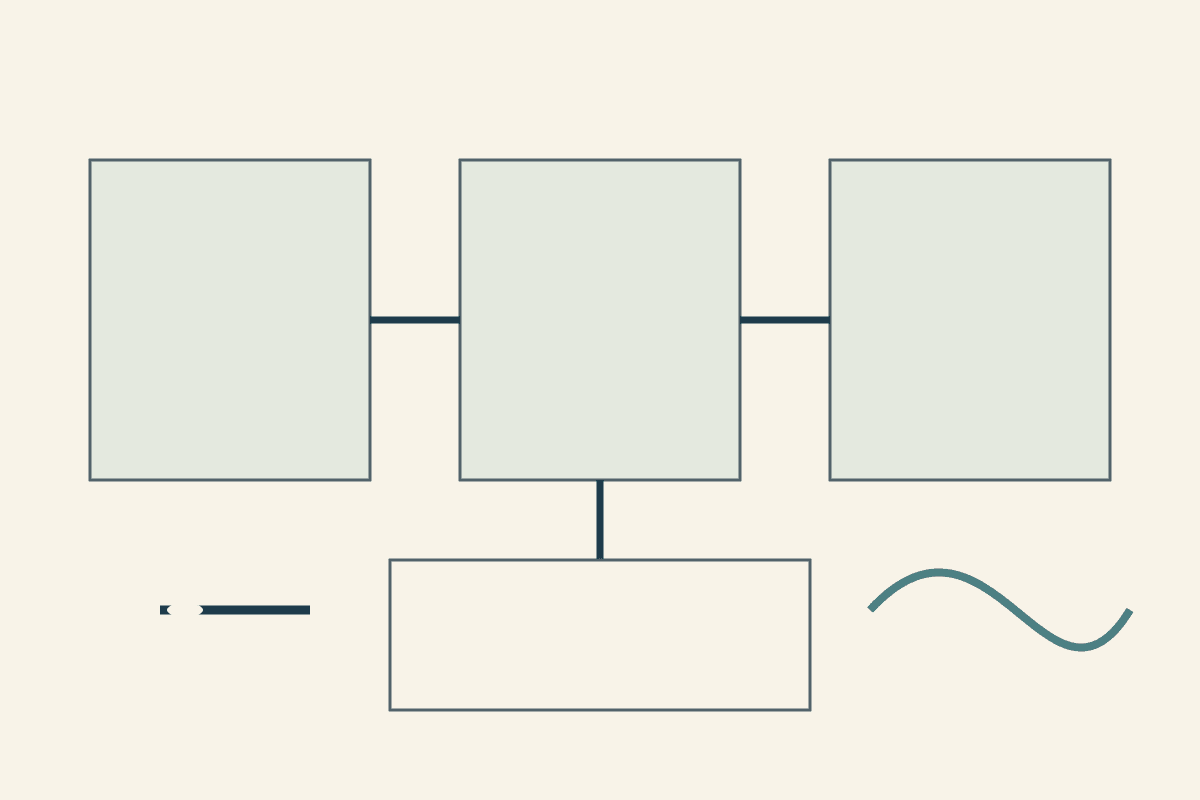
Match the exact thread, needle type and machine system before a sample test. Two maker-supported candidates show why a generic size list isn't enough.
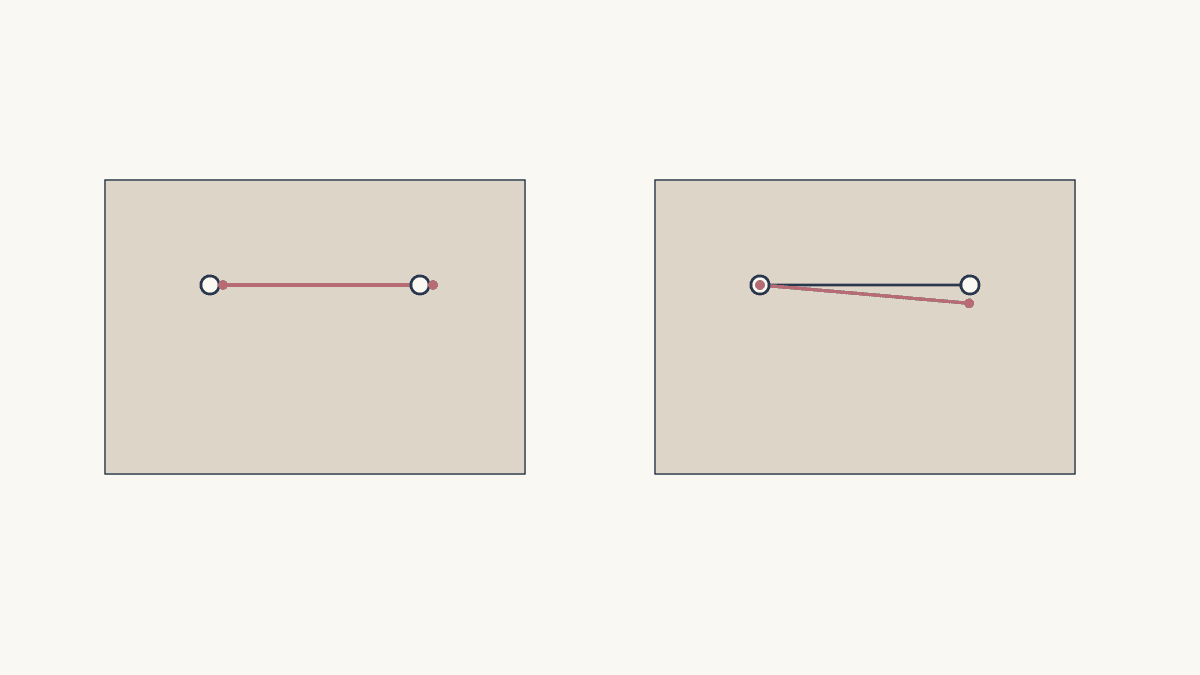
Use two print landmarks to tell a simple shift from a rotation or mismatched repeat before cutting the next batch.
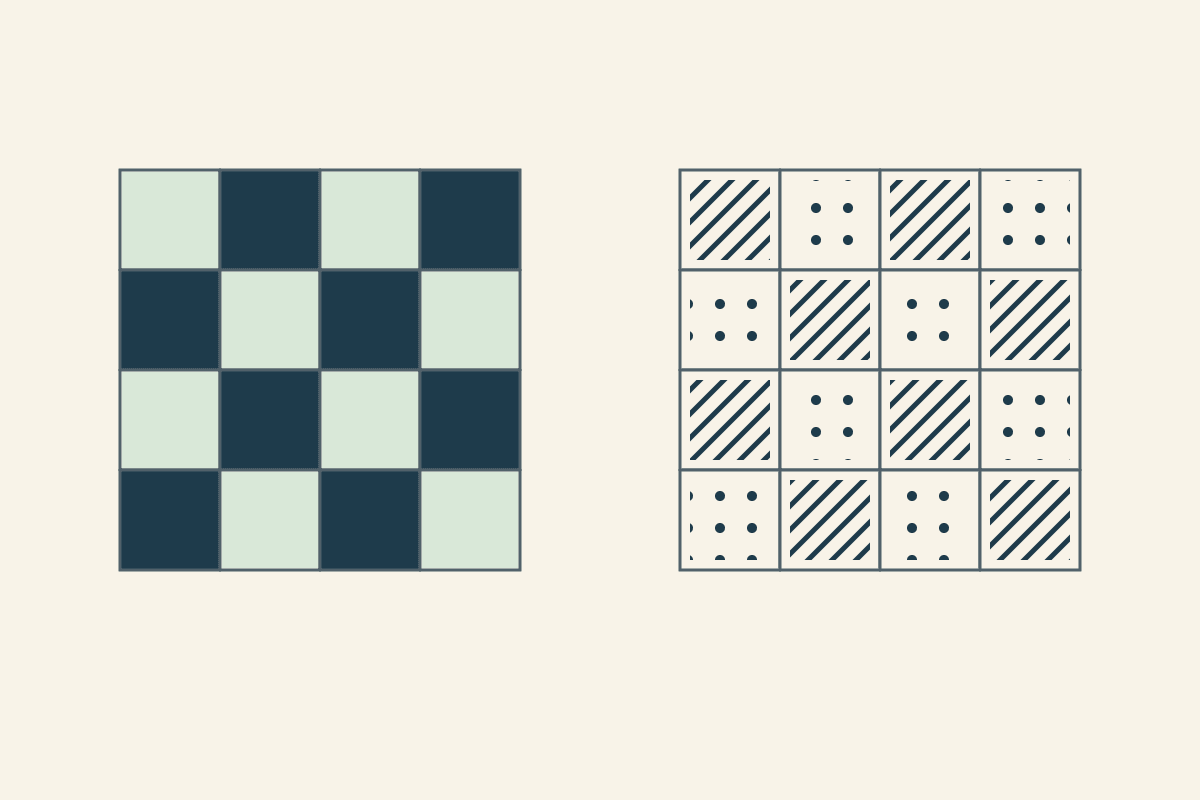
Give fabrics clear roles, check their light-dark contrast and use a readable placement key. A sixteen-cell study keeps the plan clear without hue alone.
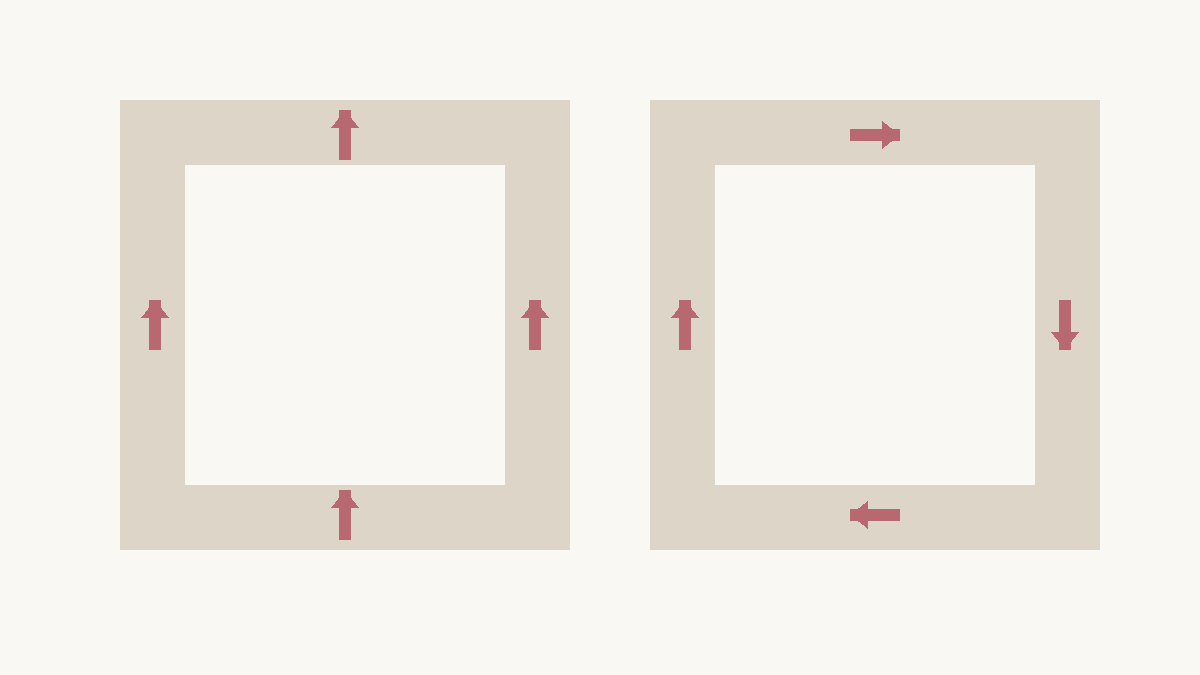
Choose whether border motifs stay upright or turn around the quilt, then check every corner before cutting matching print bands.
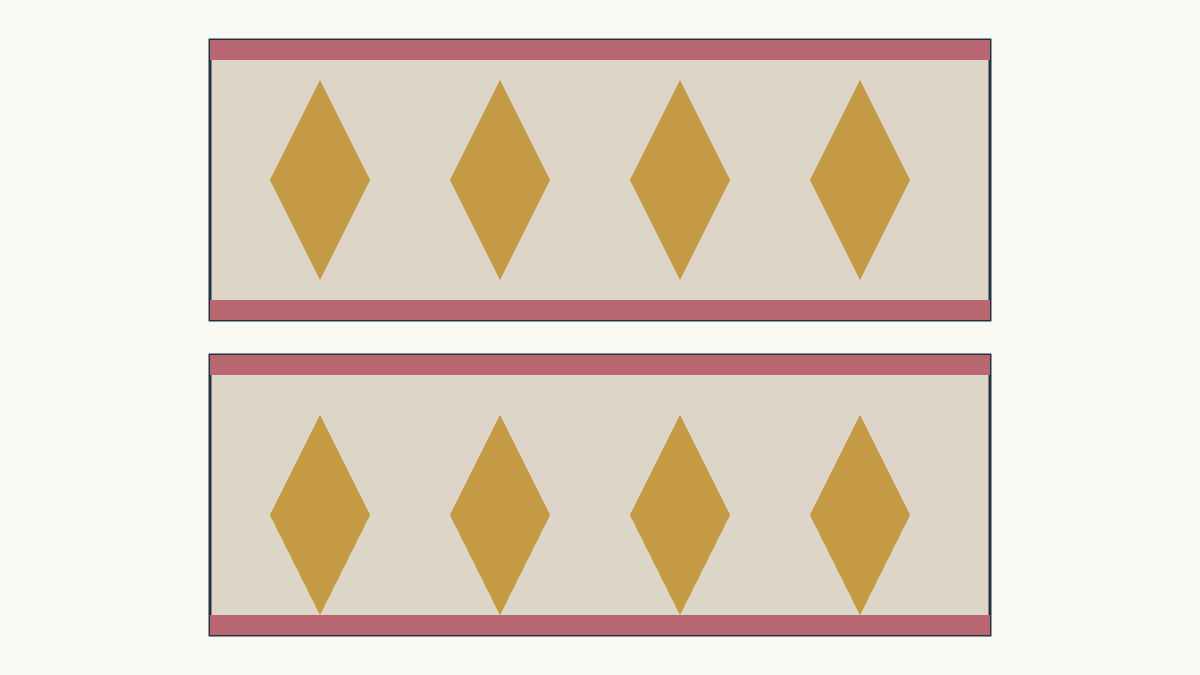
Choose a border print by its finished visible band, preserve calm margins, and check repeat phase before cutting long strips.

Find eight matching print windows, keep the same wedge reference, and preview the octagon before cutting a batch.

Measure a sewn center and existing pieced borders, calculate a spacer in both directions, and preserve complete motifs.
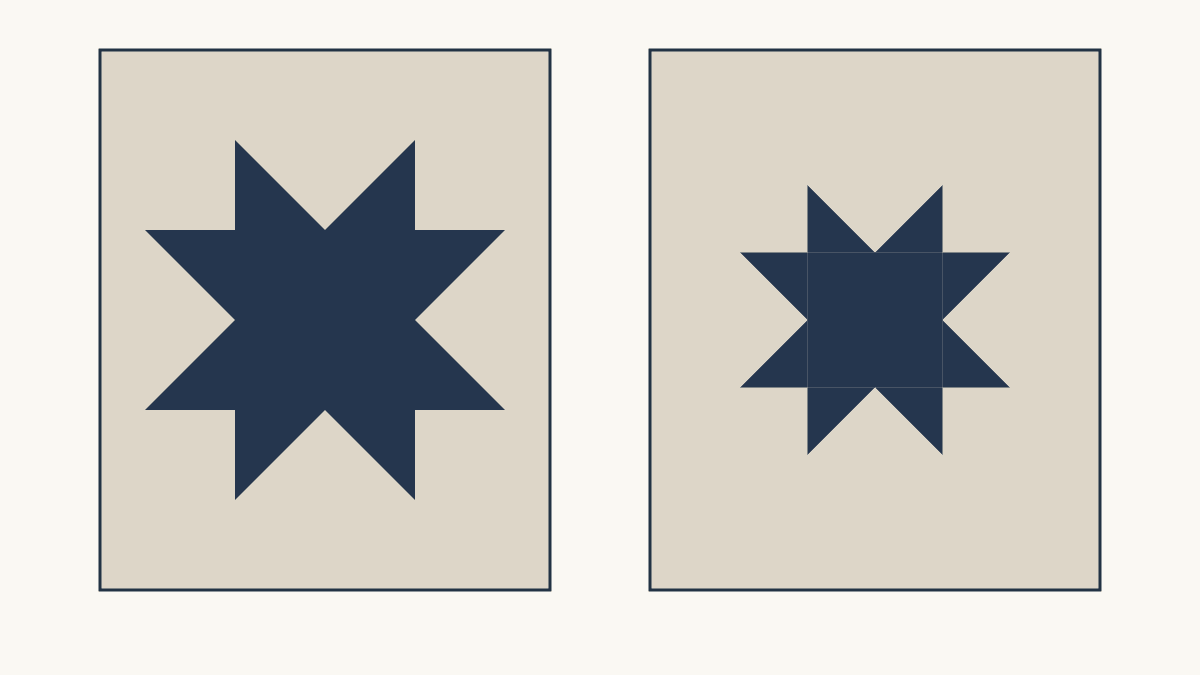
Compare 36-inch and 48-inch stars on one quilt top, then check the center print, background and fabric-width constraints.

Compare three nested star sizes, choose contrast at each shared edge, and check which fabric survives in the narrowest ring.
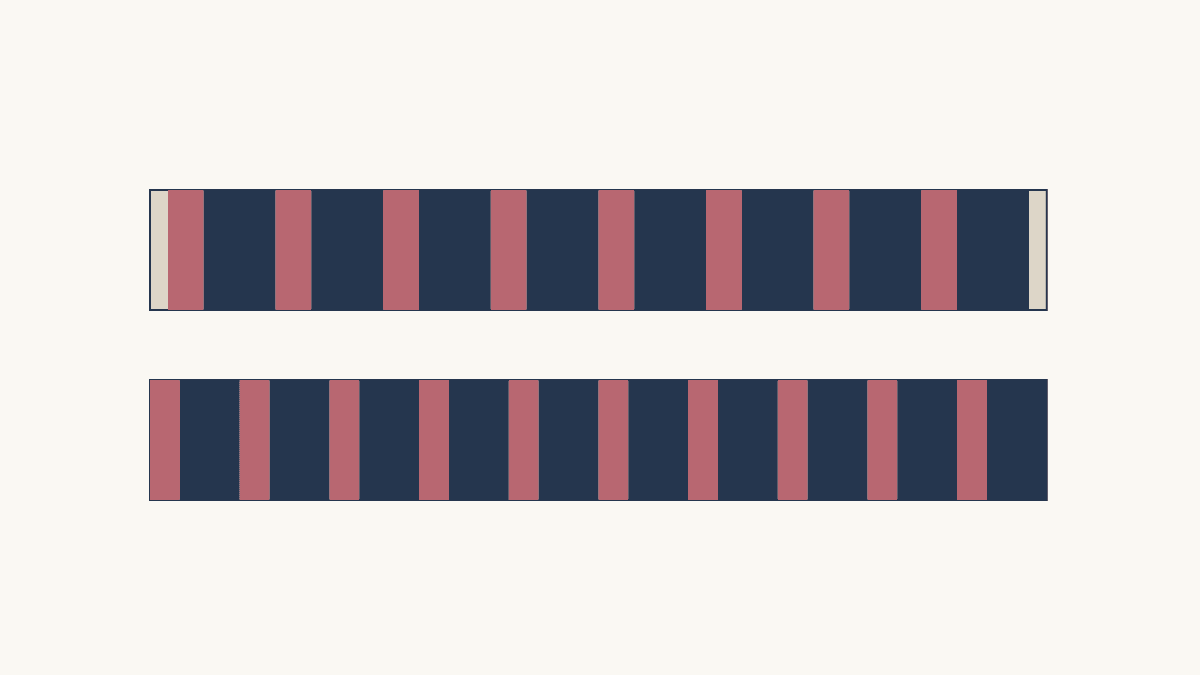
Fit complete border motifs around a measured center, compare end caps with resizing, and keep repeat phase clear at the corners.
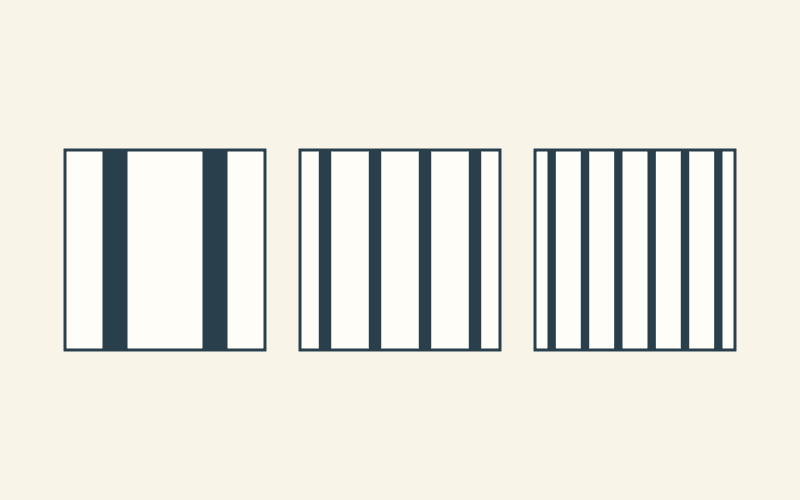
Compare three band studies with the same size, colors and colored area, then choose one question to carry into a small quilt series.
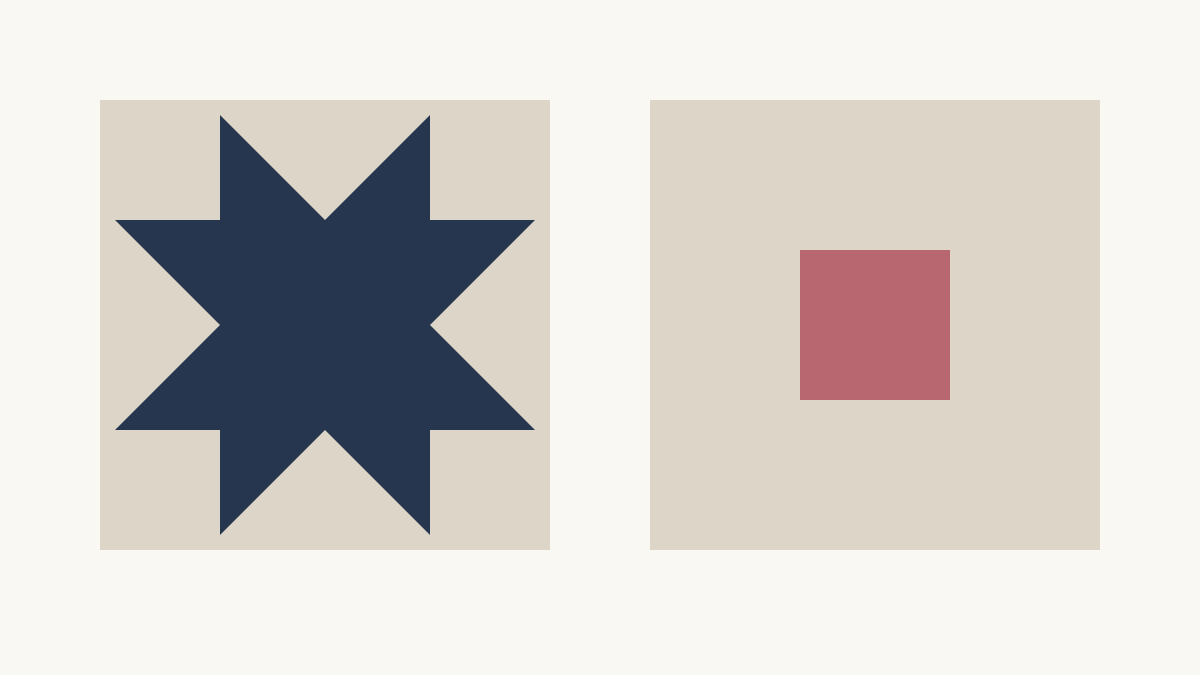
Compare the center windows in different star blocks before assigning one feature print across a sampler.
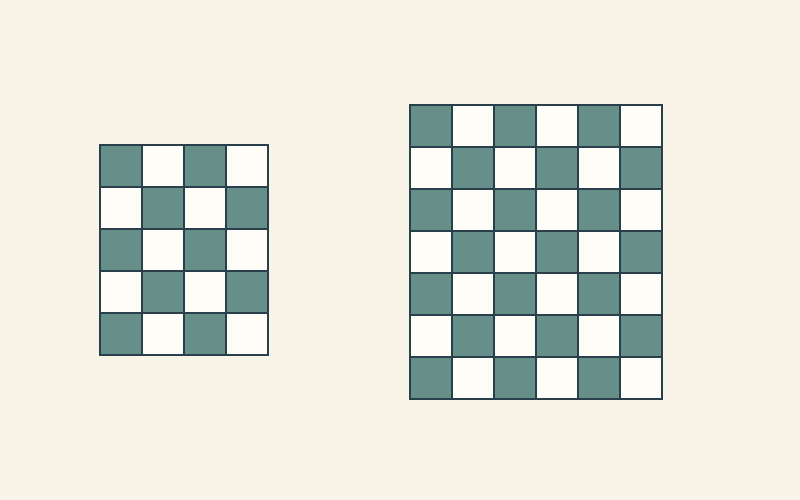
Keep size labels, counts and exceptions consistent while checking a worked two-size instruction example from units to finished dimensions.
Turn a quilt challenge idea into a clear entrant brief with exact size, fabric, finish, judging and hand-in rules.
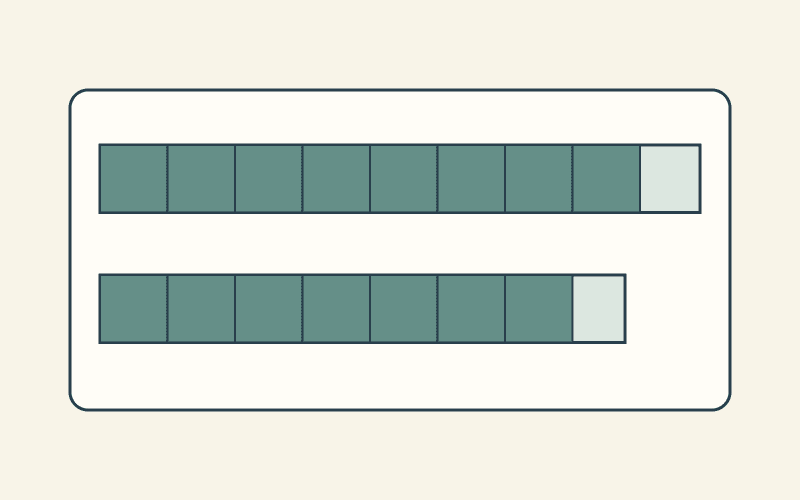
Trace patch counts, usable fabric width, strip yield and rounding through a worked fabric requirements table for a quilt pattern.
Write fabric roles readers can replace, audit a small substitution map, and keep the labels consistent through the pattern.
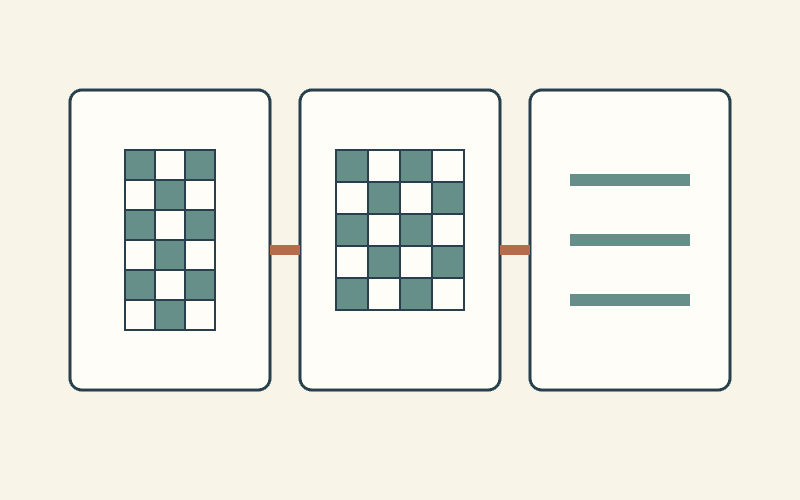
Follow a correction from a layout count through cutting, materials and instructions, then record what still needs a fresh check.
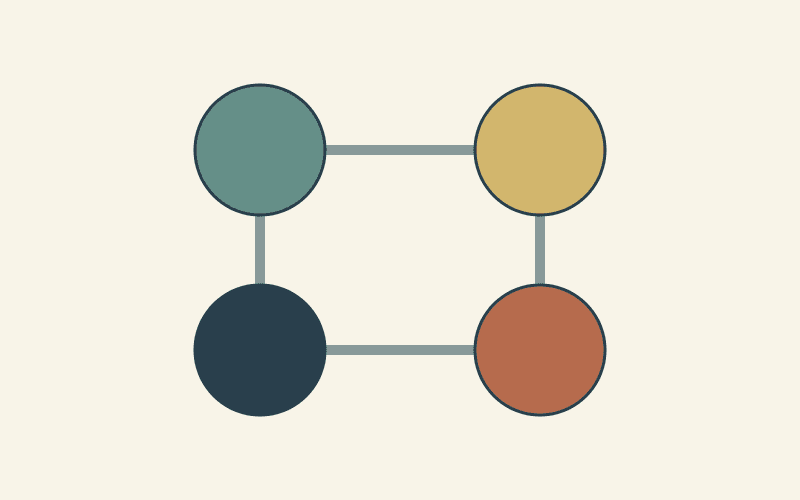
Write a four-maker round robin brief with clear handoffs, border choices, deadlines and return instructions before the centers leave home.
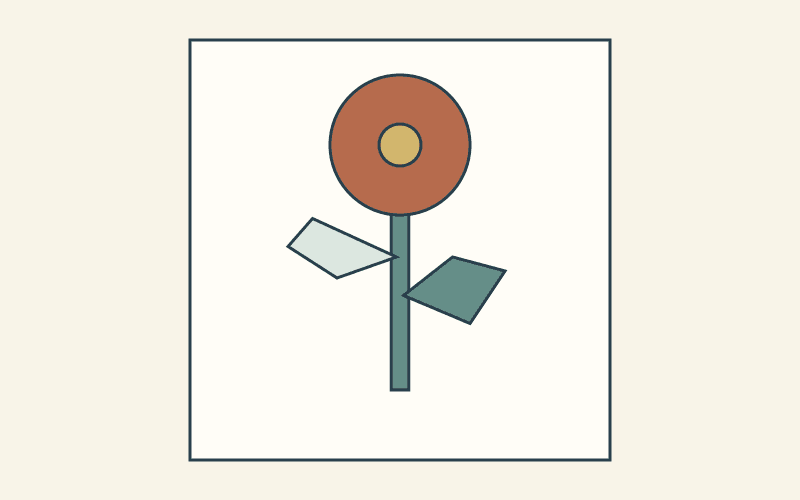
Map the covered edges in a flower design, separate placement from stitching, and check the fabric stack before preparing every piece.
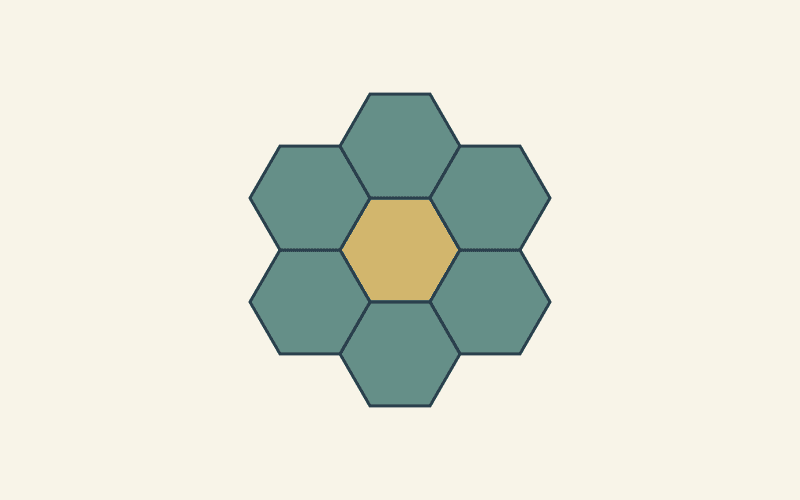
Calculate a seven-hex EPP flower from its paper side length, compare sizes, and keep orientation and cutting allowances separate.
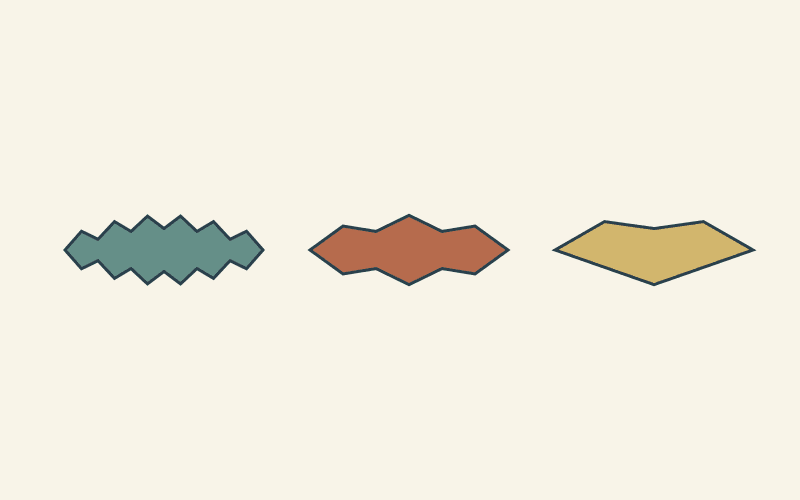
Compare leaf contours at one scale, keep the features that identify the subject, and check small details before cutting fabric.
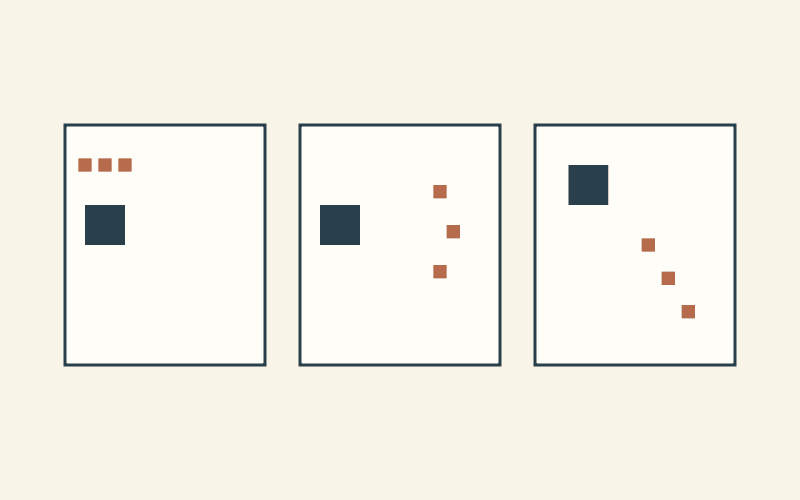
Compare three arrangements of one large patch and three small accents, keeping patch sizes and colored area fixed.
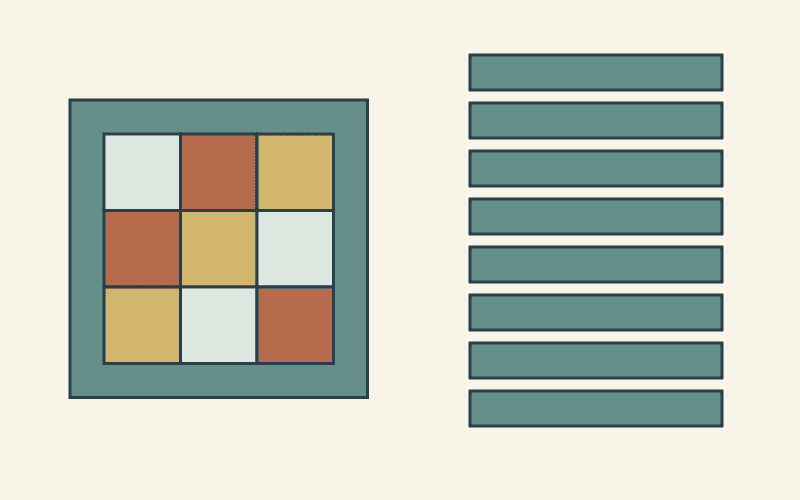
Audit a small panel from nine charm squares and short strips, then keep a clear record of useful material left for another project.
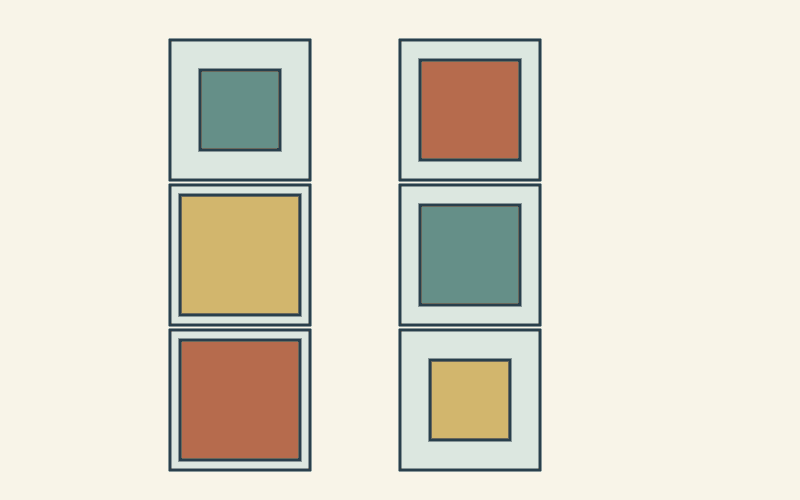
Measure existing blocks, plan frames that preserve their designs, and check a six-block layout before committing the collection.
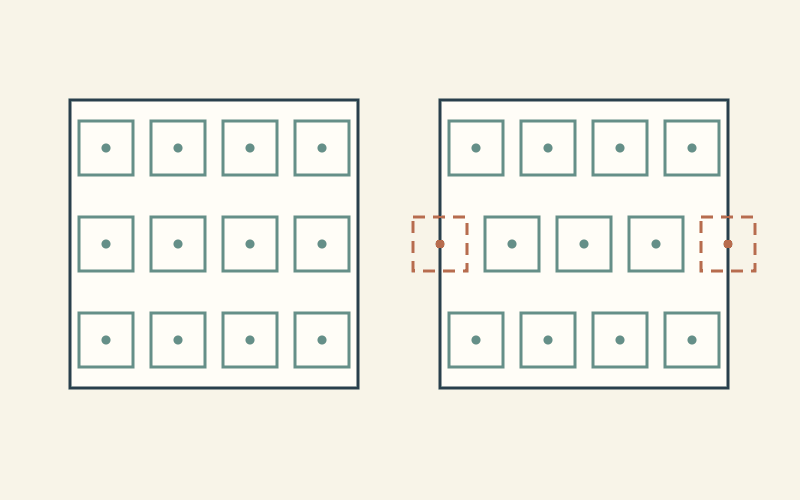
Count complete fussy-cut windows in aligned and staggered rows, including the two edge motifs a center-only count misses.
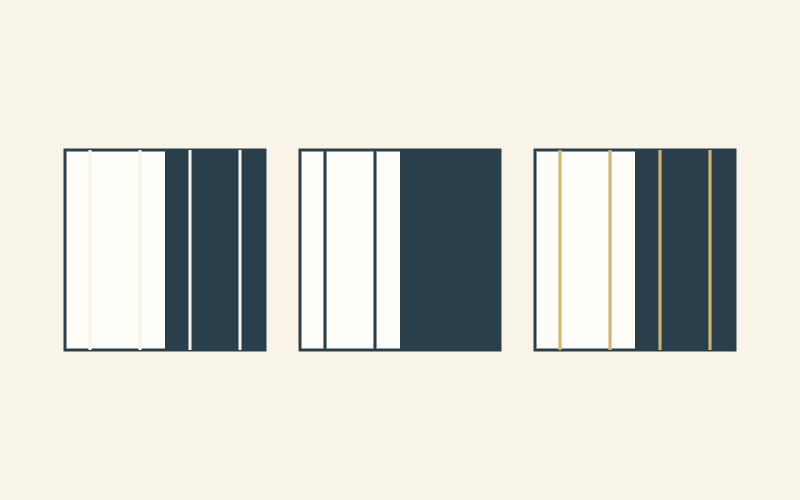
Hold the quilting path still while comparing colors, read exact thread specifications, and make a labeled sample with your actual fabrics.
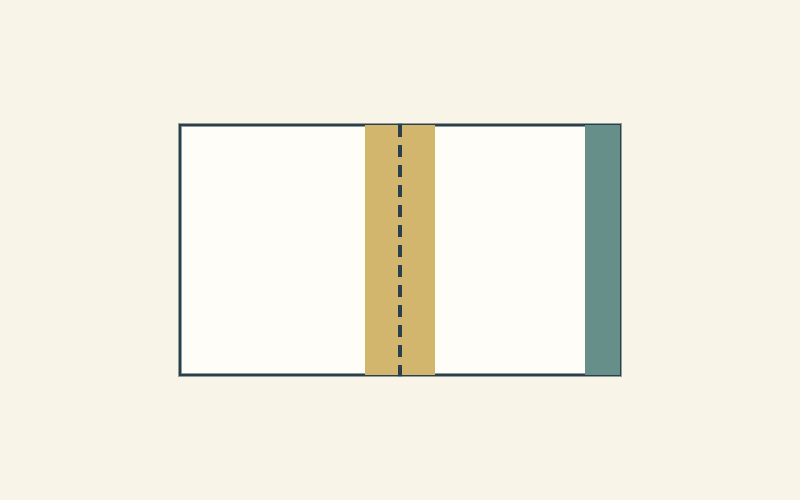
Separate paper needed for later joins from paper ready to remove, then support the sewn unit while following its pattern and paper directions.
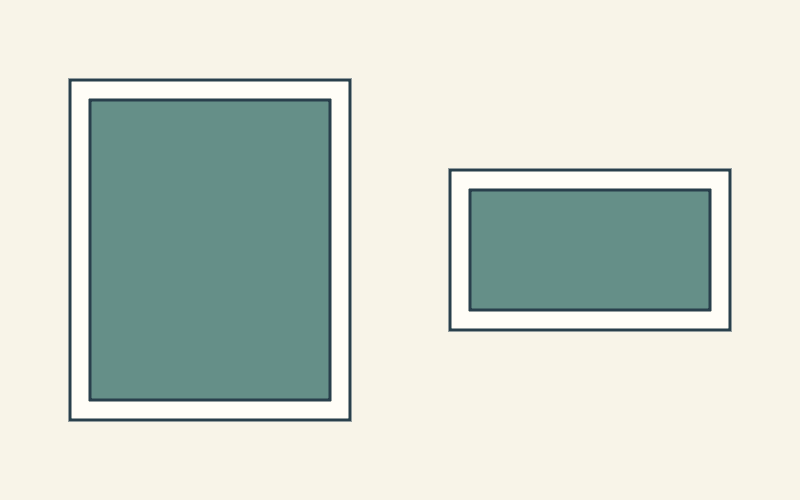
Measure the prepared bundle and box, add protection and identification, then document the sealed package and the quilt's arrival condition.
Measure your usable wall, compare a full-size quilt footprint, and plan textile support before choosing the final composition and finish.
Specify block sizes, fabric roles and a first-sample check so contributors know what to make and when to ask before continuing.
Size a pillow front from your actual block, then account for borders, the closure seam and the panel's measured size after quilting.
Give testers an exact assignment, useful measurement checkpoints and a clear way to report questions before they start cutting.
Choose whether to finish, redesign, pause or repurpose an old quilt project using its current purpose, usable materials and next missing prerequisite.
Separate known blocks from unreleased instructions, reserve fabrics by role, and keep the layout flexible until the program supplies the missing details.

Turn one recipient program's current rules into a measured quilt brief, then check the handoff details before buying fabric or starting a kit.
Use the directions for the quilt's actual materials, check the finished construction, and record what happened after it dries before writing a care note.
Use three small practice lanes for travel, waves and loops, then record one change at a time so each sample tells you what to try next.
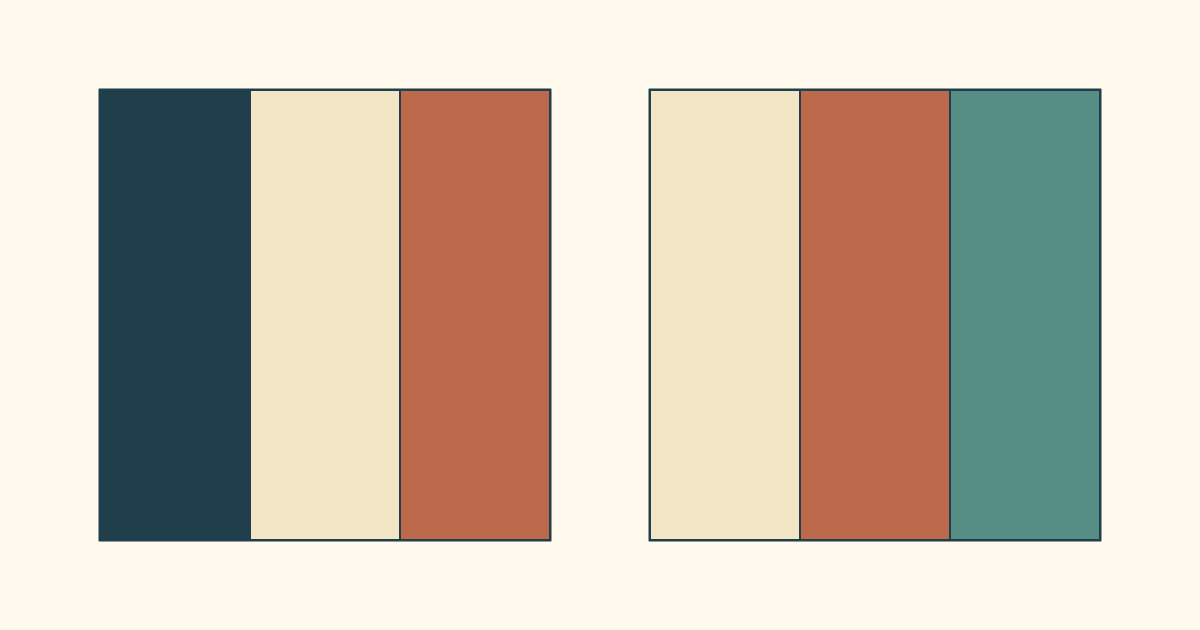
Compare sewing through a foundation with sewing beside folded freezer paper, using one simple unit and a realistic plan for sixteen repeats.
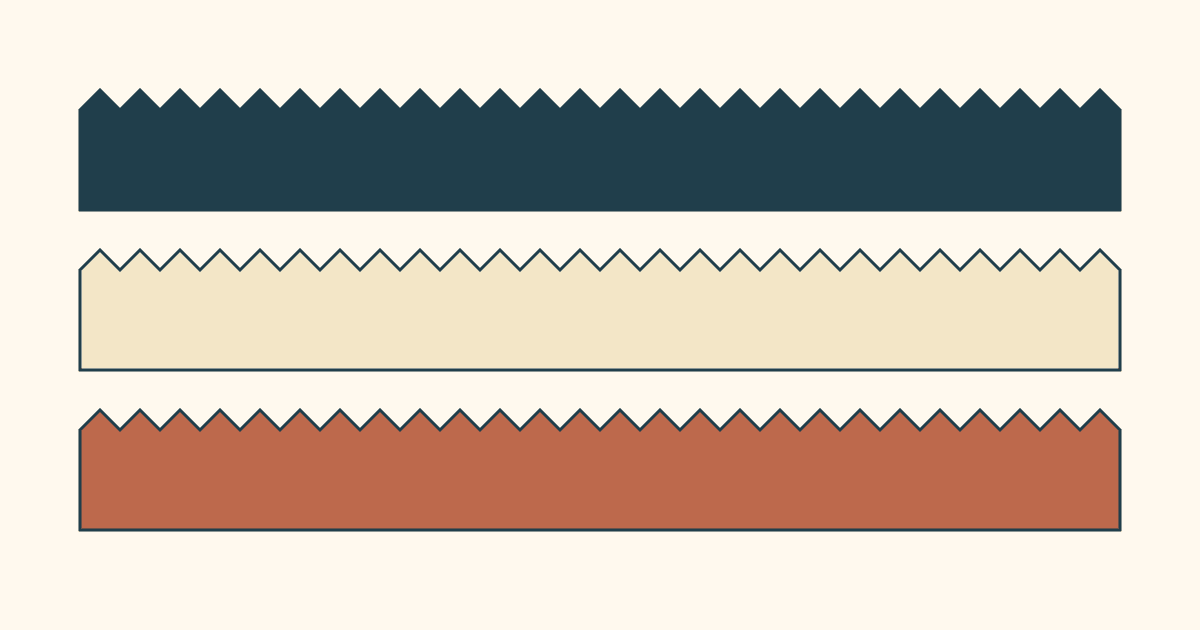
Peaks or valleys? Compare Moda and C&T guidance, then use a three-strip check to choose a consistent seam reference for your actual precuts.

Plan flat or gently folded storage, allow room for padded folds and keep an inspection record. A worked example separates footprint from actual fit.
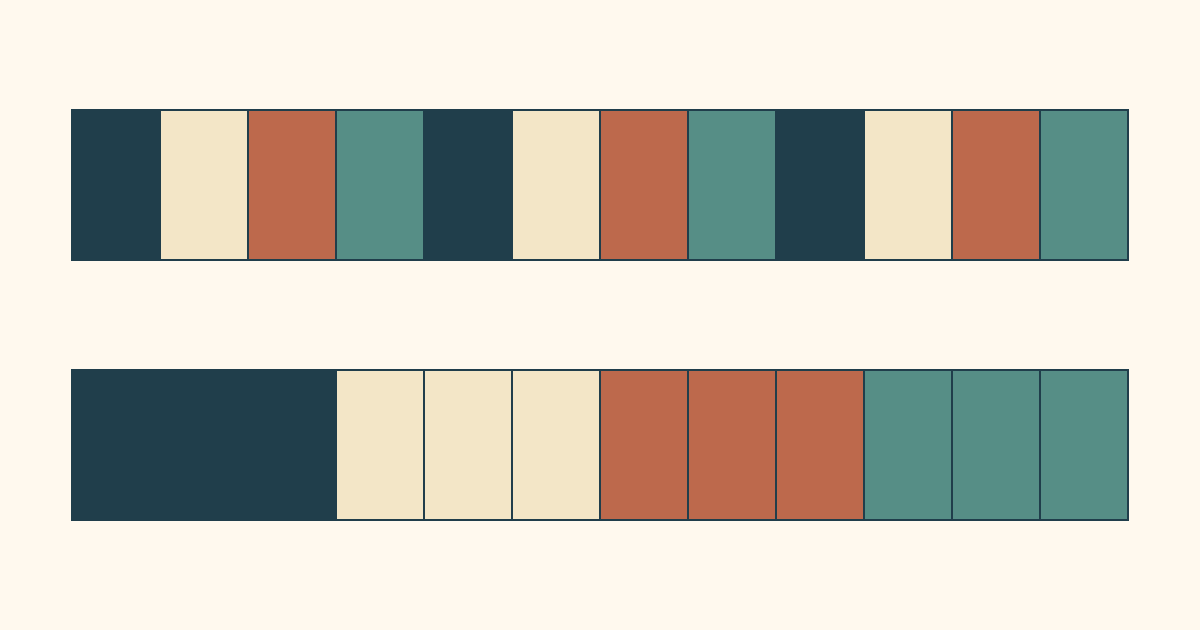
Give leftover binding strips a deliberate order. Compare repeated and grouped colors, allow for joins and audition the sequence around a 40 x 52 quilt.
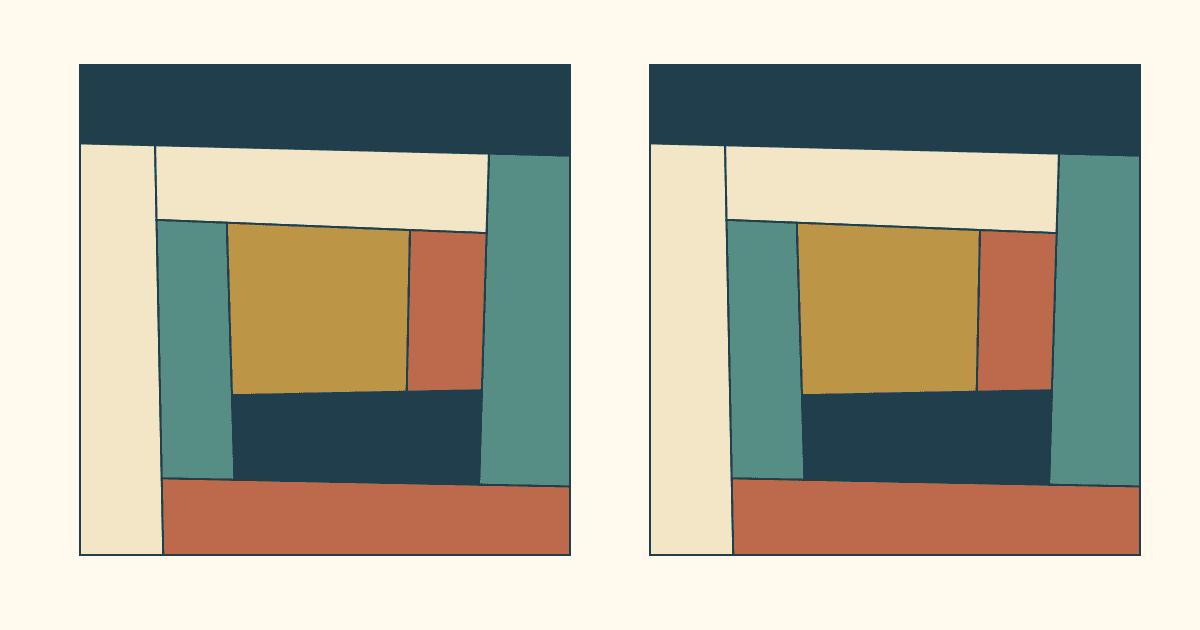
Keep the irregular strips and still make blocks that fit. Plan an 8-inch finished block, check the trimming square and protect the outer seams.

Keep a settled quilt layout in order with labeled row stacks, a checked pickup route and a three-row assembly example.
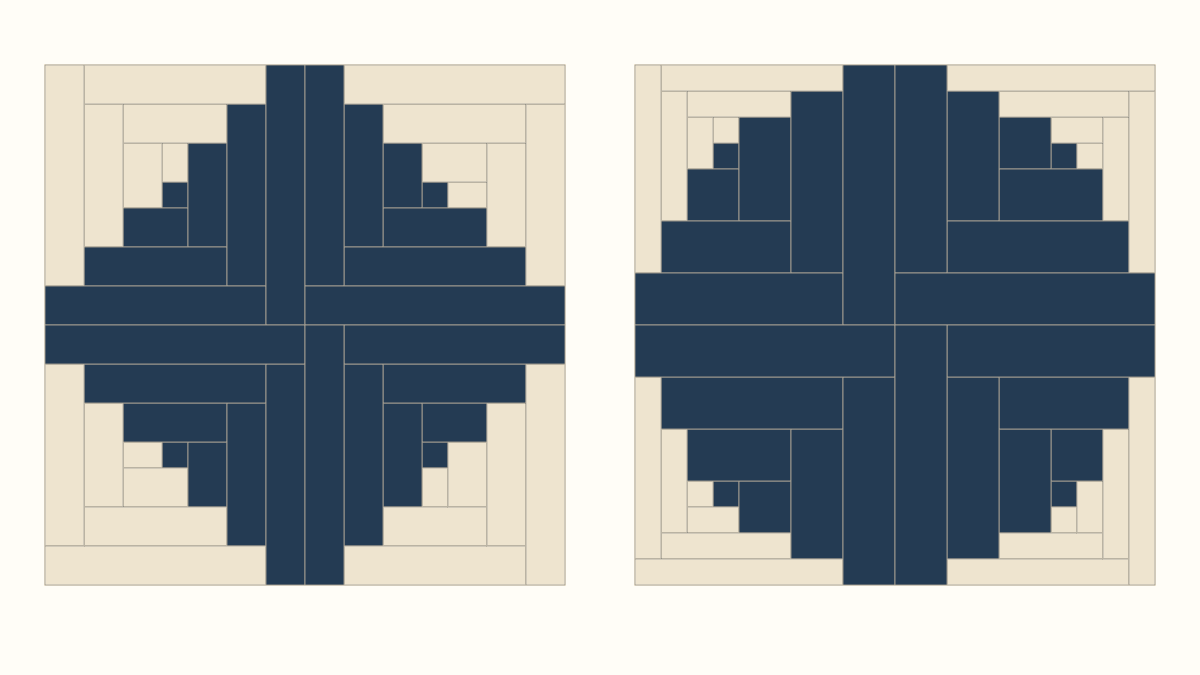
Unequal straight logs make a curved-looking outline. Compare two ten-inch blocks, then turn four together without changing the finished size.
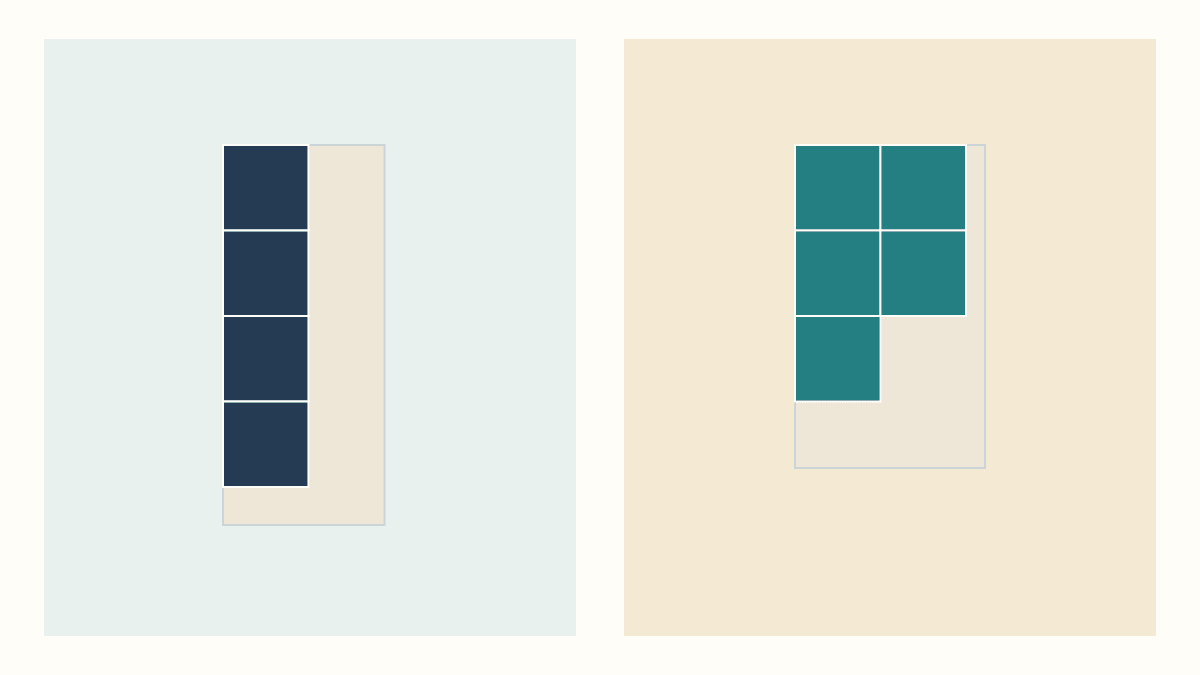
Check a pattern's fabric format and complete per-print cutting group before choosing a quilt for your fat-eighth bundle.
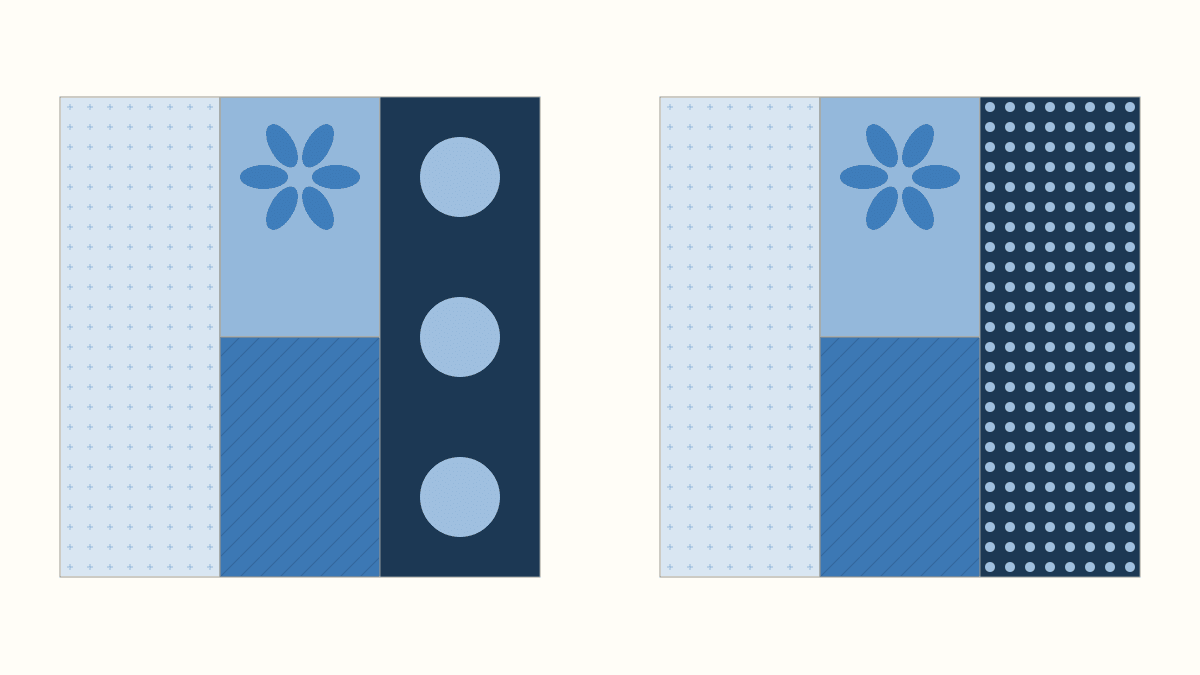
Choose four blue prints by their jobs, then compare value and print scale separately. An equal-coverage dot swap shows why both matter.
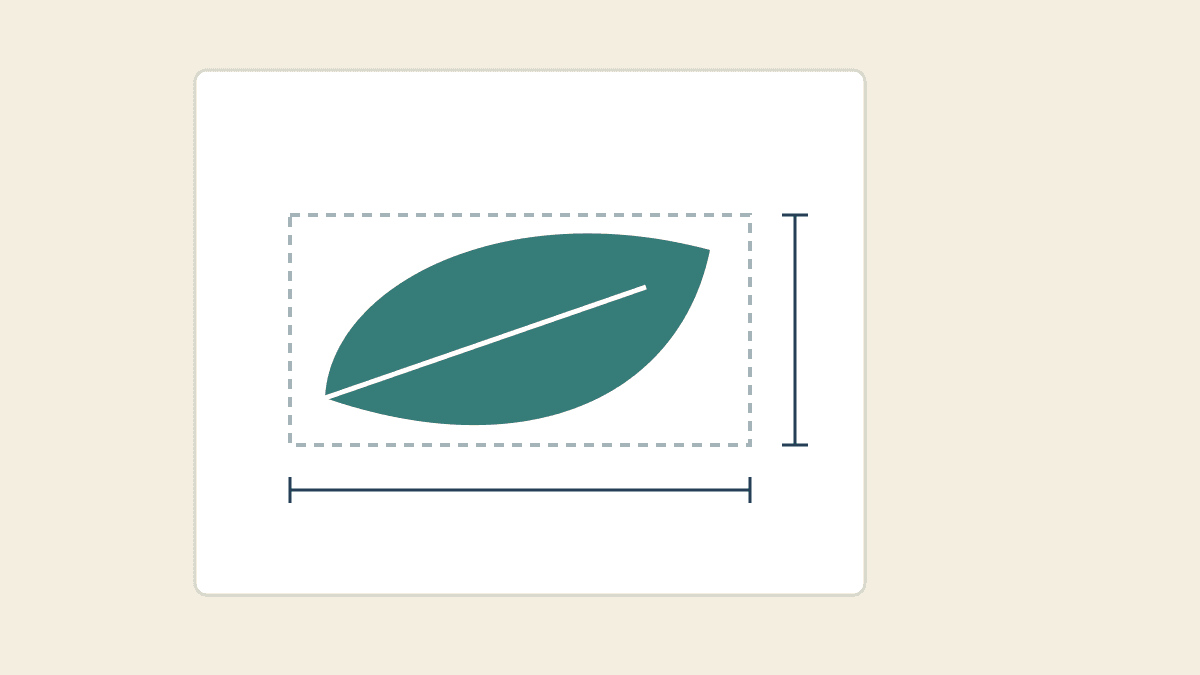
Choose the right PDF print setting, measure both axes, and work out why a template prints too small or changes shape.
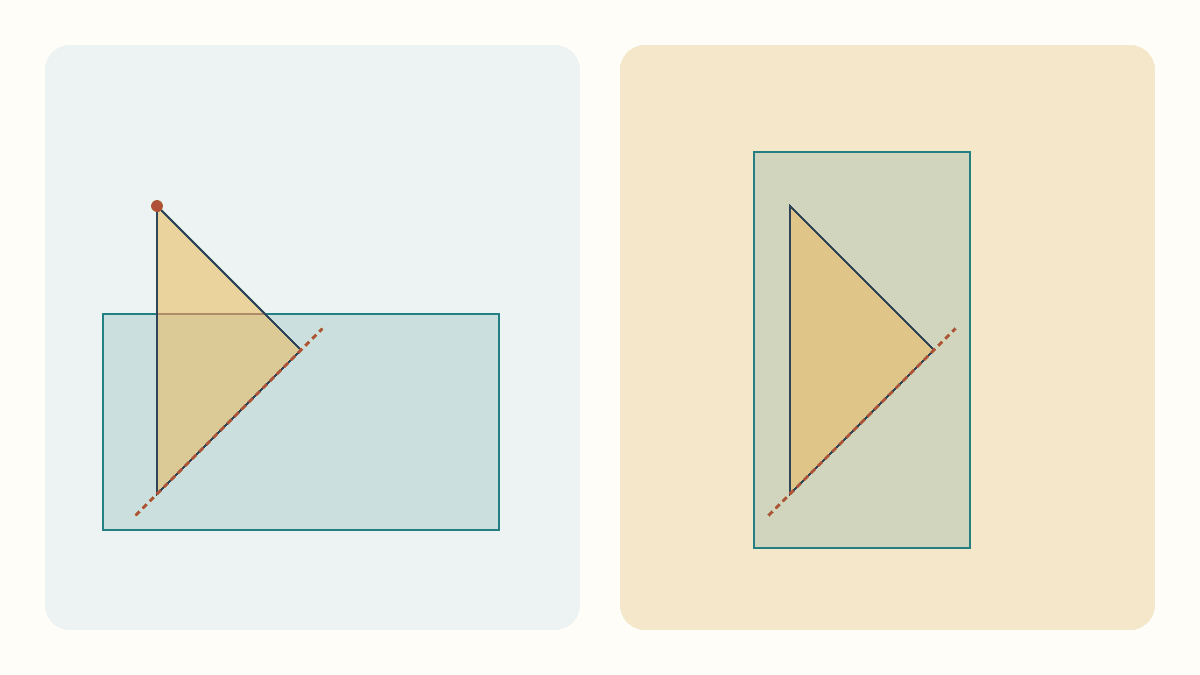
Check an awkward section after the fold, compare two placements of the same rectangle, and catch a missing seam allowance before sewing.
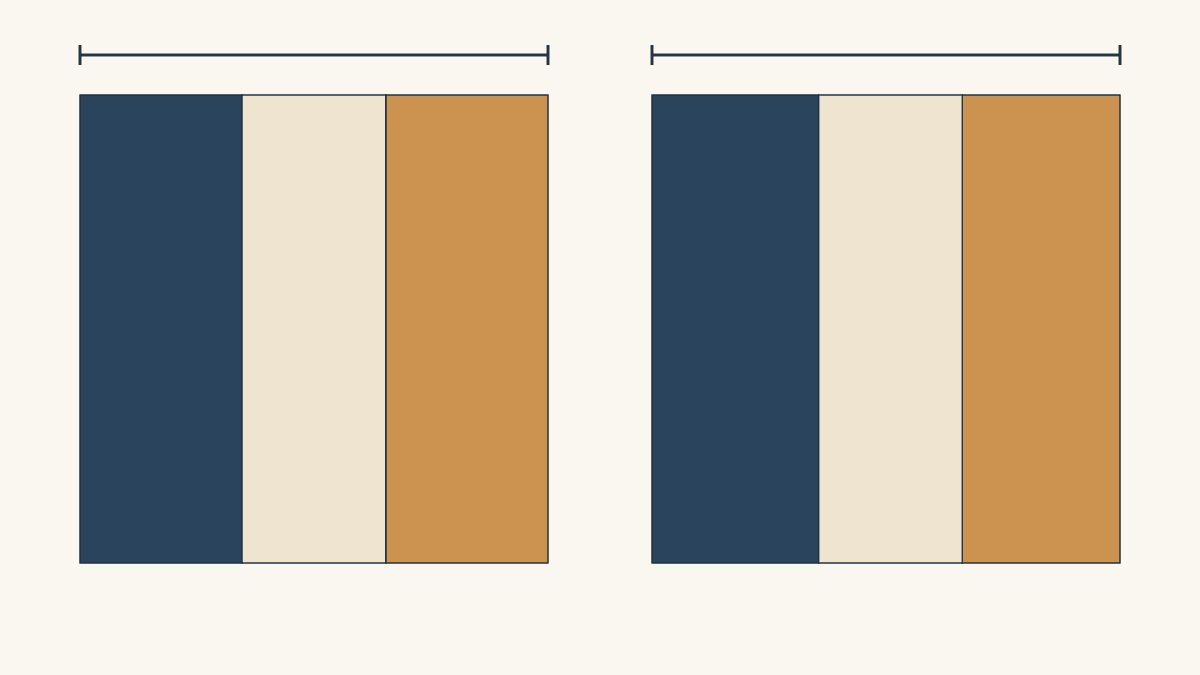
Check a pressed test unit in three places, record one adjustment at a time, and catch uneven seams that a correct total width can hide.
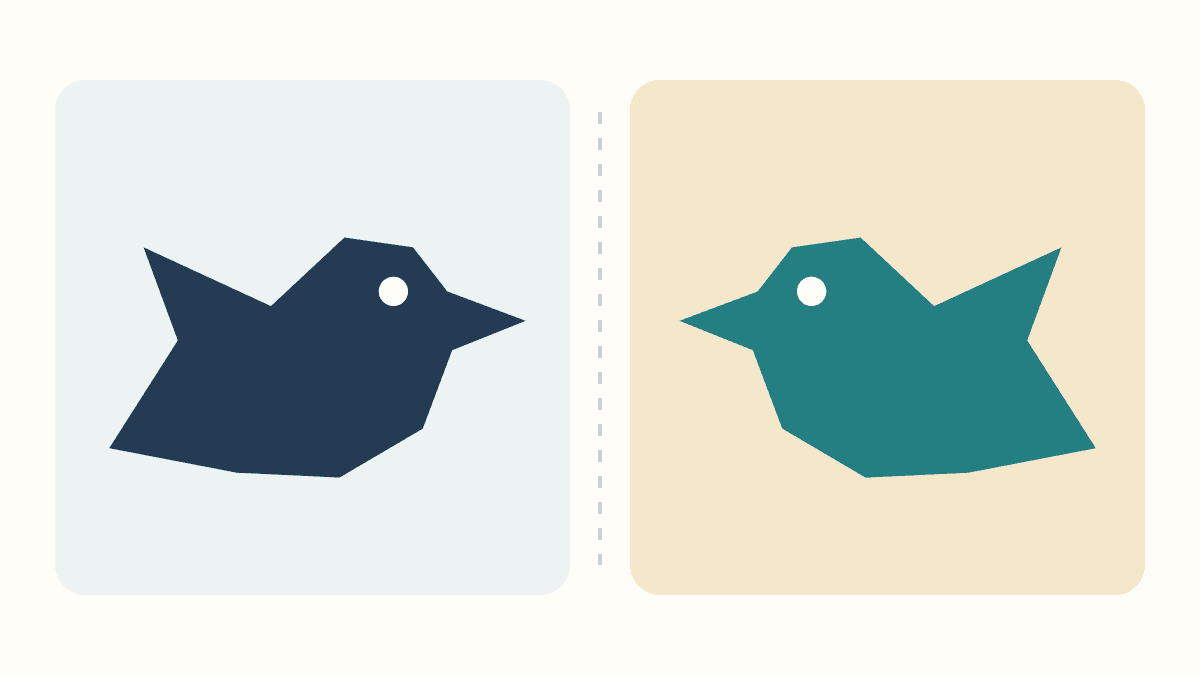
Follow one asymmetric bird through right-side tracing, wrong-side transfers and an already-reversed sheet so the finished shape faces your way.
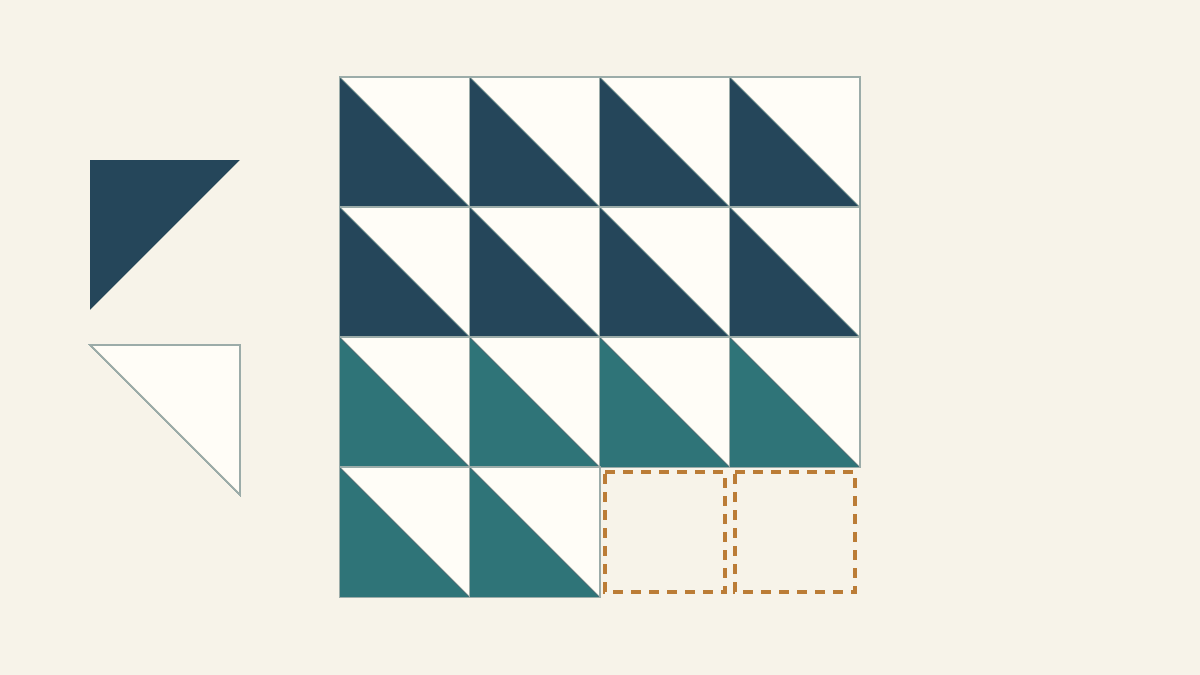
Choose one unfinished trim size, check the seam as well as the edges, and turn a mixed pile of bonus triangles into a counted project.
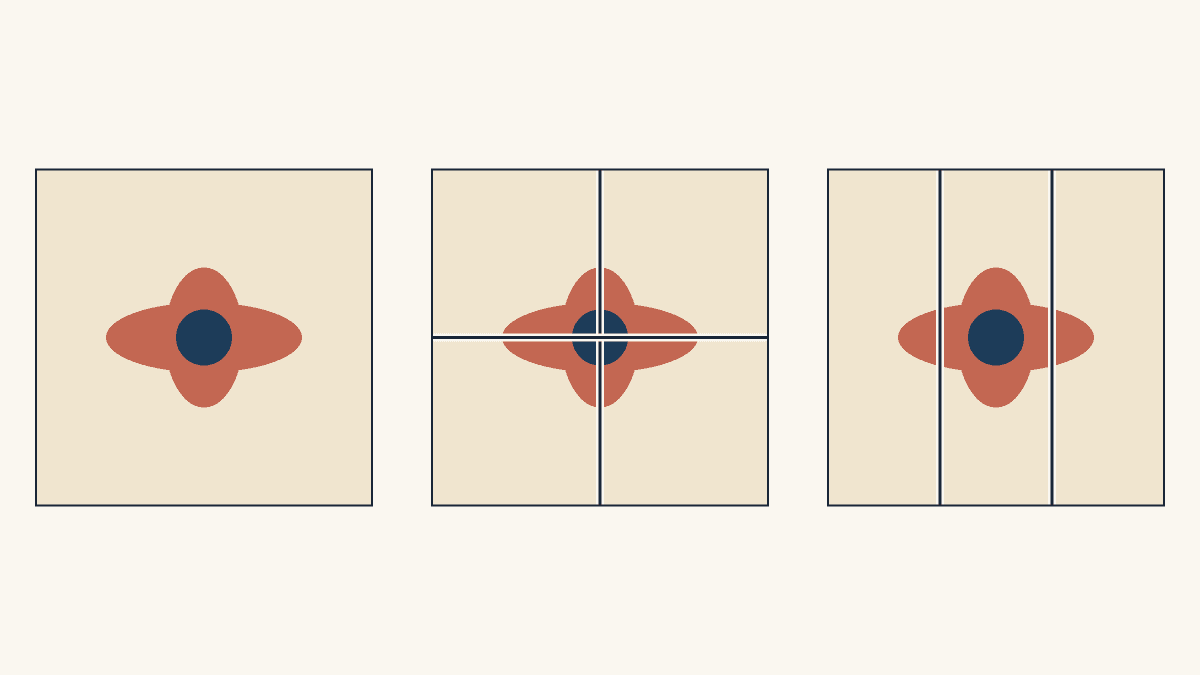
Compare three 12-inch block maps to see which keeps a whole flower, which splits its center, and why moving the print can reverse the answer.
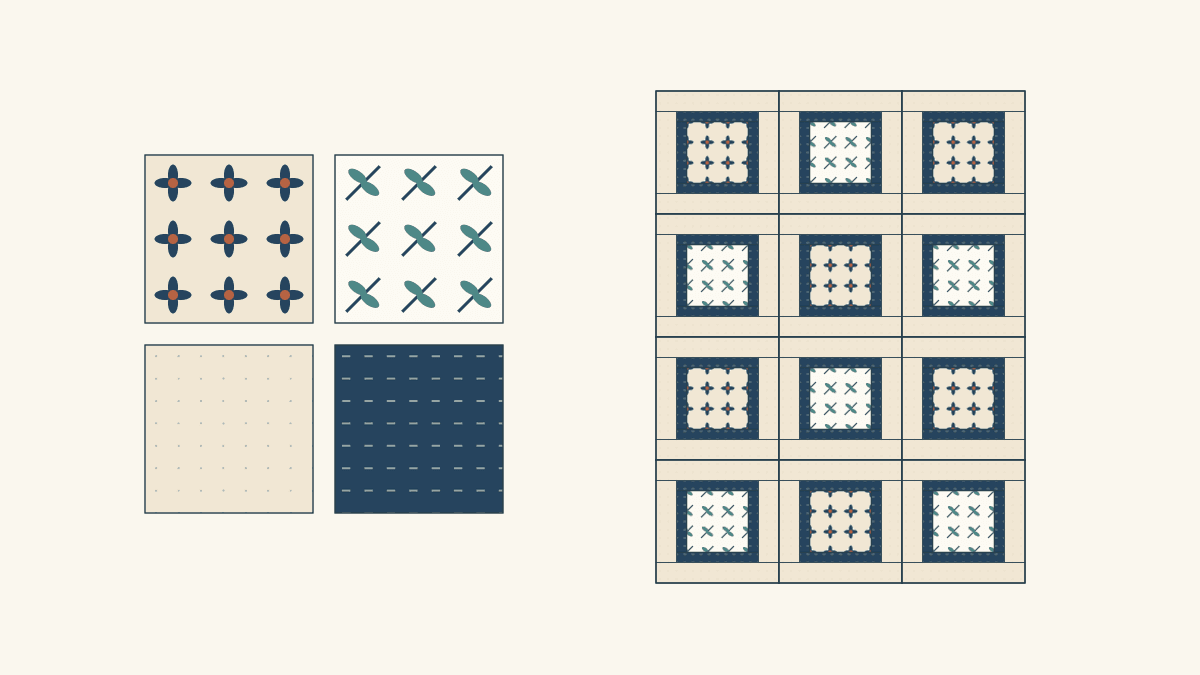
Choose an anchor print, keep useful pieces from two collections, and repeat a bridge fabric. A four-role worksheet shows what to leave out.
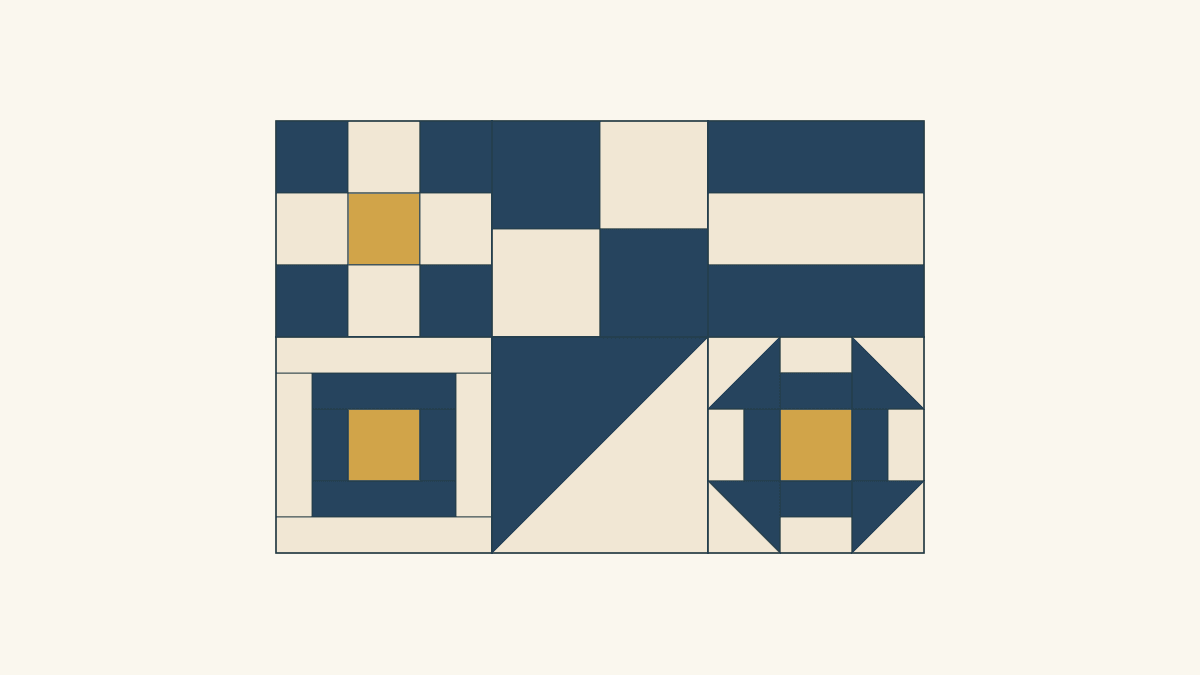
Connect six different blocks by repeating one fabric's role. Compare two placement maps, their fabric areas and the seams between blocks.
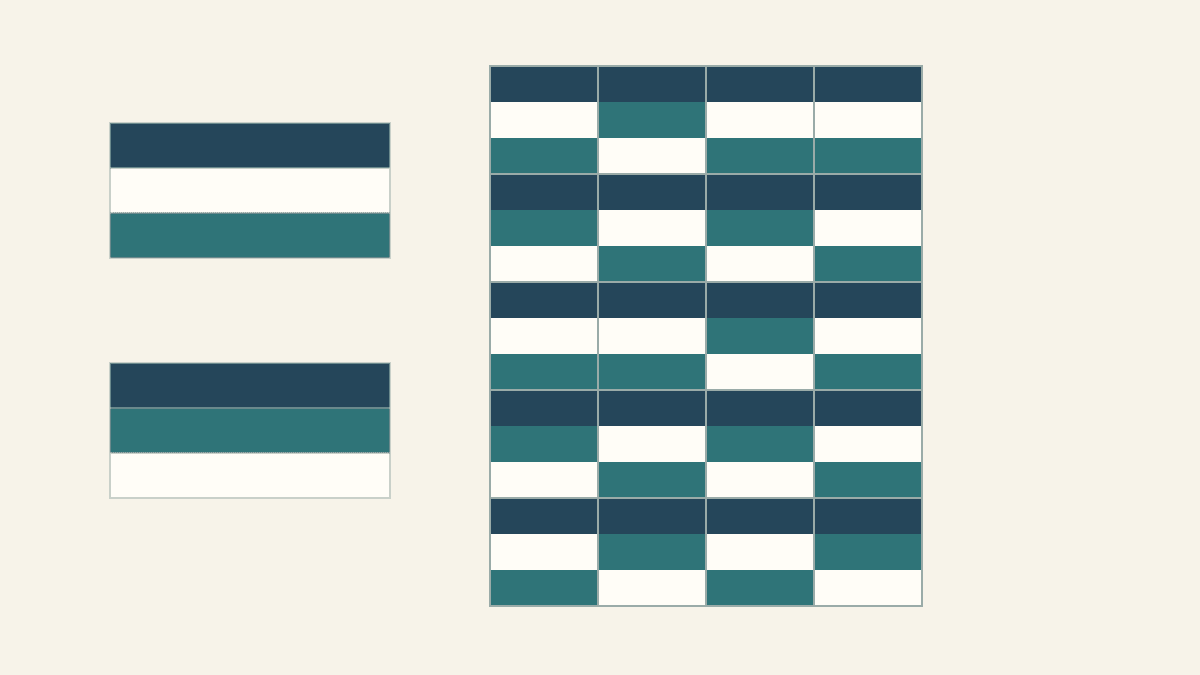
Work backward from the blocks you need, check a sewn strip set, and plan the right fabric order, subcuts and leftovers before batching.
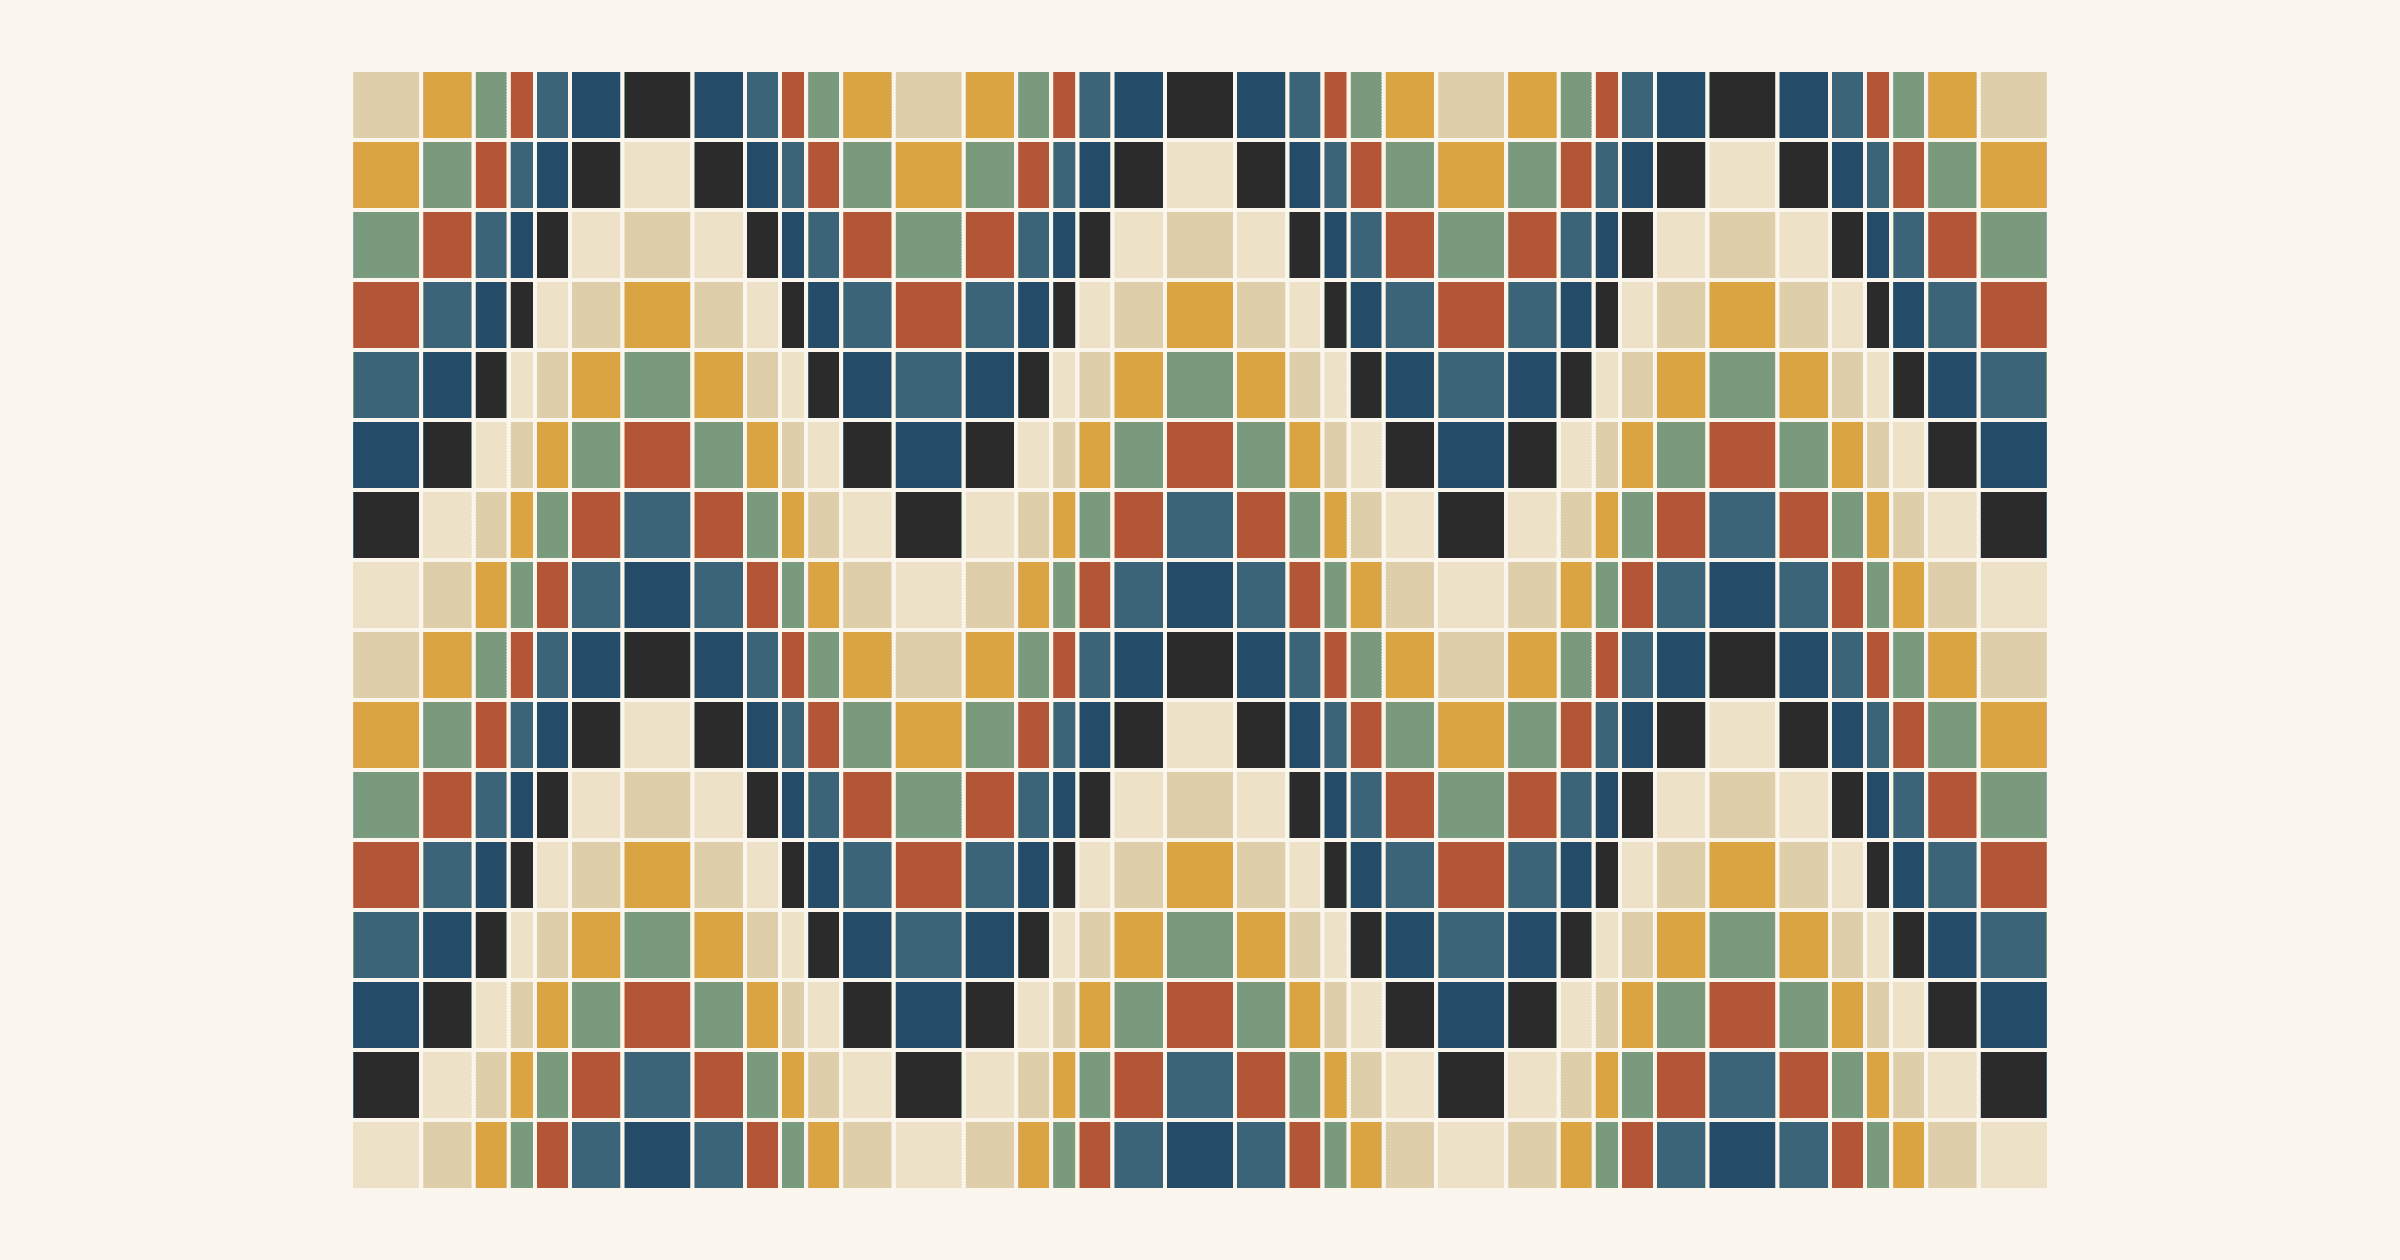
A bargello wave is a staircase of stepped columns. Number your strips, write one row per column, and see how column width turns a zigzag into a curve.
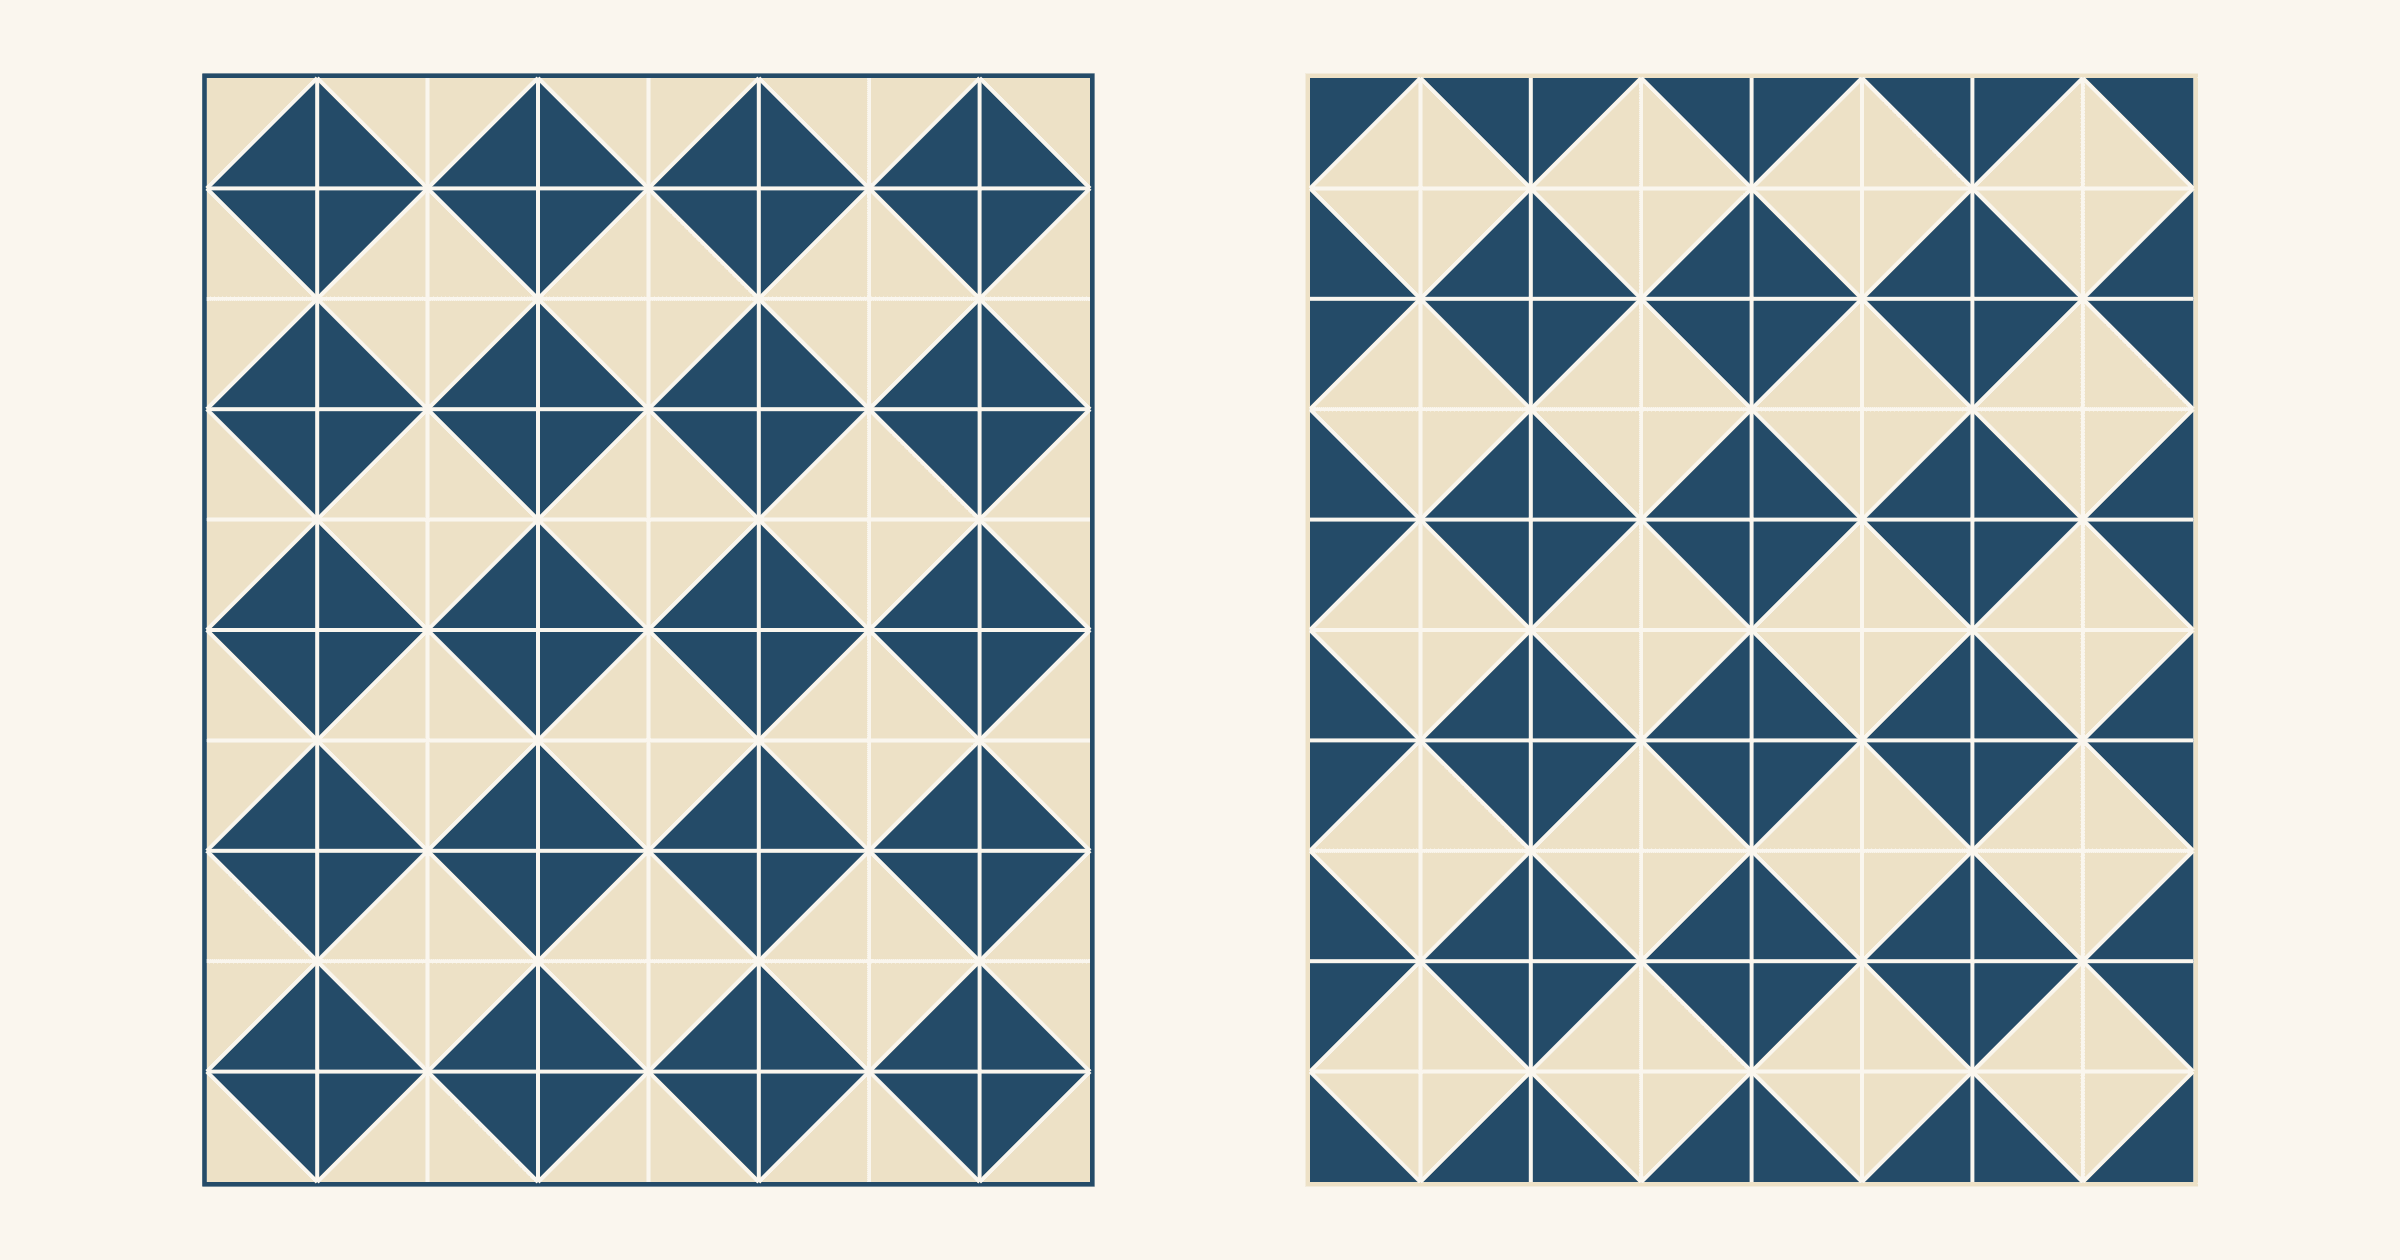
With no border, the outer blocks and the binding make the edge. Compare whole and halved motifs on one 48 x 60 inch quilt, then pick the binding color.
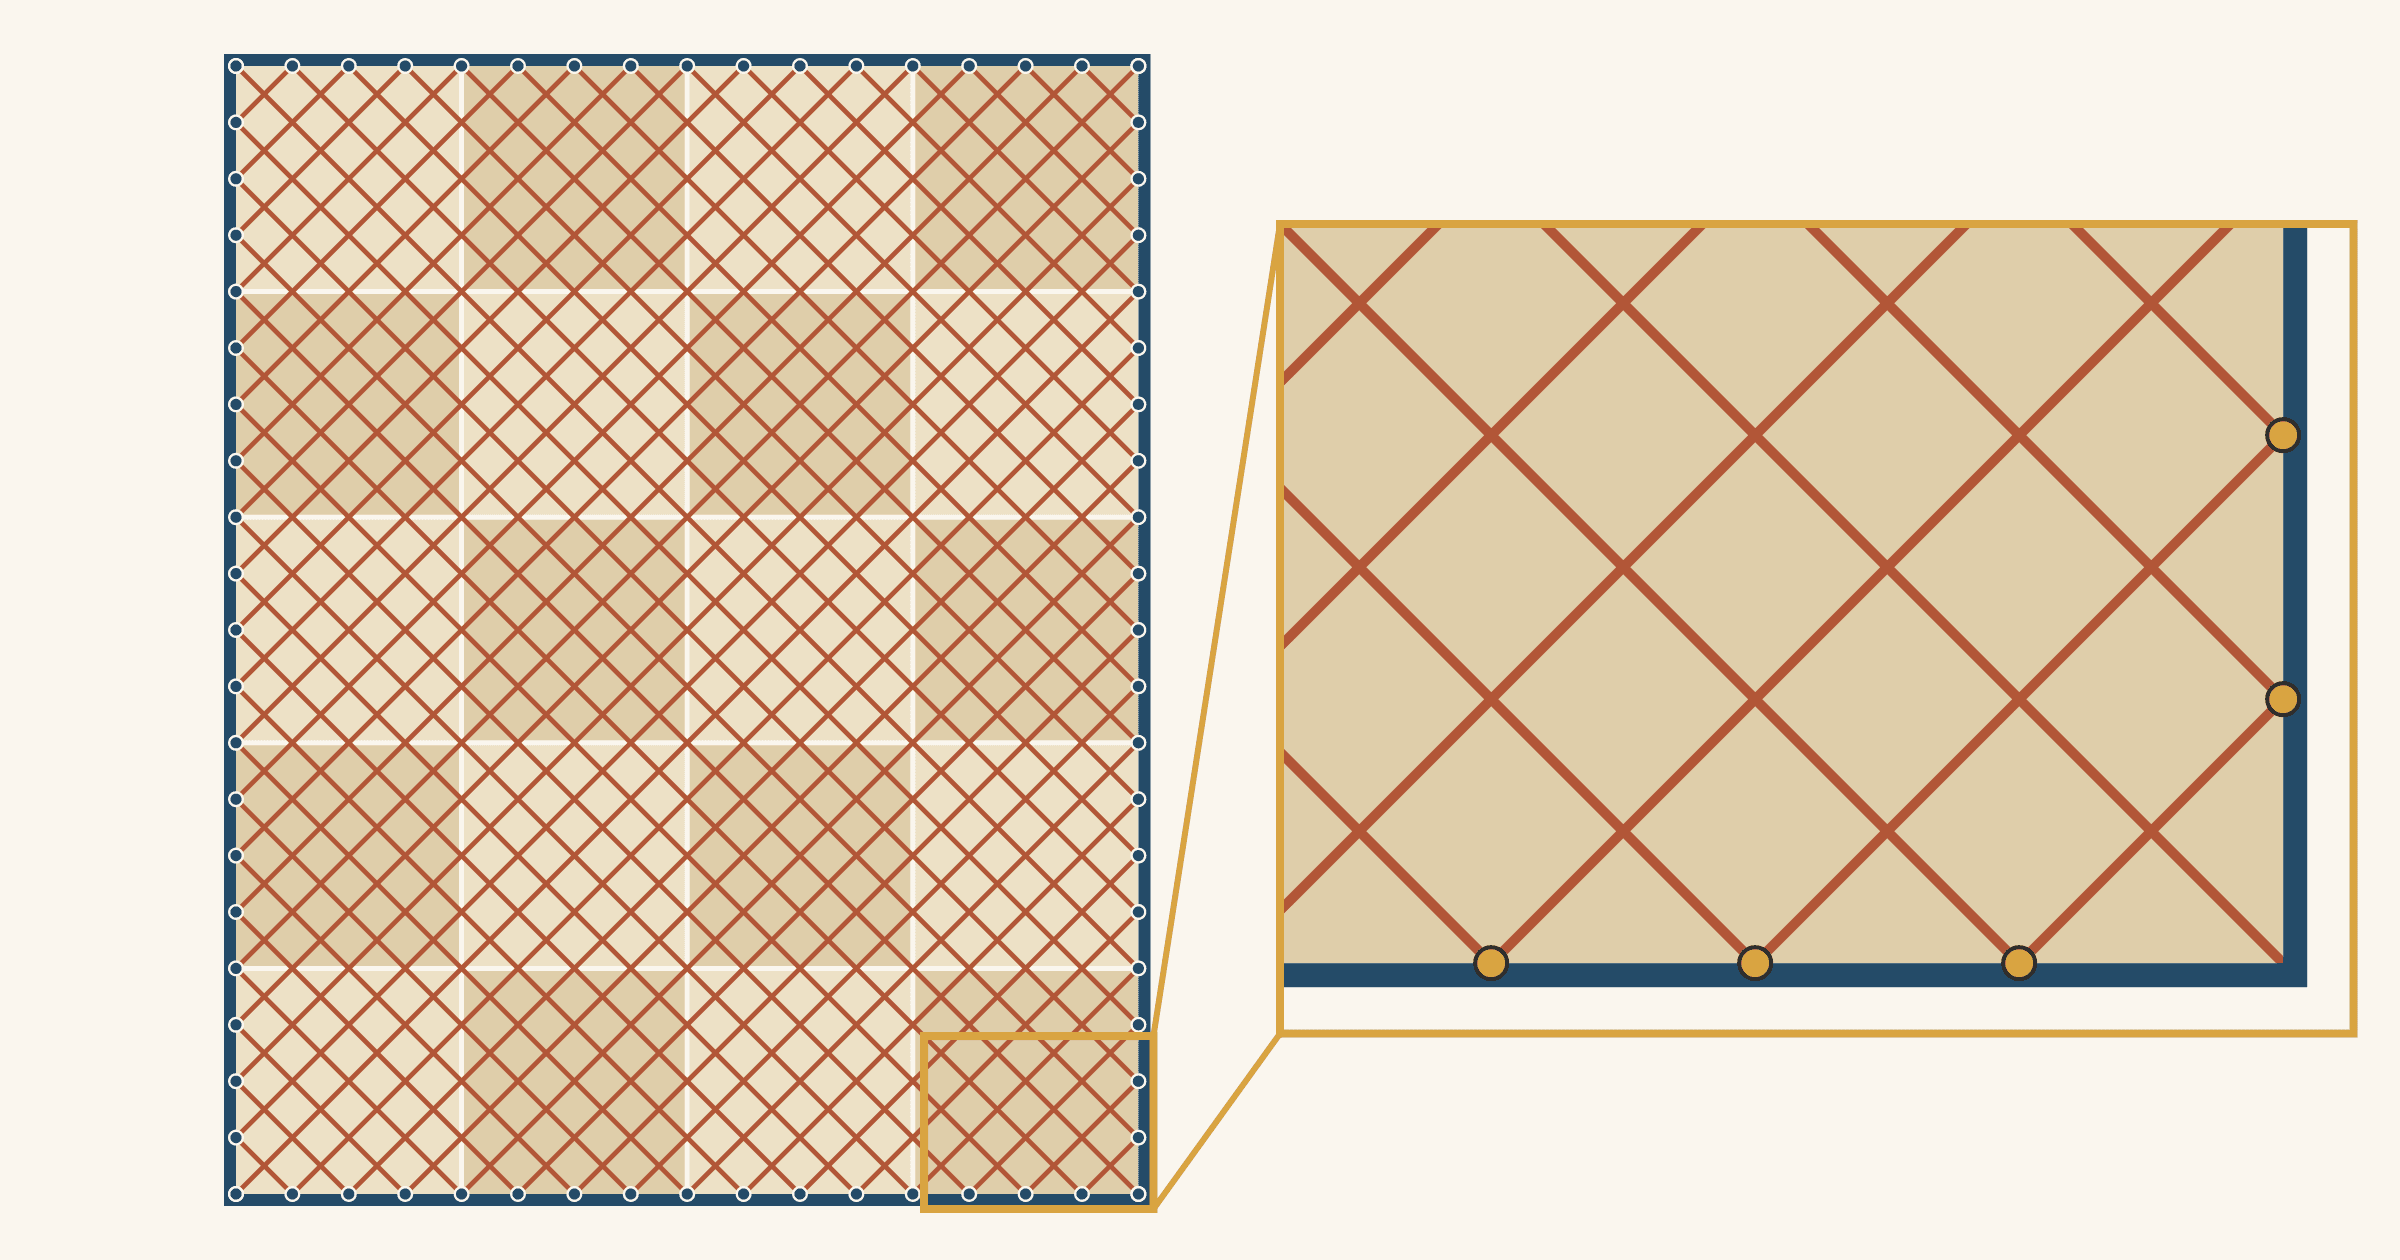
Space a 45-degree crosshatch so the lines meet in a V at every edge and corner. Choose the edge step first, mark dots around the quilt, then connect them.
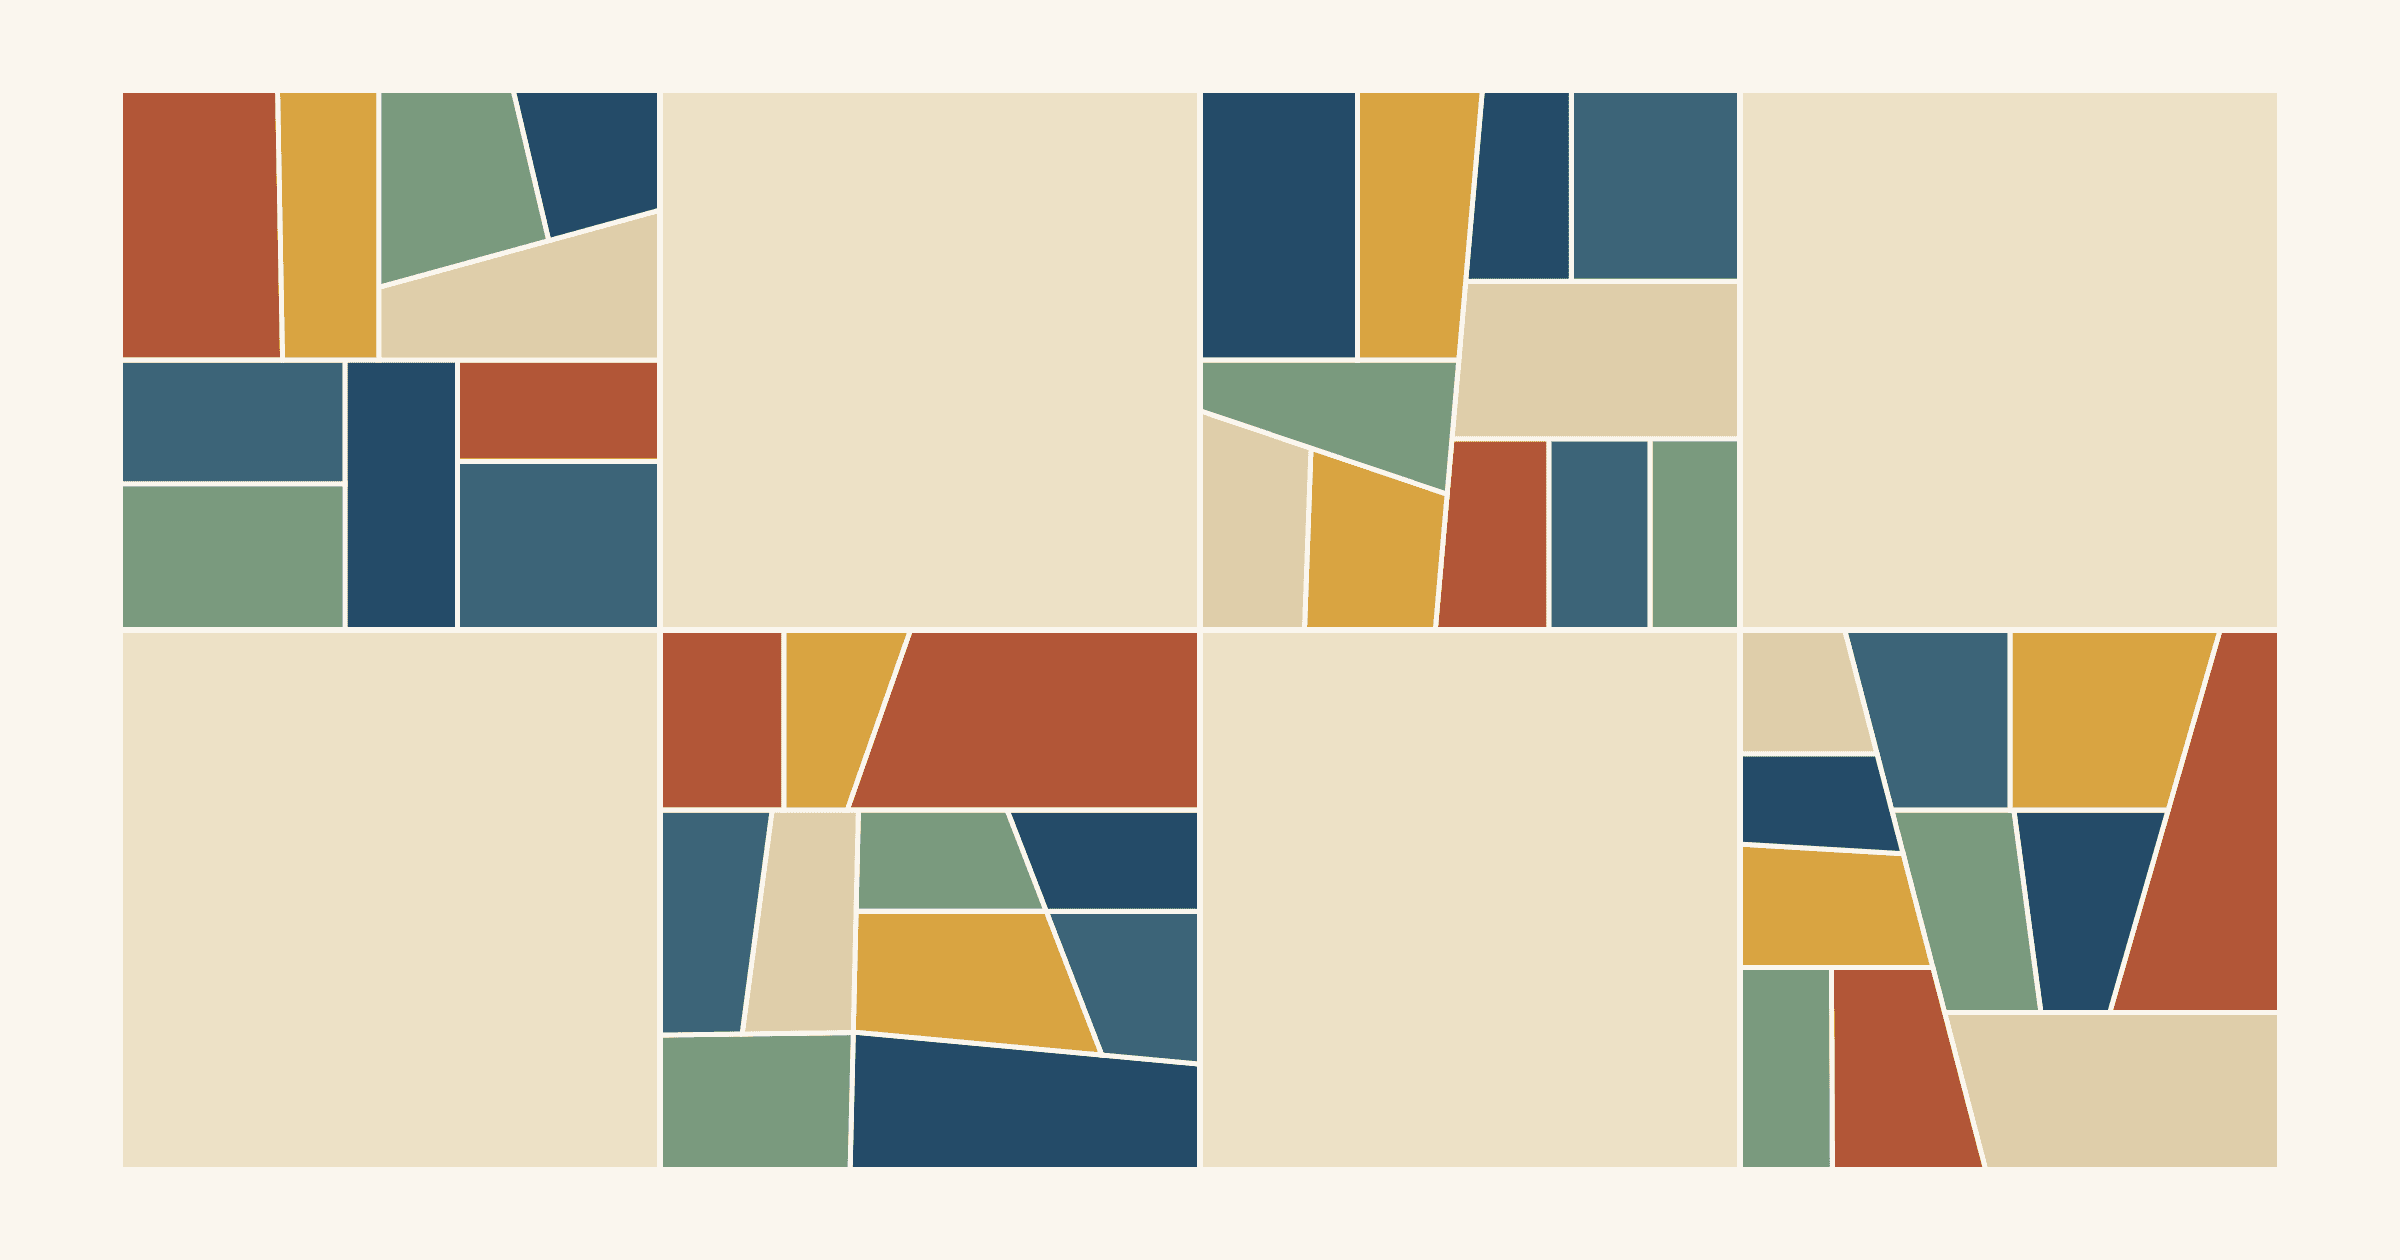
Crumb quilters commonly stop at 1 to 1 1/2 inch scraps. See what each size costs a 6 inch block in pieces and seams, then write your smallest-scrap rule.
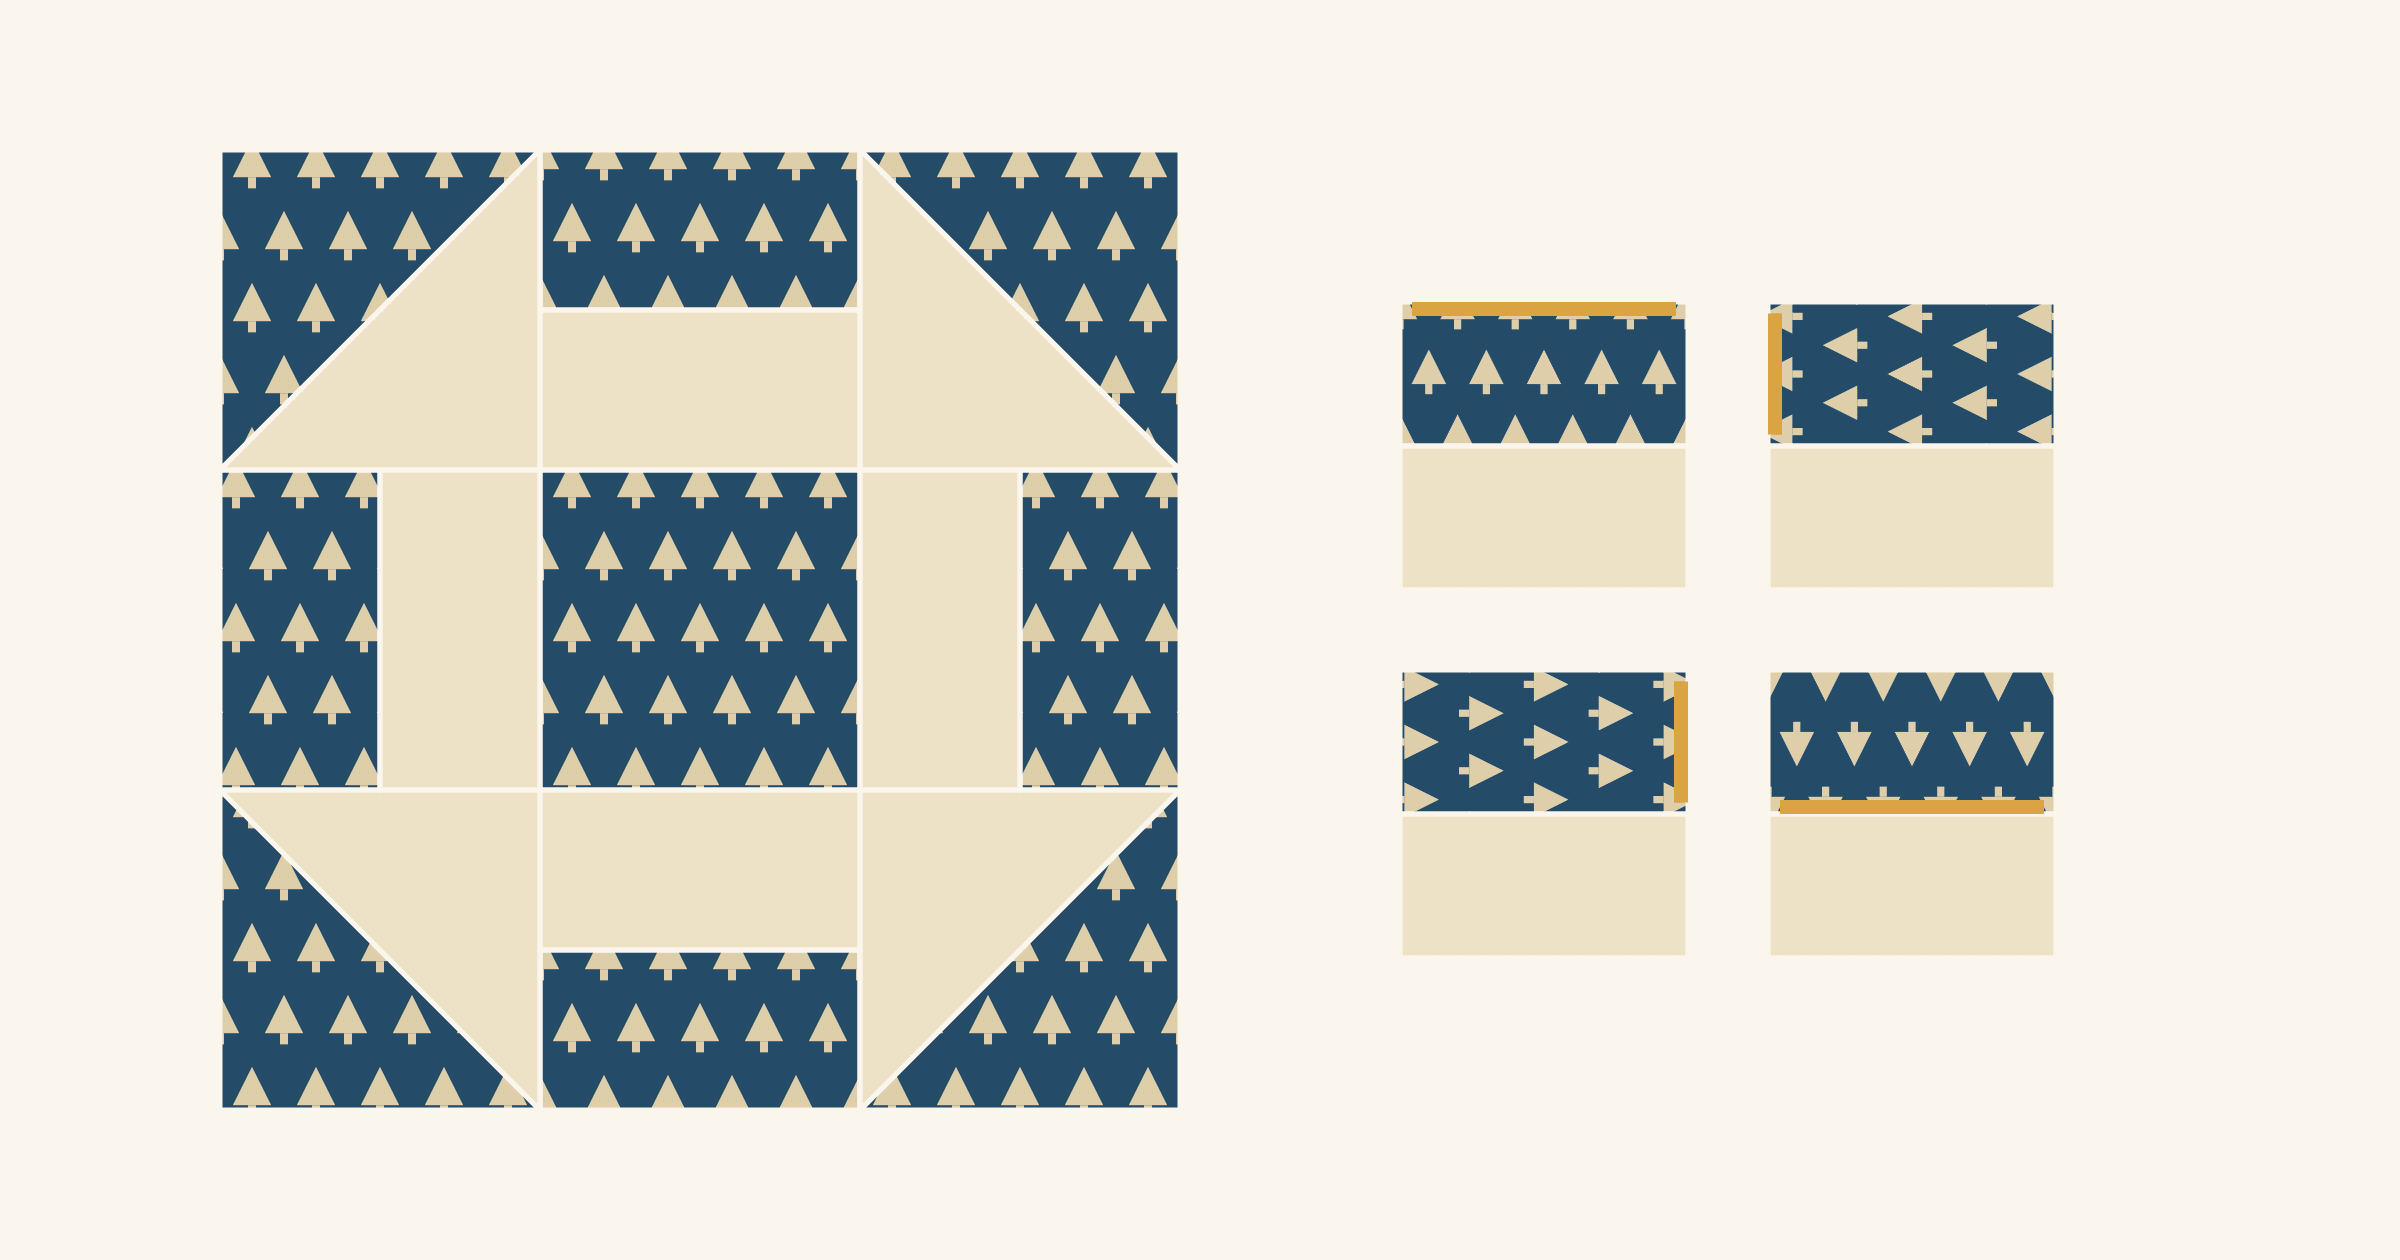
Mark the top of every print piece, undo each turn, and cut to match. A one-way print worked through a 12-inch Churn Dash, plus when you need twice the fabric.
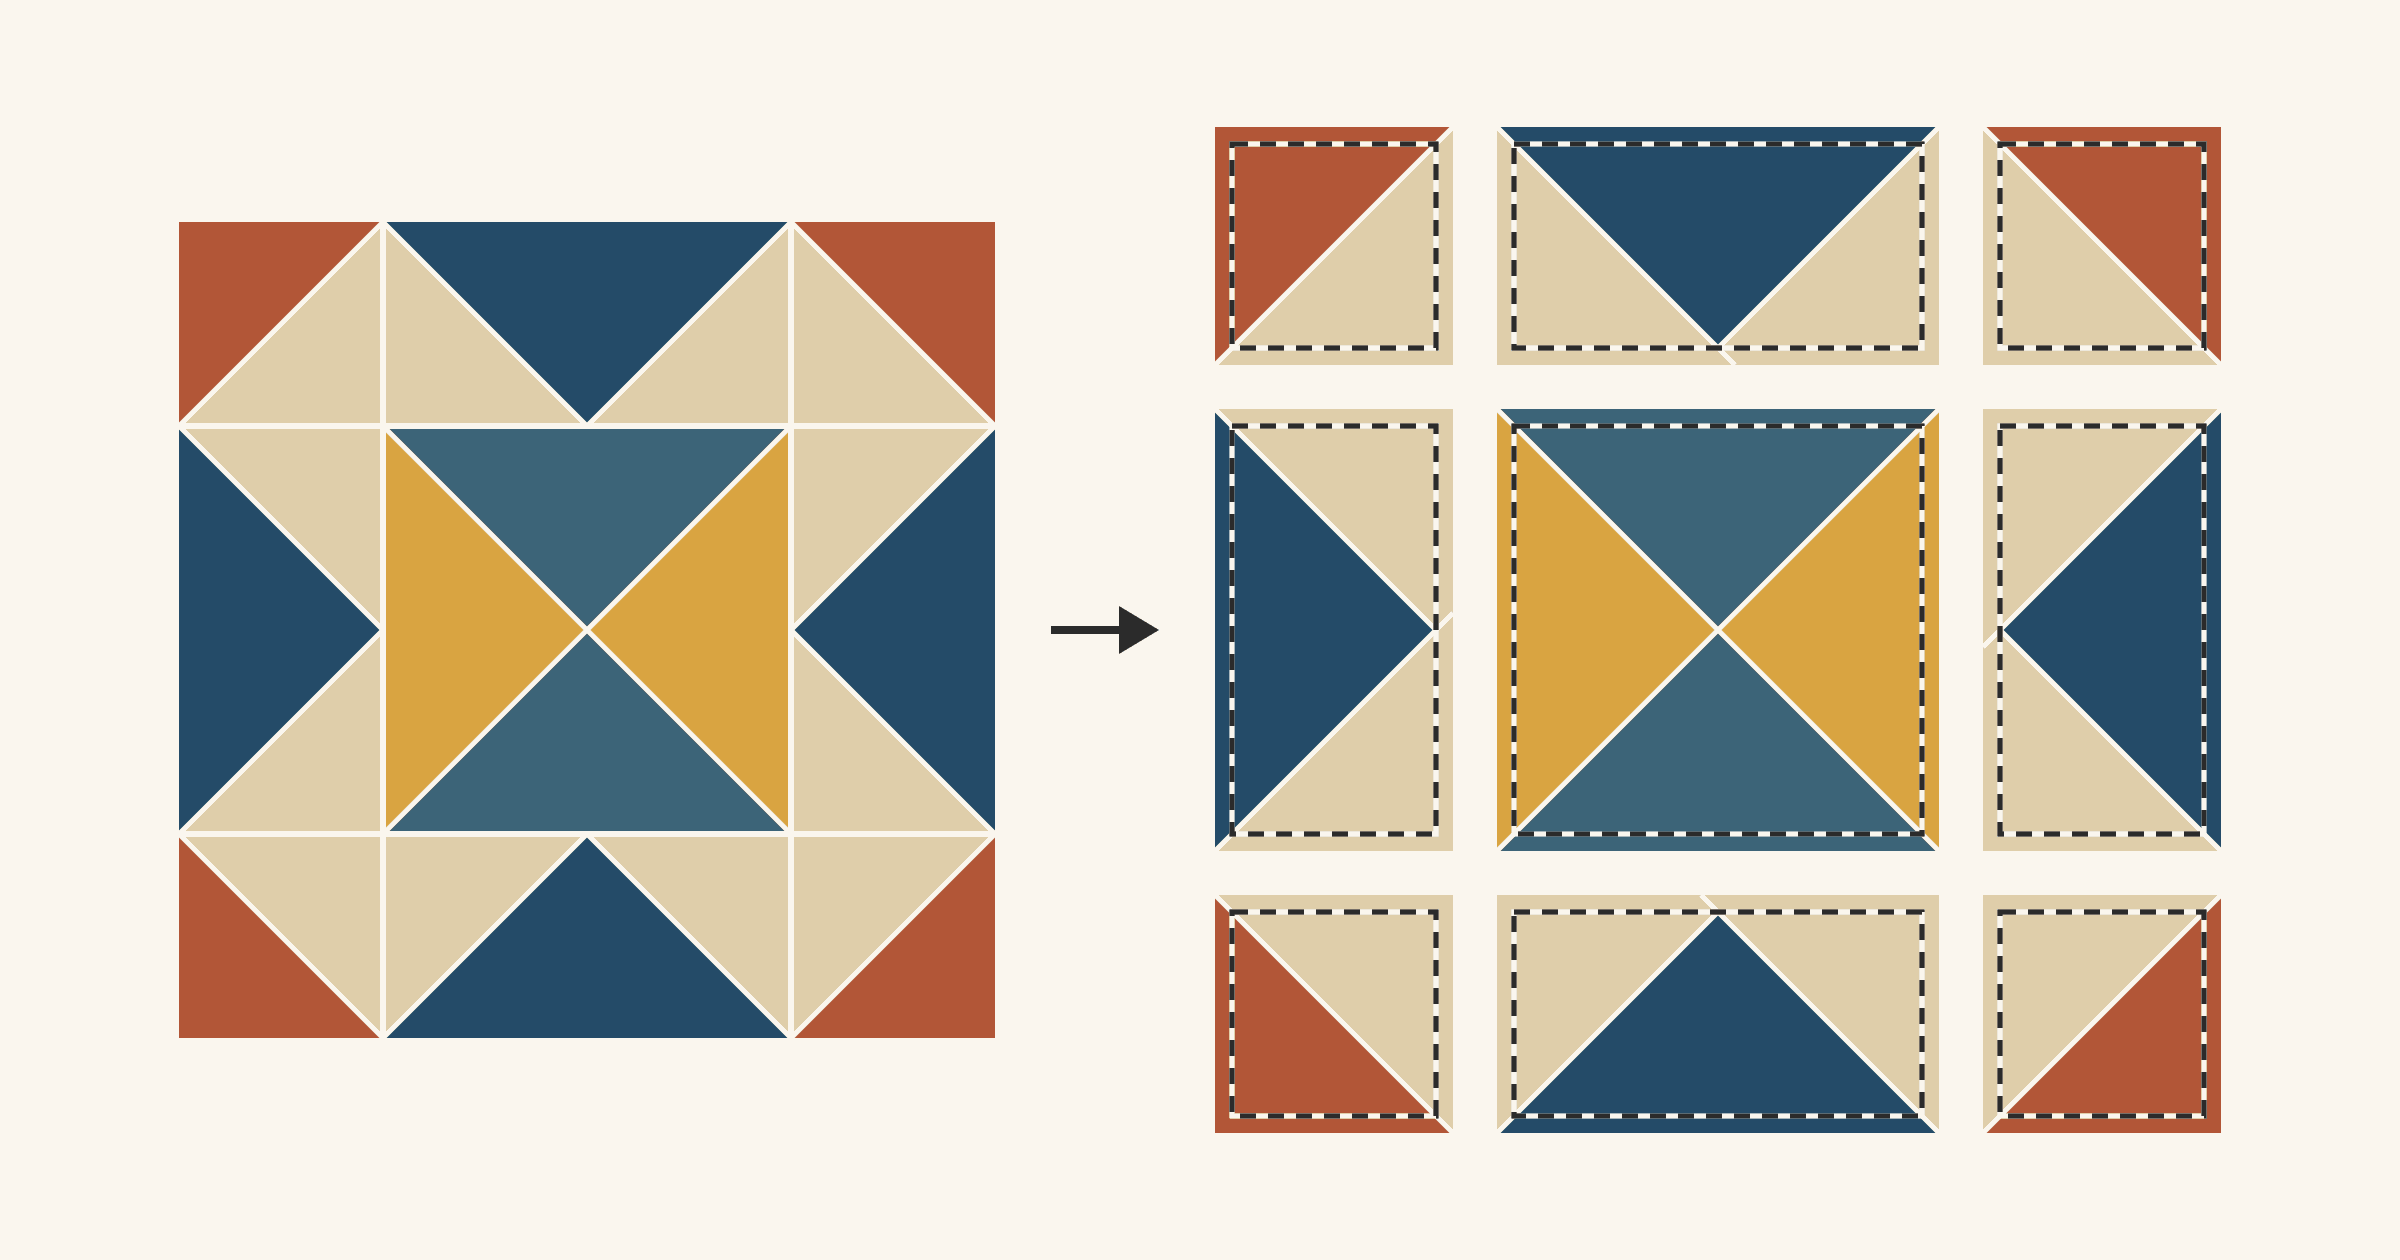
Unfinished is finished plus 1/2 inch; cut size depends on the method. Translate HST, flying geese and hourglass numbers, with a 12-inch block worked through.
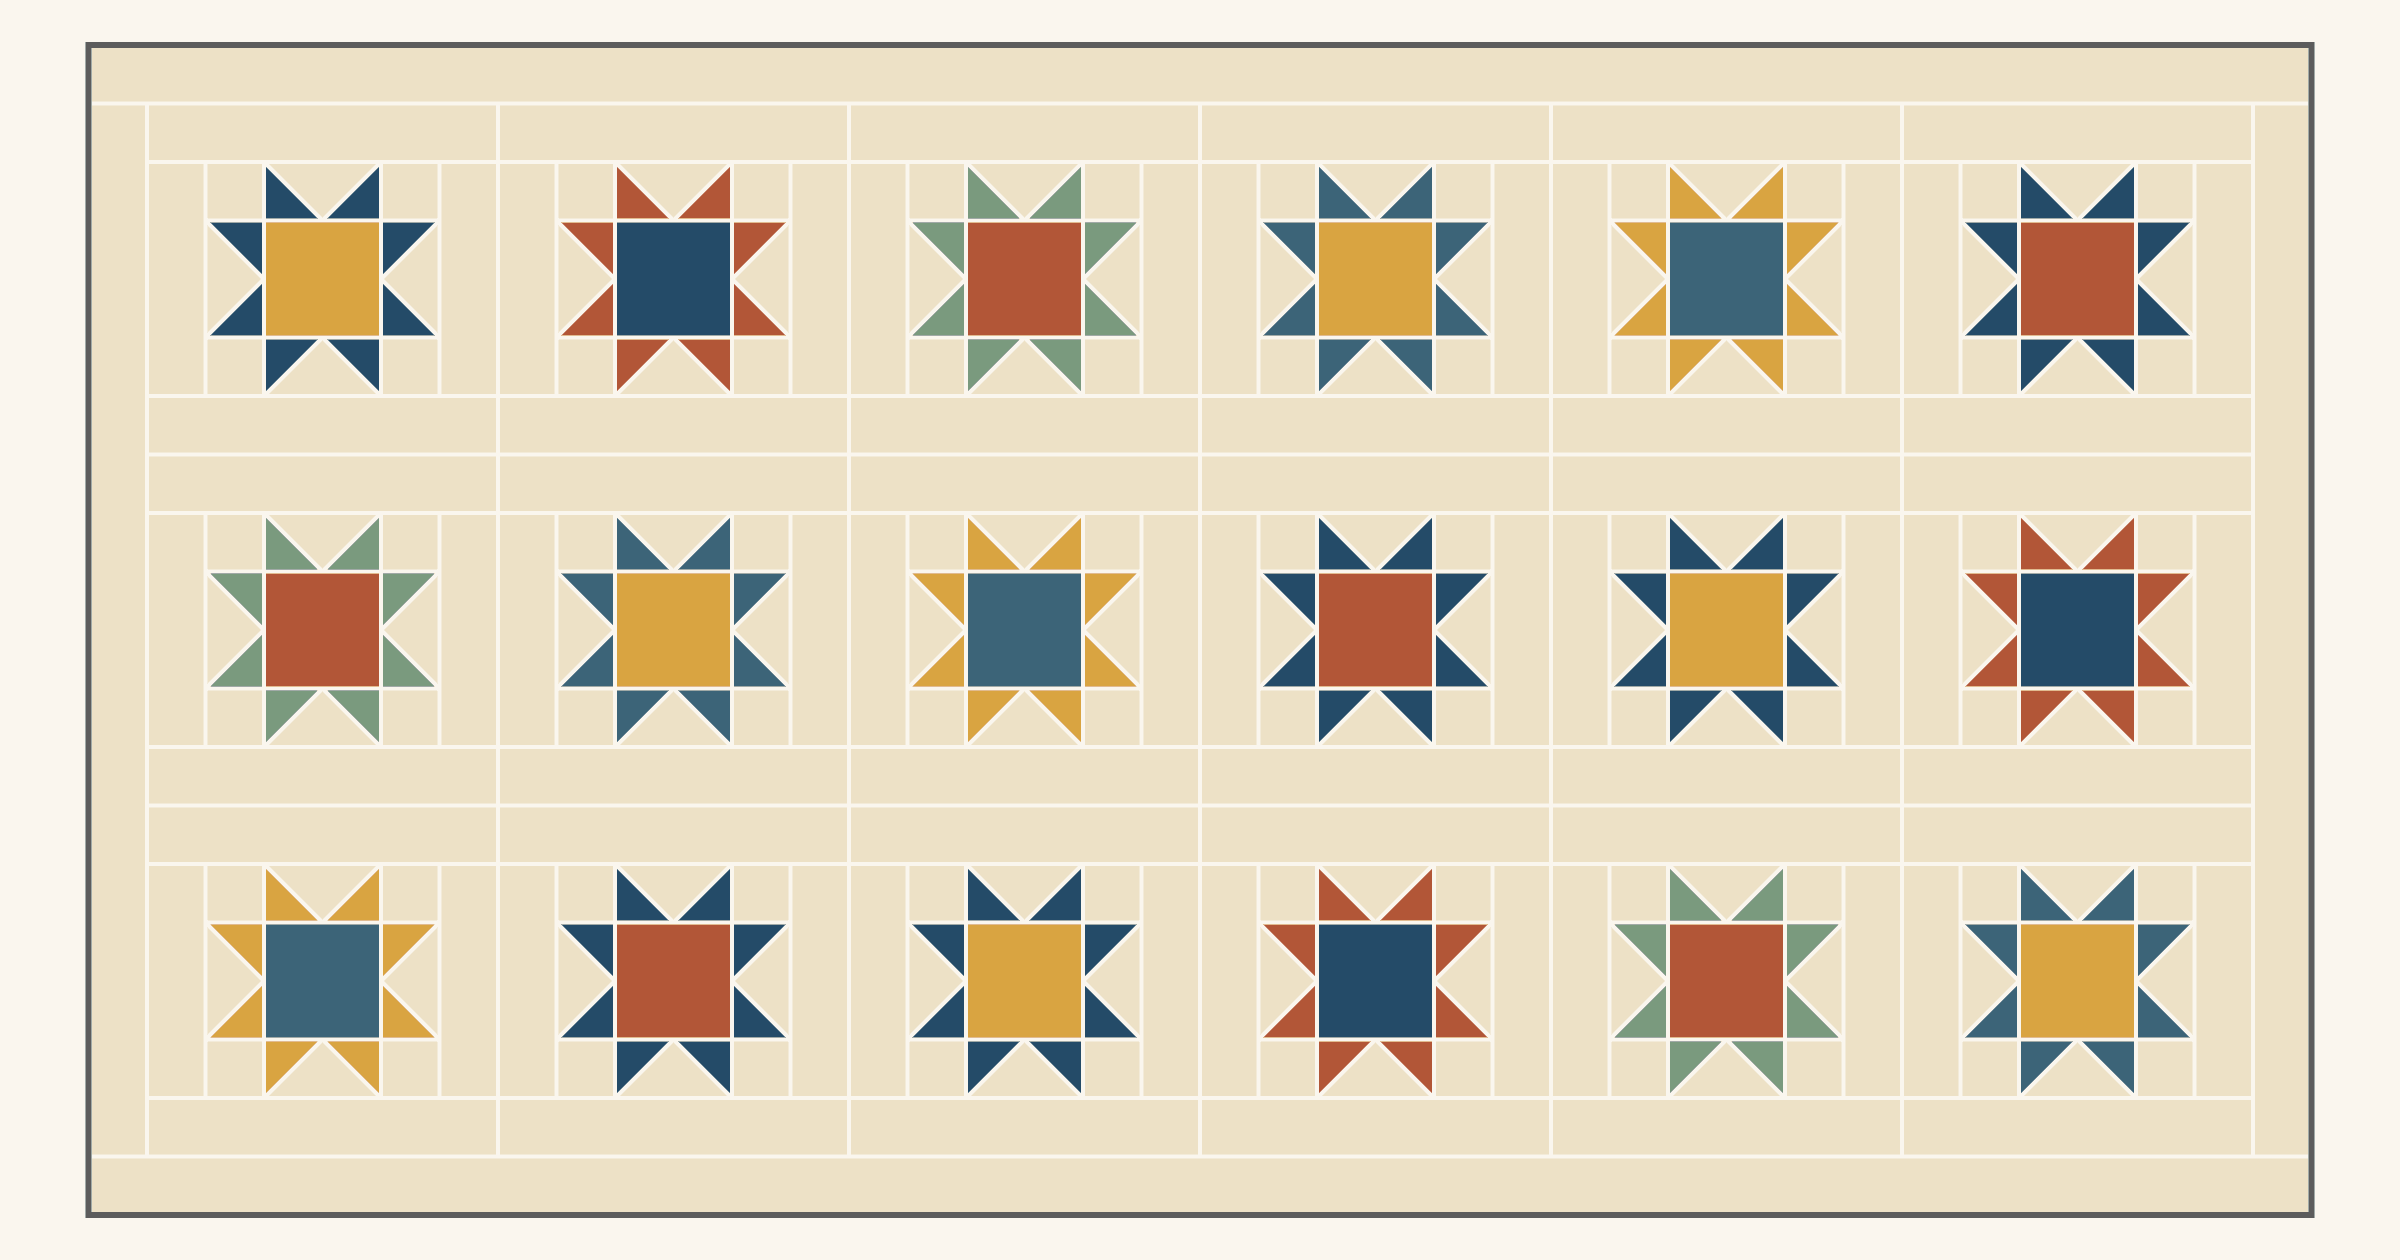
Leave a gap half the block's width between motifs and the same space at the edge. Twenty 6-inch stars show the frame, border and size math.
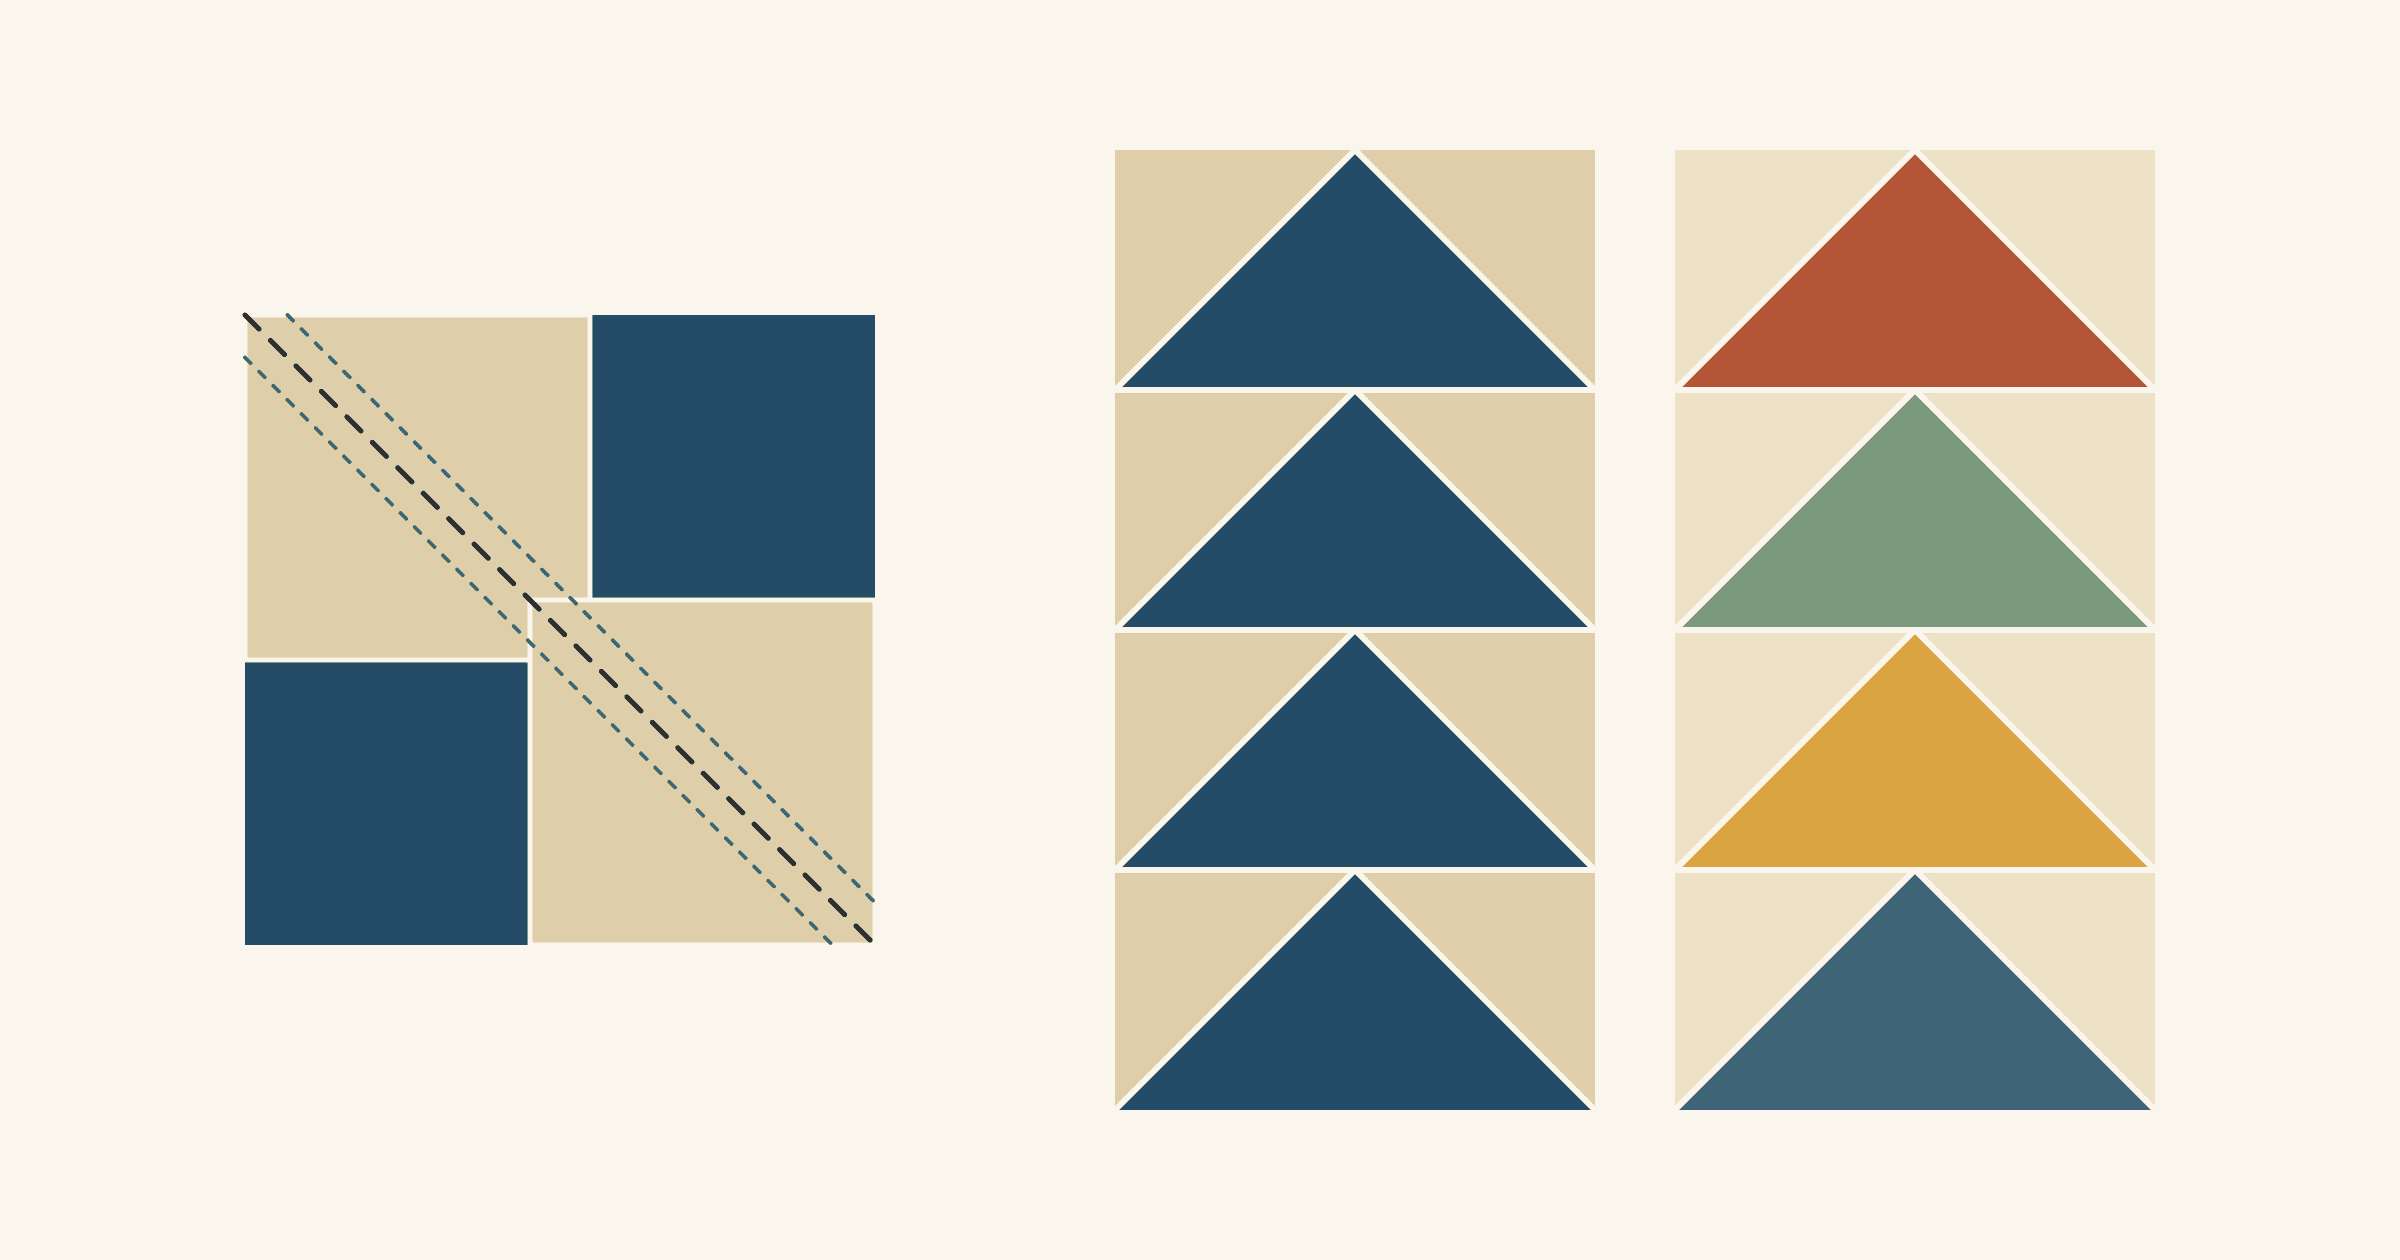
Four at a time saves fabric when you need matching geese. One at a time suits directional prints, scraps and odd counts. Cut sizes and a 24-goose example.
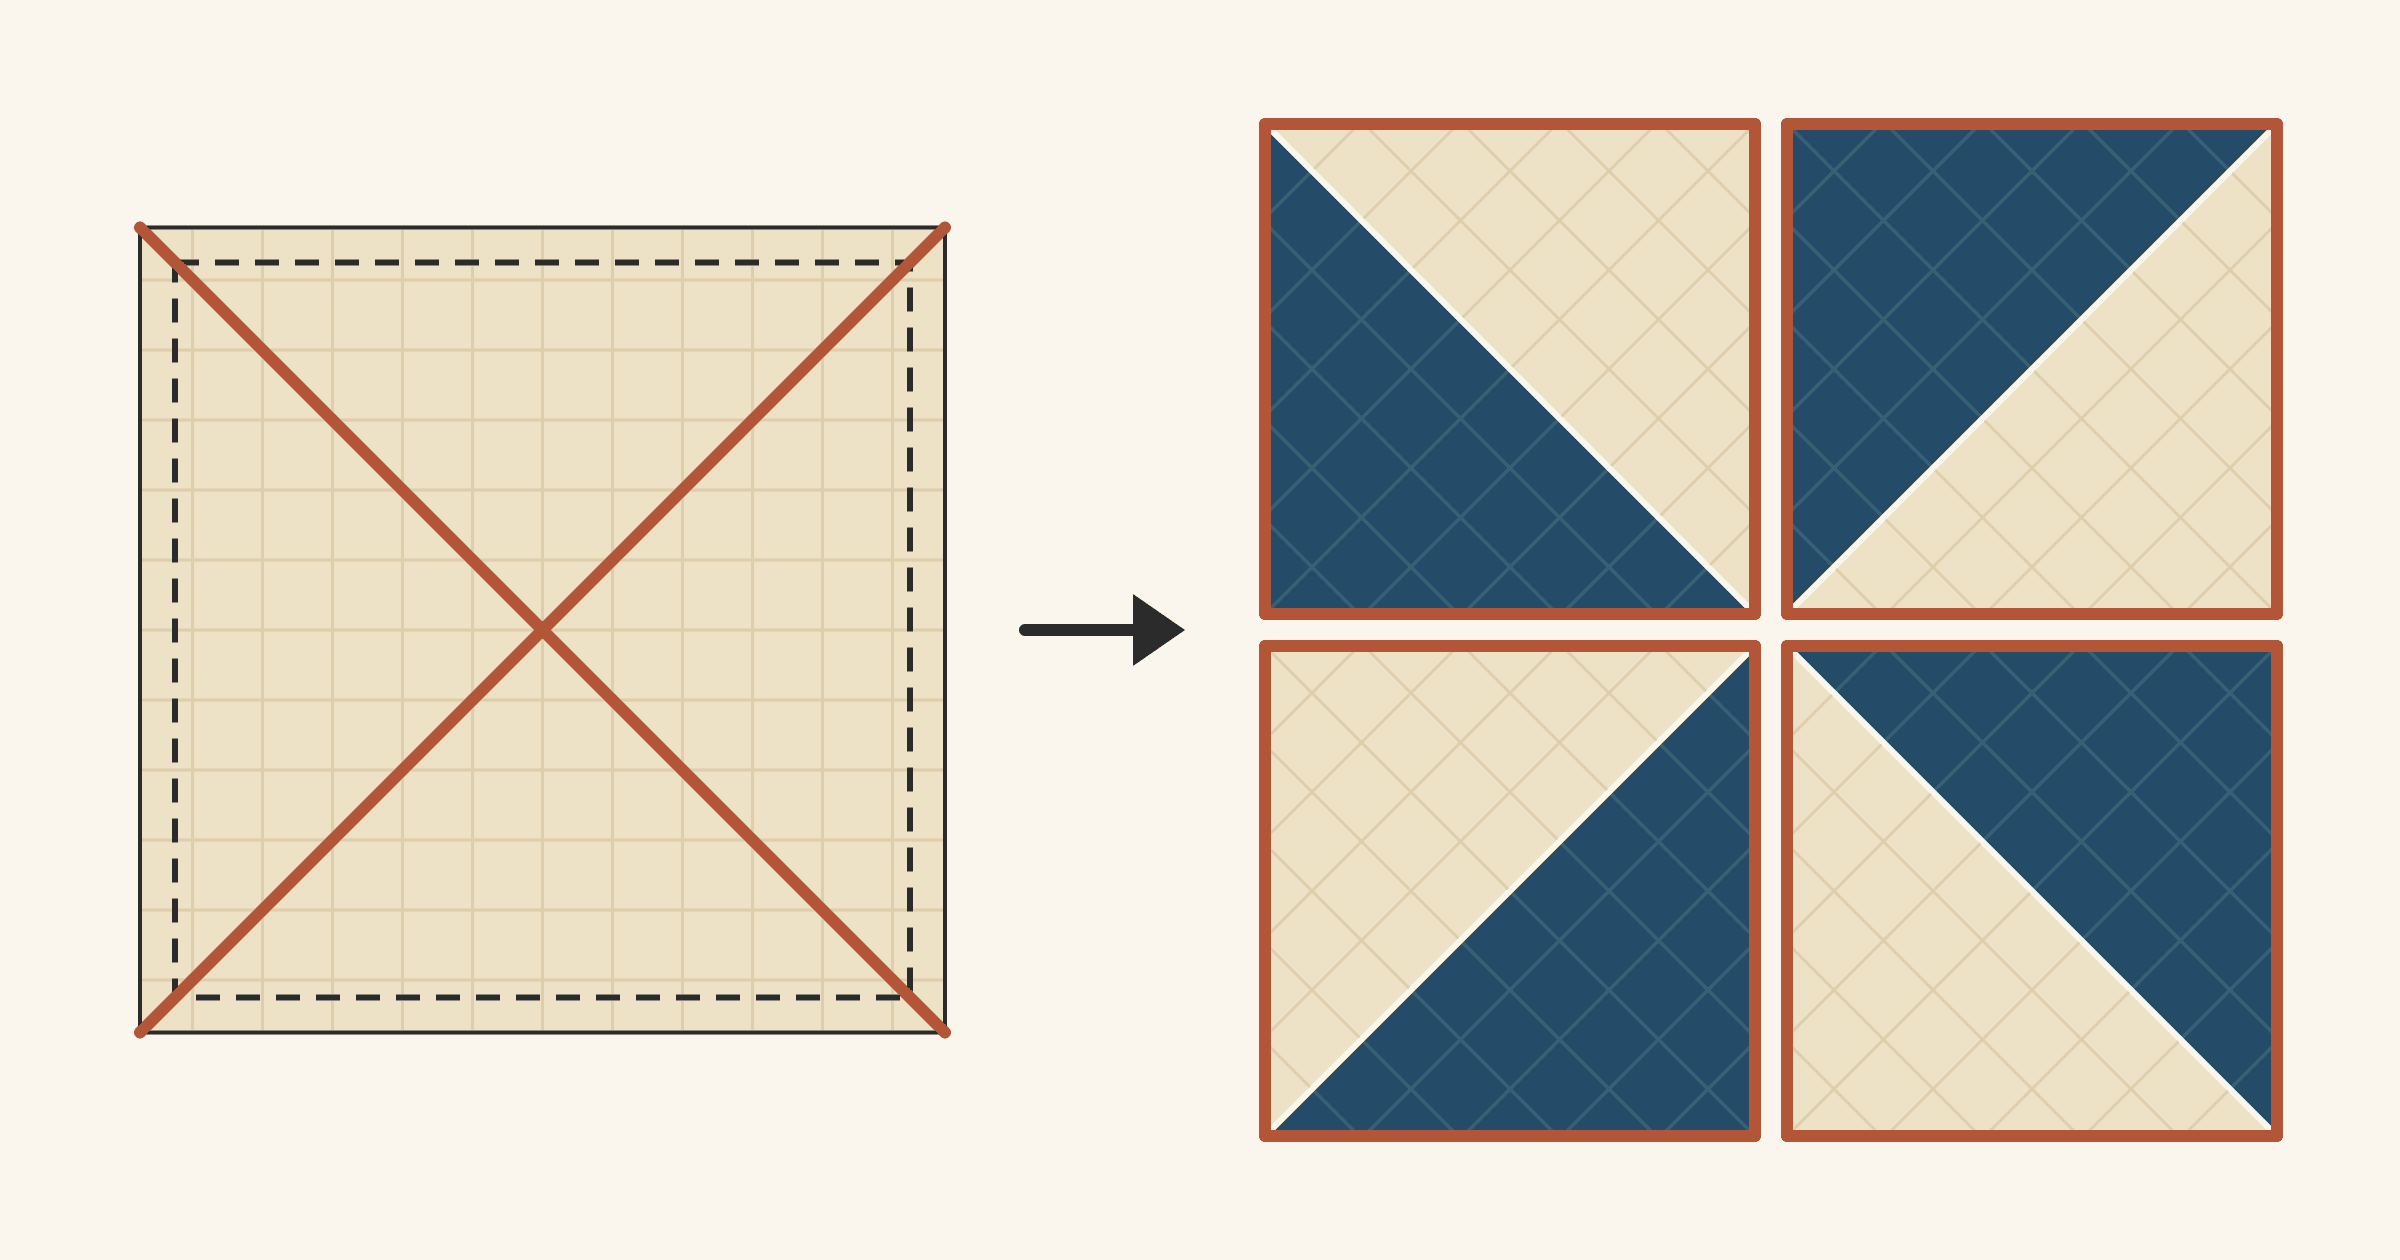
Four-at-a-time HSTs put bias on every outside edge. See where the grain runs, how to size and handle the squares, and when to switch methods.
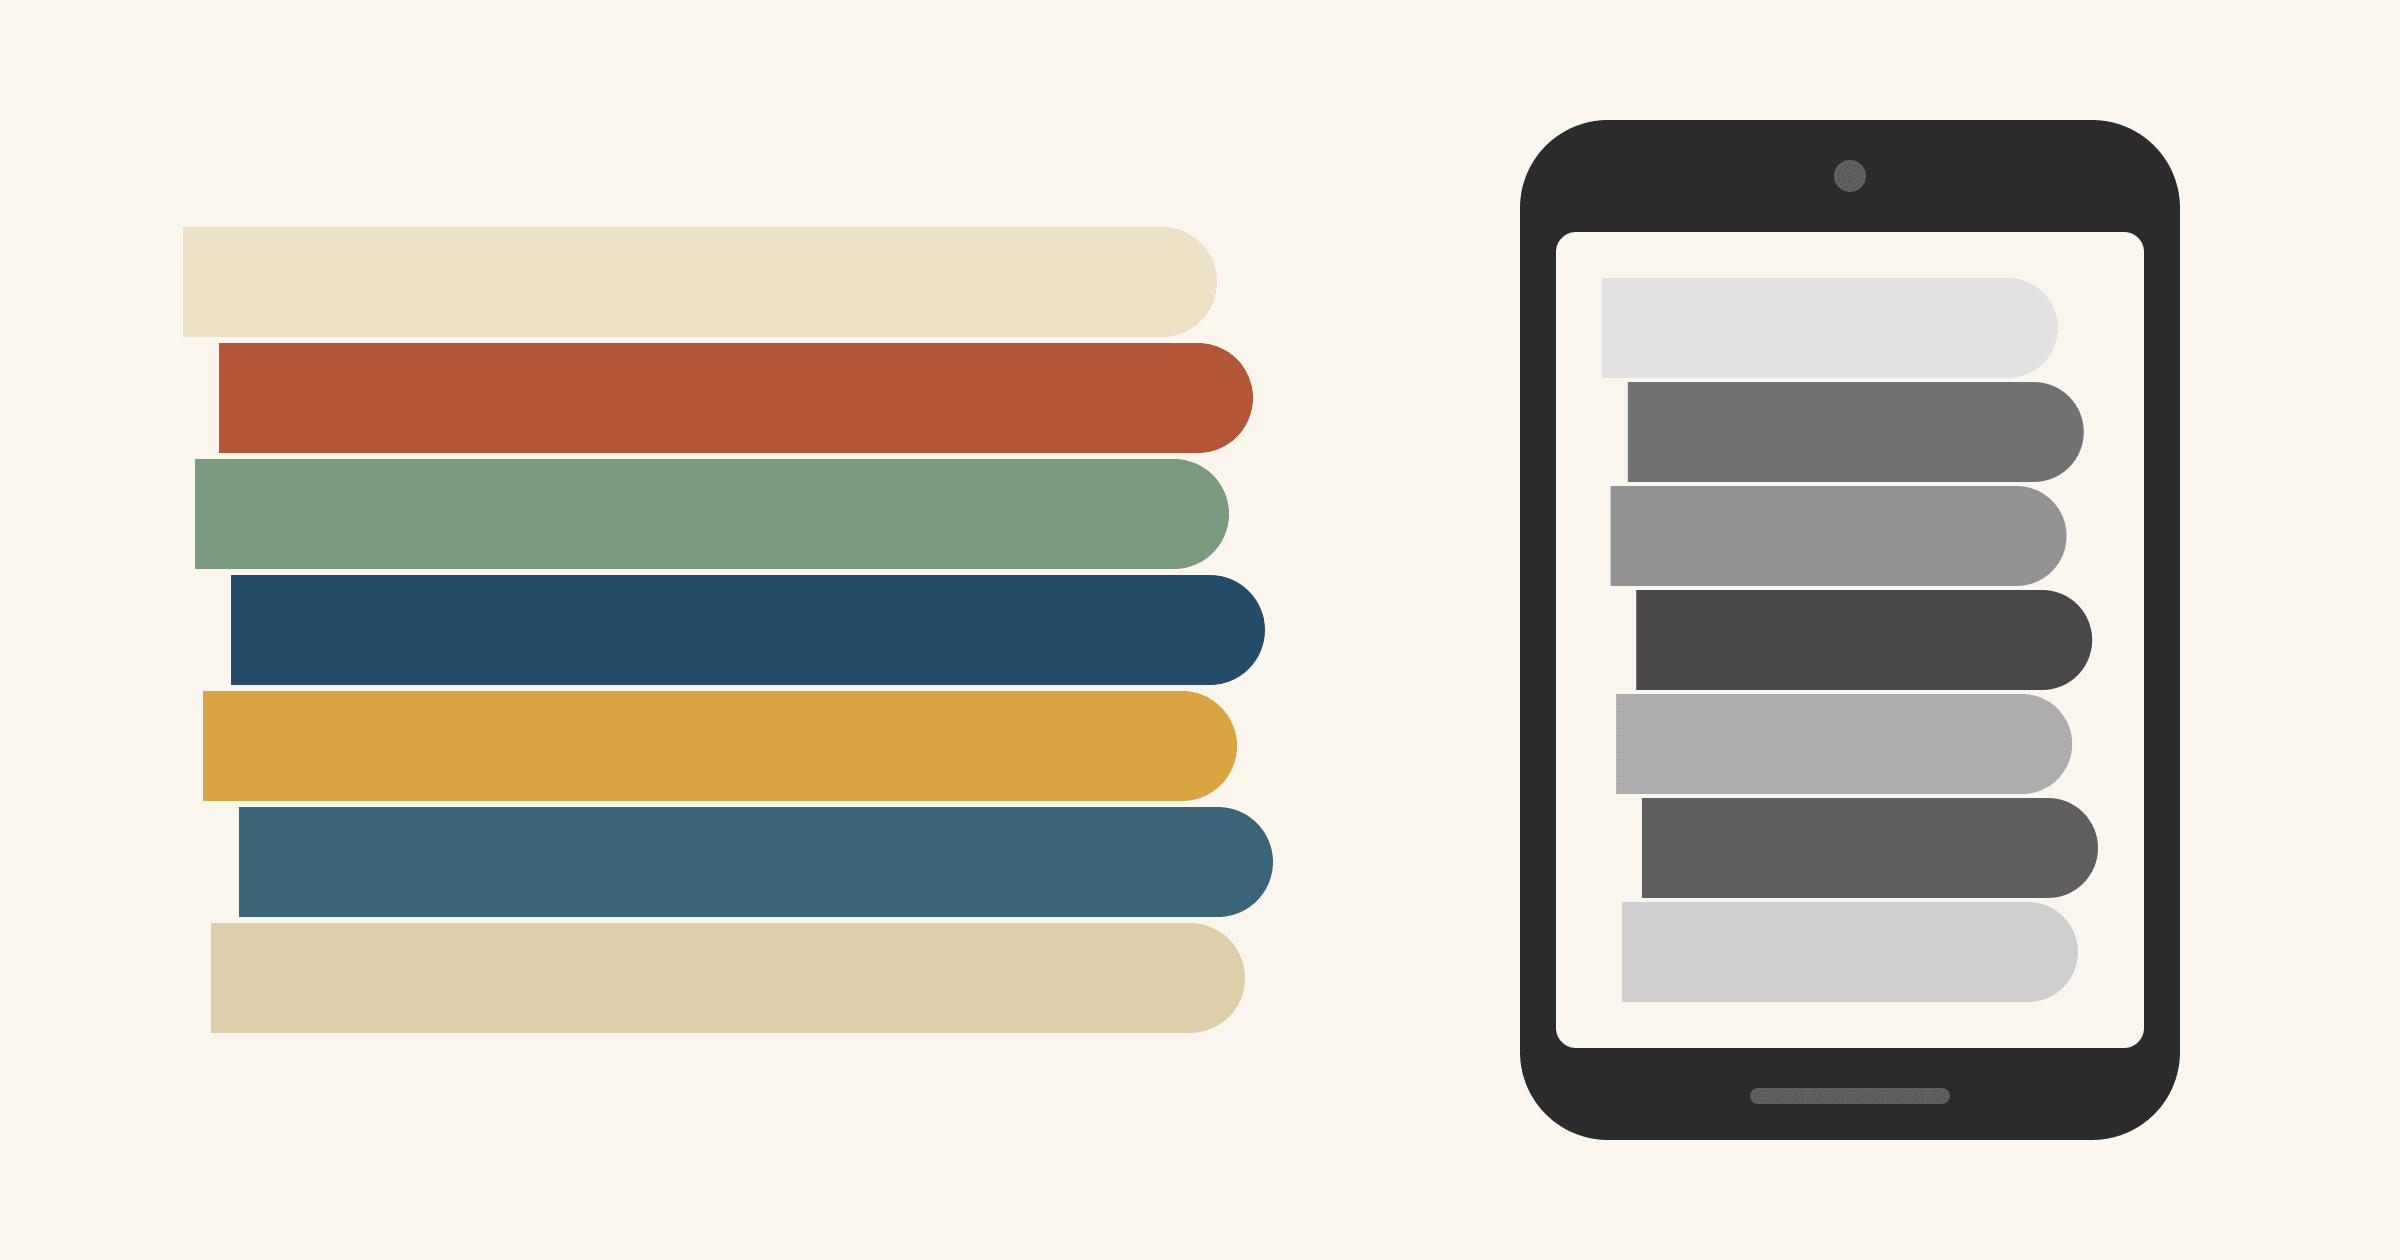
Photograph your fabrics in black and white and look for any two that turn the same gray. A worked Friendship Star shows why opposite colors can blend.
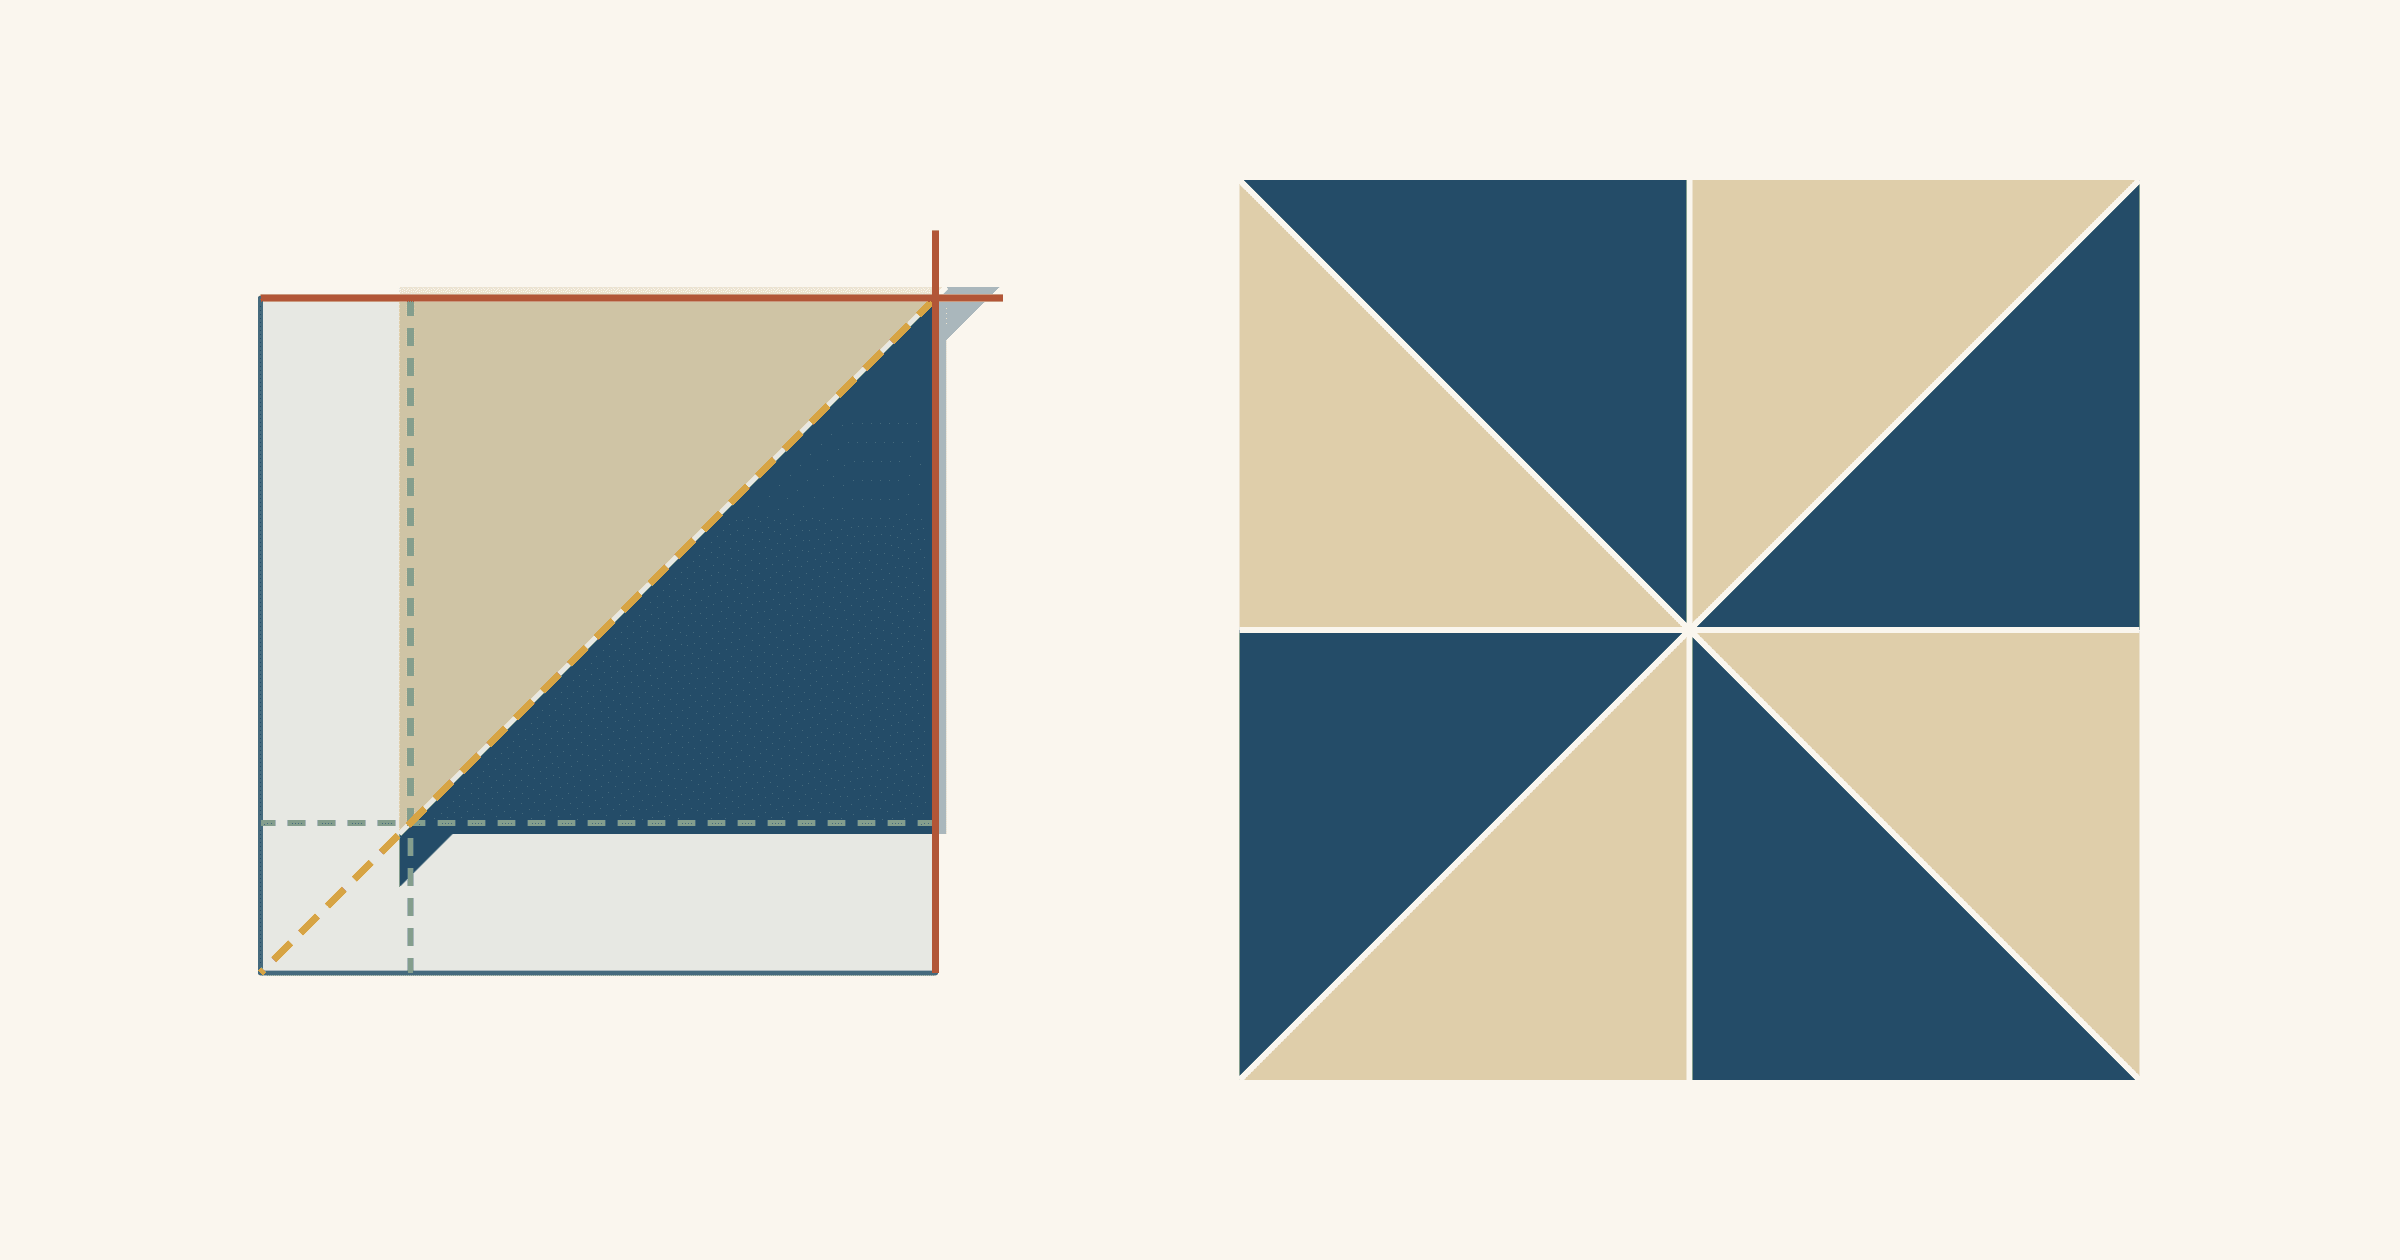
Put the ruler's 45-degree line on the seam, cut two sides, then turn and repeat. A 3 1/2-inch worked example shows the small slips that cost you points.
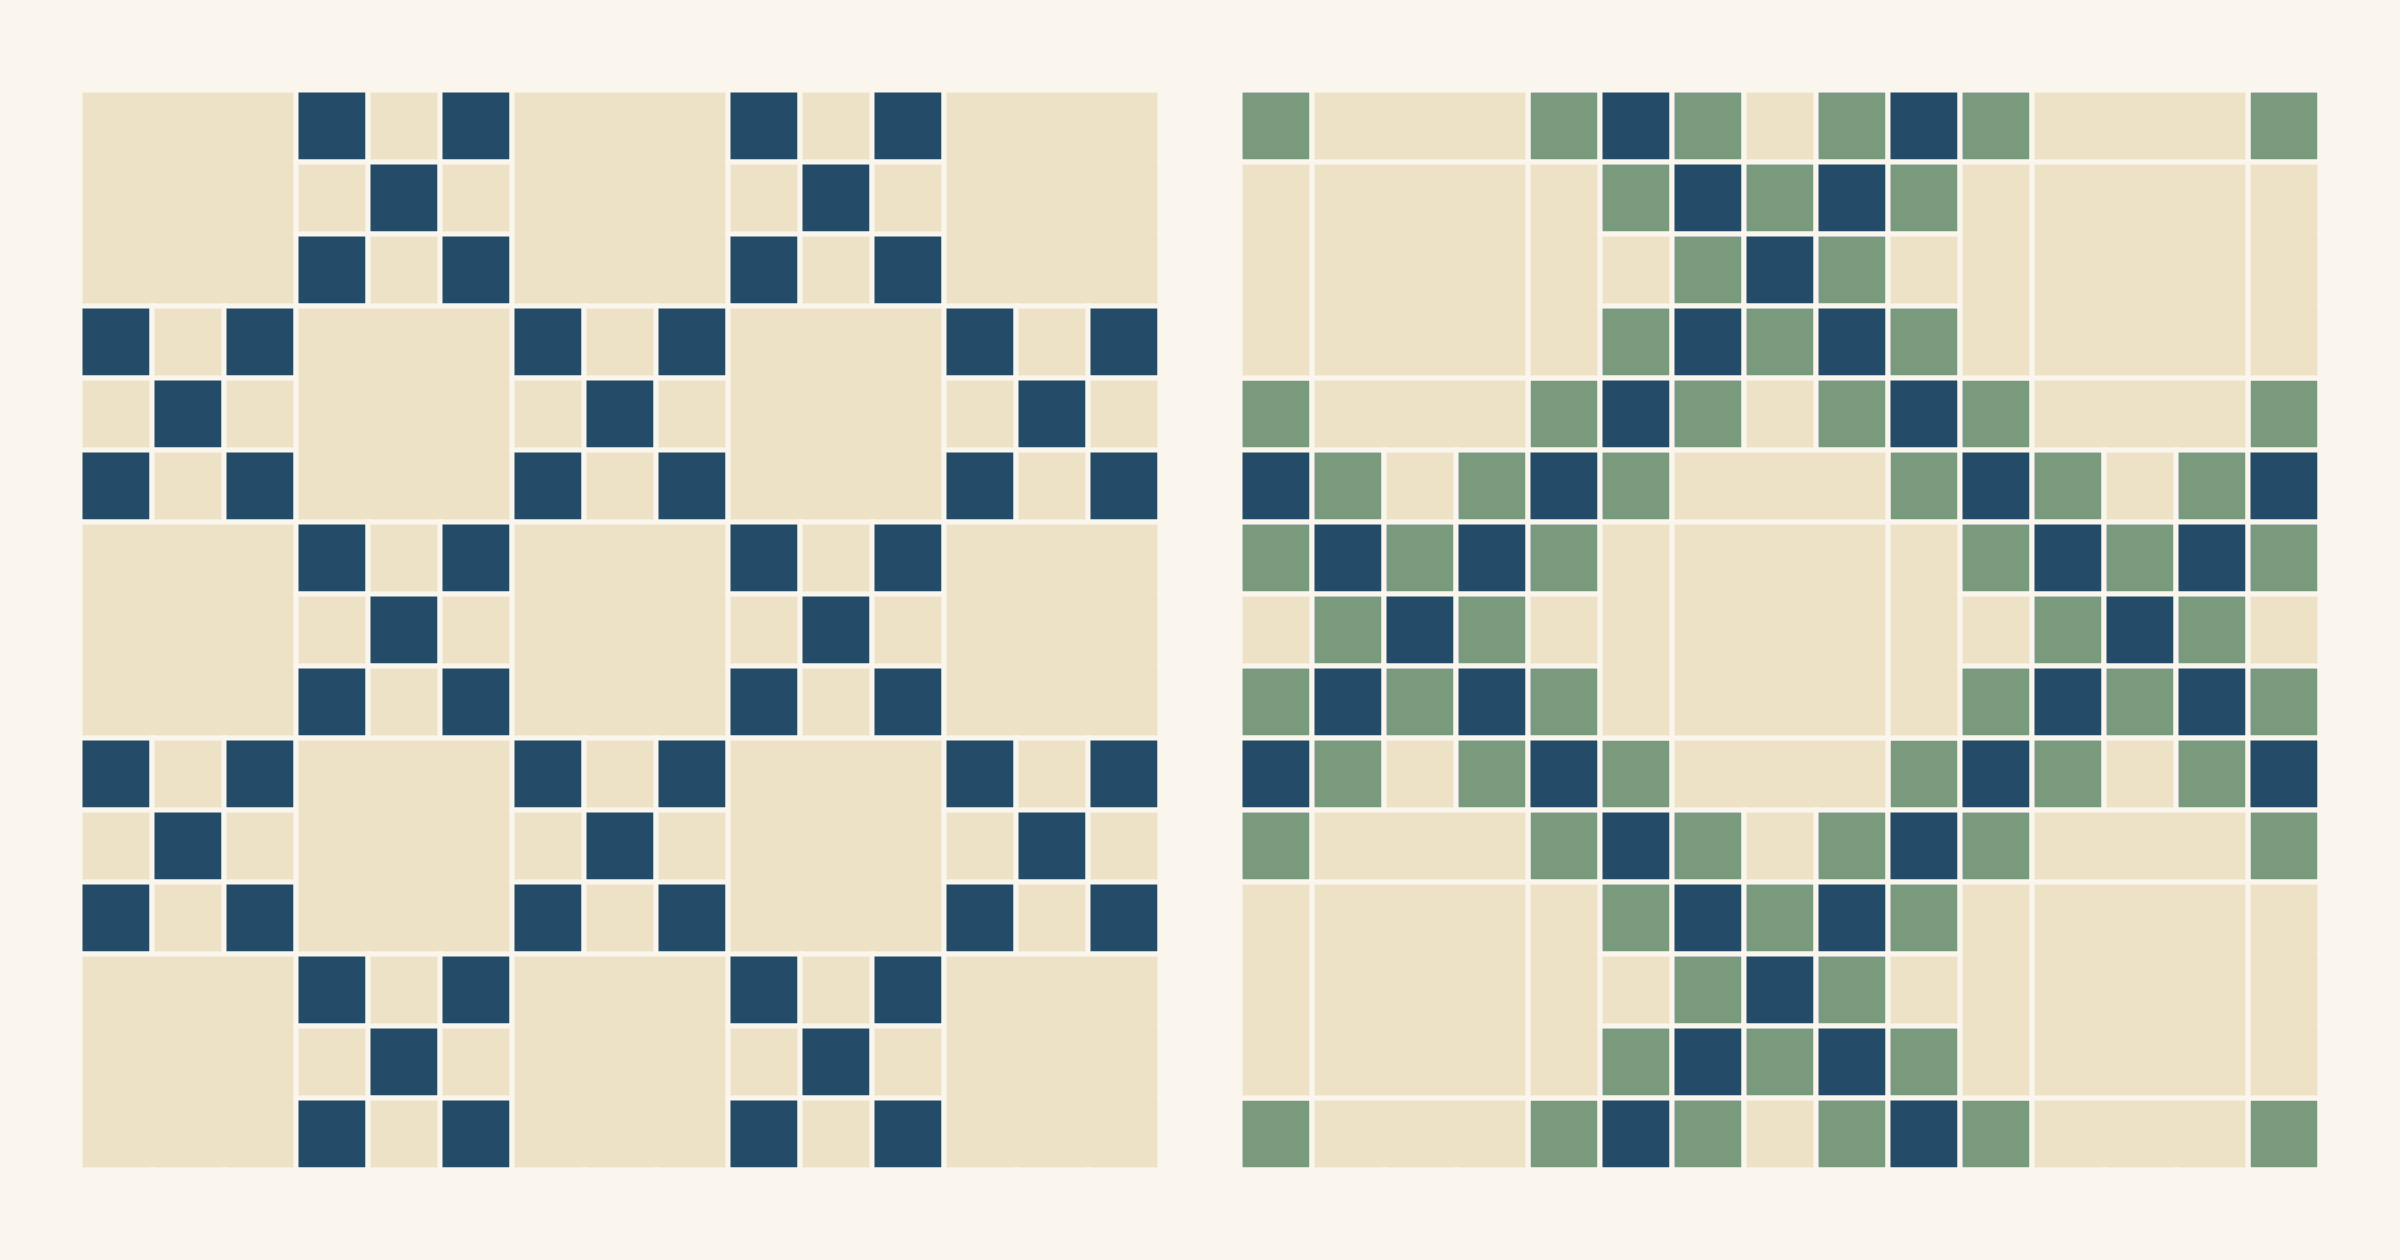
Most Irish Chains put darker chain fabrics on a light background. Compare single and double chain value maps and see which fabric shapes the diamonds.
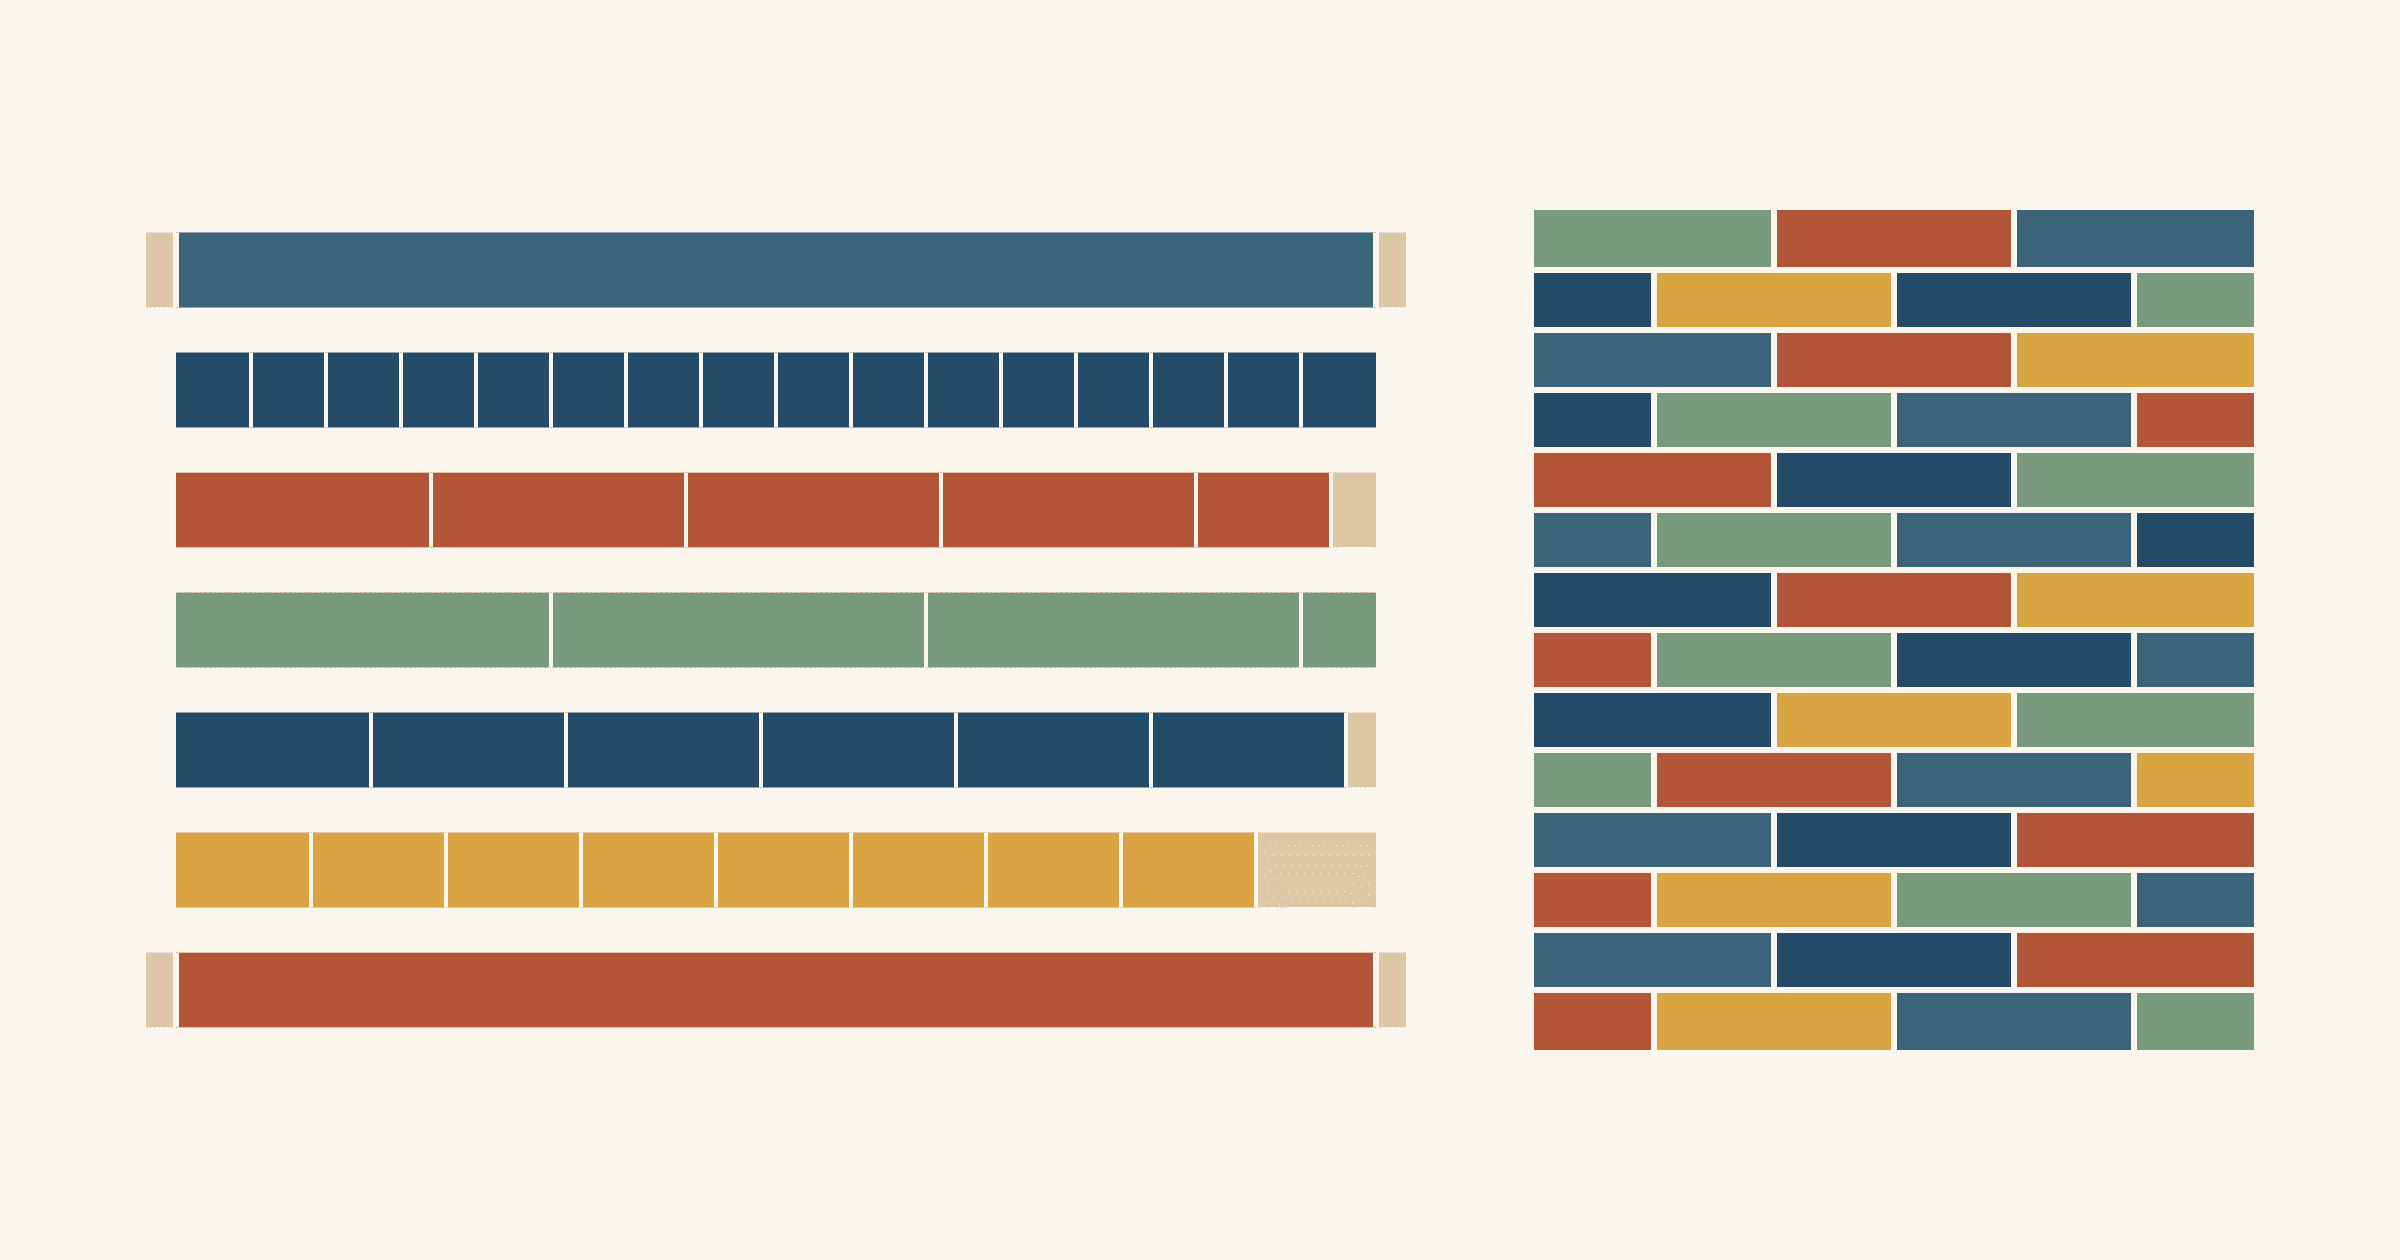
A jelly roll strip usually gives 16 squares cut 2 1/2 inches. See the counts for longer pieces and a brick quilt planned from one 40-strip roll.
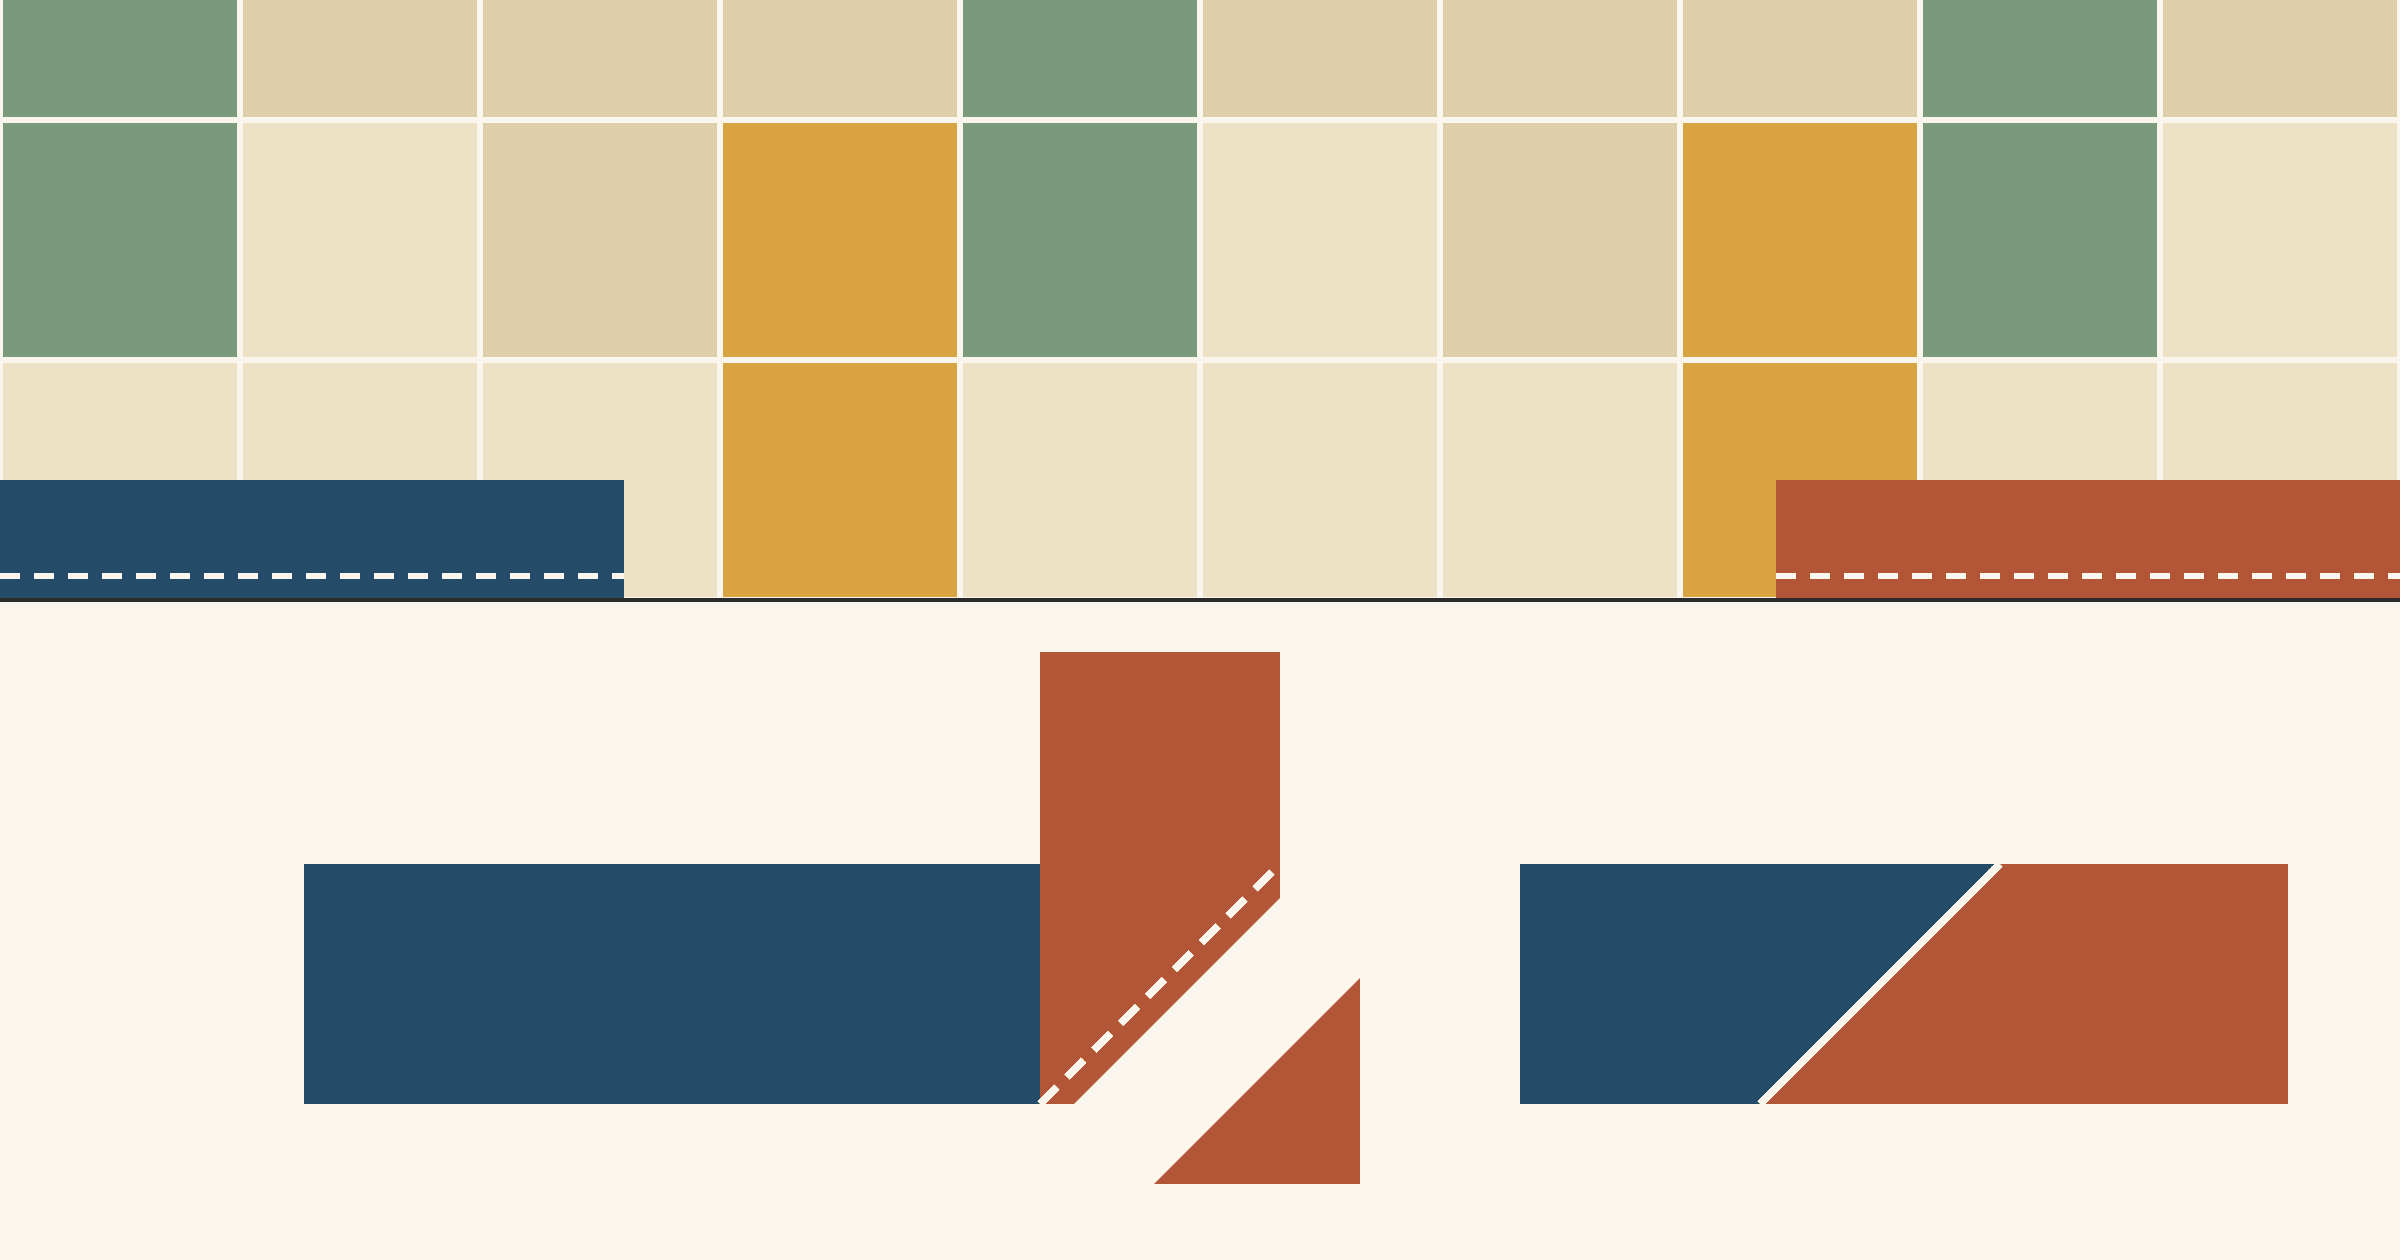
Overlap the two binding tails by the cut width of your strip, then sew them on a 45-degree diagonal. Here's why that works, with a 12-inch worked example.
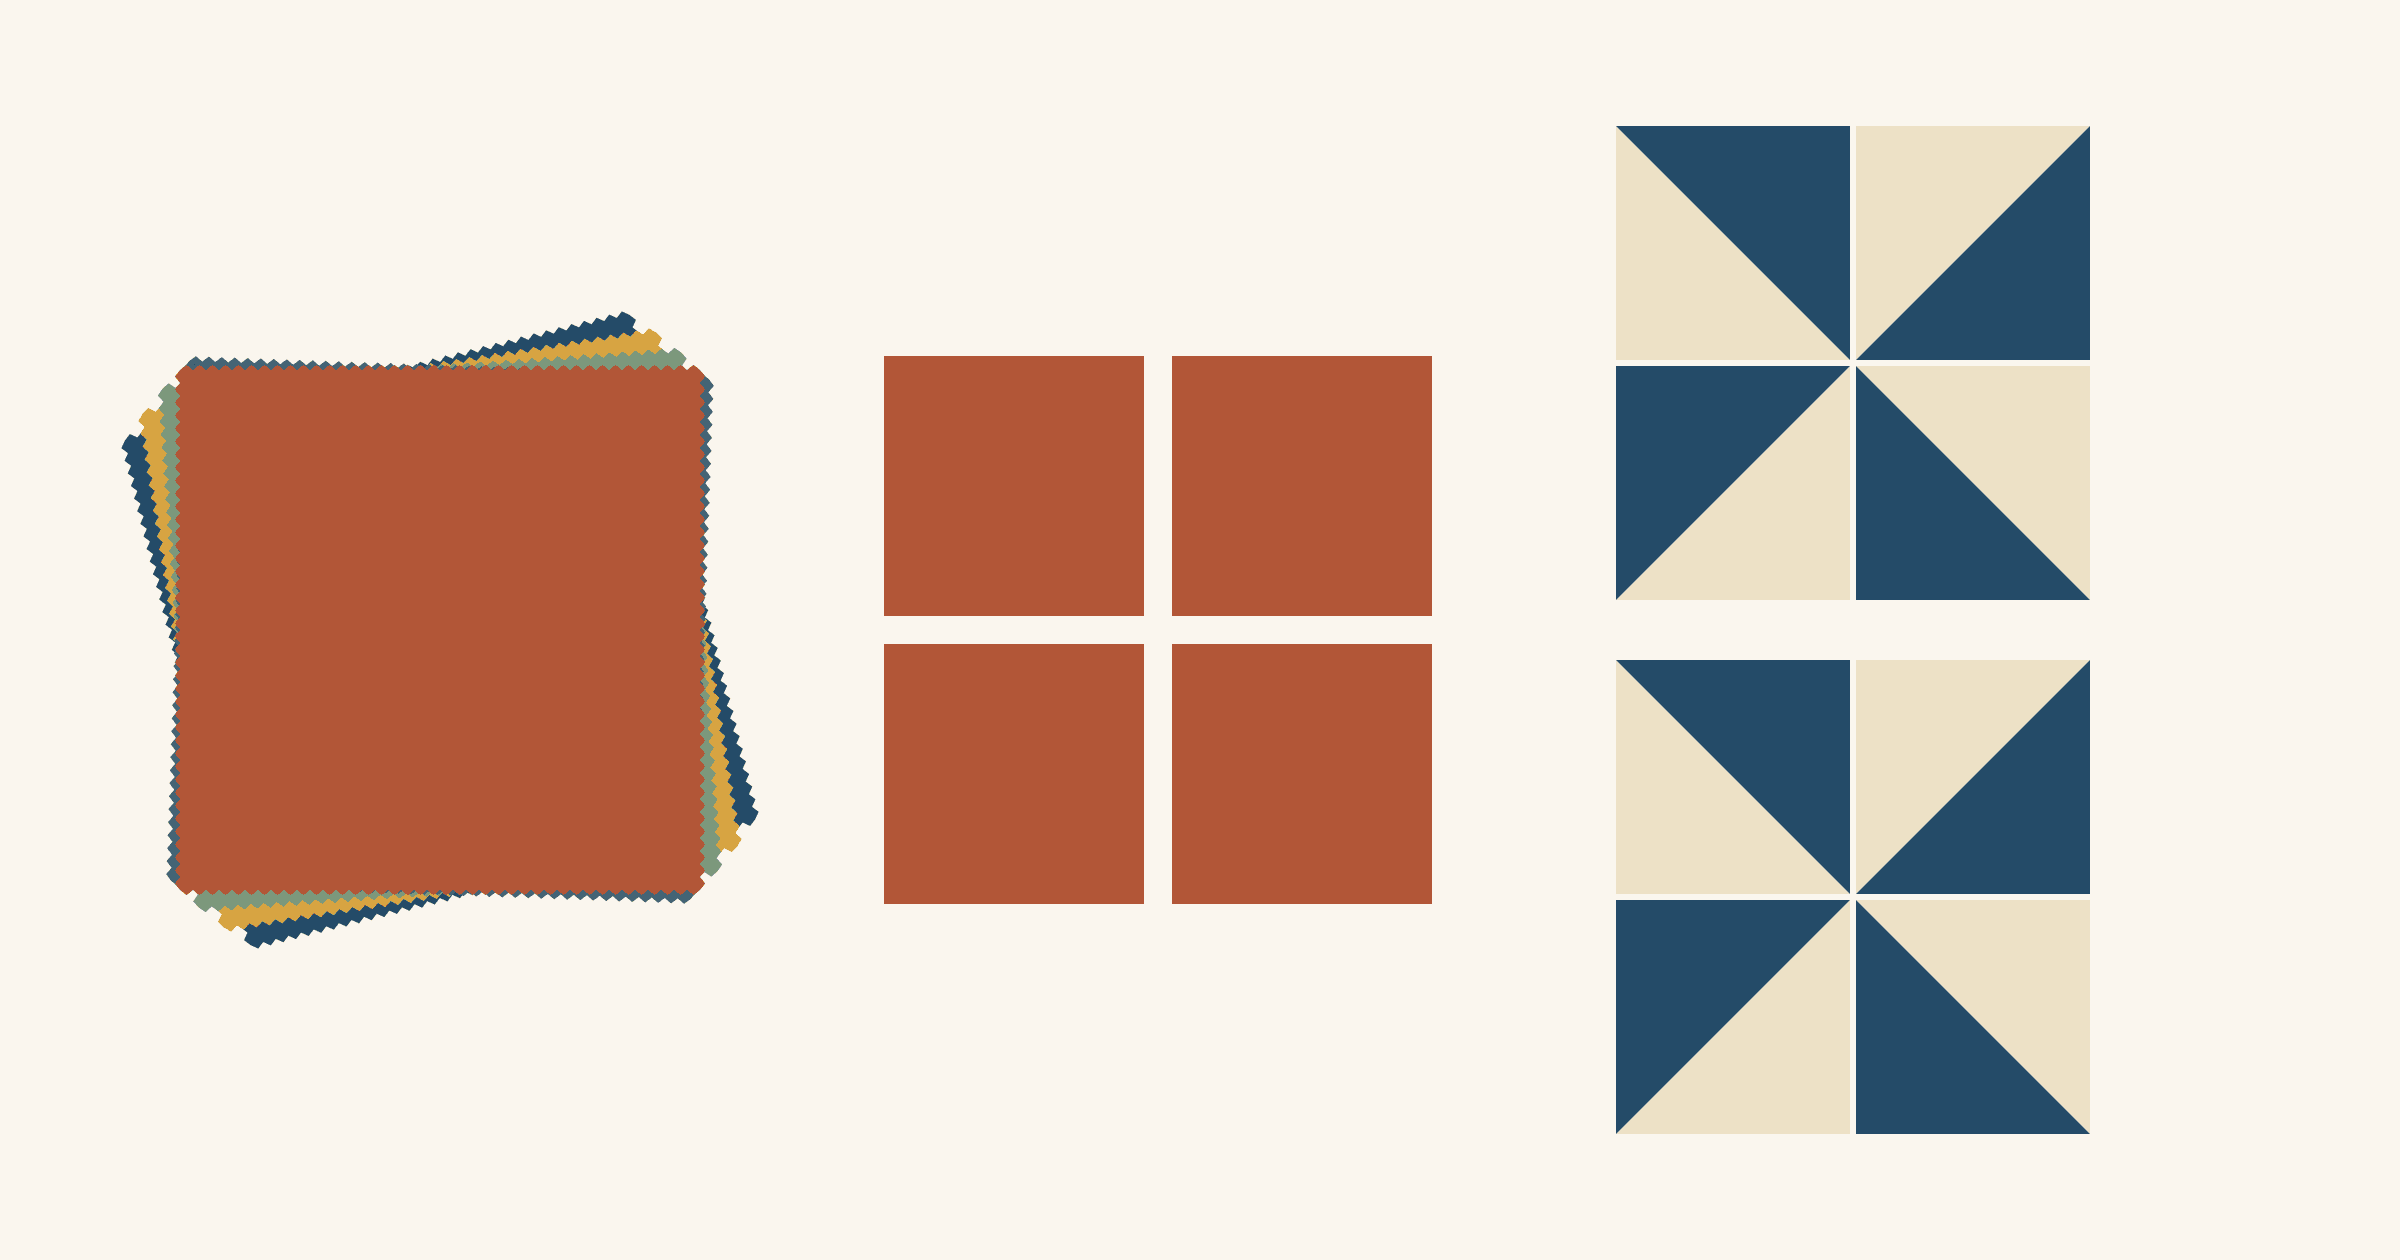
One 42-square layer cake sewn whole makes a 57 x 66 1/2-inch throw. See how many pieces quarters, small squares and HSTs give you, and how much size each cut costs.
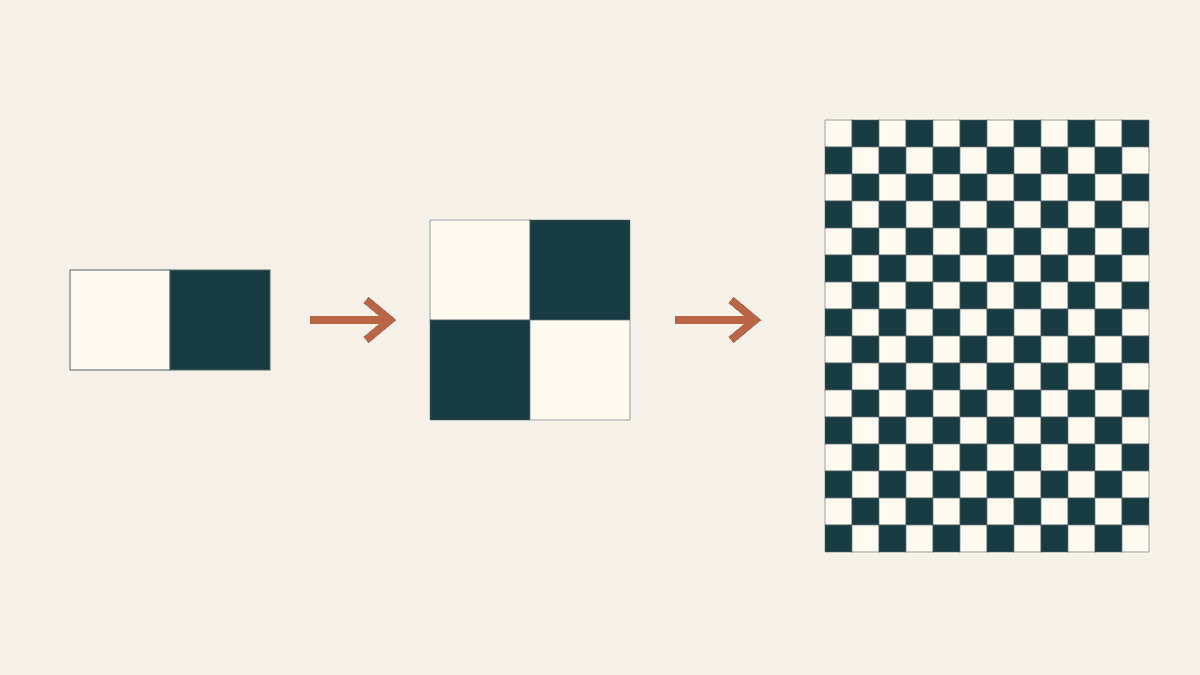
Give your second project a clear block target, a small ready-to-sew queue and a count that keeps loose pairs separate from finished blocks.
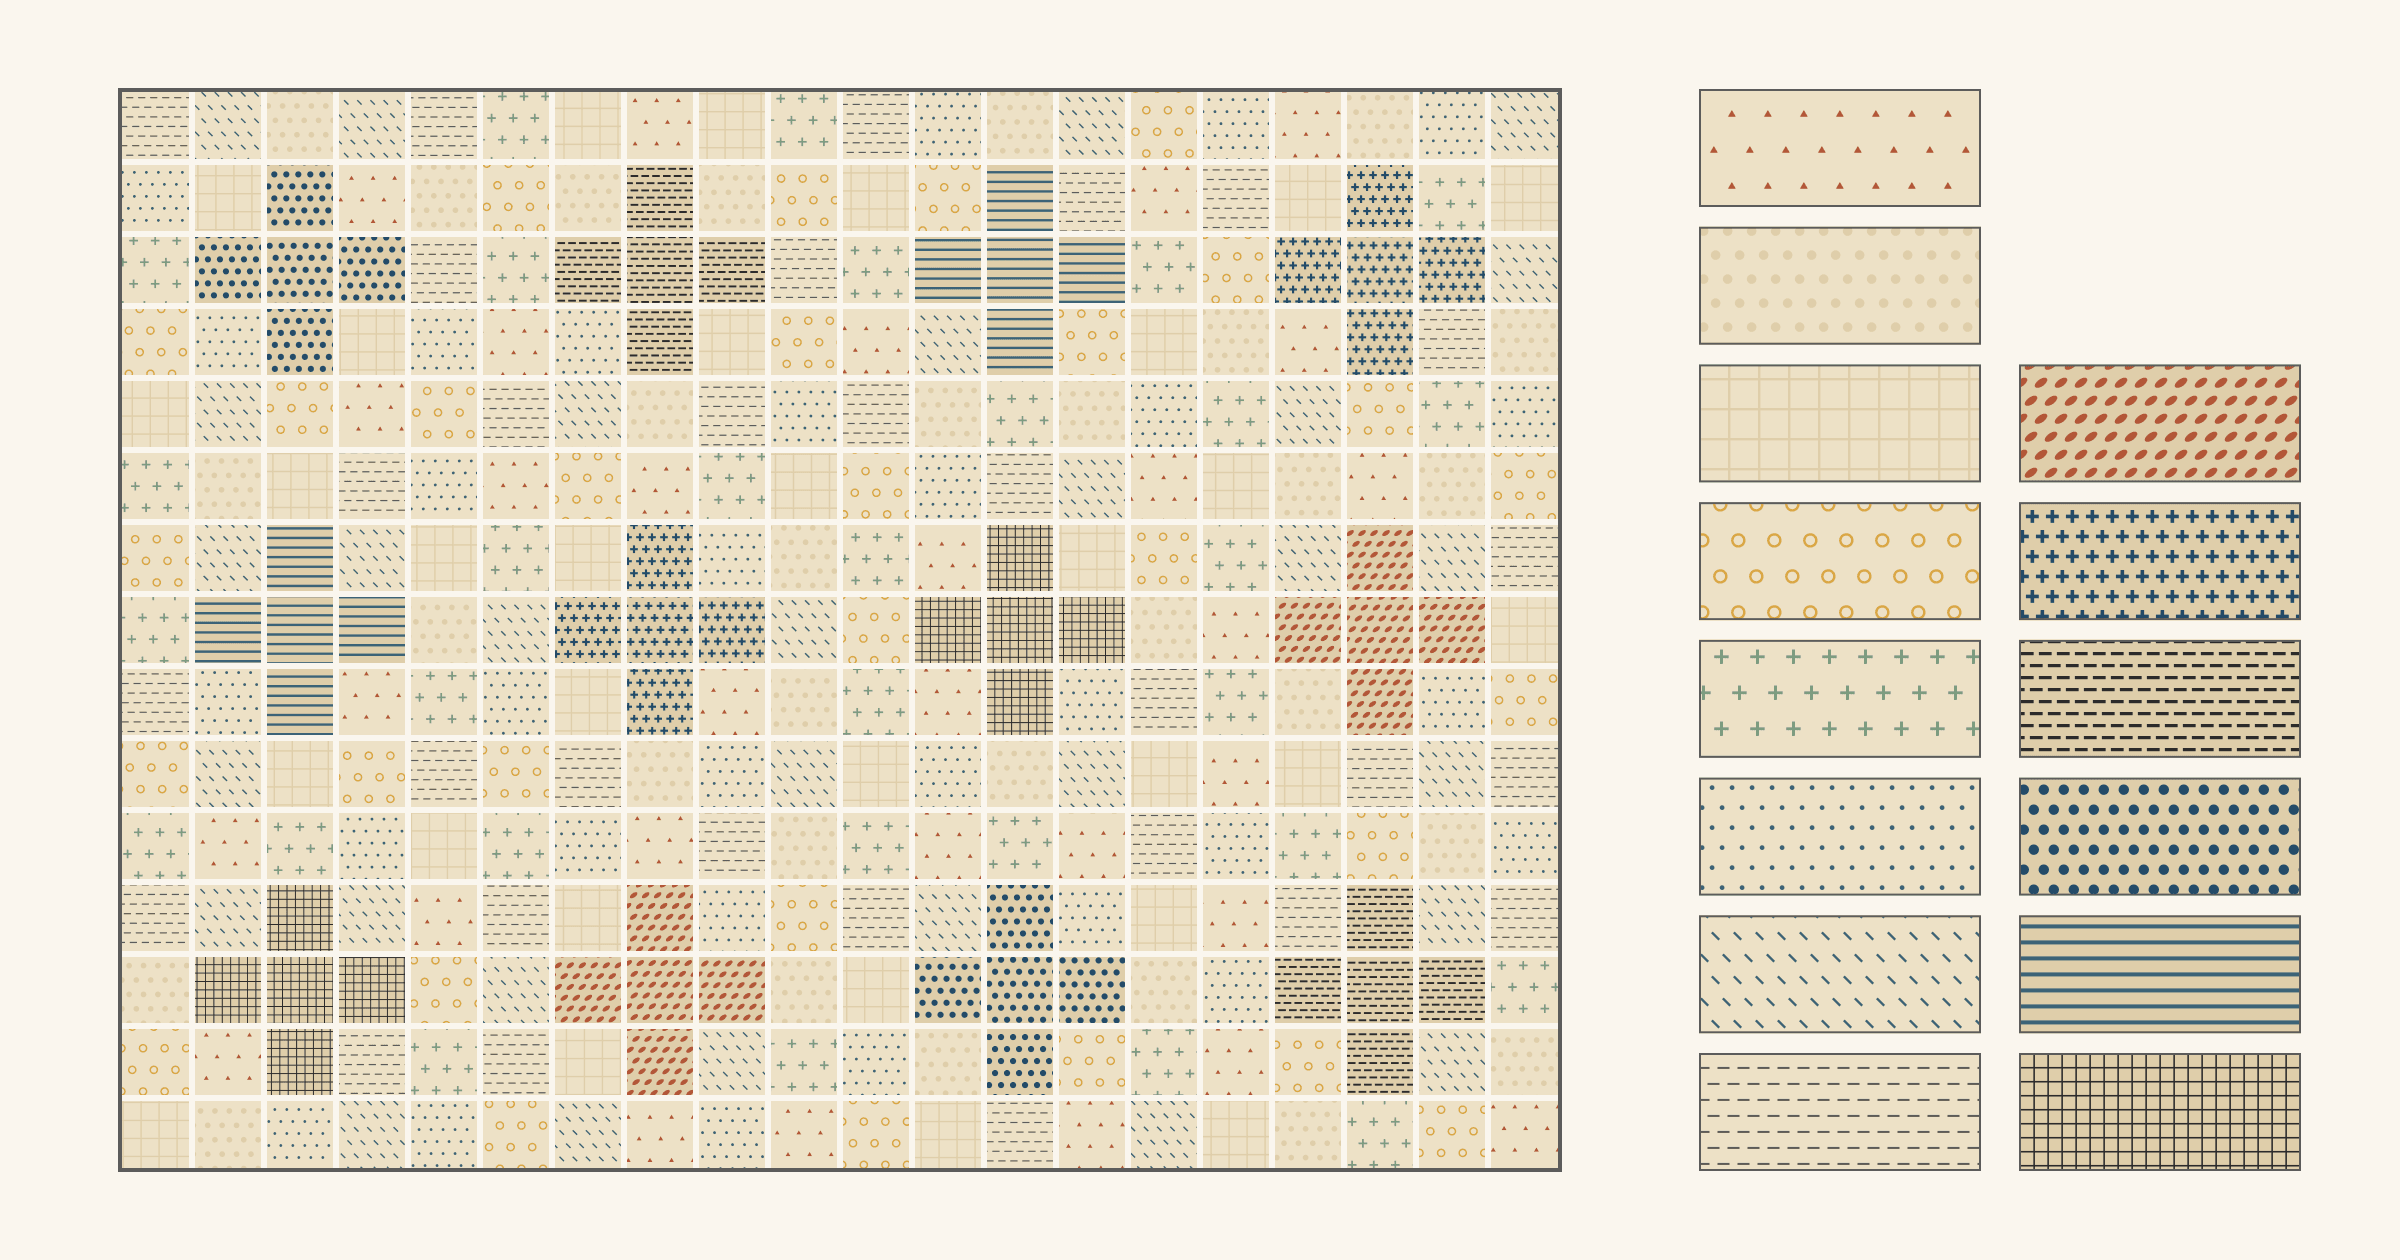
Light prints can blend in the background but need a value step wherever they form the design. Sort them into two groups and follow a 45 x 60 inch plan.
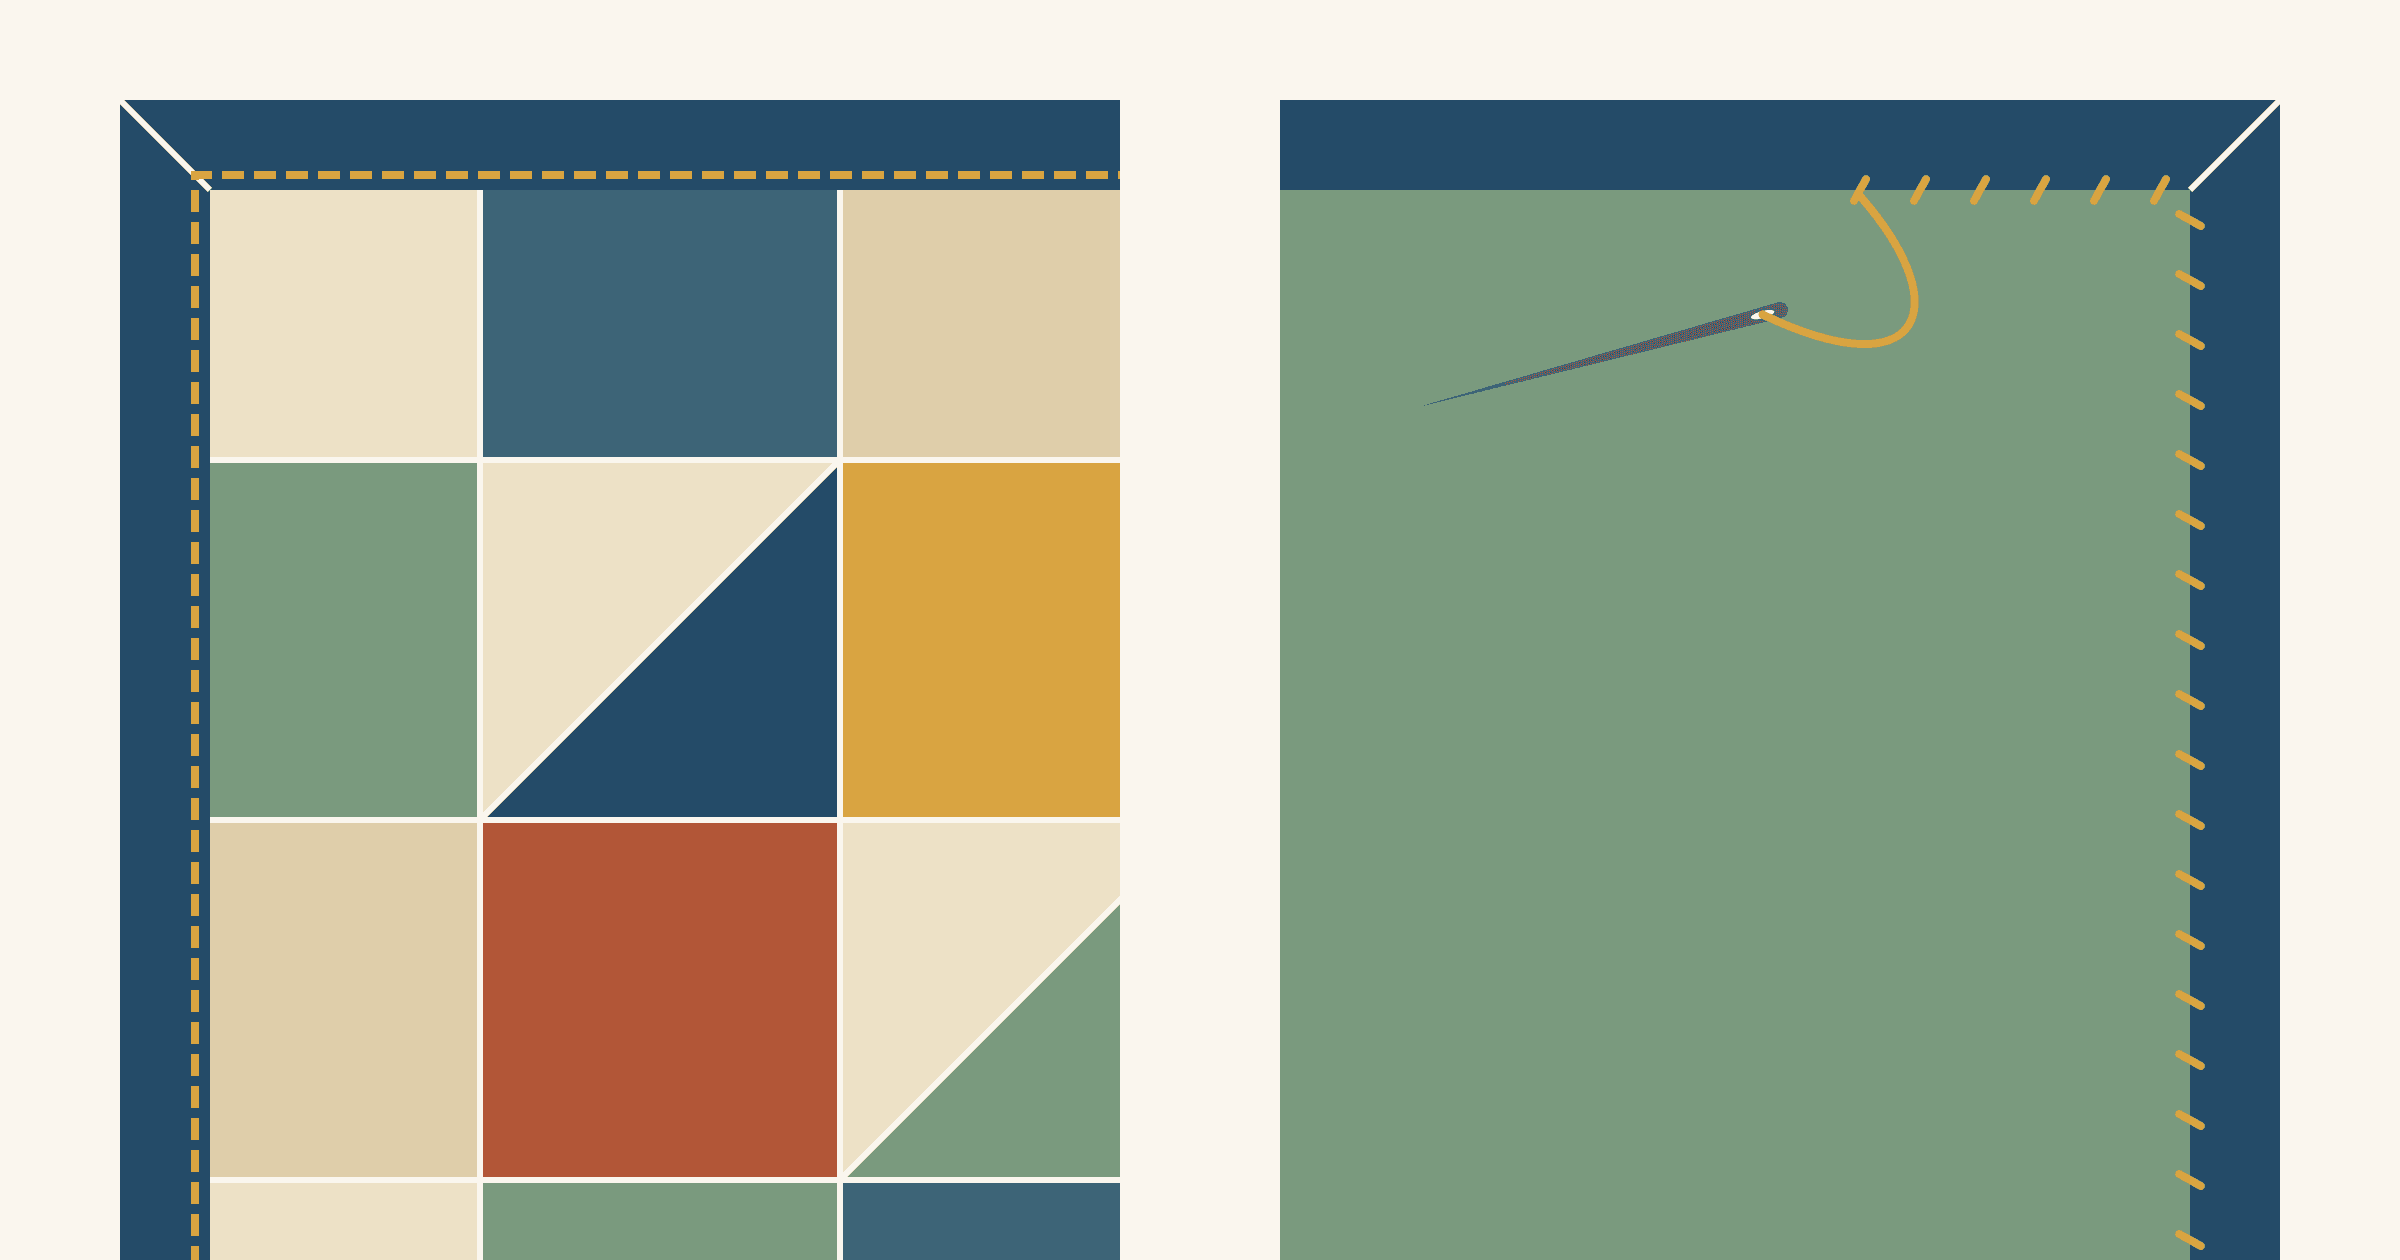
Machine binding saves hours; hand binding keeps the stitching out of sight. See where each finish shows and what each costs in time on a 60 x 72 in throw.
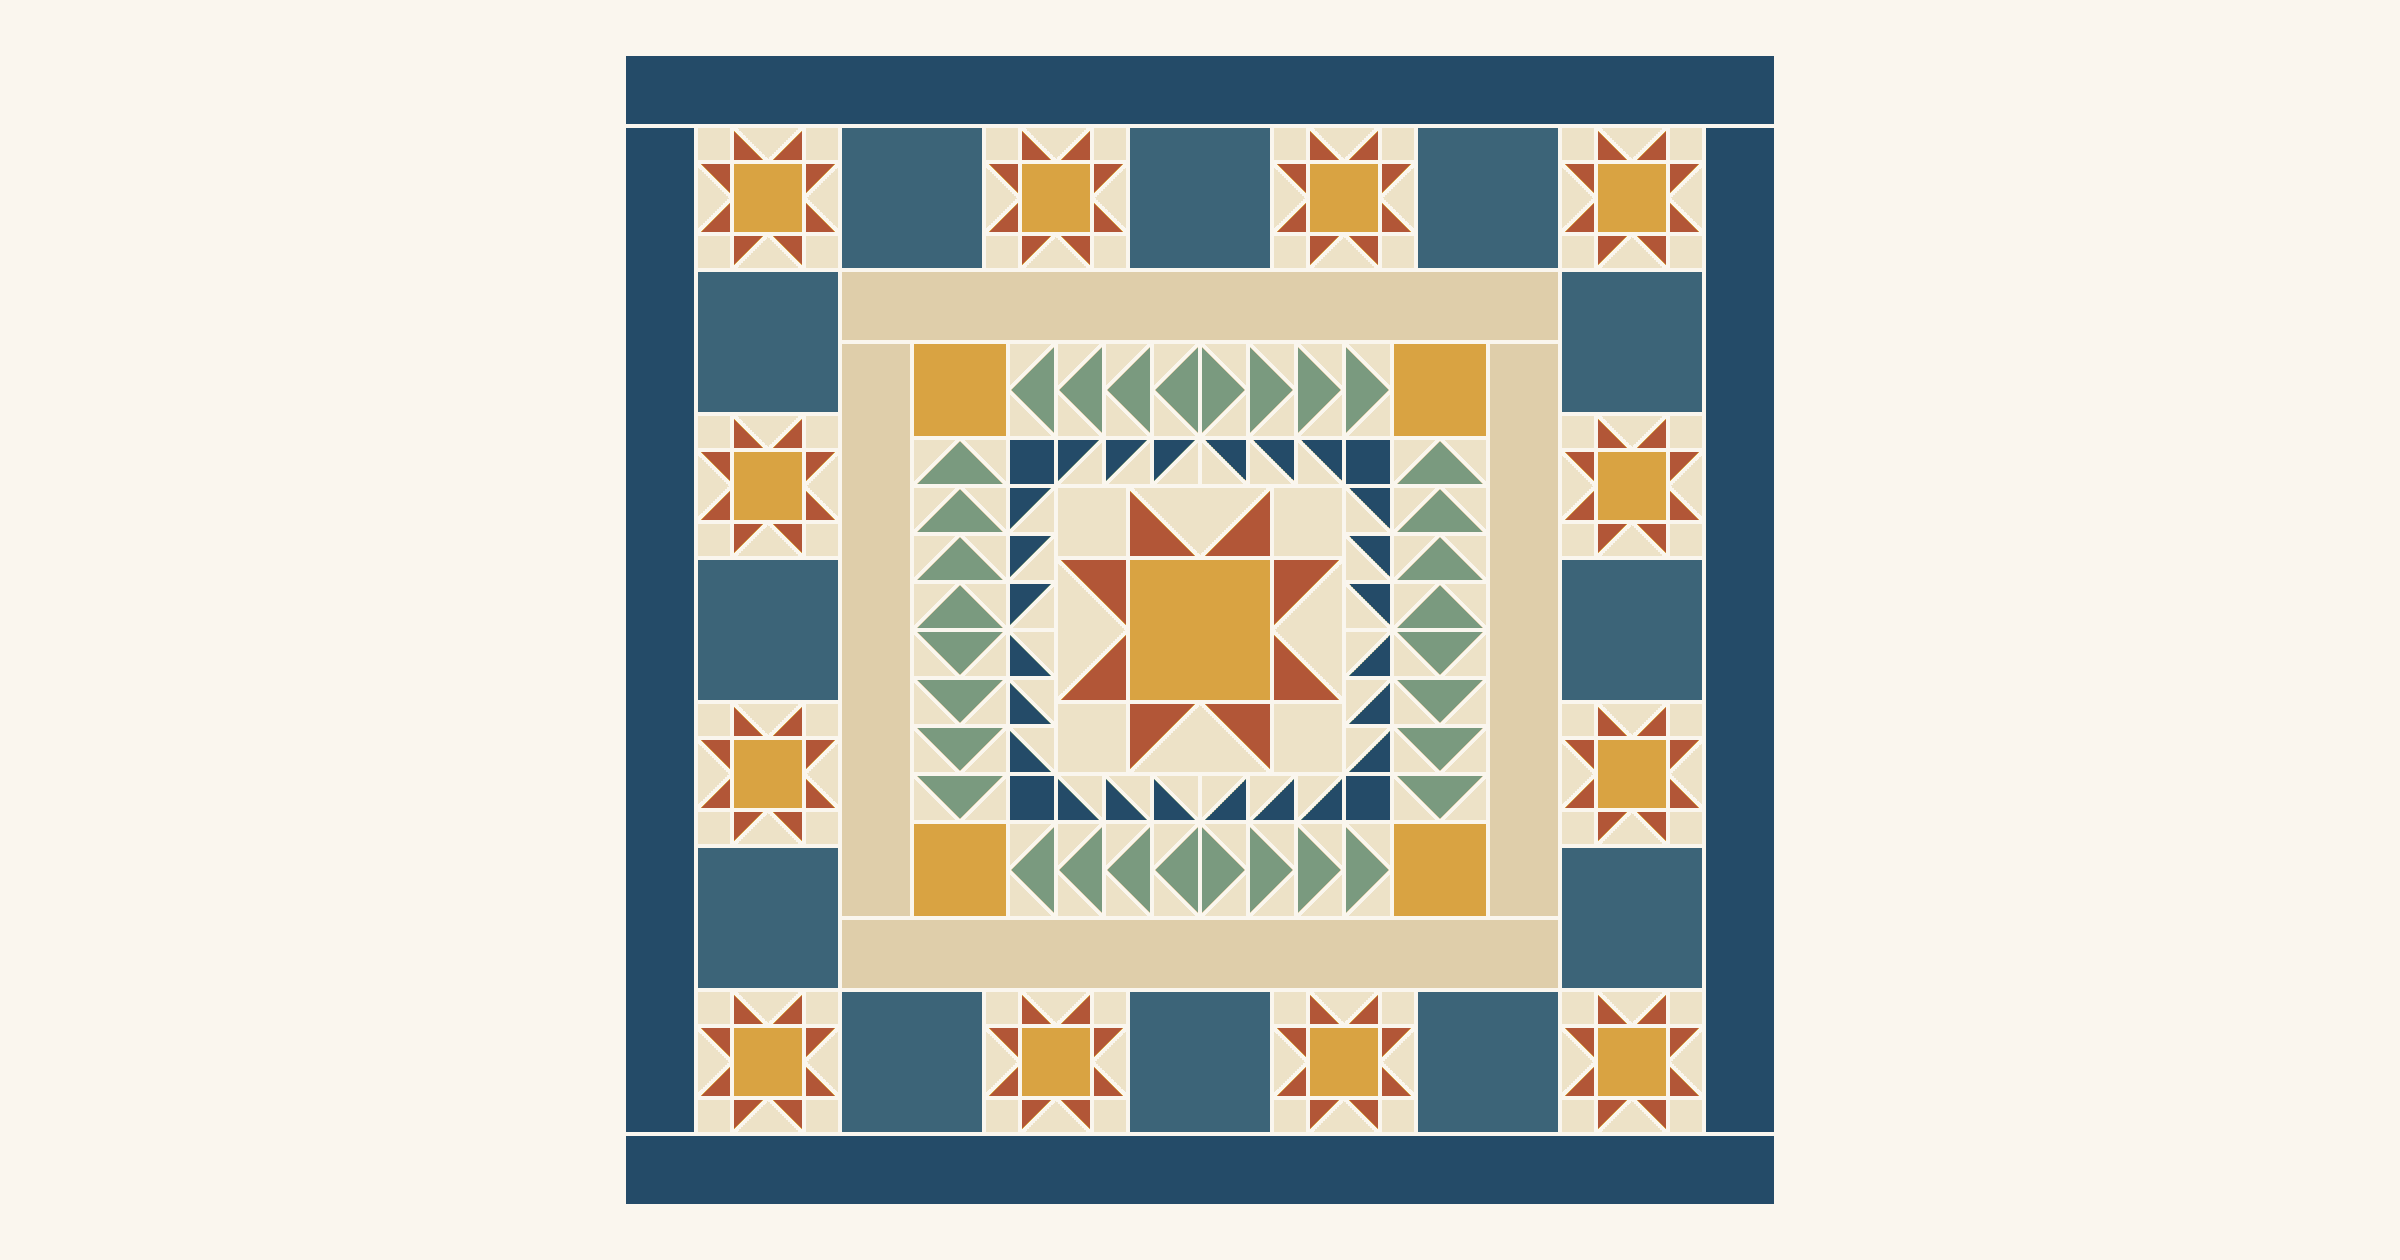
Plan a medallion ring by ring: check that each pieced border divides its side, add a plain spacer when it doesn't, and grow a 12 in star to a 48 in quilt.
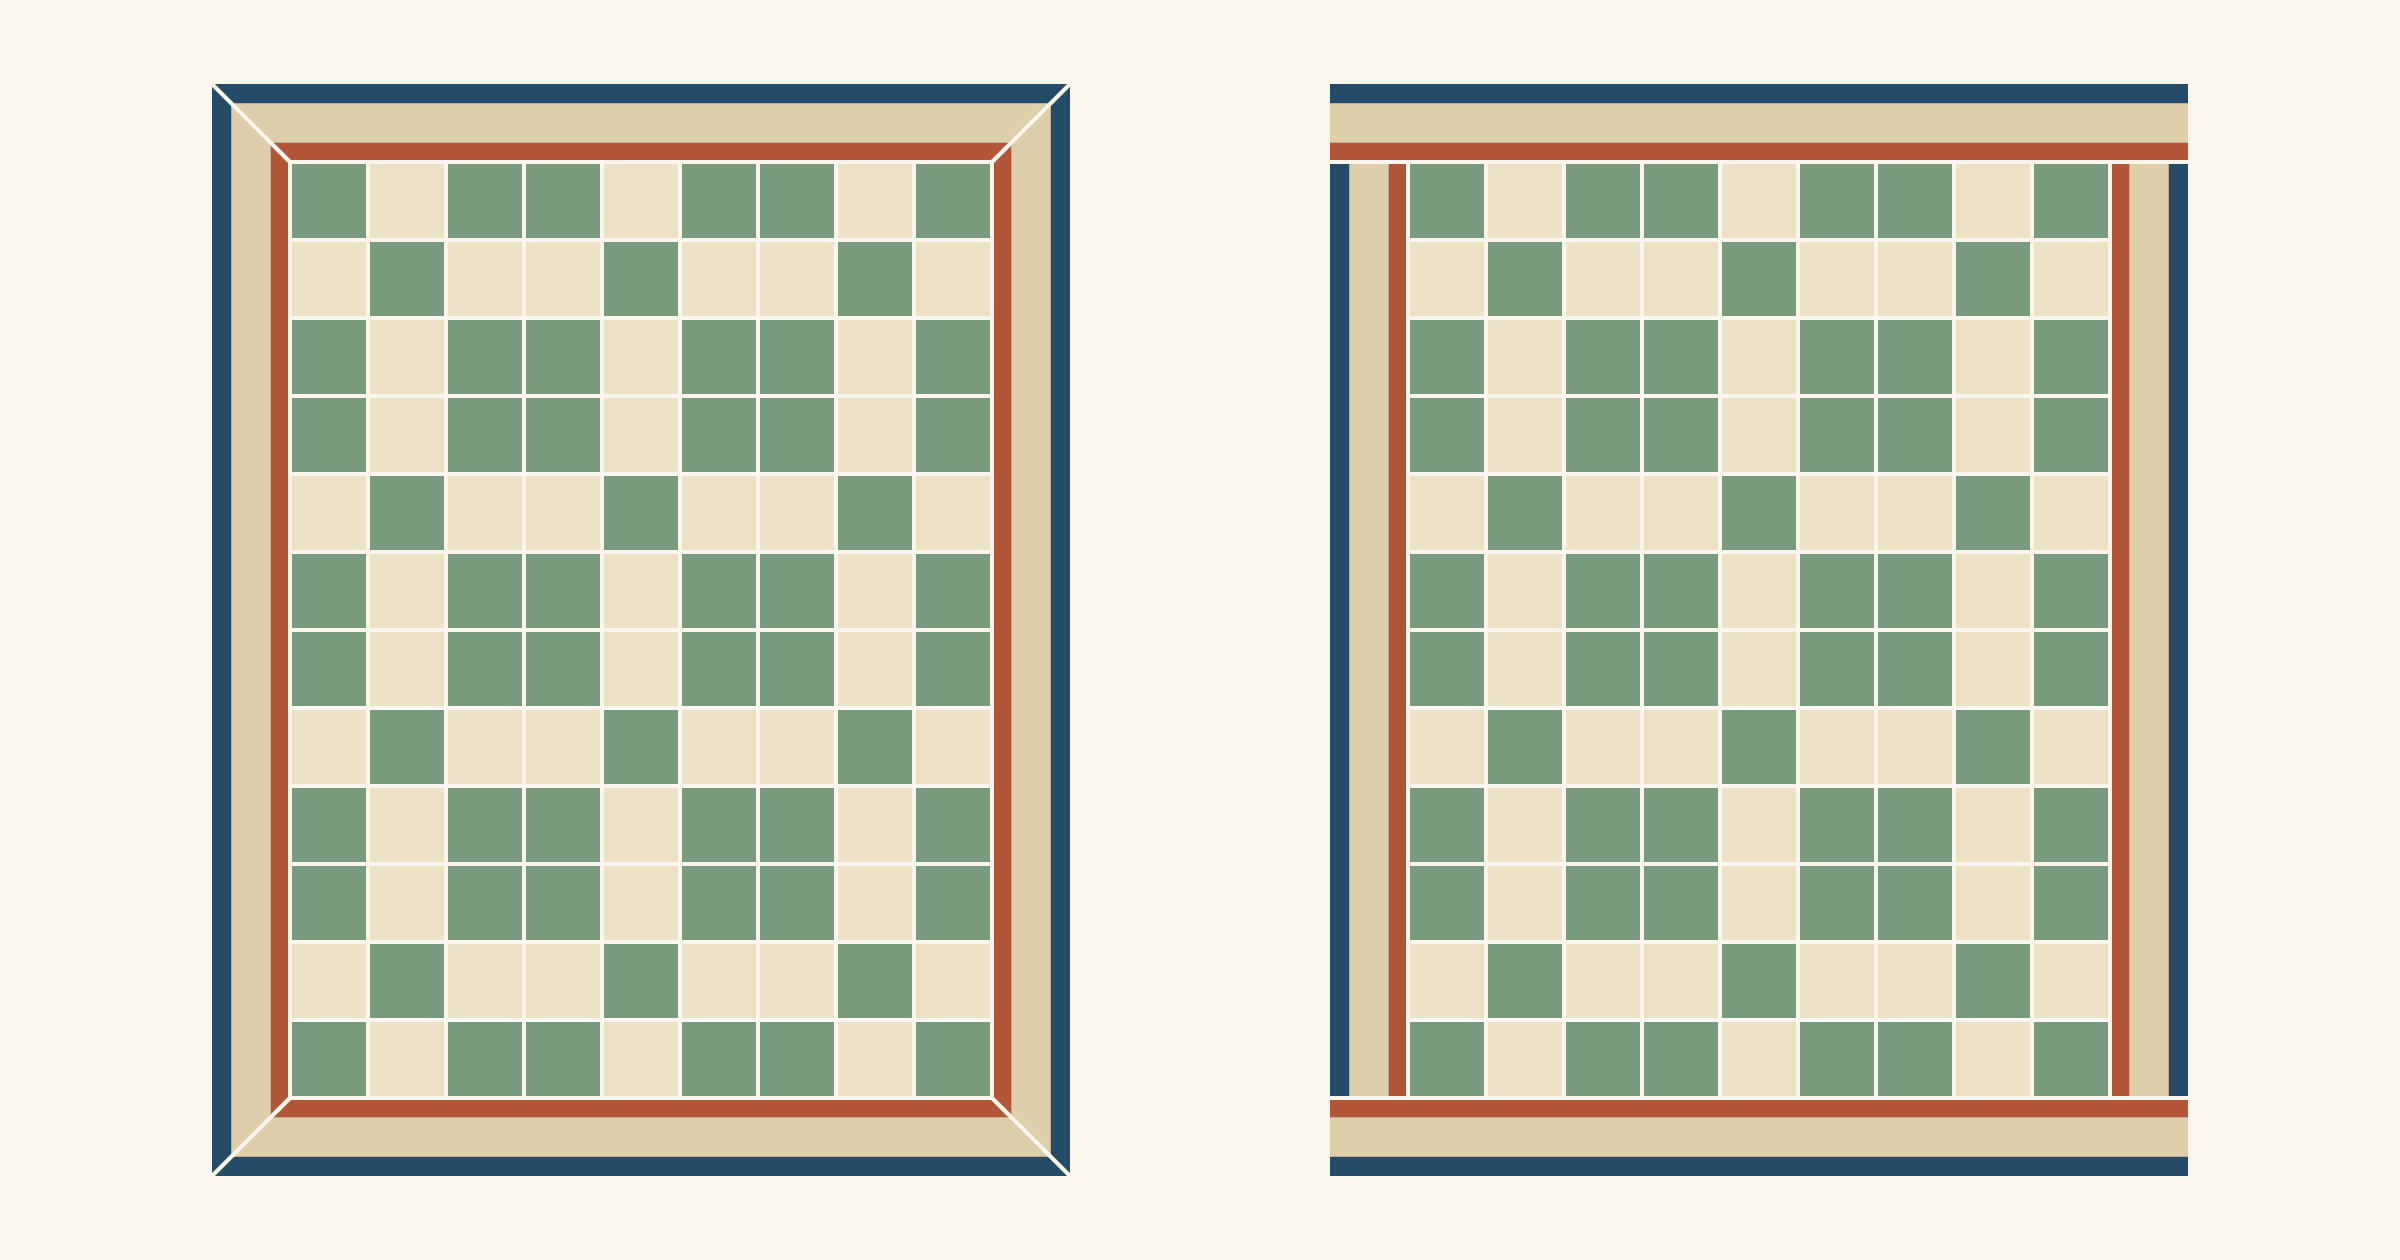
Butt the corners on solids and busy prints, miter them on stripes. See both corners drawn side by side, how much longer mitered strips must be, and how to sew each.
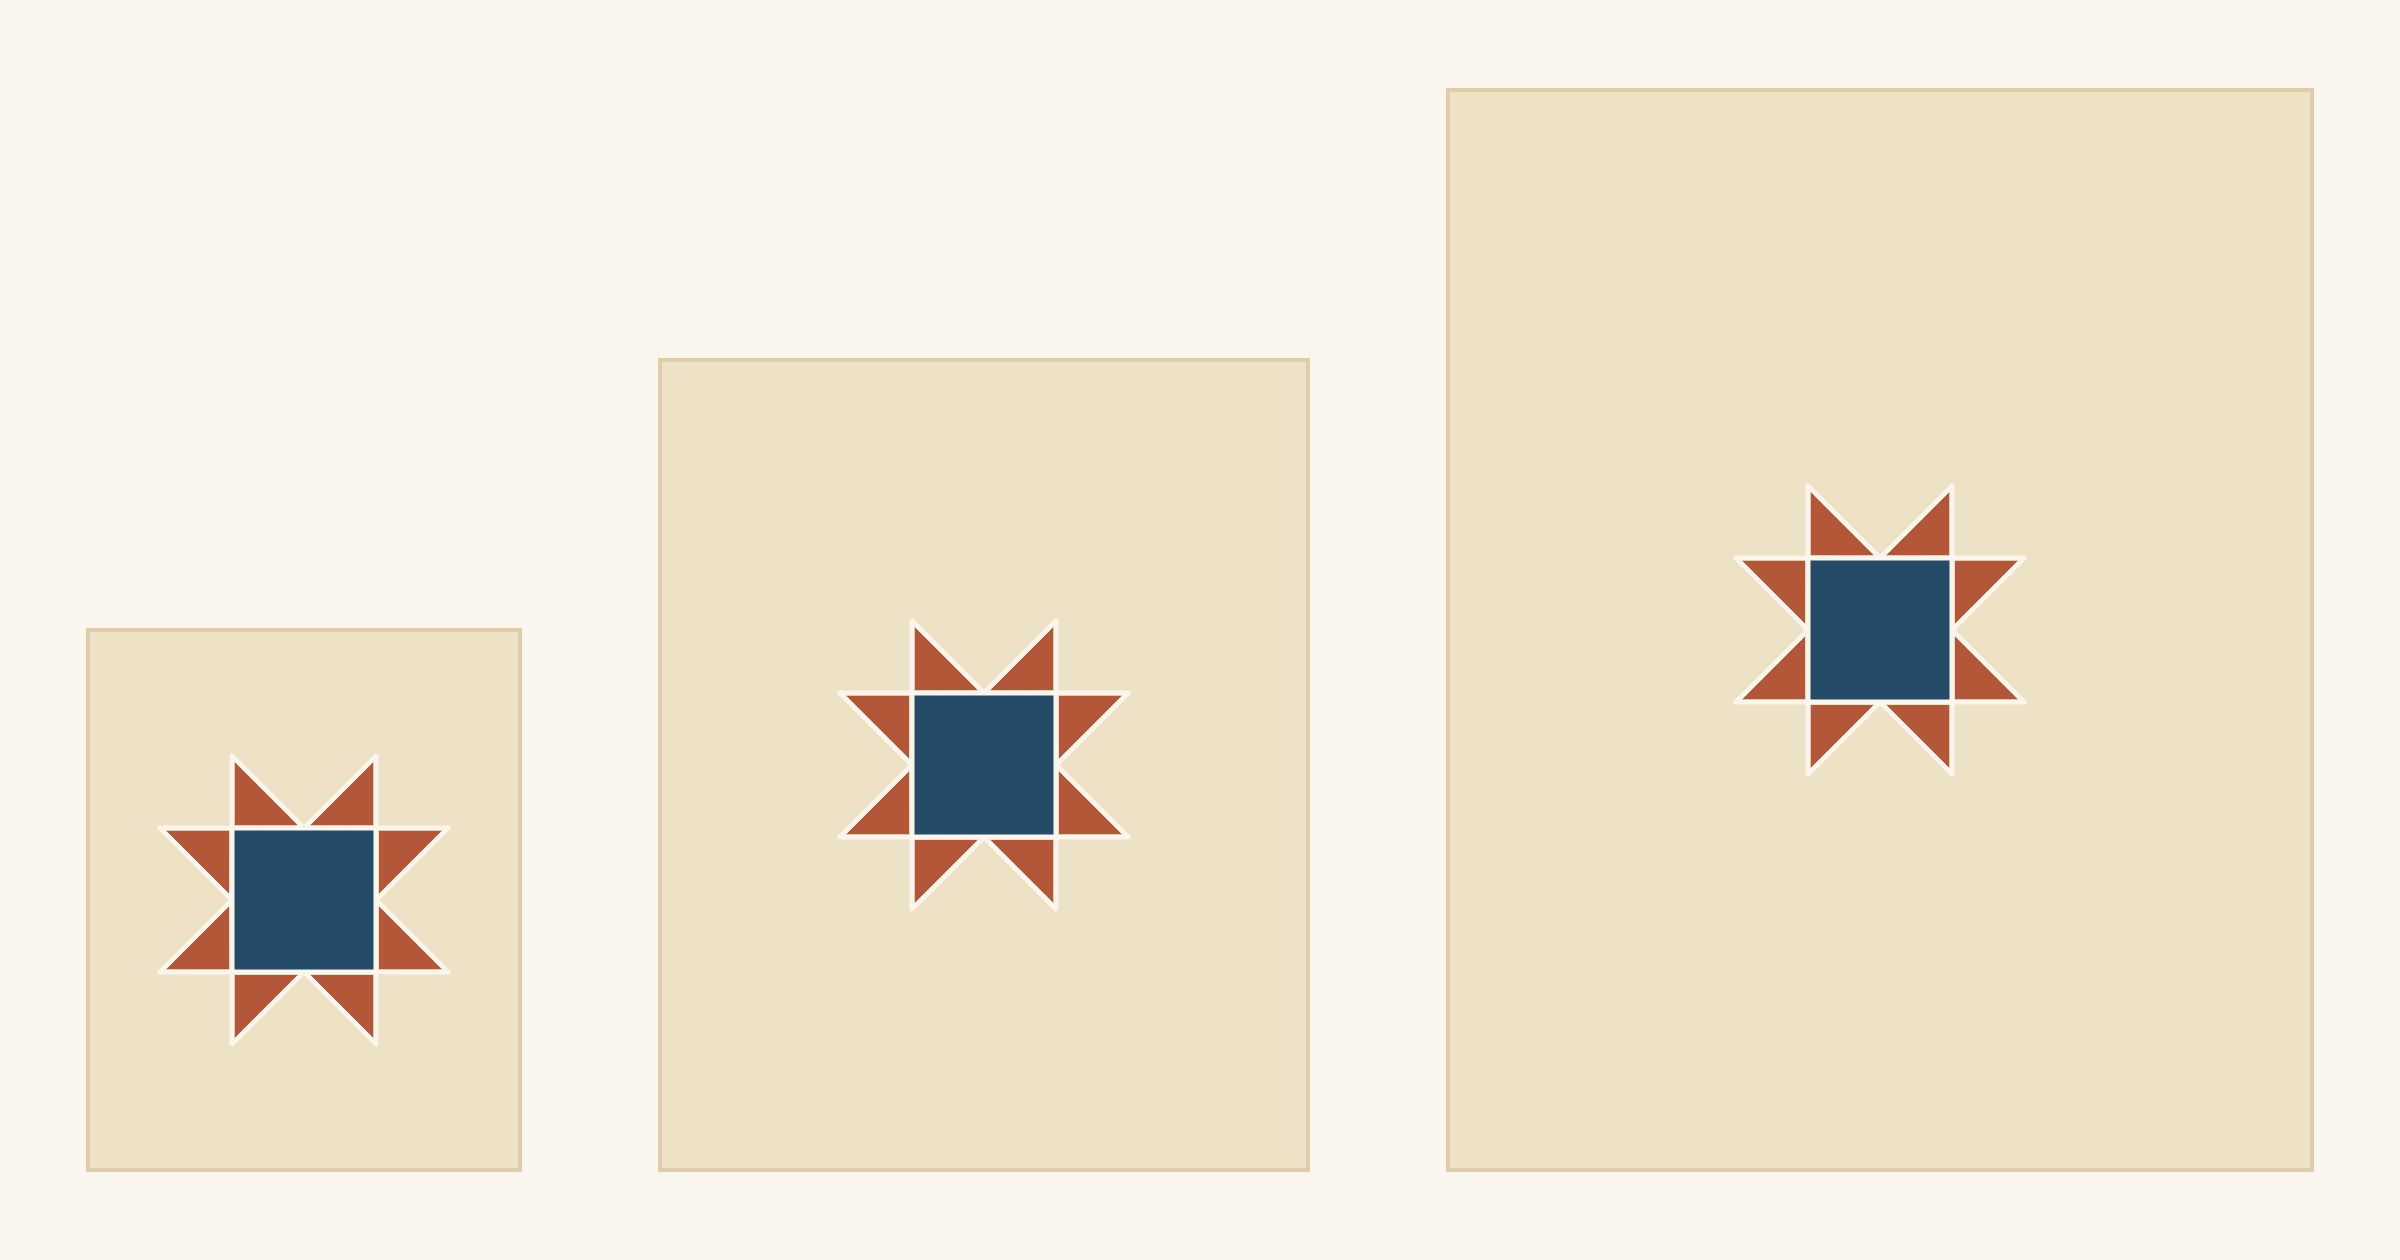
One 16-inch star in three quilt sizes and two positions: measure negative space in block widths, set the block on the thirds and plan the background pieces.
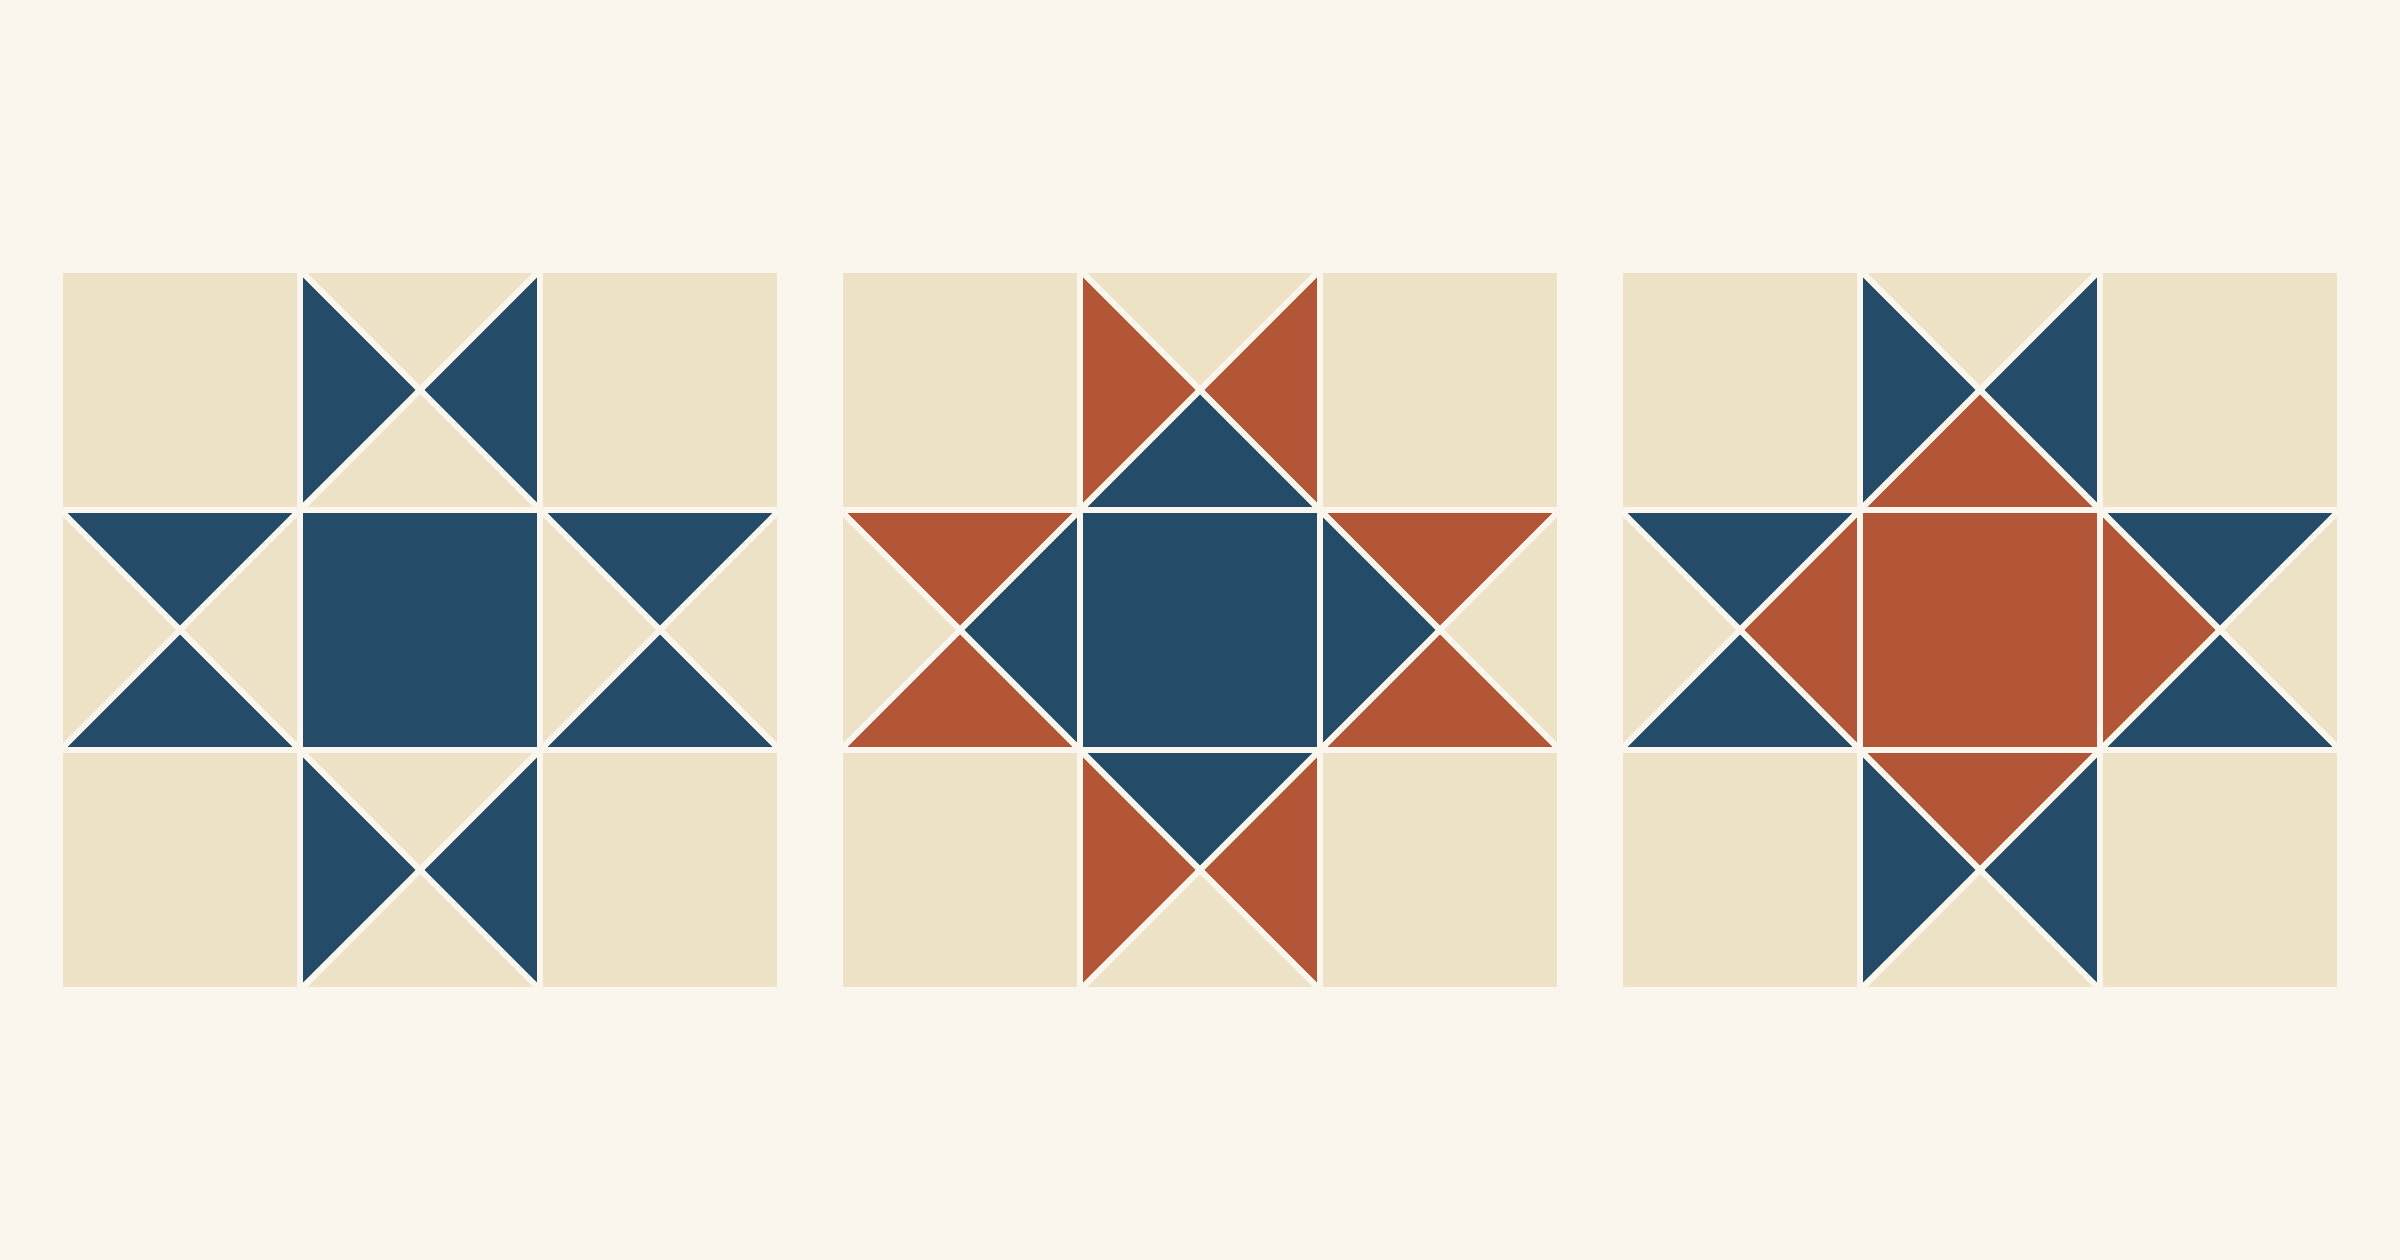
Many Ohio Star variations keep the same nine-patch and move the fabrics. Compare four color maps on one 12-inch star and see why value decides what you notice first.
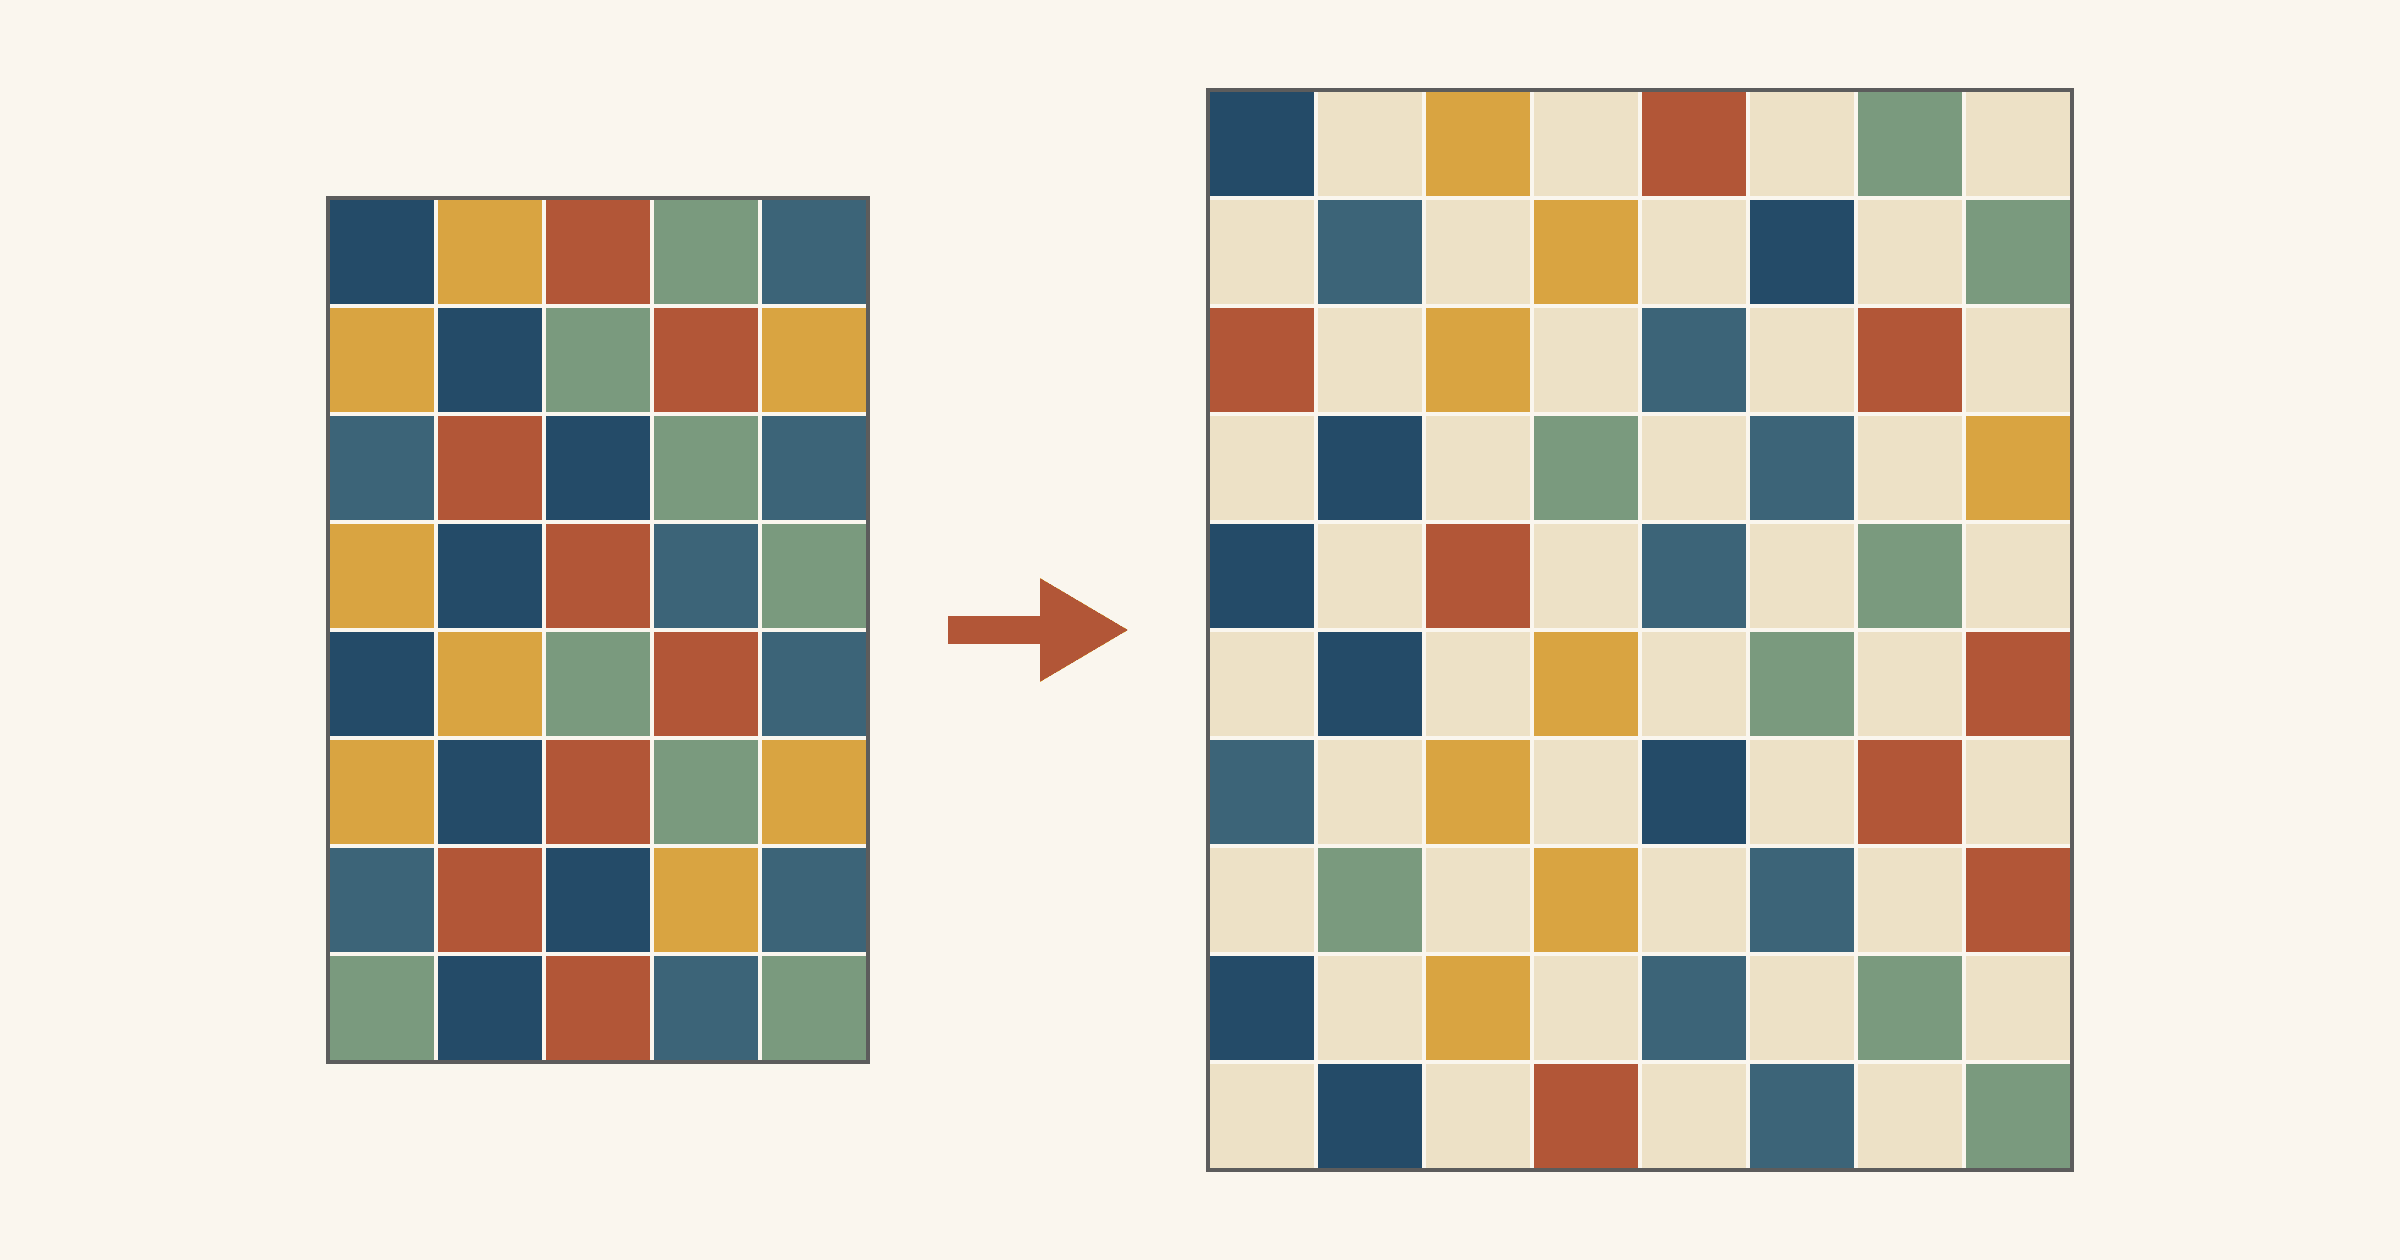
Sewn edge to edge, one charm pack makes a quilt about 27 x 31 1/2 inches. Count your usable squares, then compare four layouts that stretch it with background.
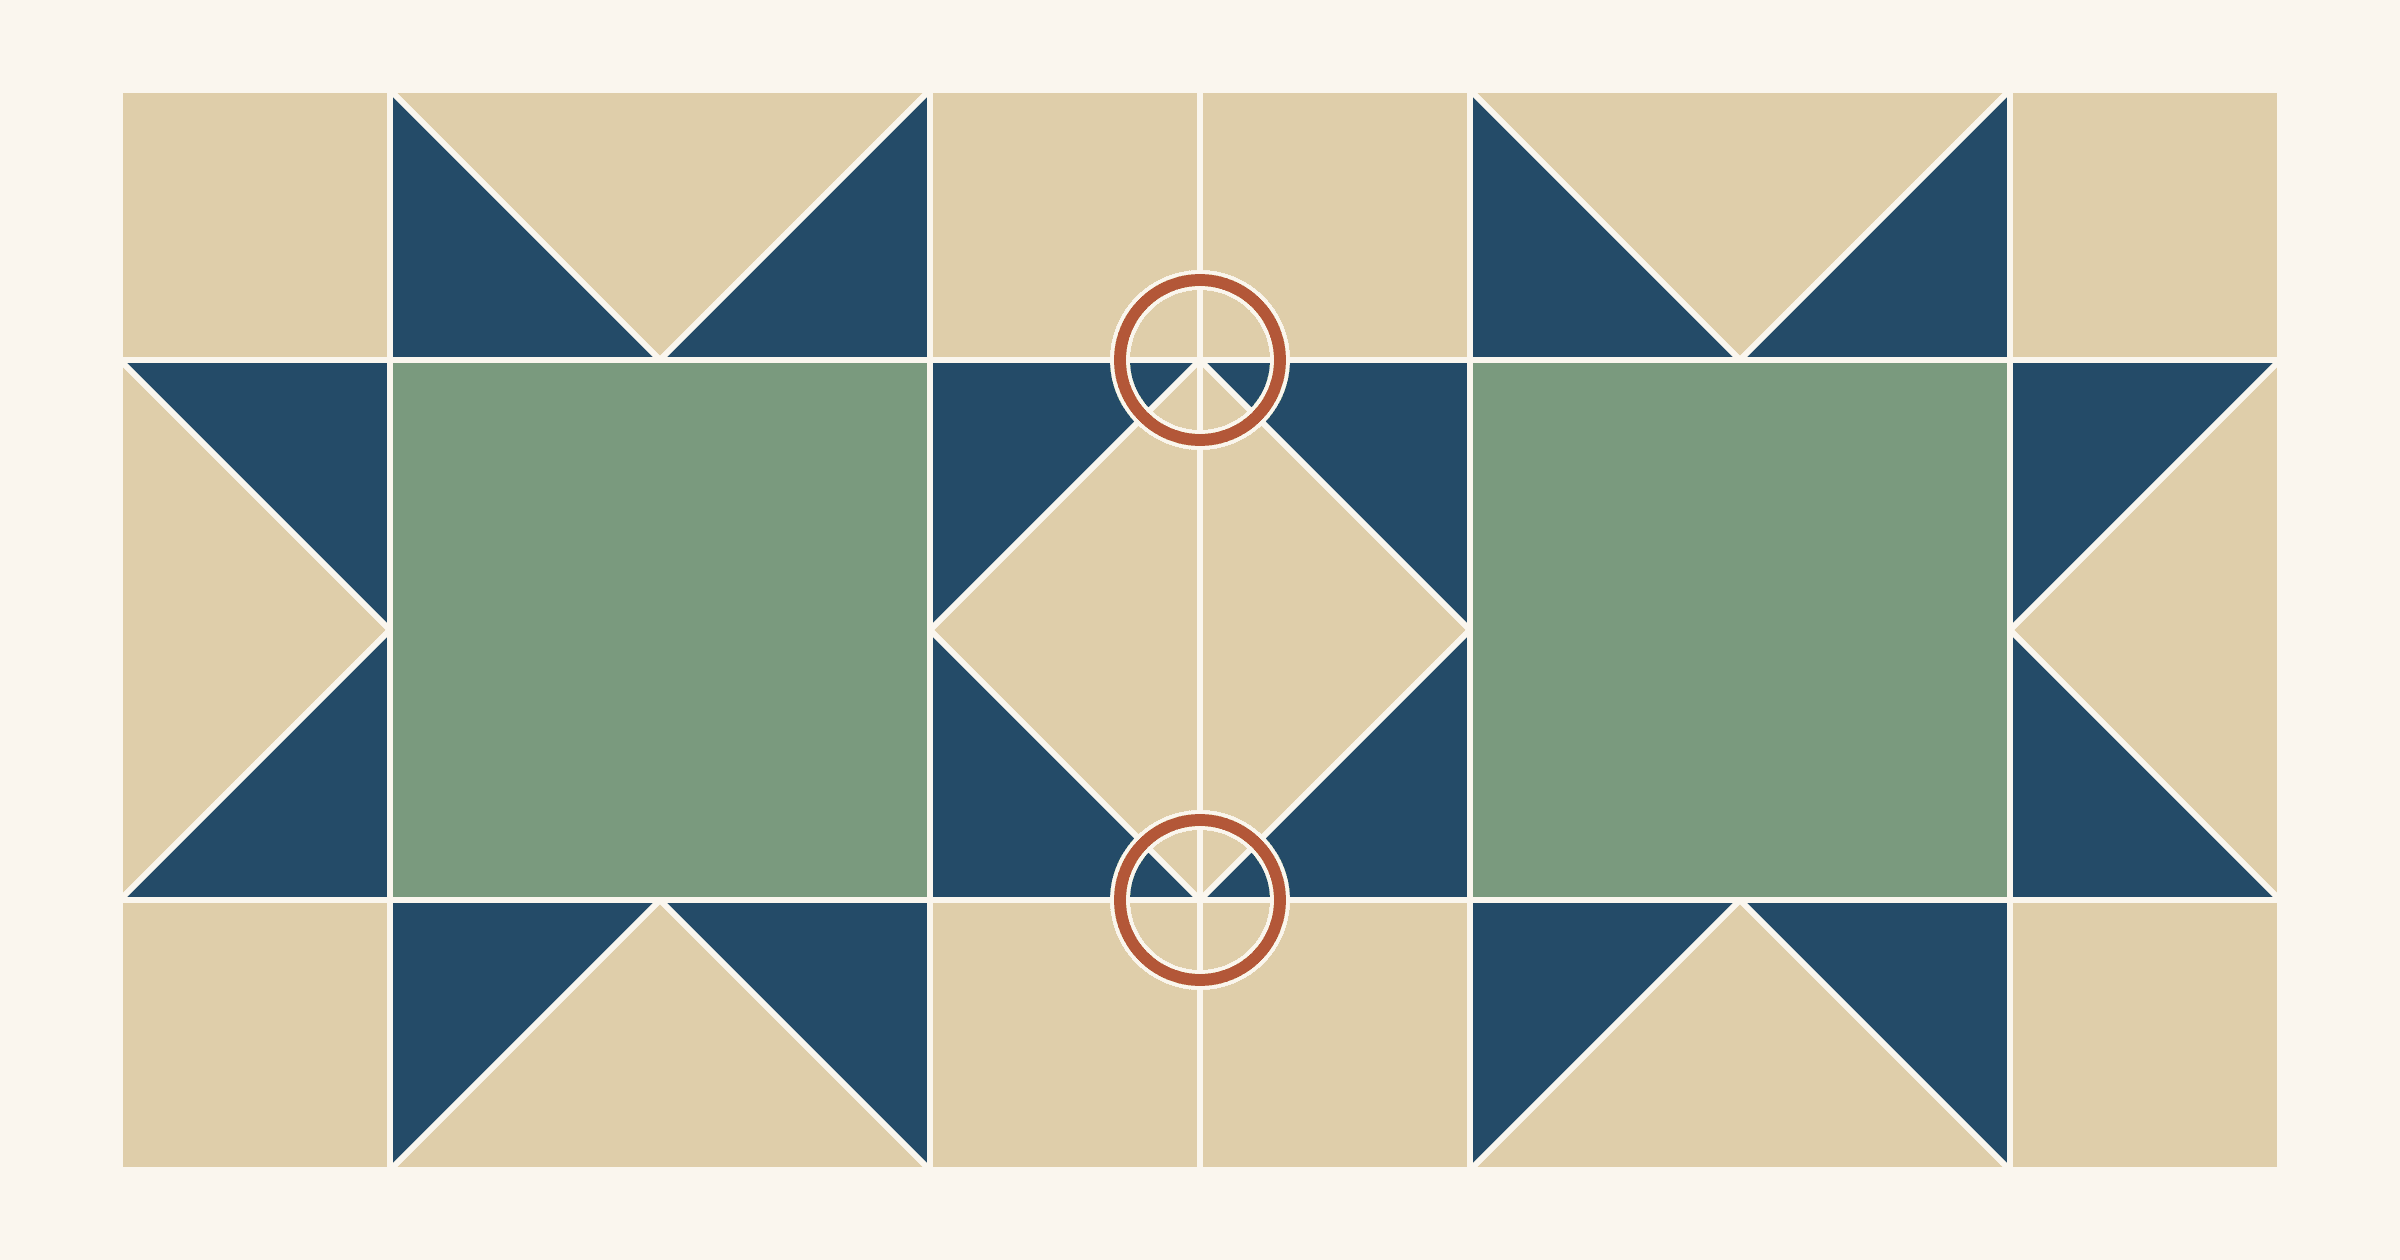
Sew through the X, where the seams cross 1/4 in from the raw edge. Two 12-inch Sawtooth Stars show where the X sits and what a 1/8 in miss does to a point.
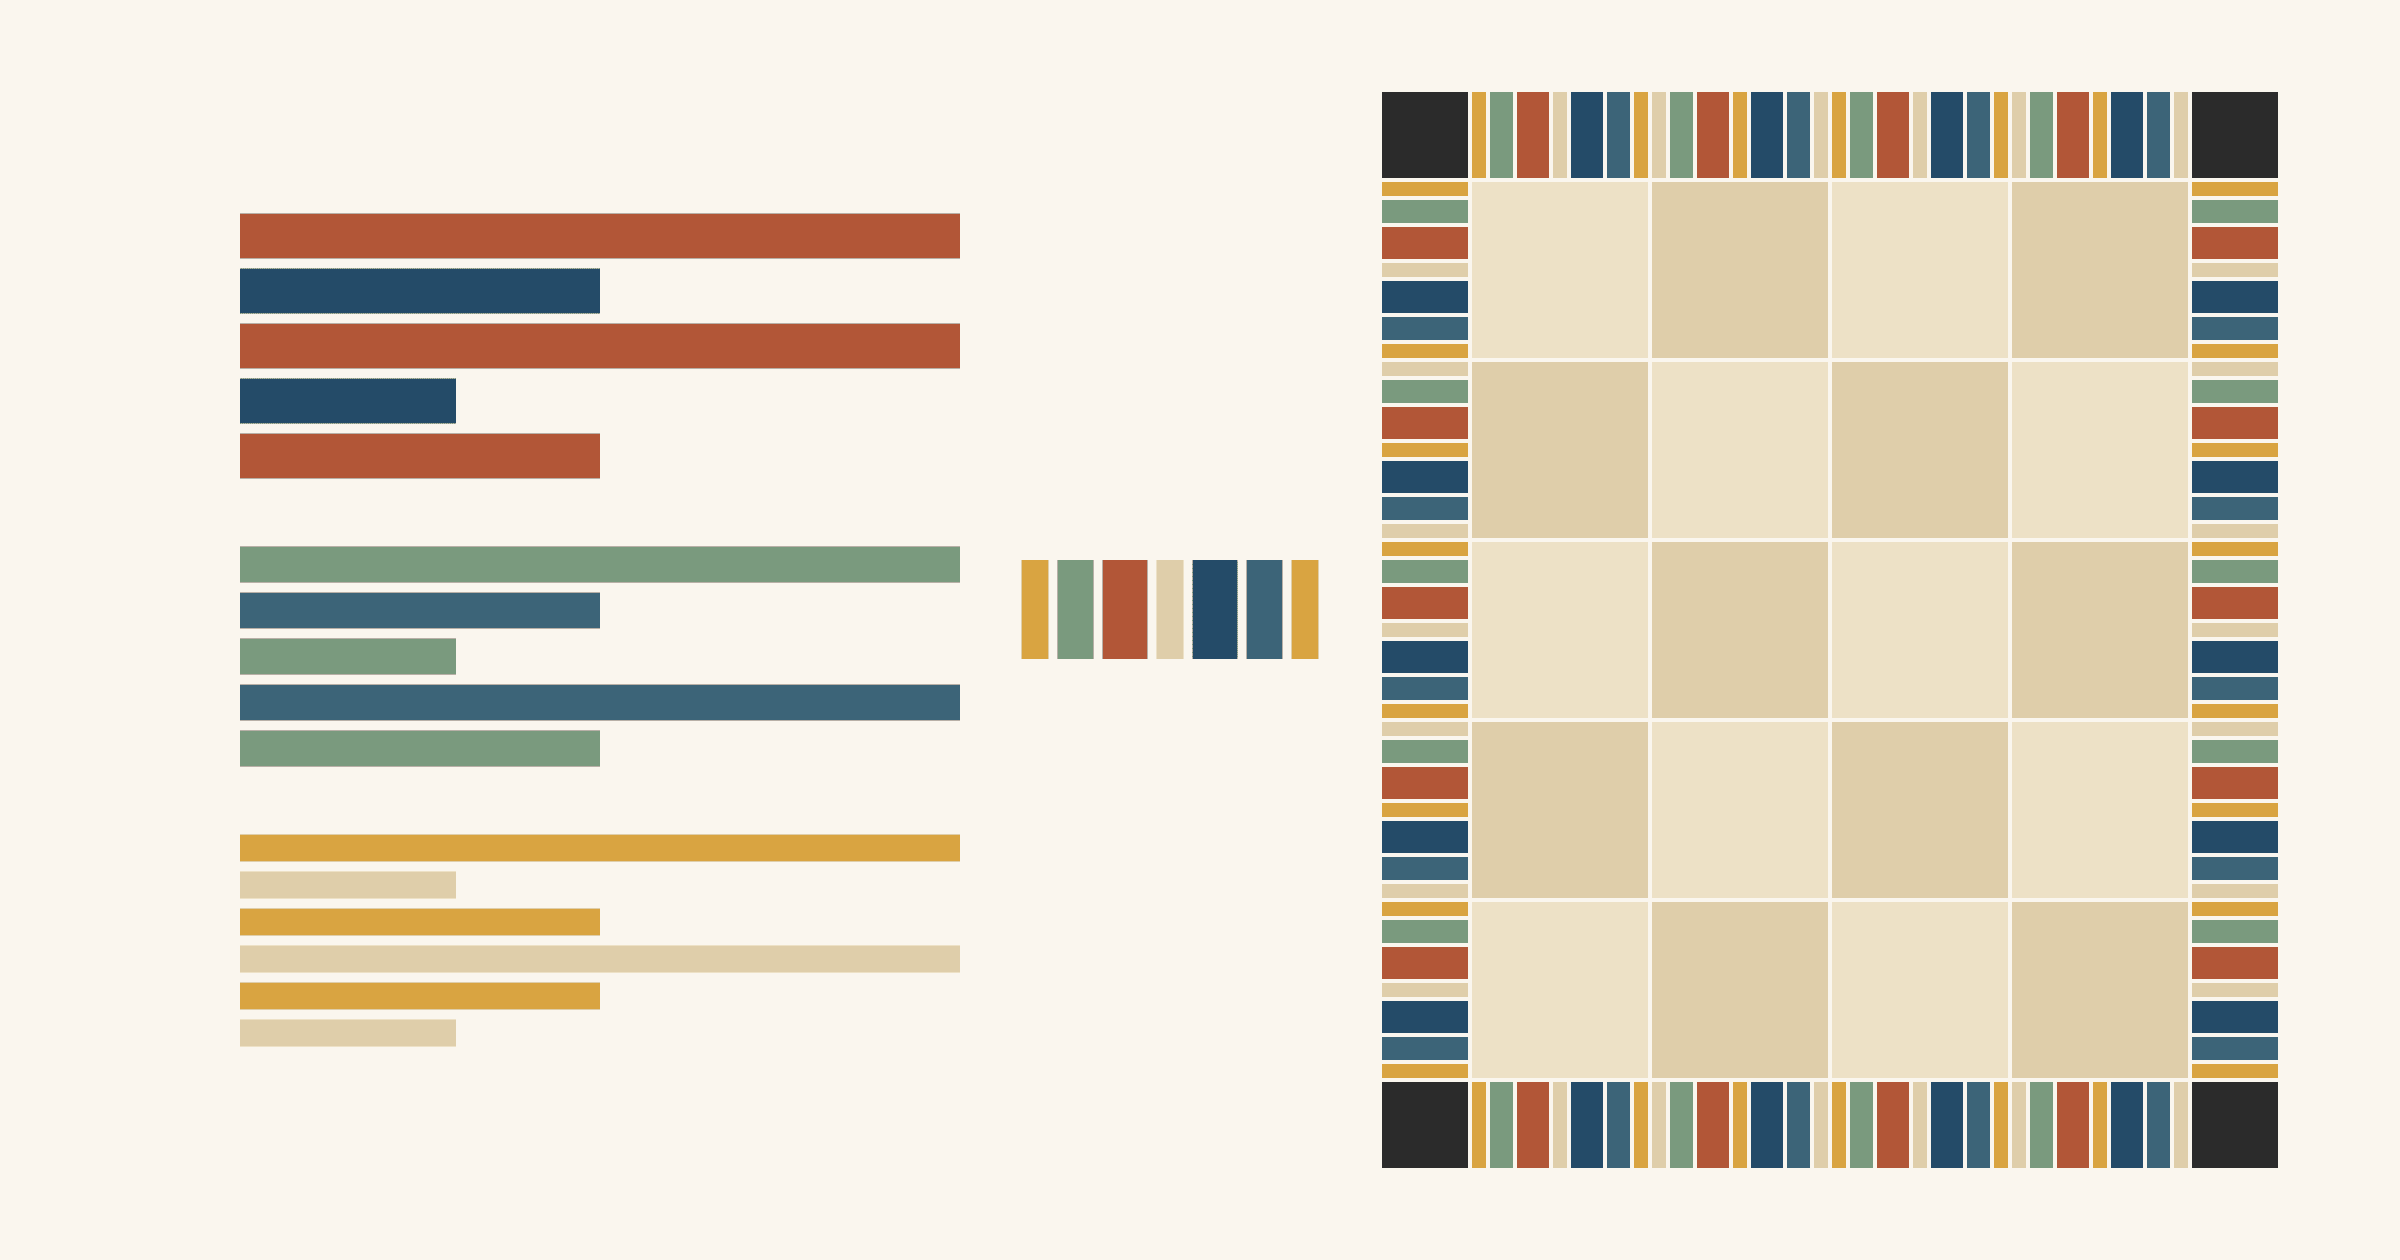
Sort scrap strips into three widths, build a repeat as long as one block, count keys against what you have, and trim the ends so every side fits.
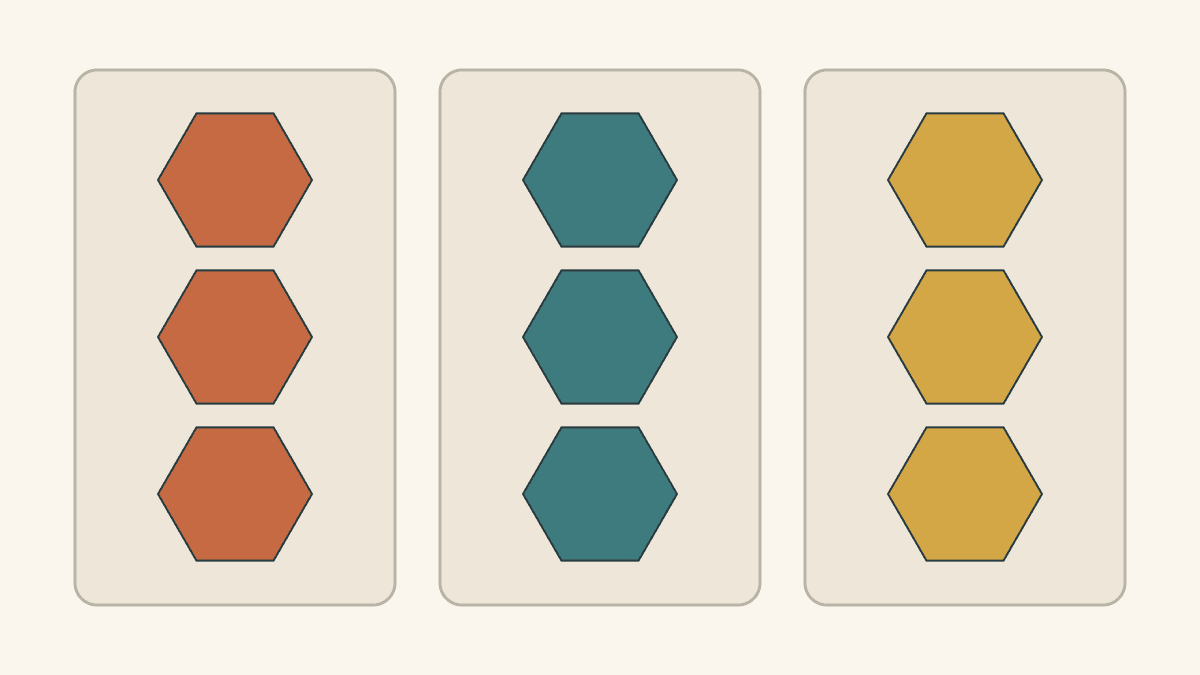
Pack prepared pieces in small, labeled units, keep the next join on a map, and use a nine-piece example to check your work when you return.
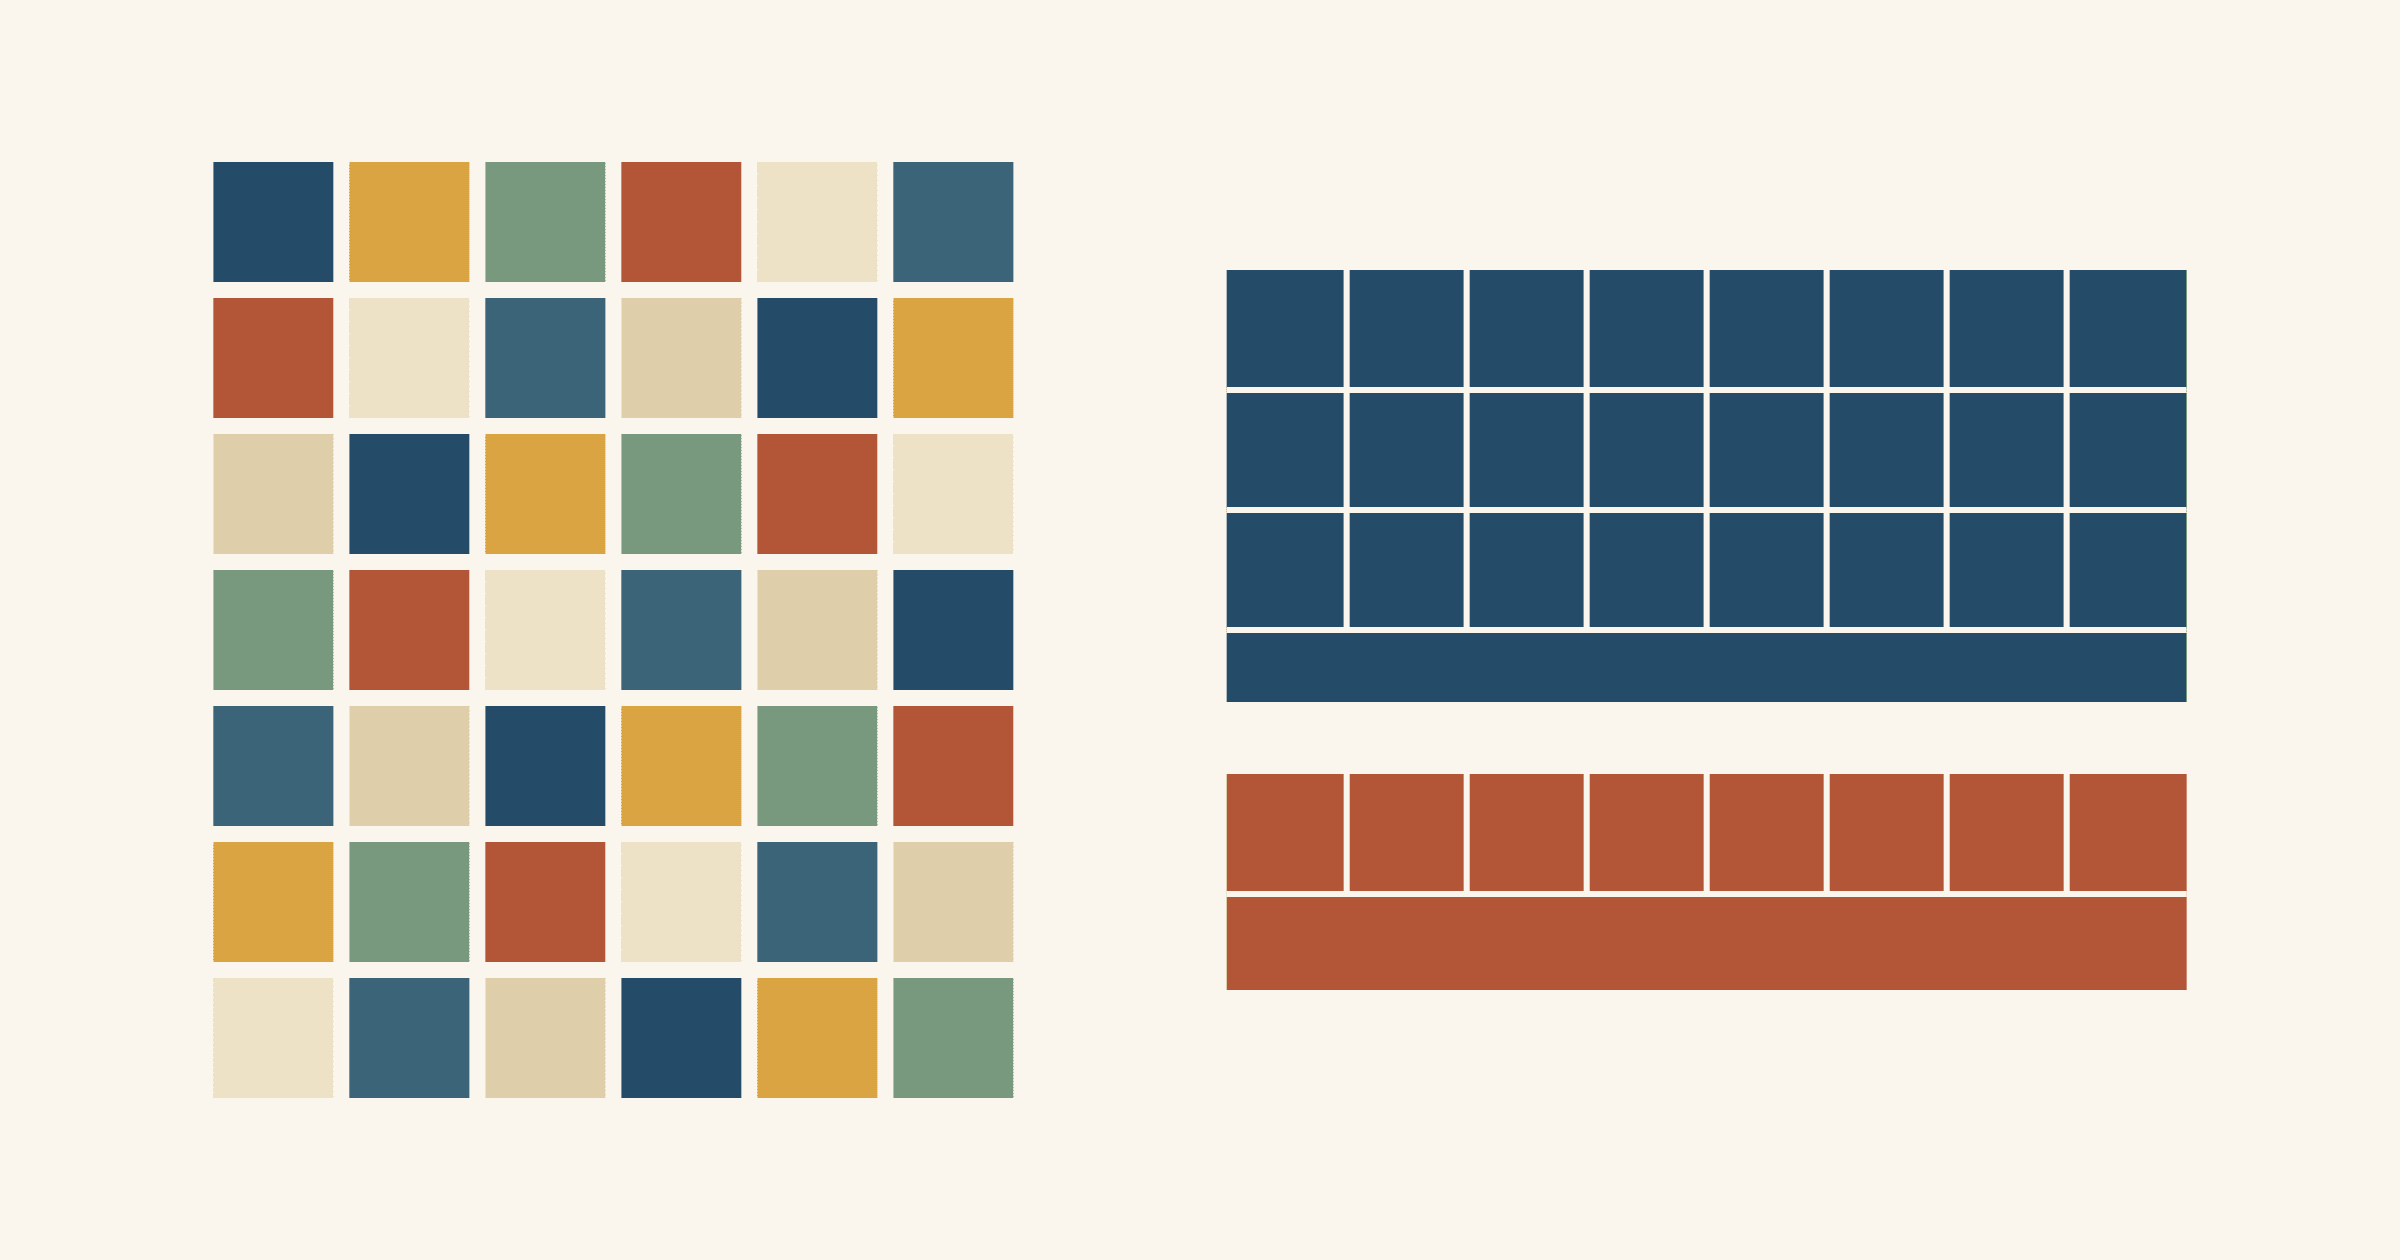
One 45 x 54-inch quilt of 120 five-inch squares, bought as charm packs or as yardage. See the fabric left over, the cuts and the prints you get each way.

Press to the side so seams nest; press open where six or more seams meet or you want the flattest top. A Four Patch layer count shows the trade-off.
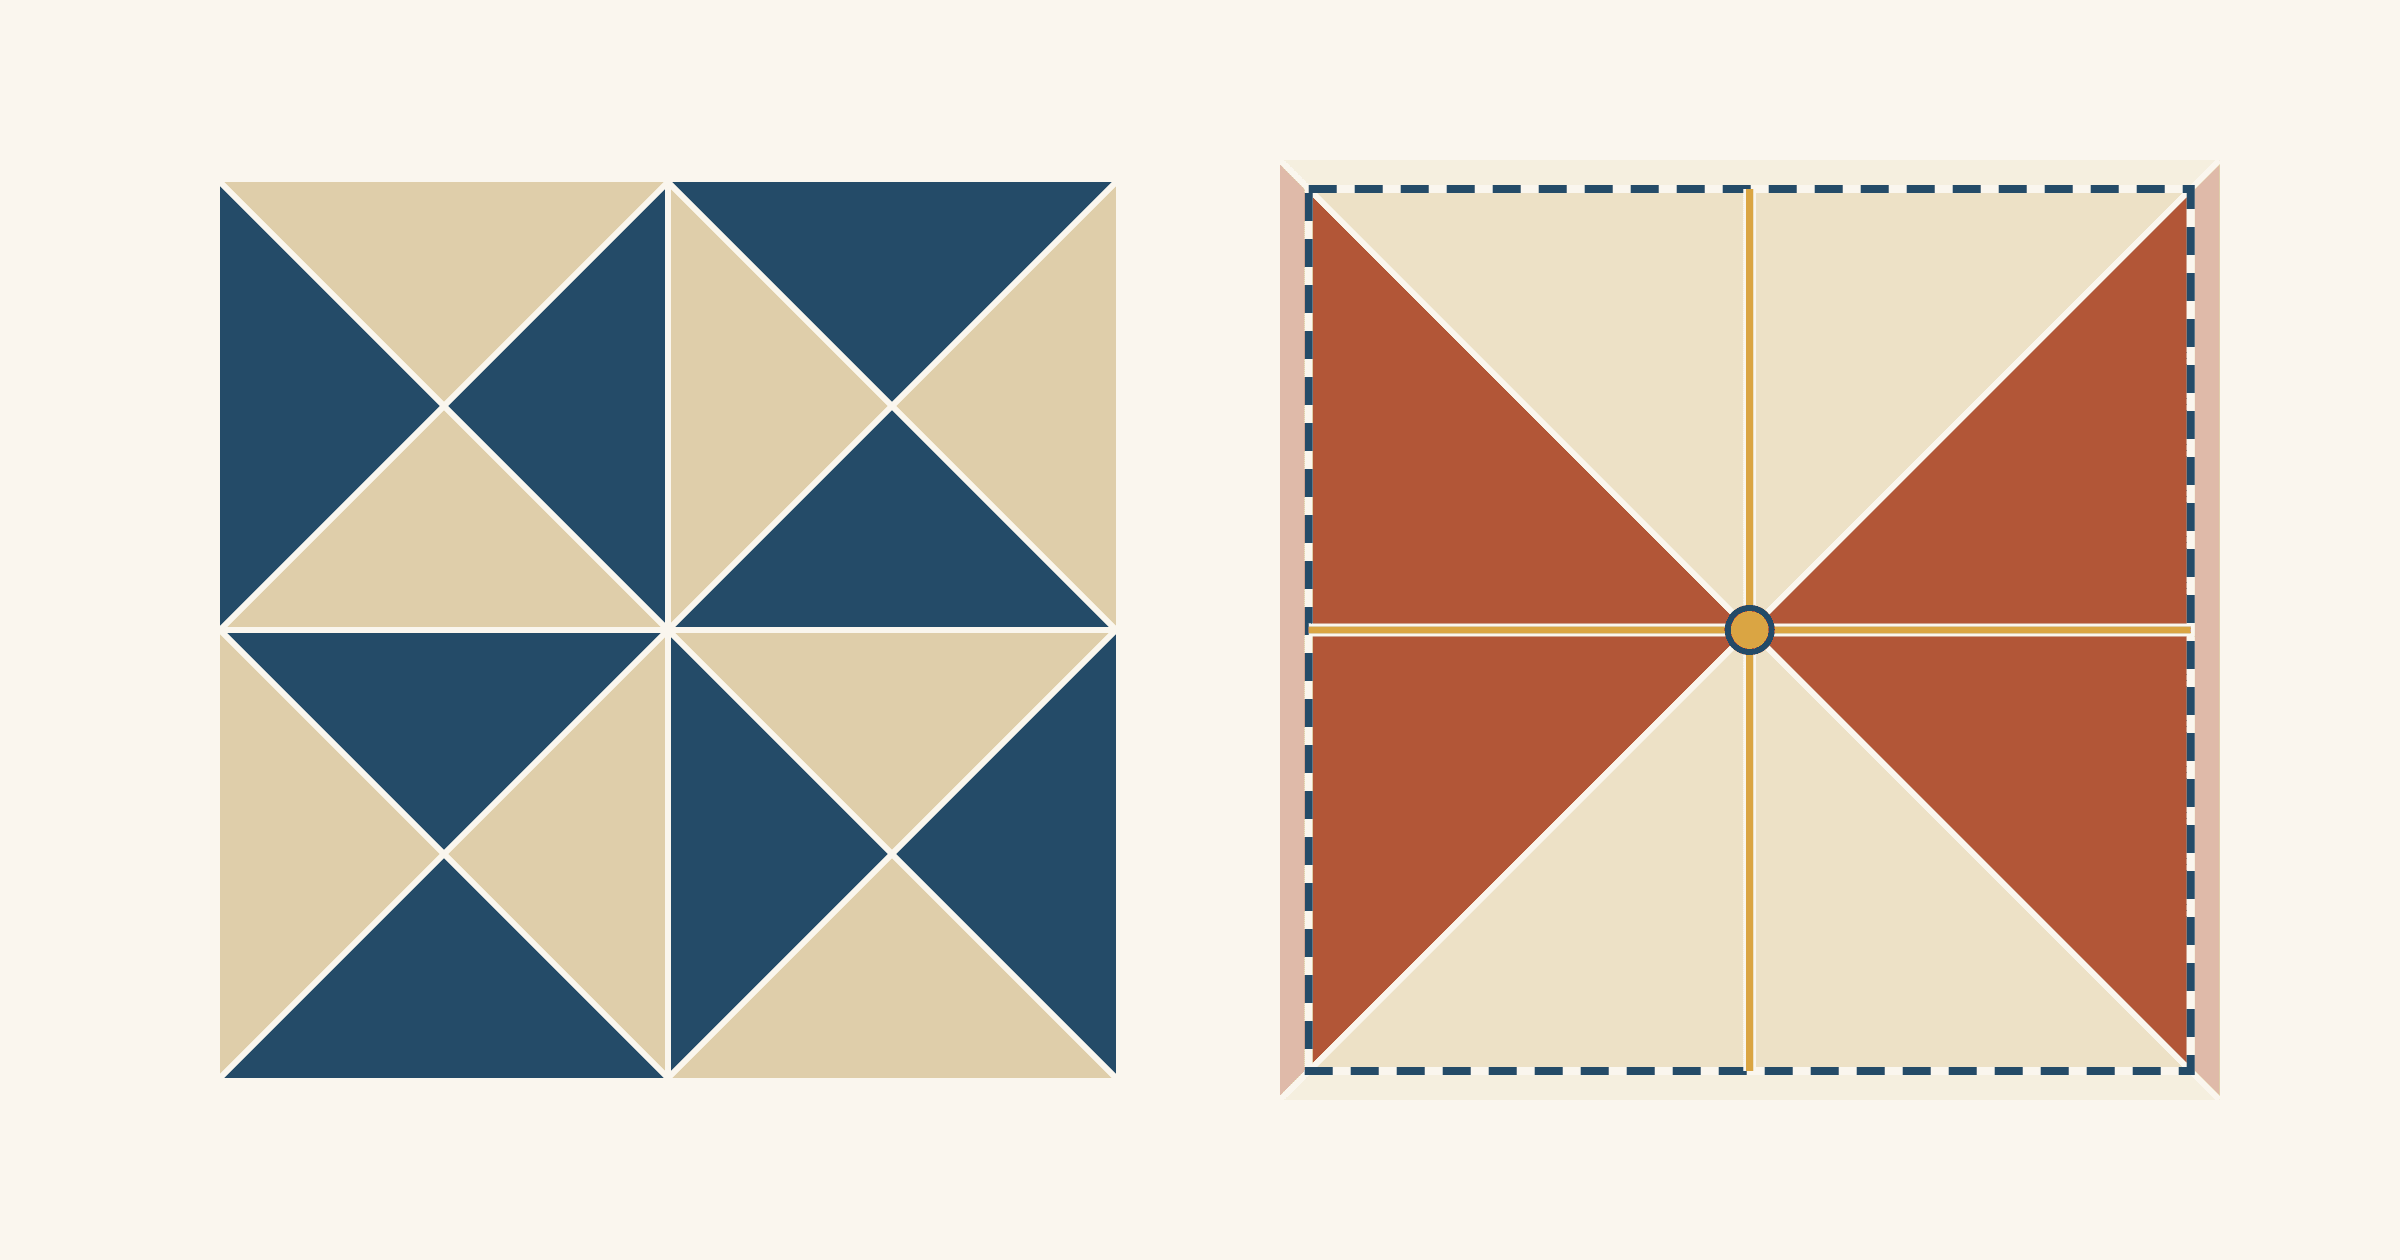
Cut two squares 1 1/4 inches larger than the finished hourglass, or 1 1/2 inches larger so you can trim. A size chart, a centered trim and a 4-inch example.
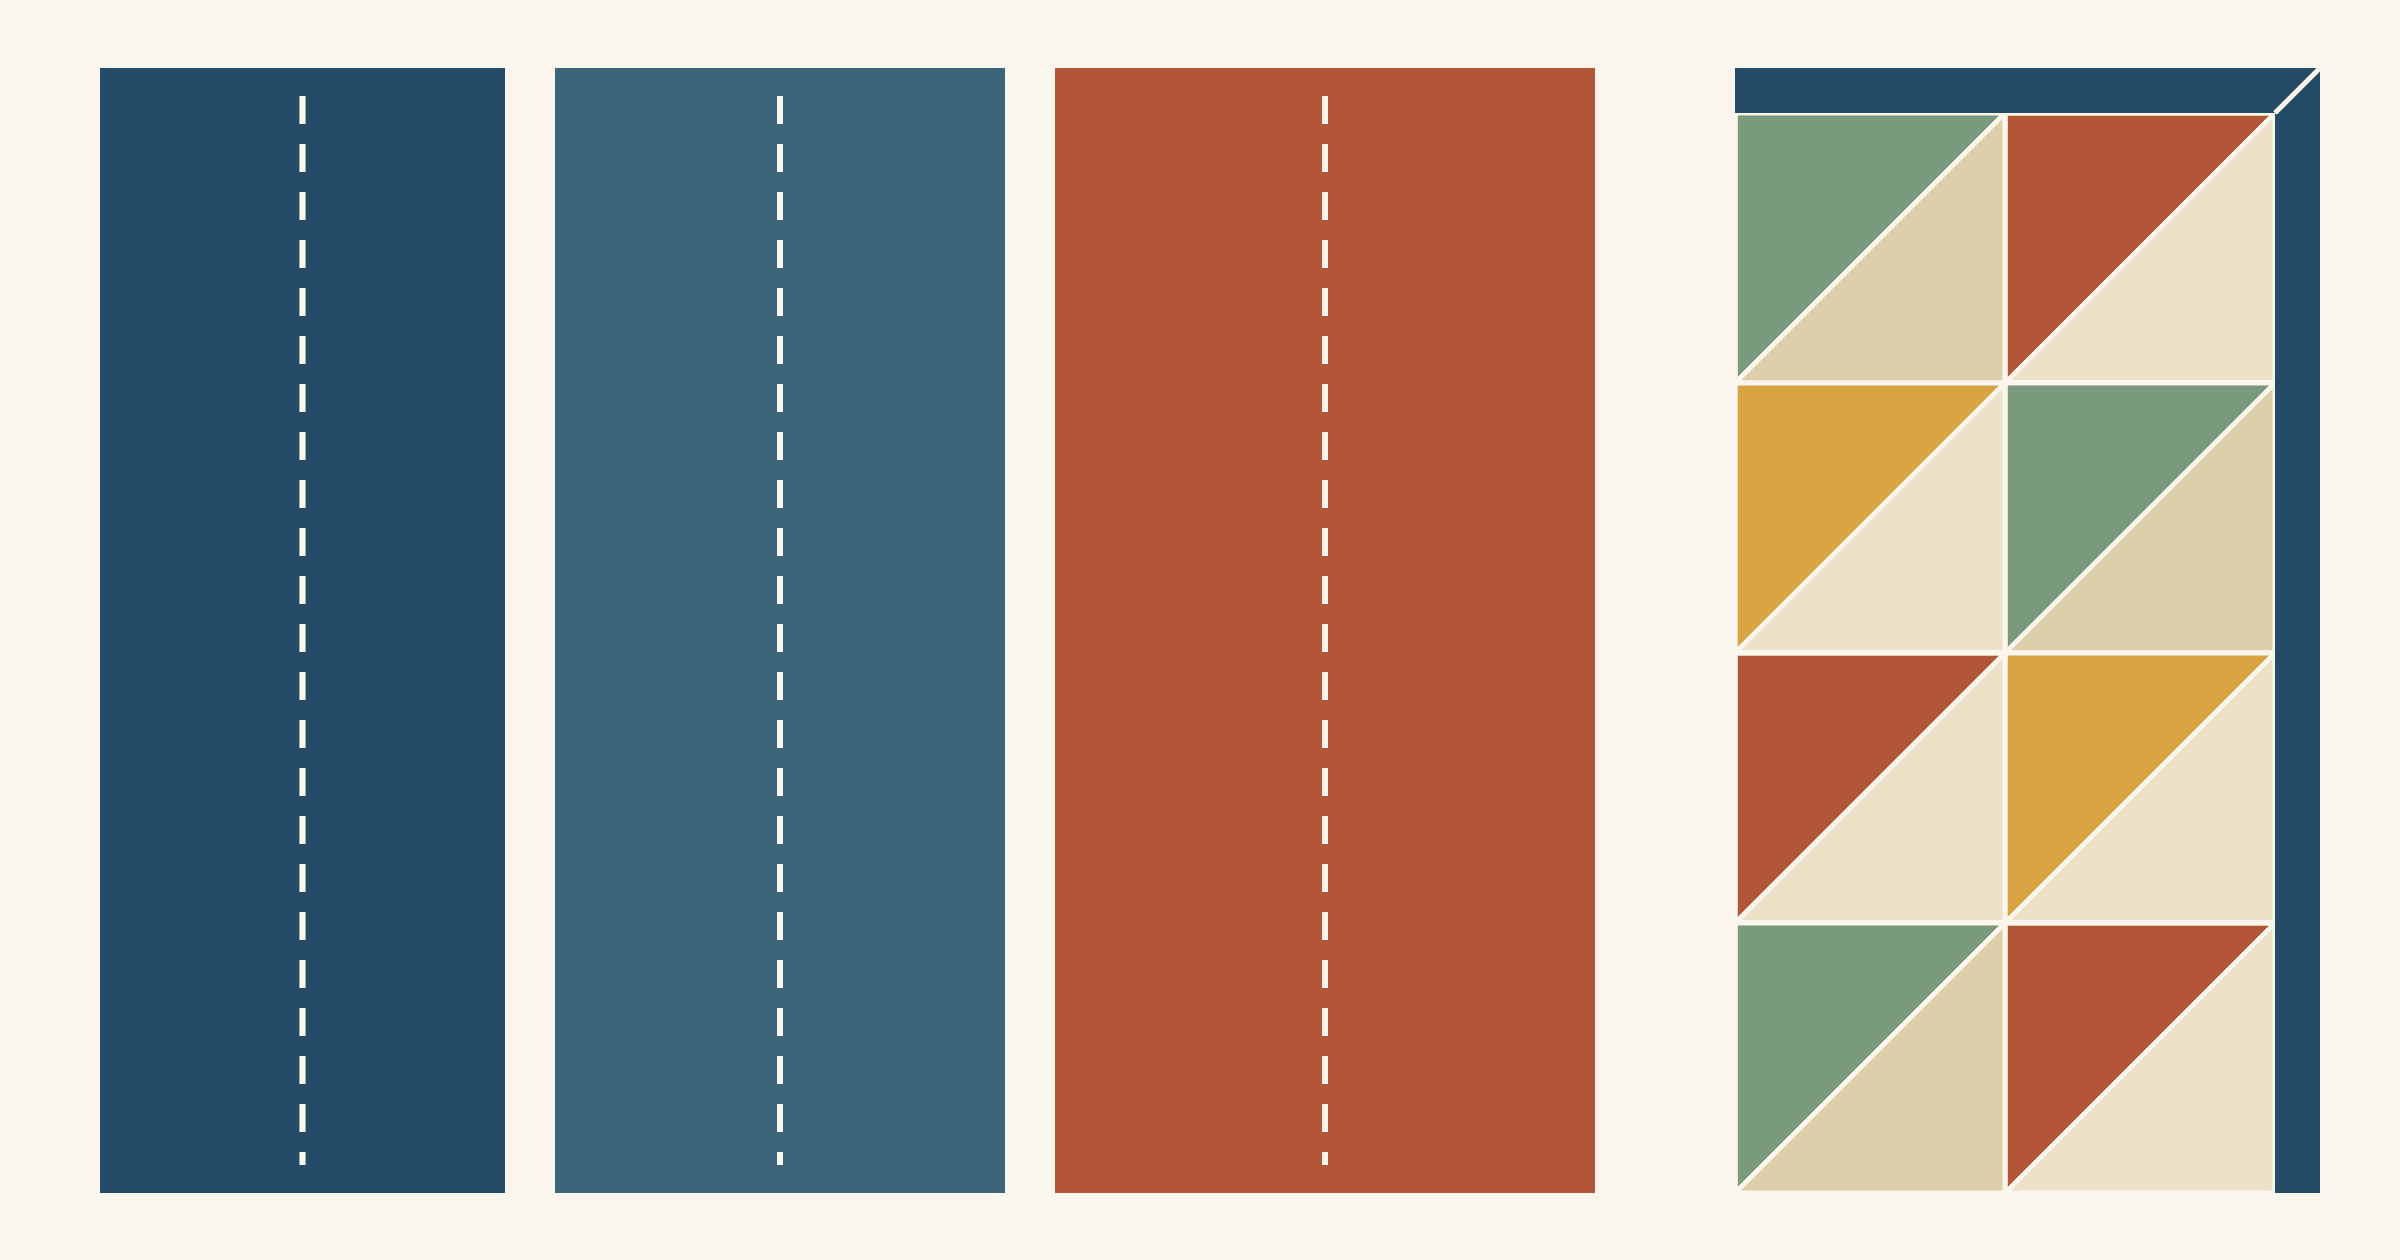
Most quilters cut binding strips 2 1/4 or 2 1/2 inches wide. See how batting loft, seam allowance and the width you want to show change that number.
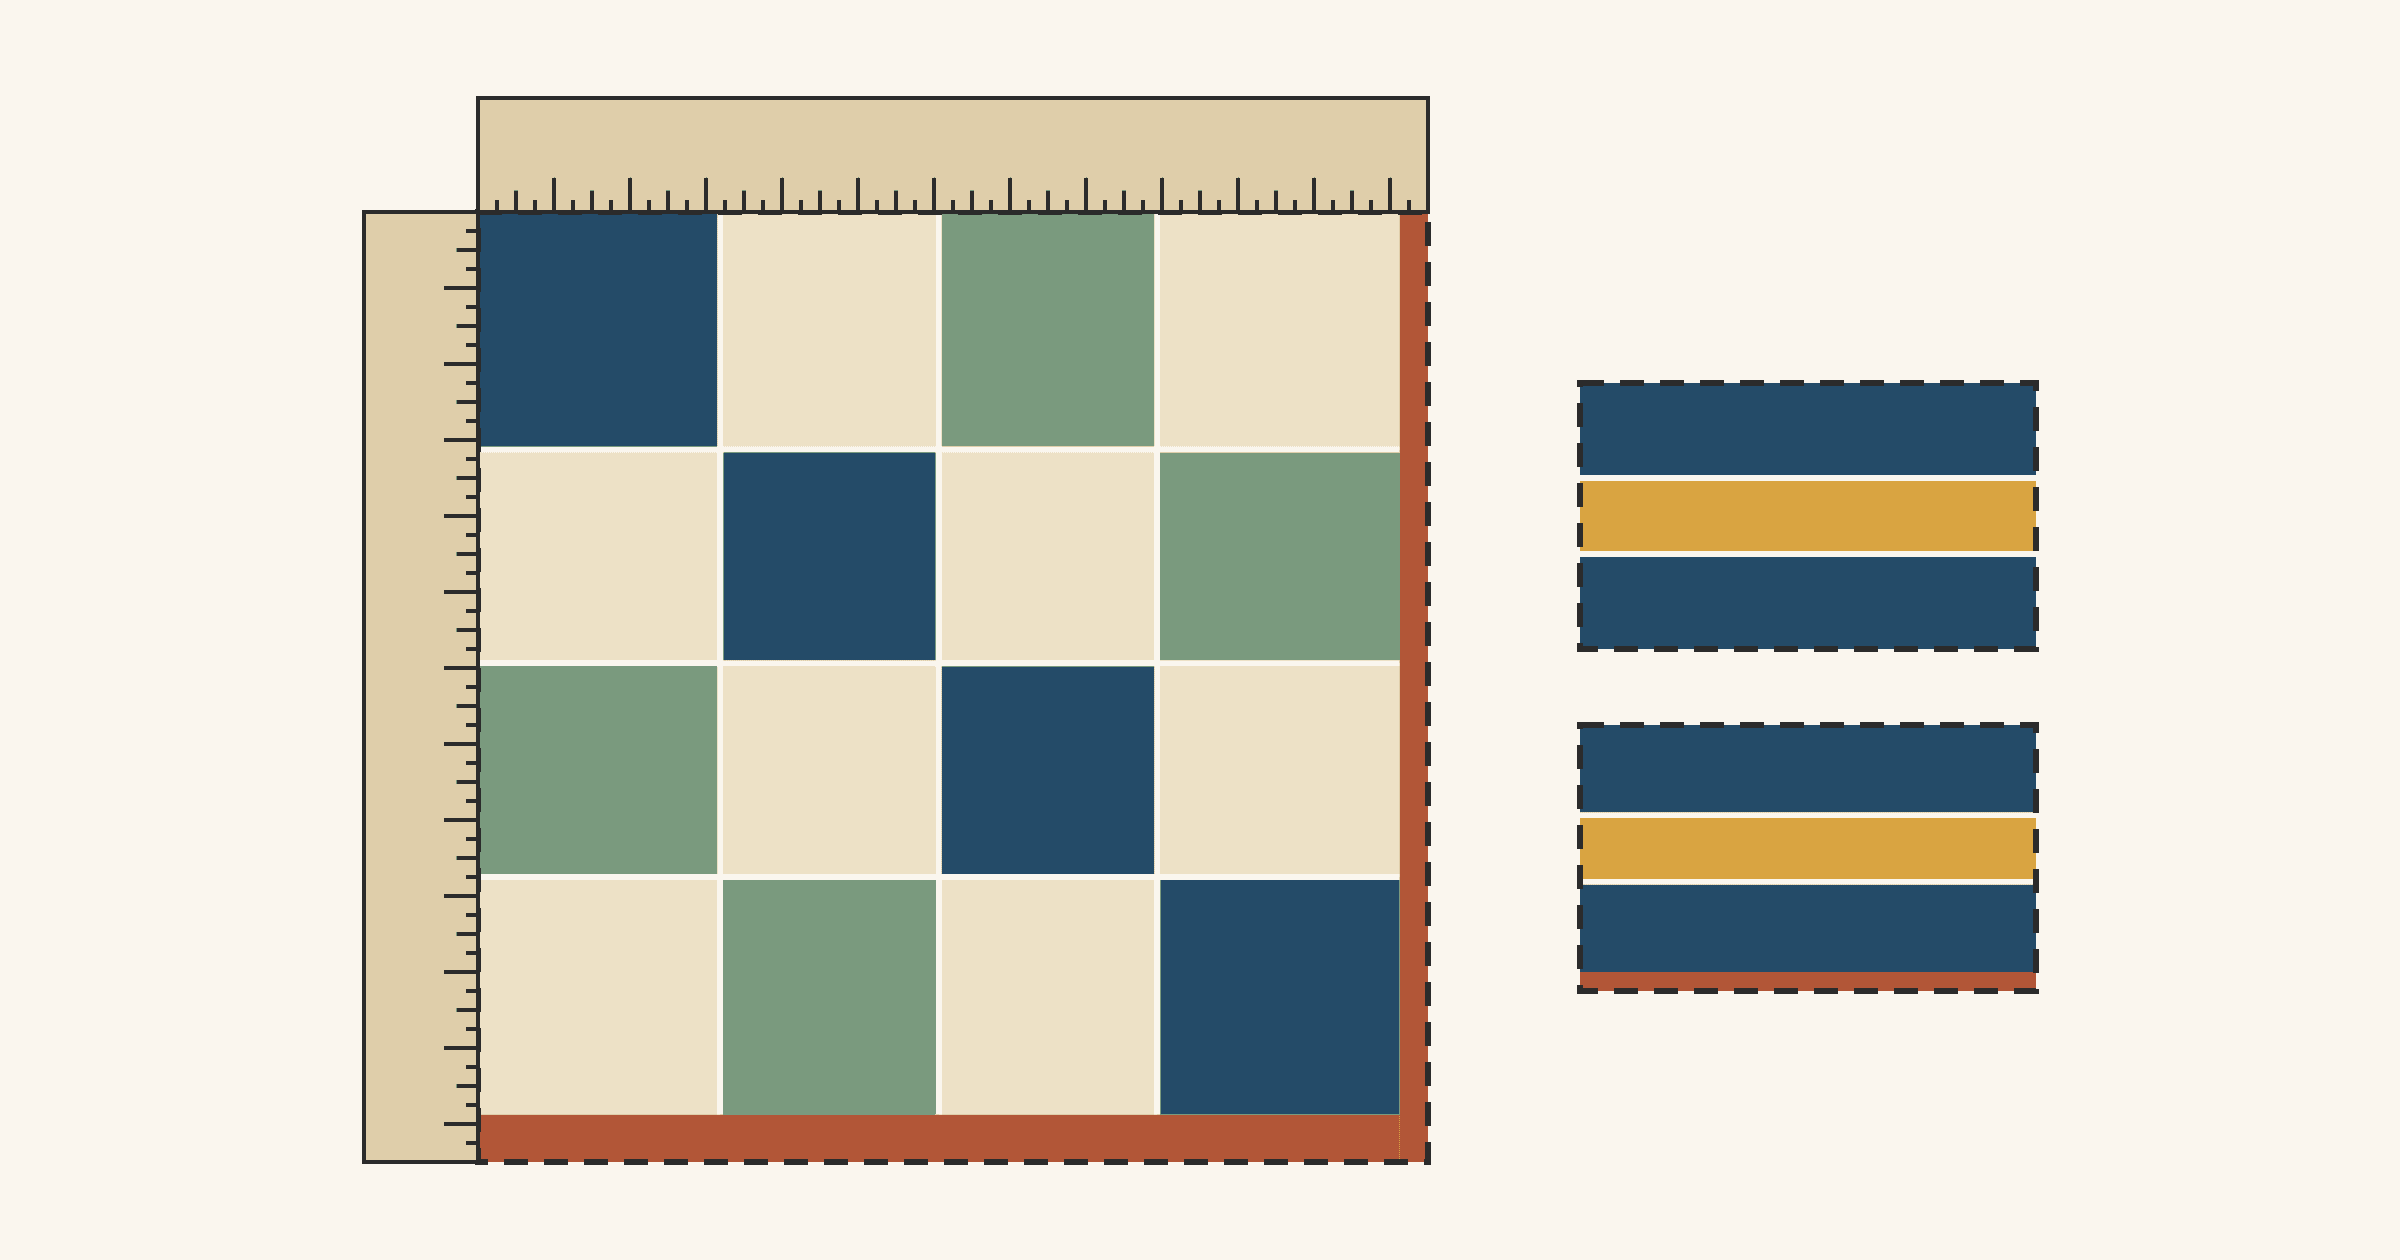
A seam a thread too wide is the usual culprit. Measure backward through units, cut pieces and seams, as in this 12 in. Sixteen Patch example.
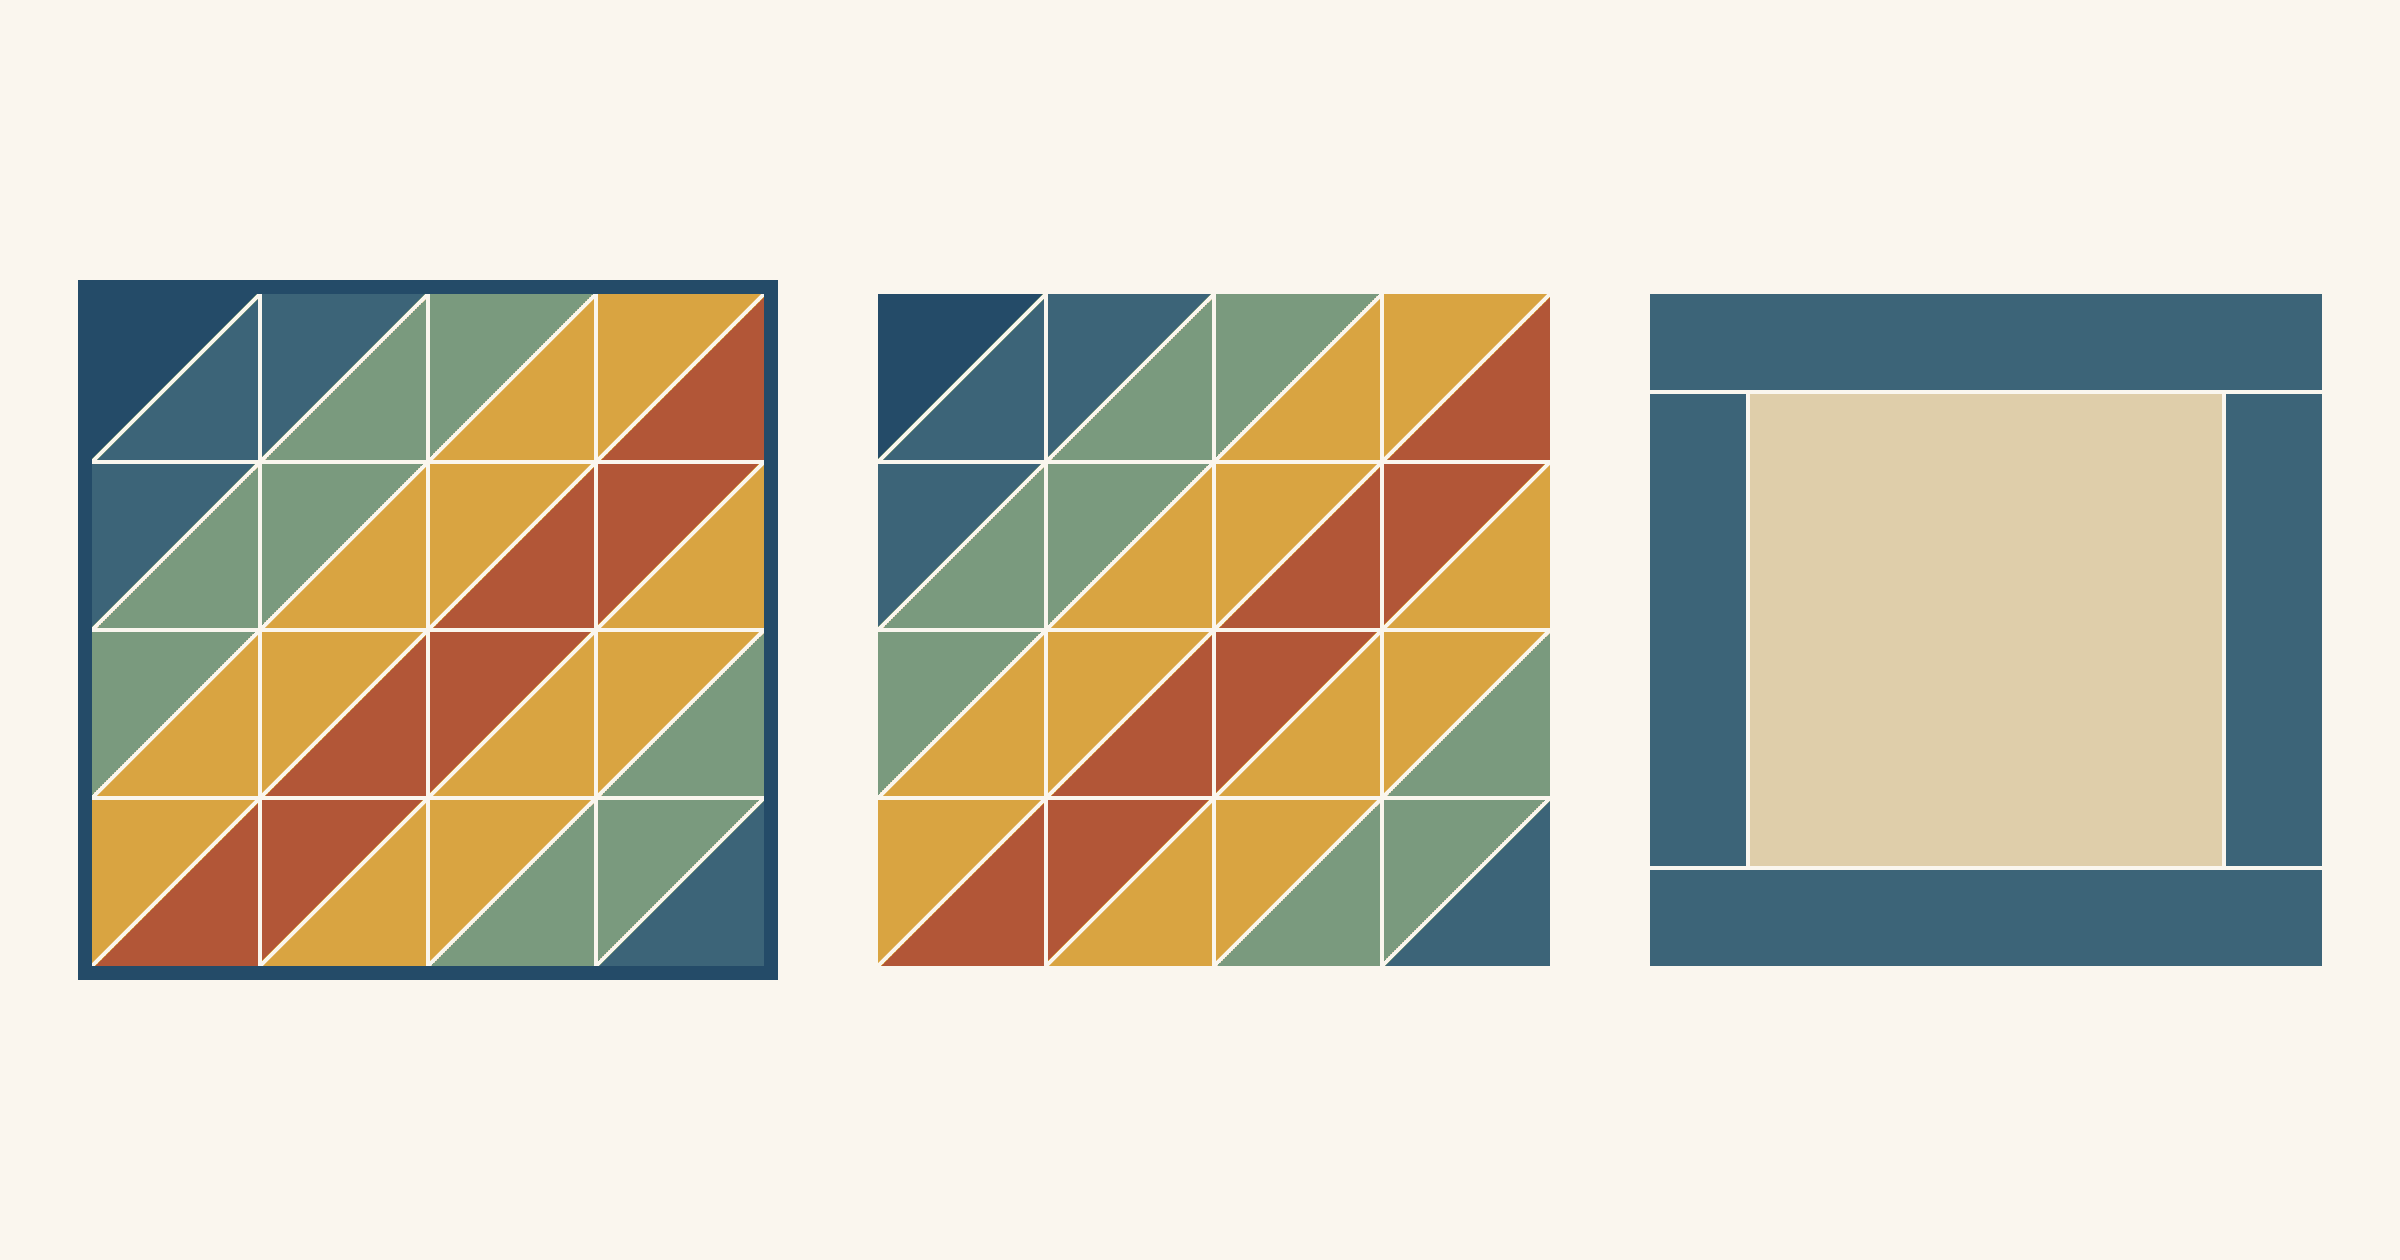
Face a quilt when the design runs off the edge; bind it when a frame helps. See one 12-inch mini both ways, the 1/2-inch size change and the facing cuts.
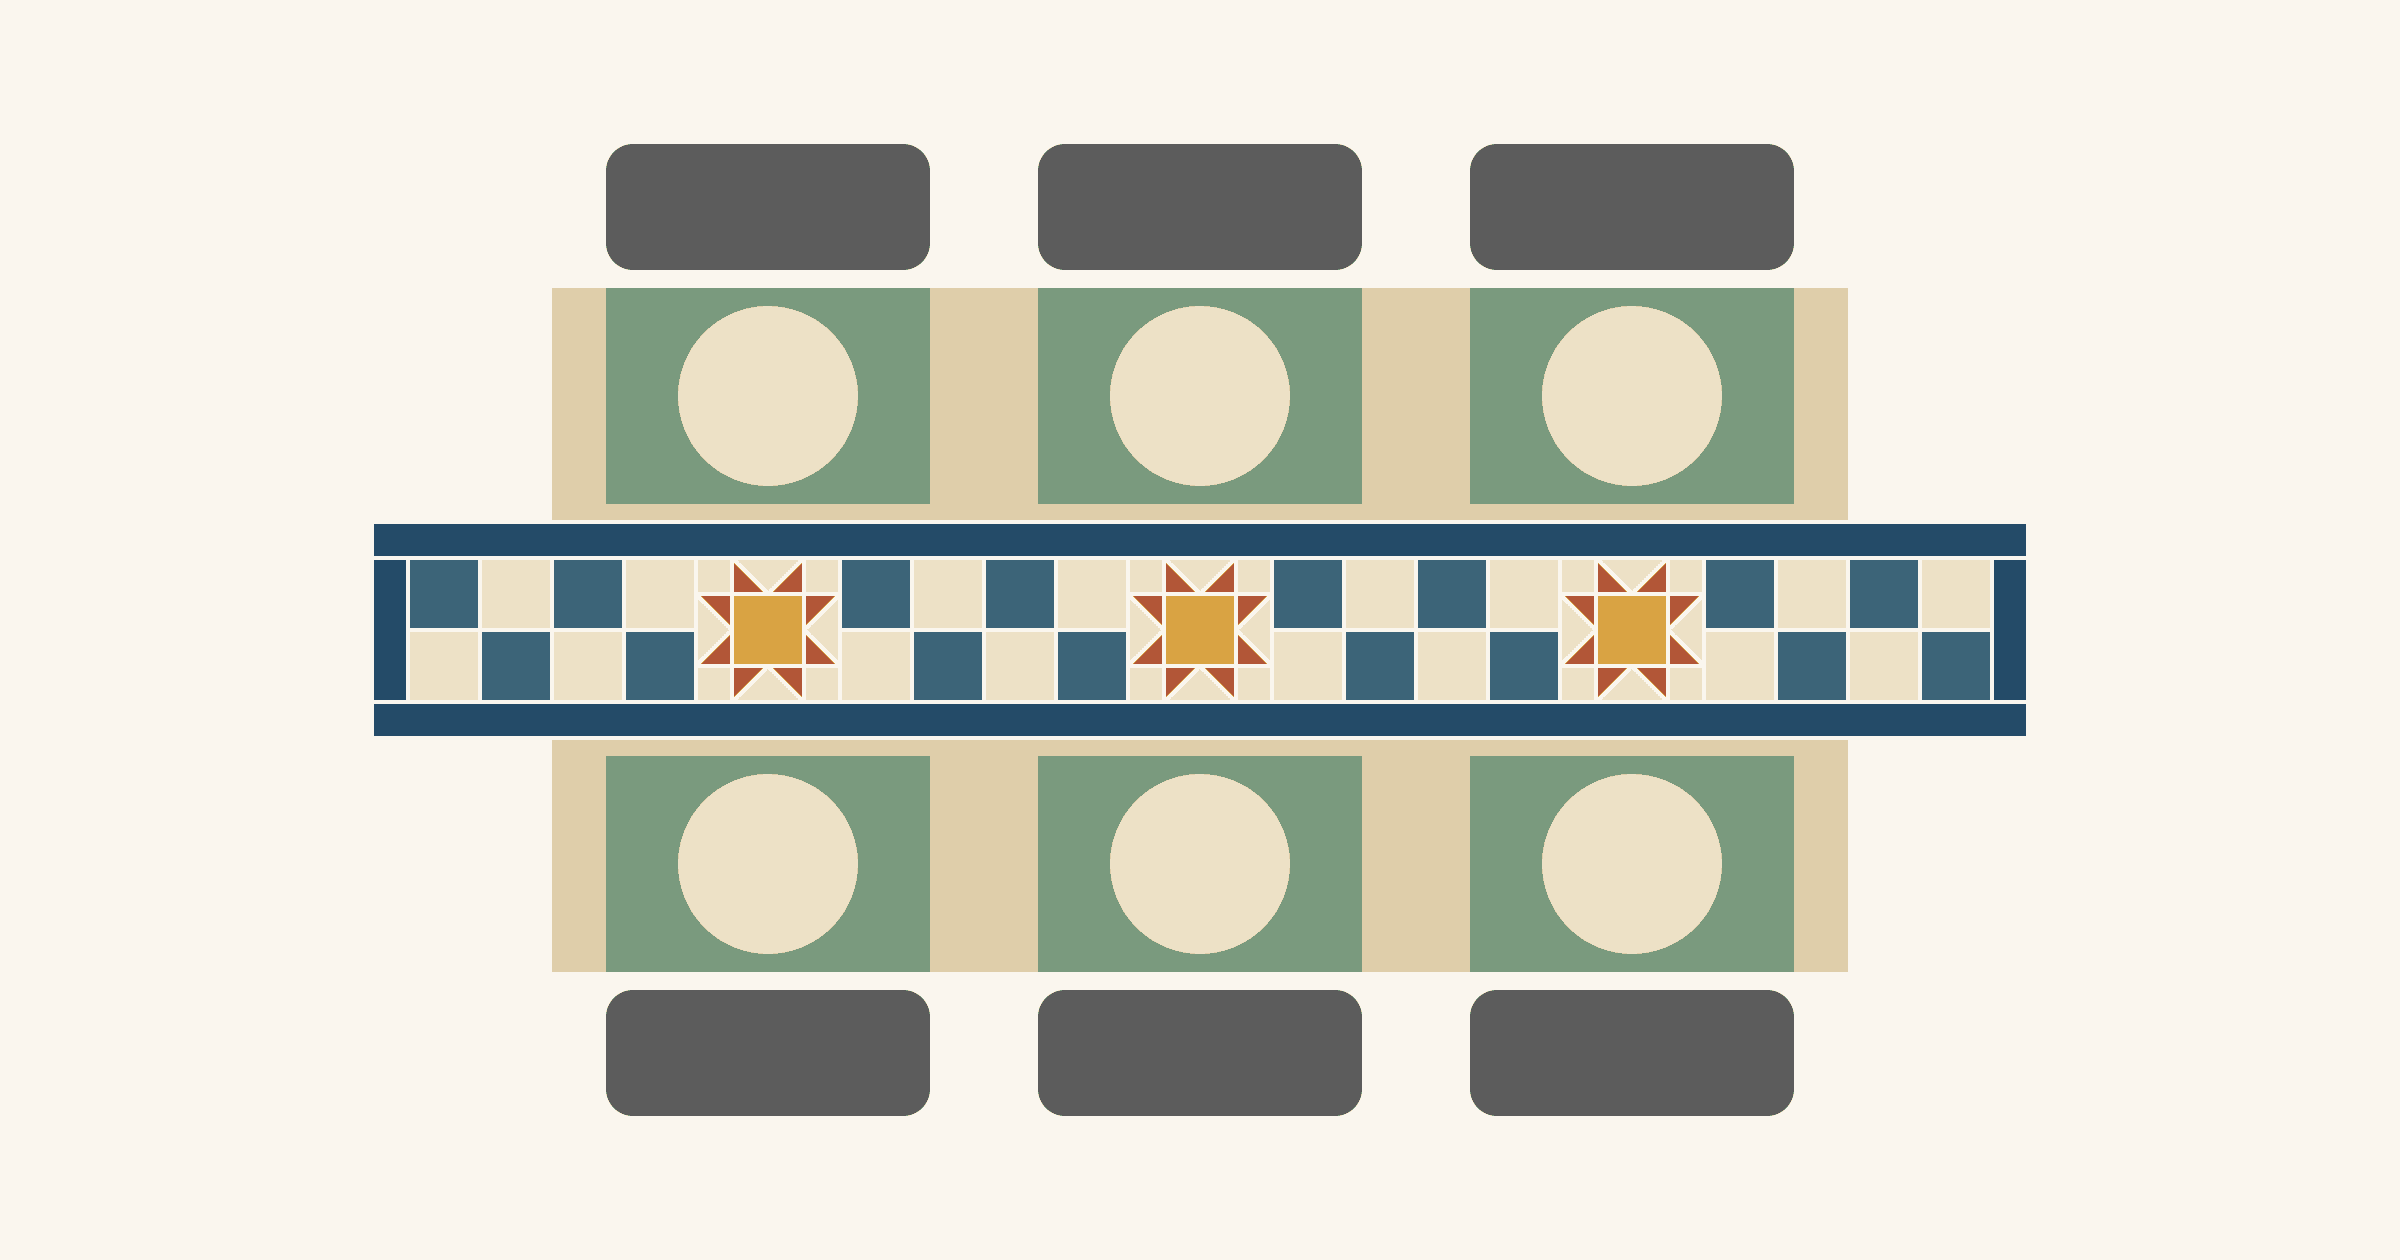
Most runners are 12 to 18 in wide and hang 6 to 12 in past each end. Fit yours between the placemats and line its blocks up with the chairs.
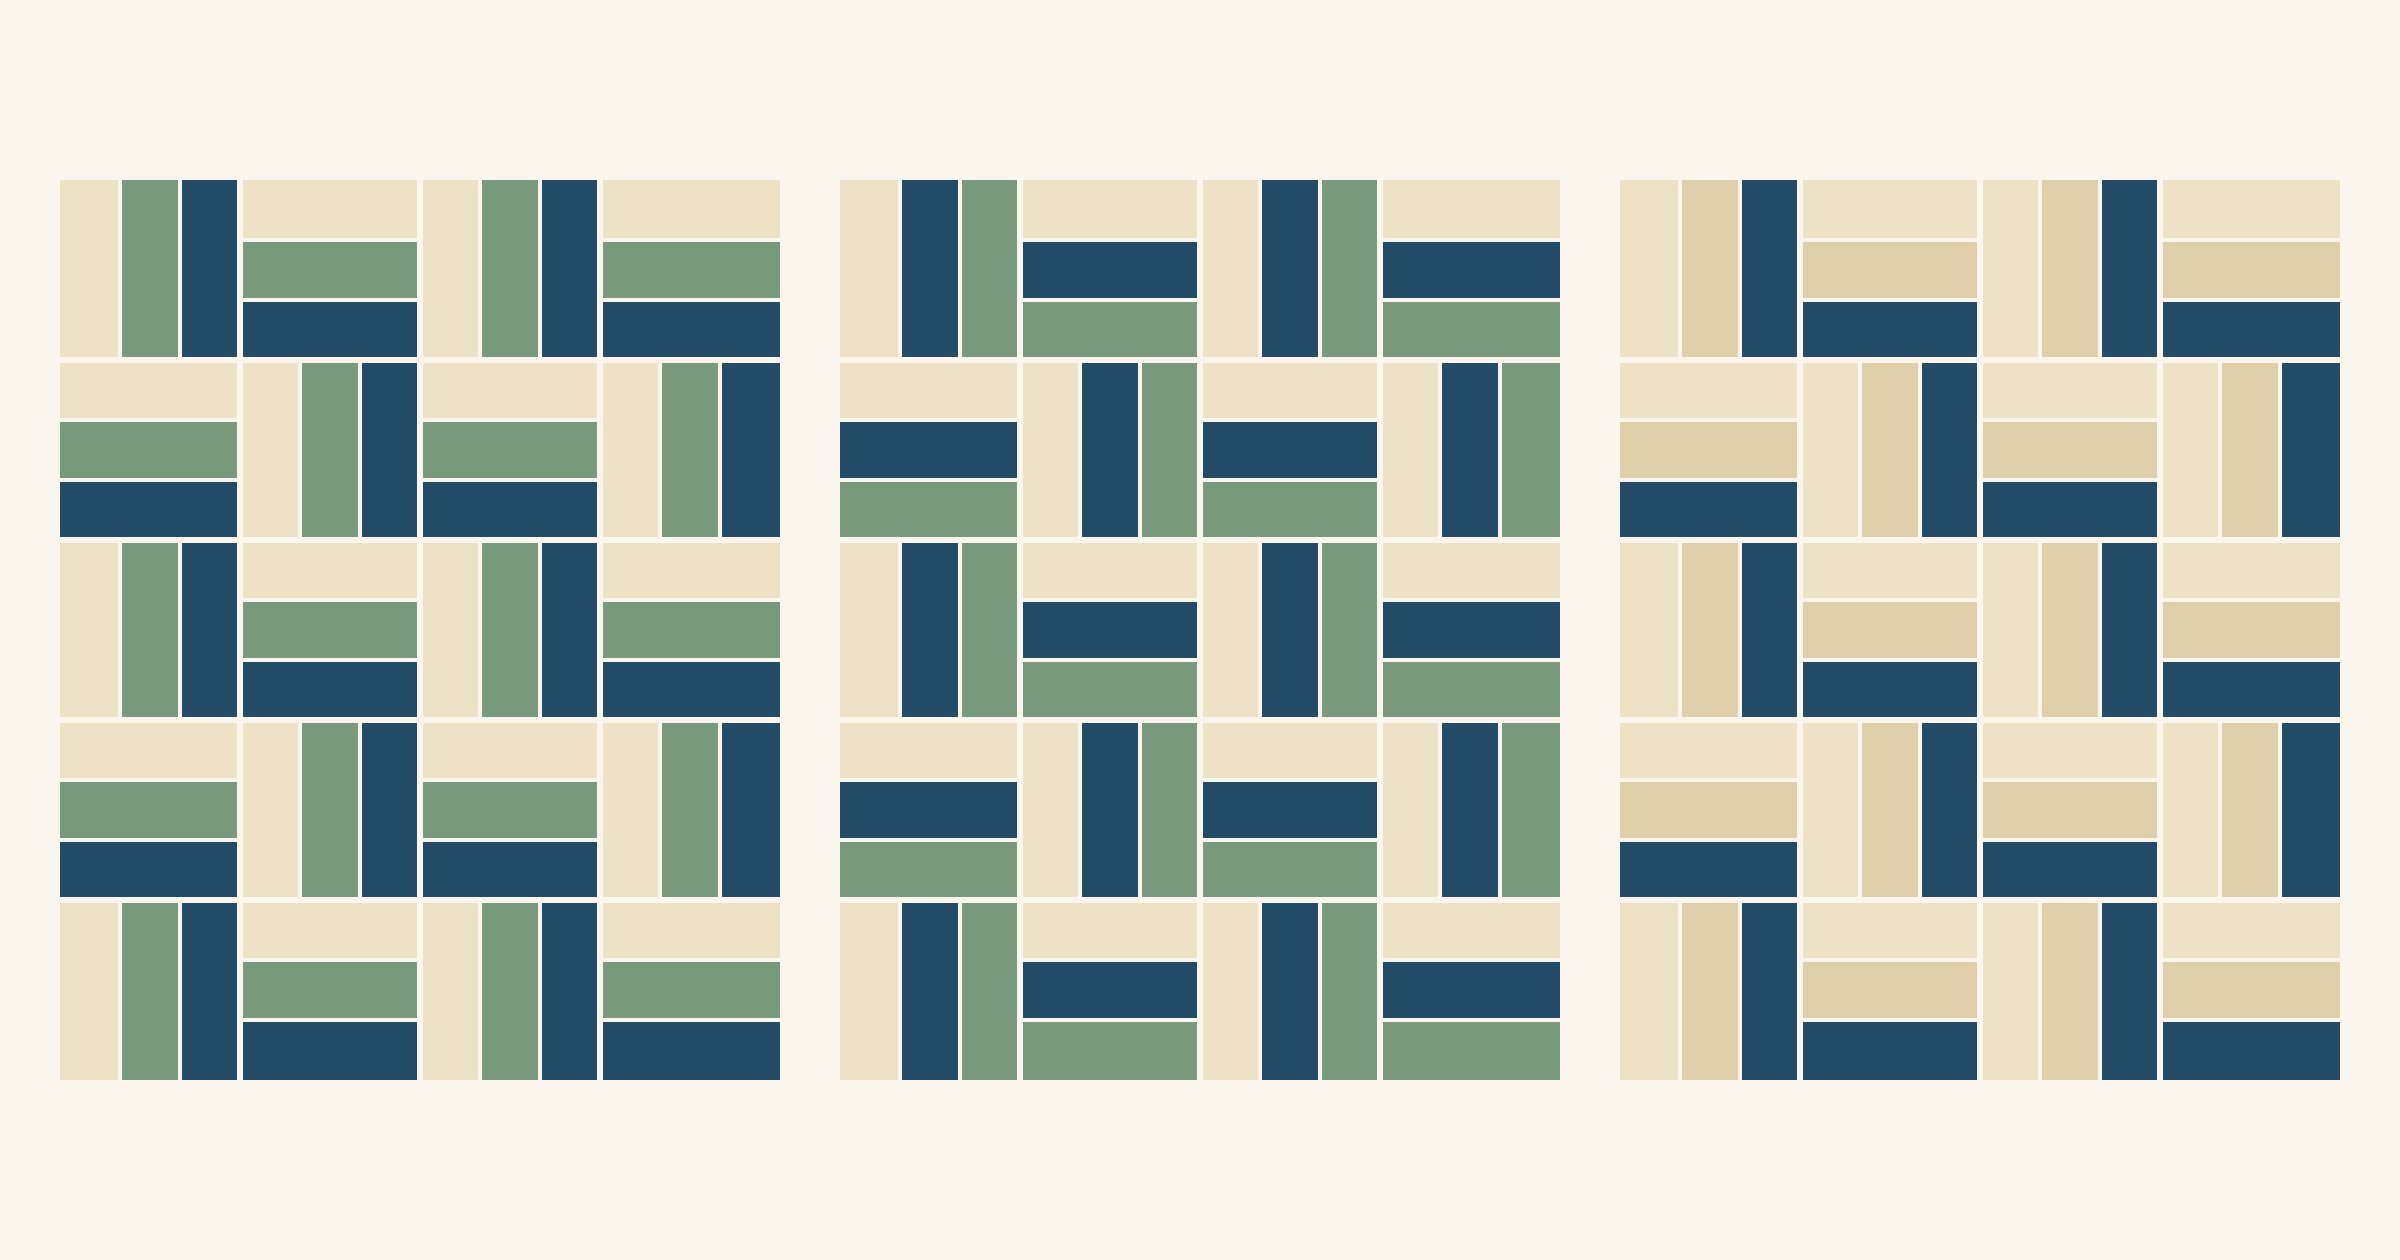
Put your lightest and darkest fabrics on the outside strips and a medium in the center. Three 24-inch studies show why the outside strips draw the zigzag.
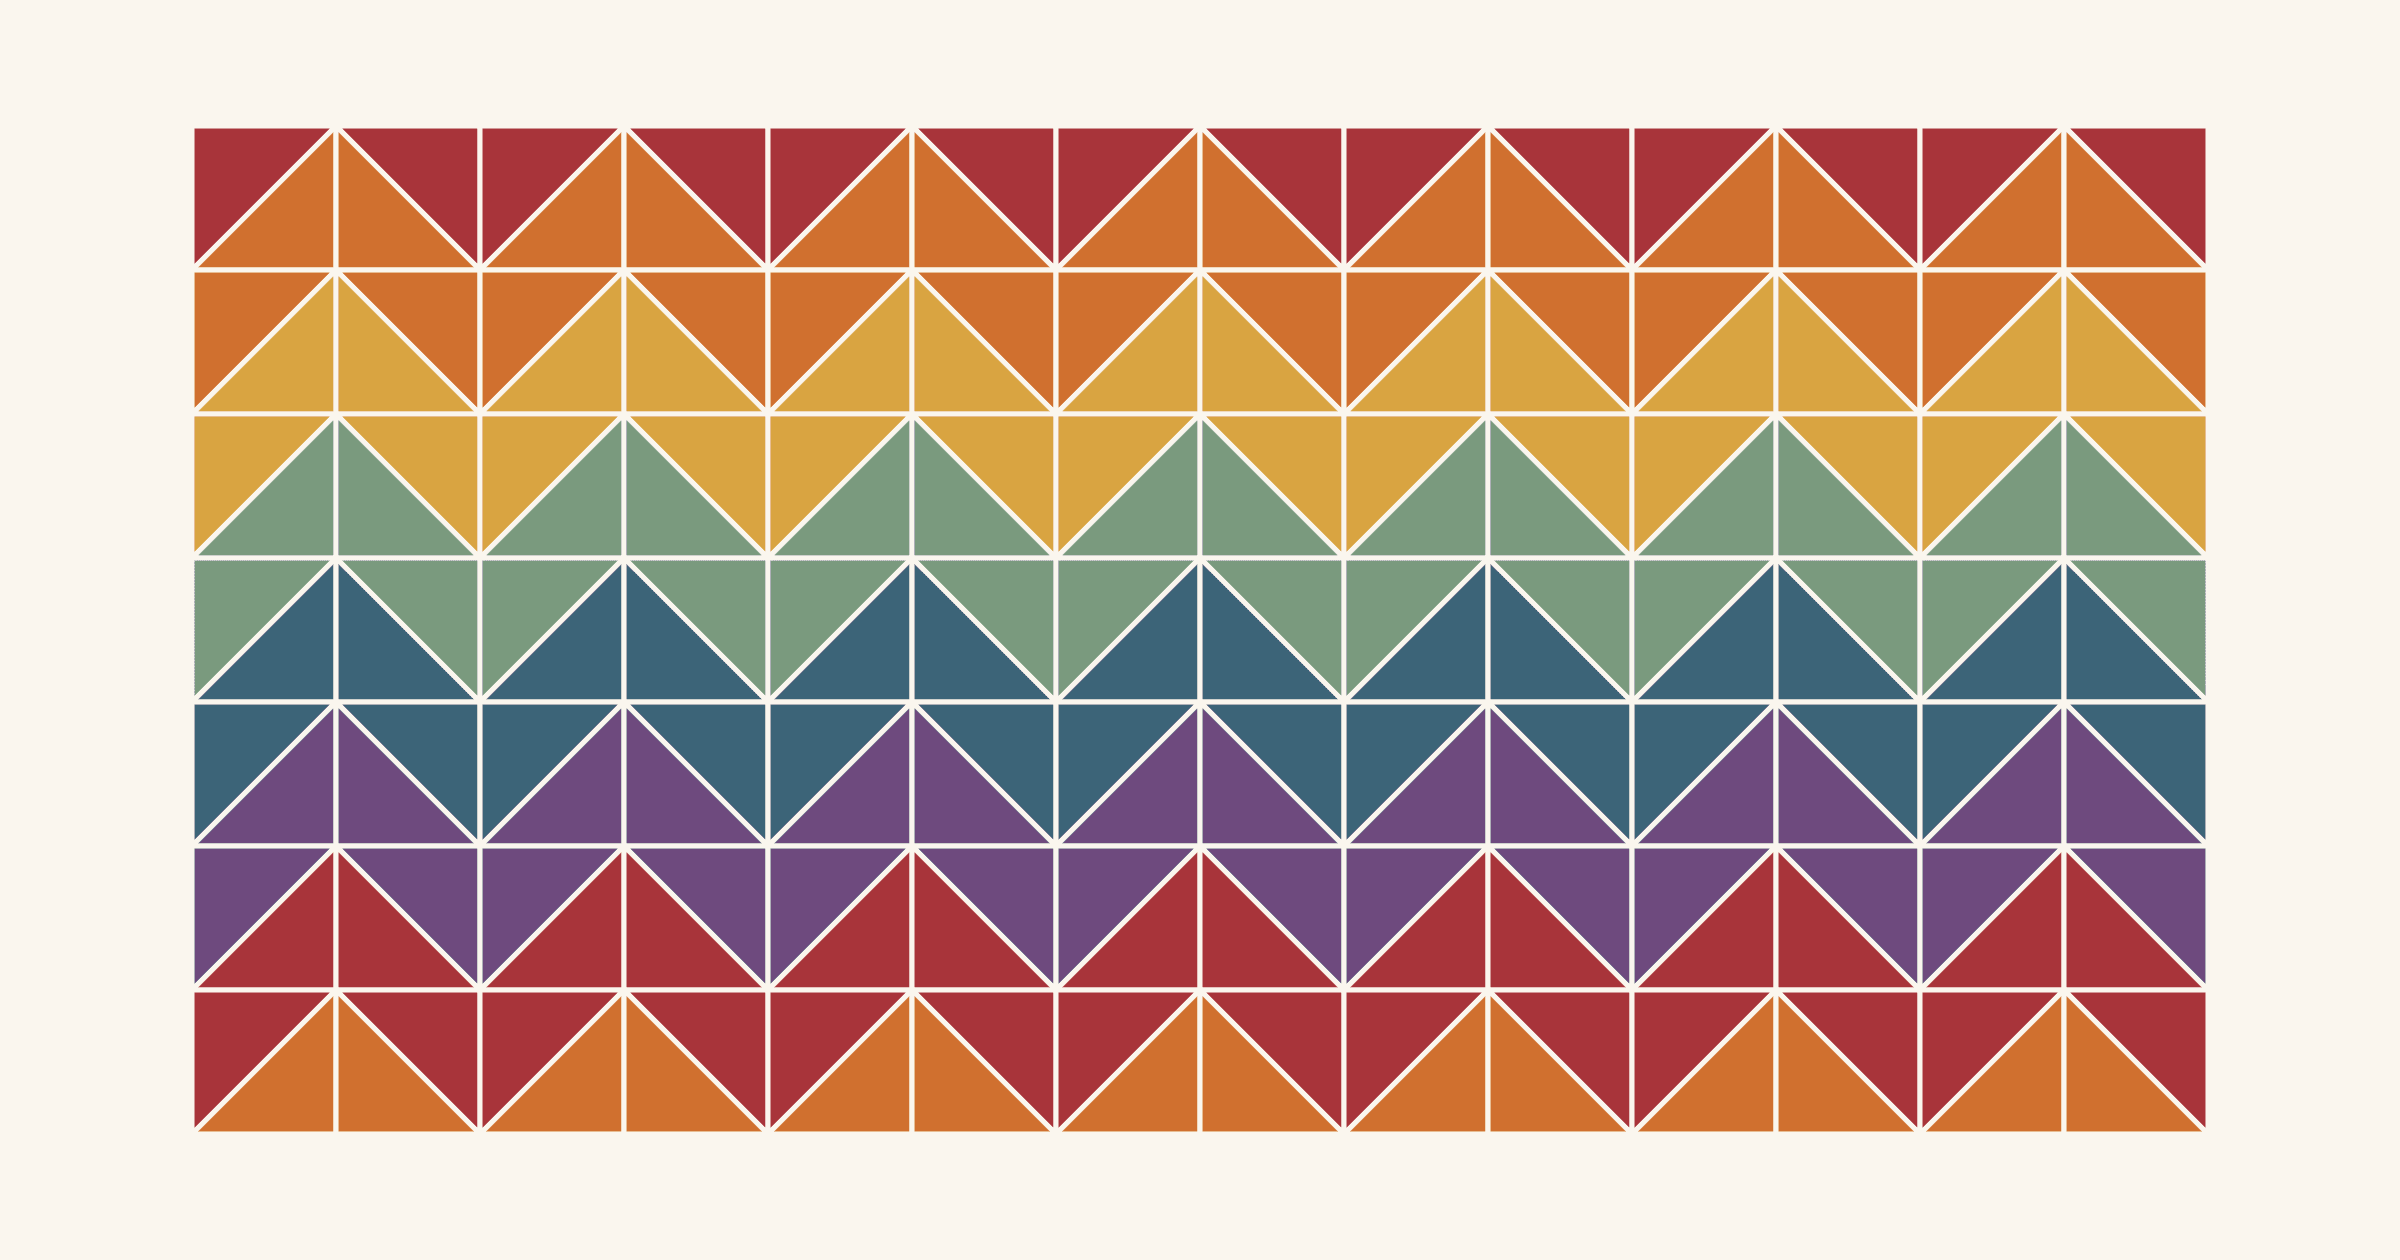
The usual rainbow order, where pinks and neutrals fit, and a 60 × 72 inch zigzag map with the turning key that keeps every hue in sequence.

Raw edge cuts on the line; turned edge folds 1/8 to 3/16 inch under. See how each handles a 4-inch heart, 1/2-inch berries and a quilt that gets washed.
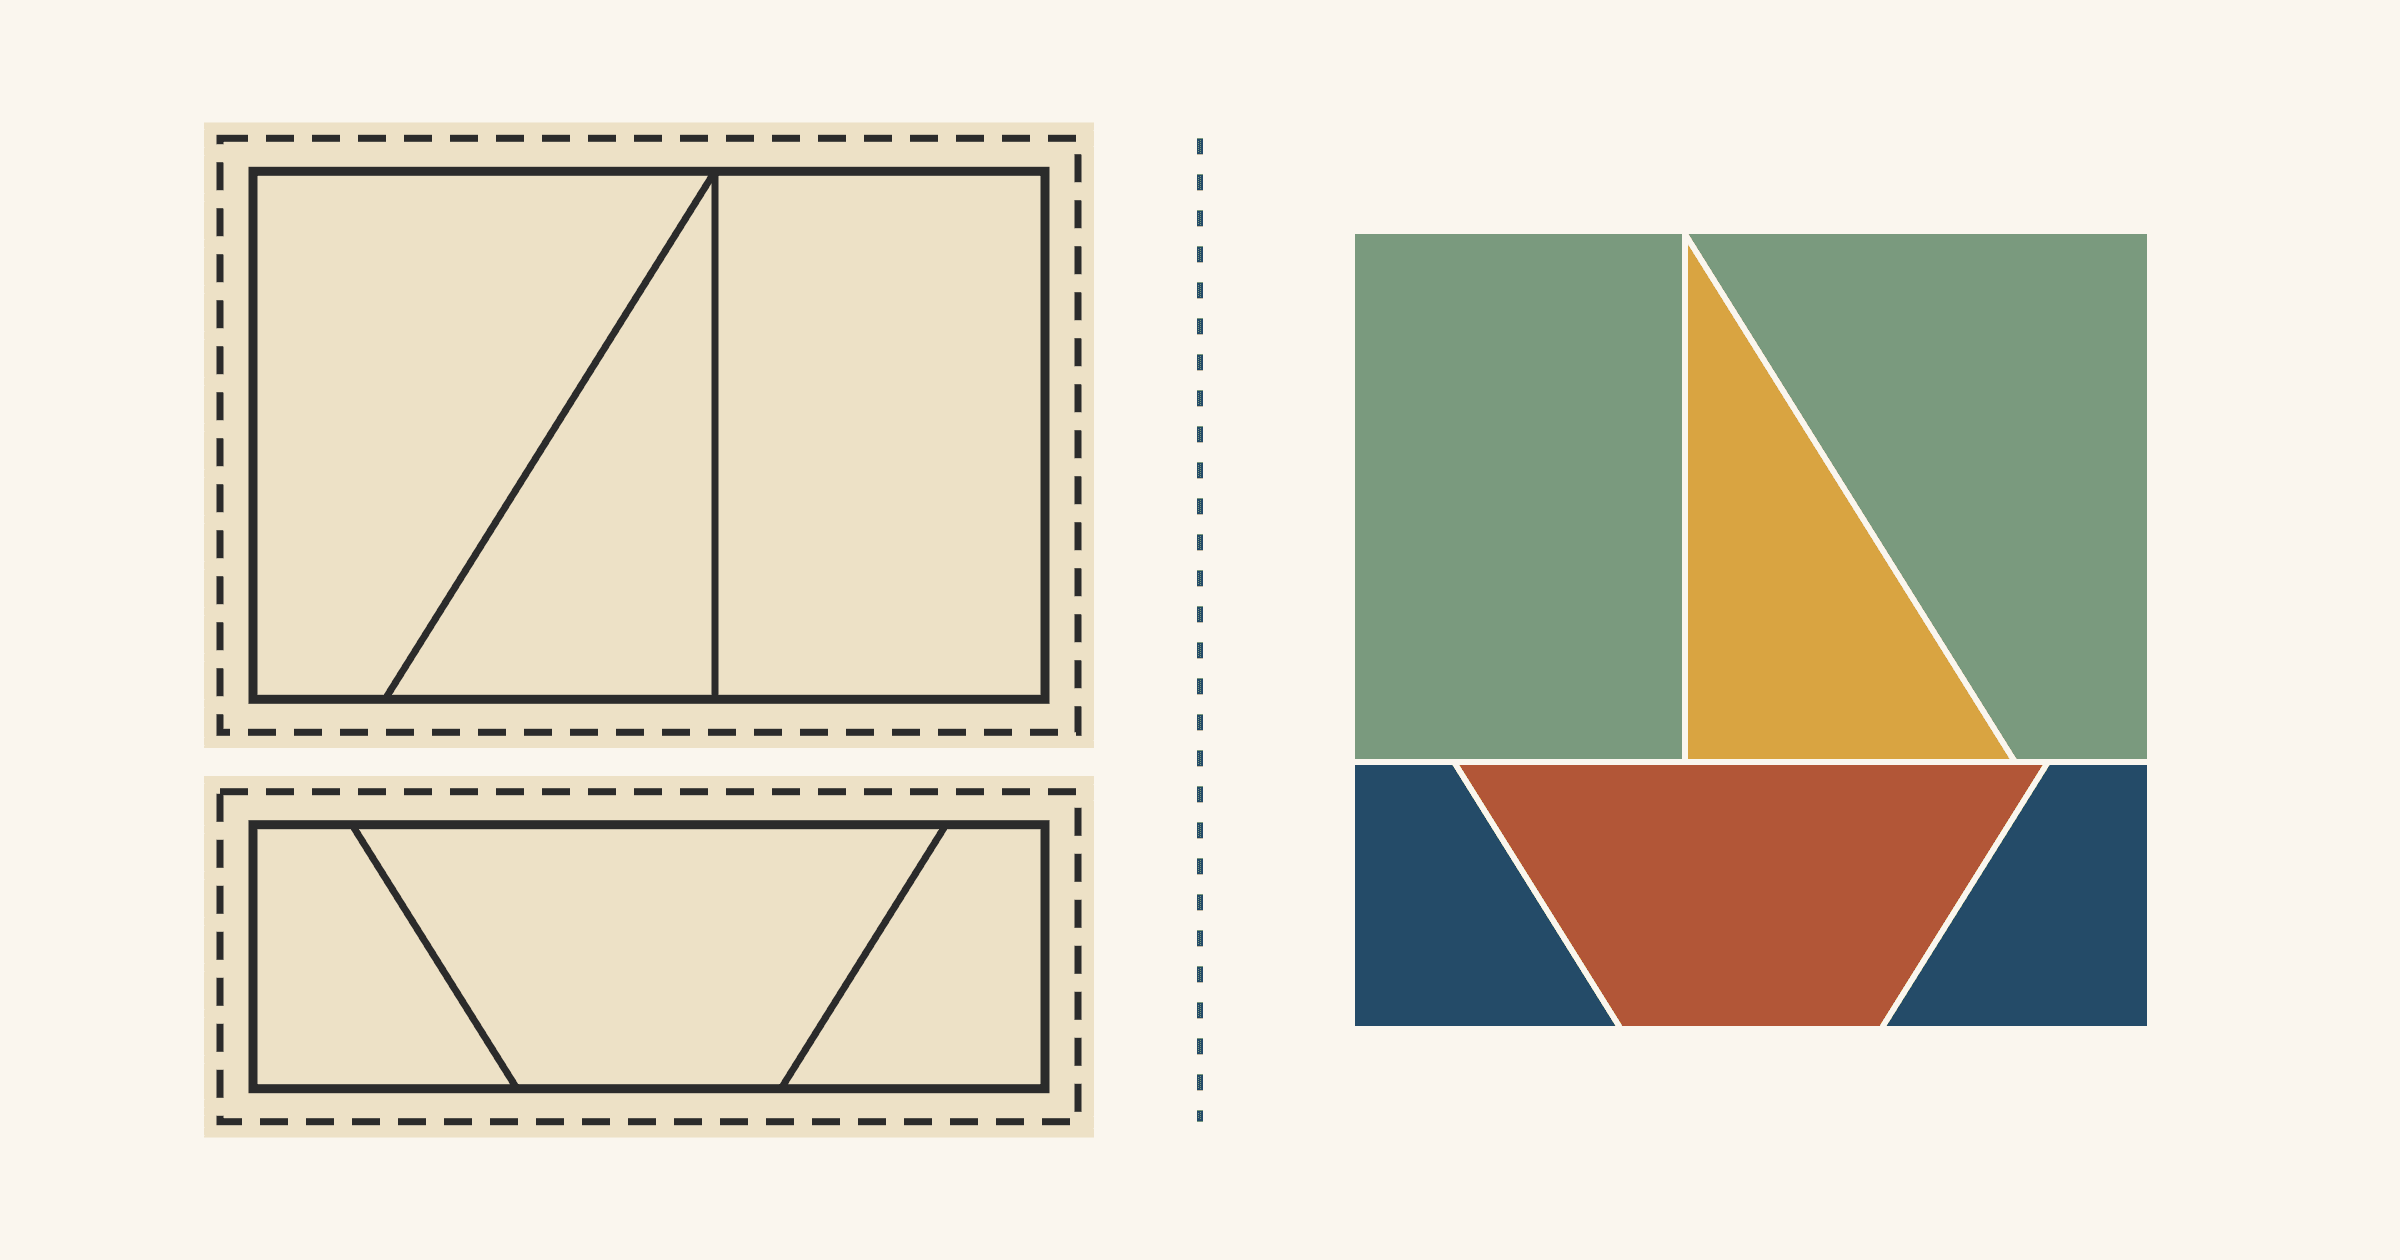
Numbers set the sewing order, the lines inside a section are where you stitch, and the outer pair of lines marks the finished edge and the trim line.
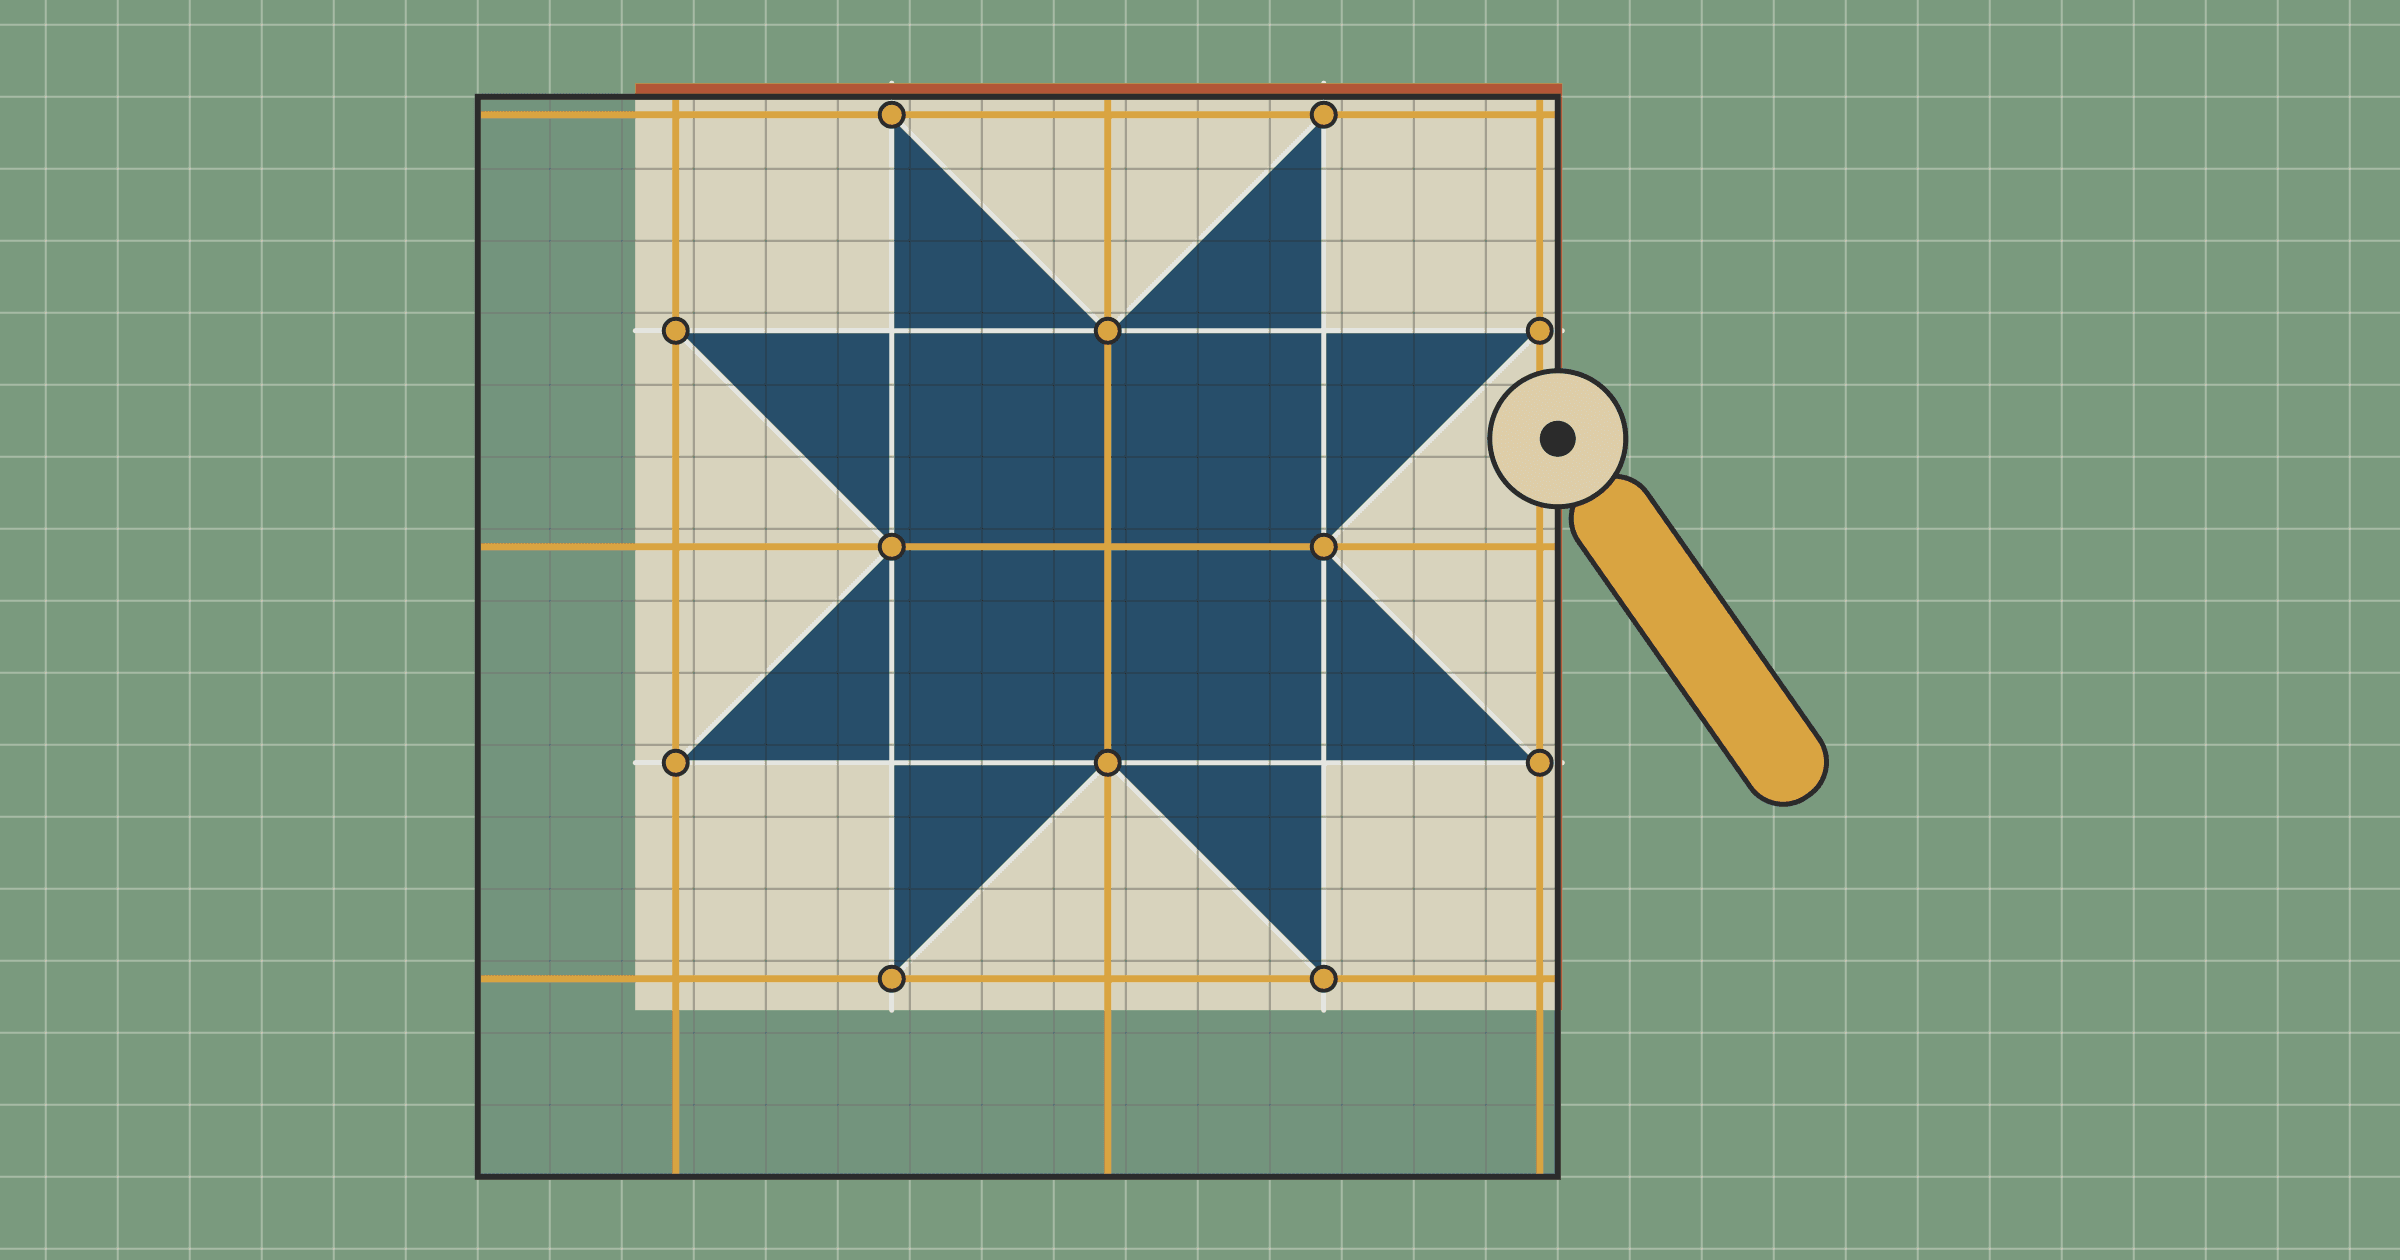
Trim to the finished size plus 1/2 inch, then let the block's own seams and points place the ruler. A 12-inch Sawtooth Star shows each landmark.
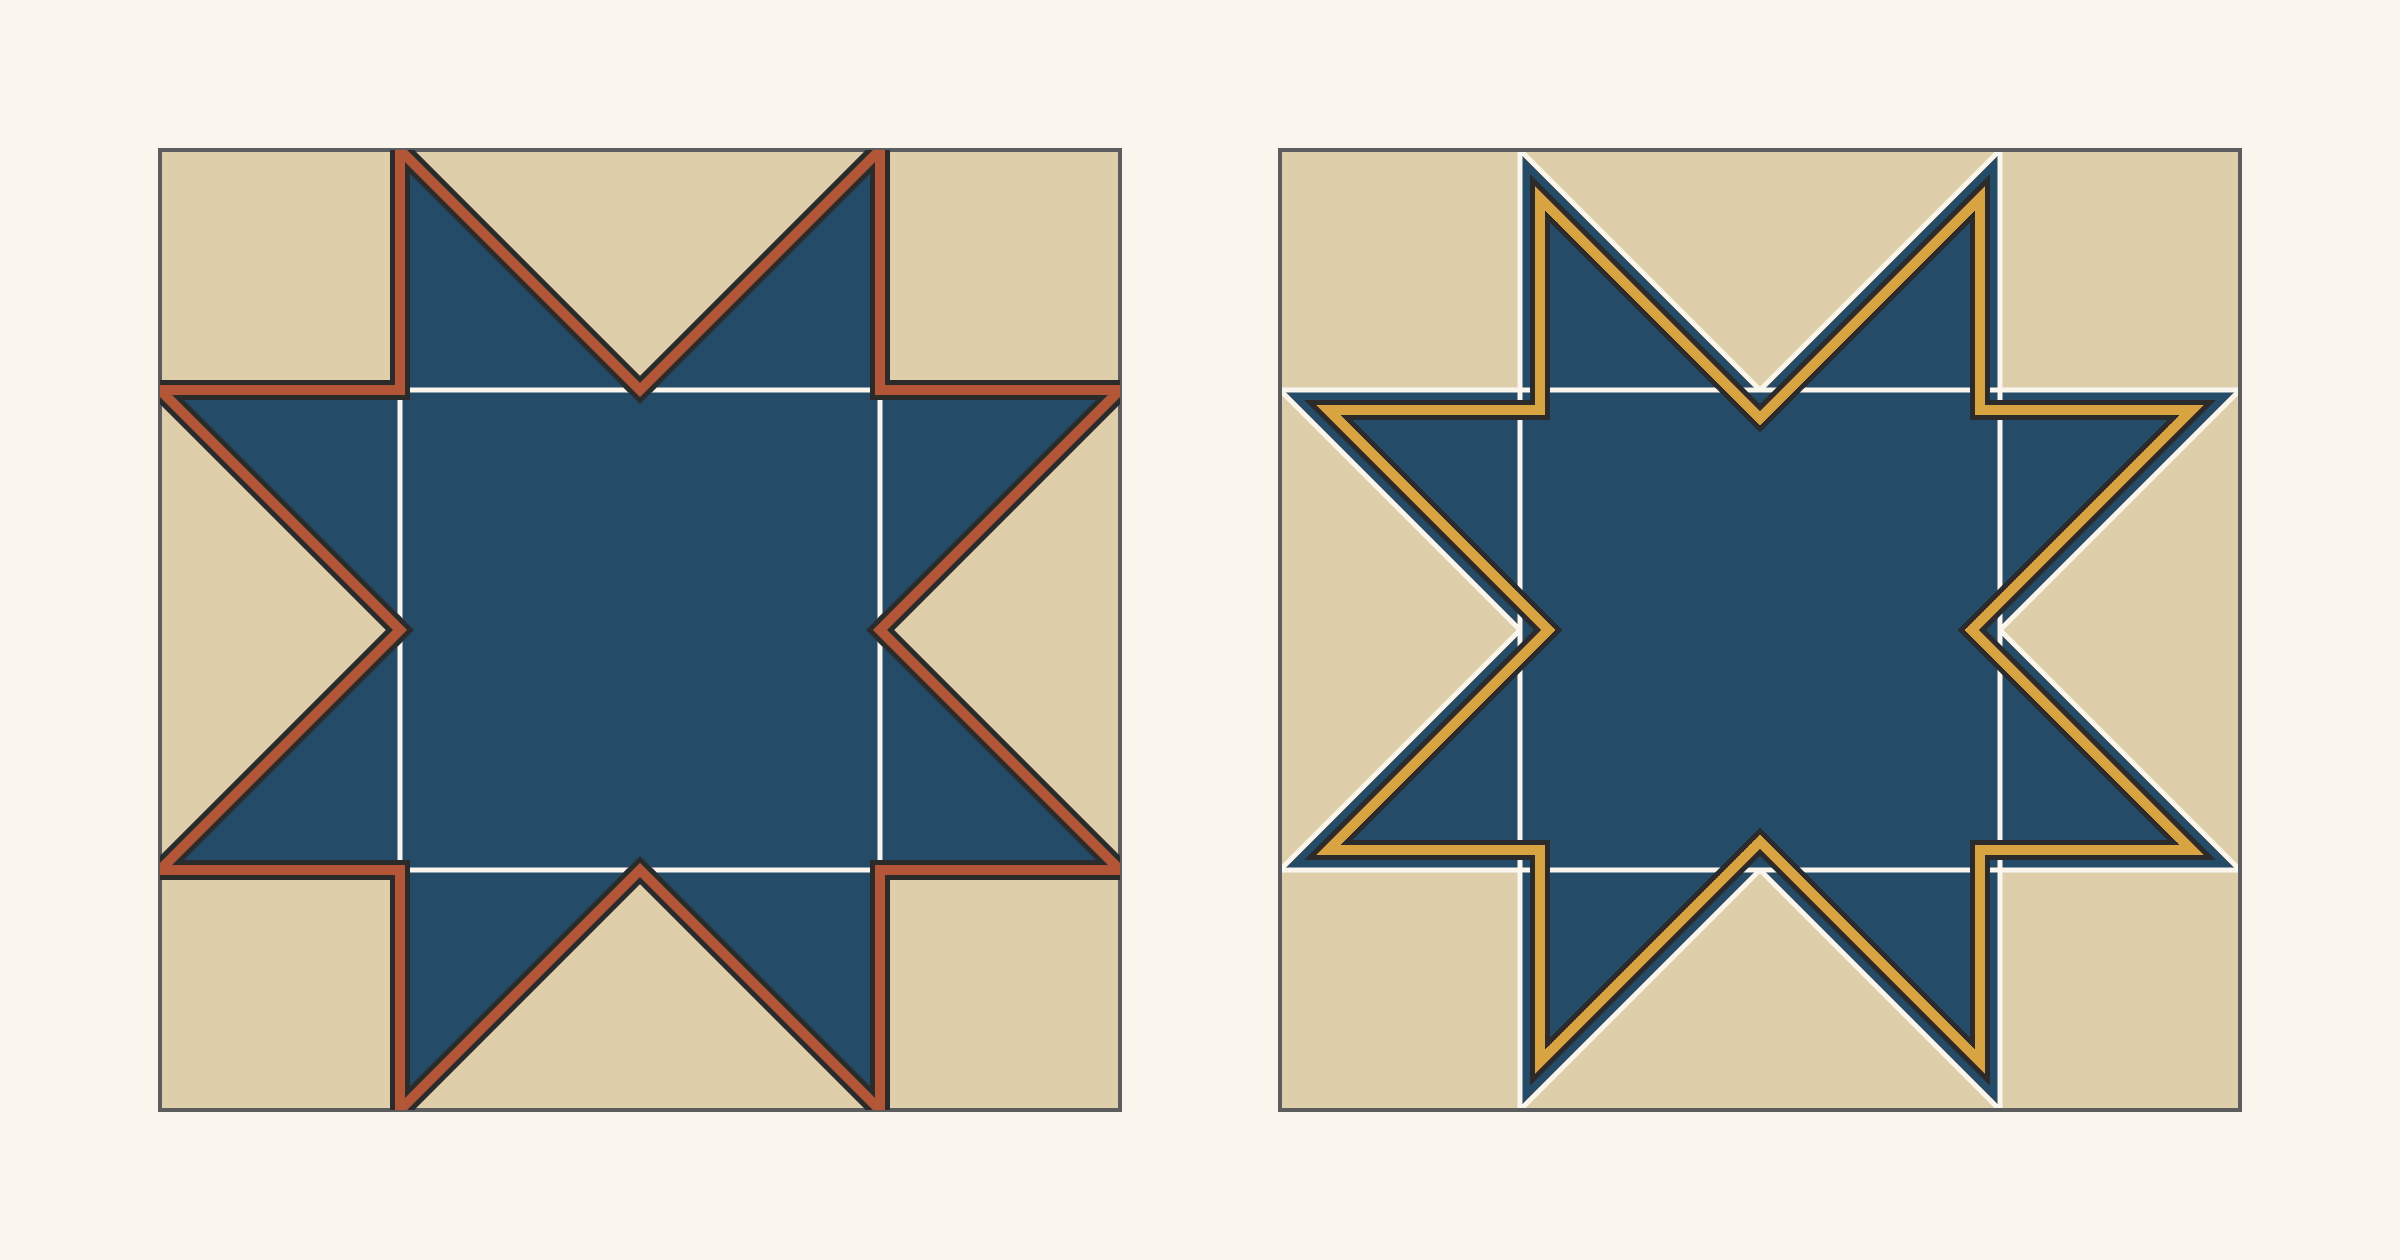
Stitch in the ditch hides in the seam; an echo draws a second outline 1/4 inch away. Compare the look, the needle position and the turns on one 12-inch star.

Straight-grain strips suit straight edges and square corners; curves need bias. See why on a rounded corner, and what bias costs on a 60 x 72 in throw.
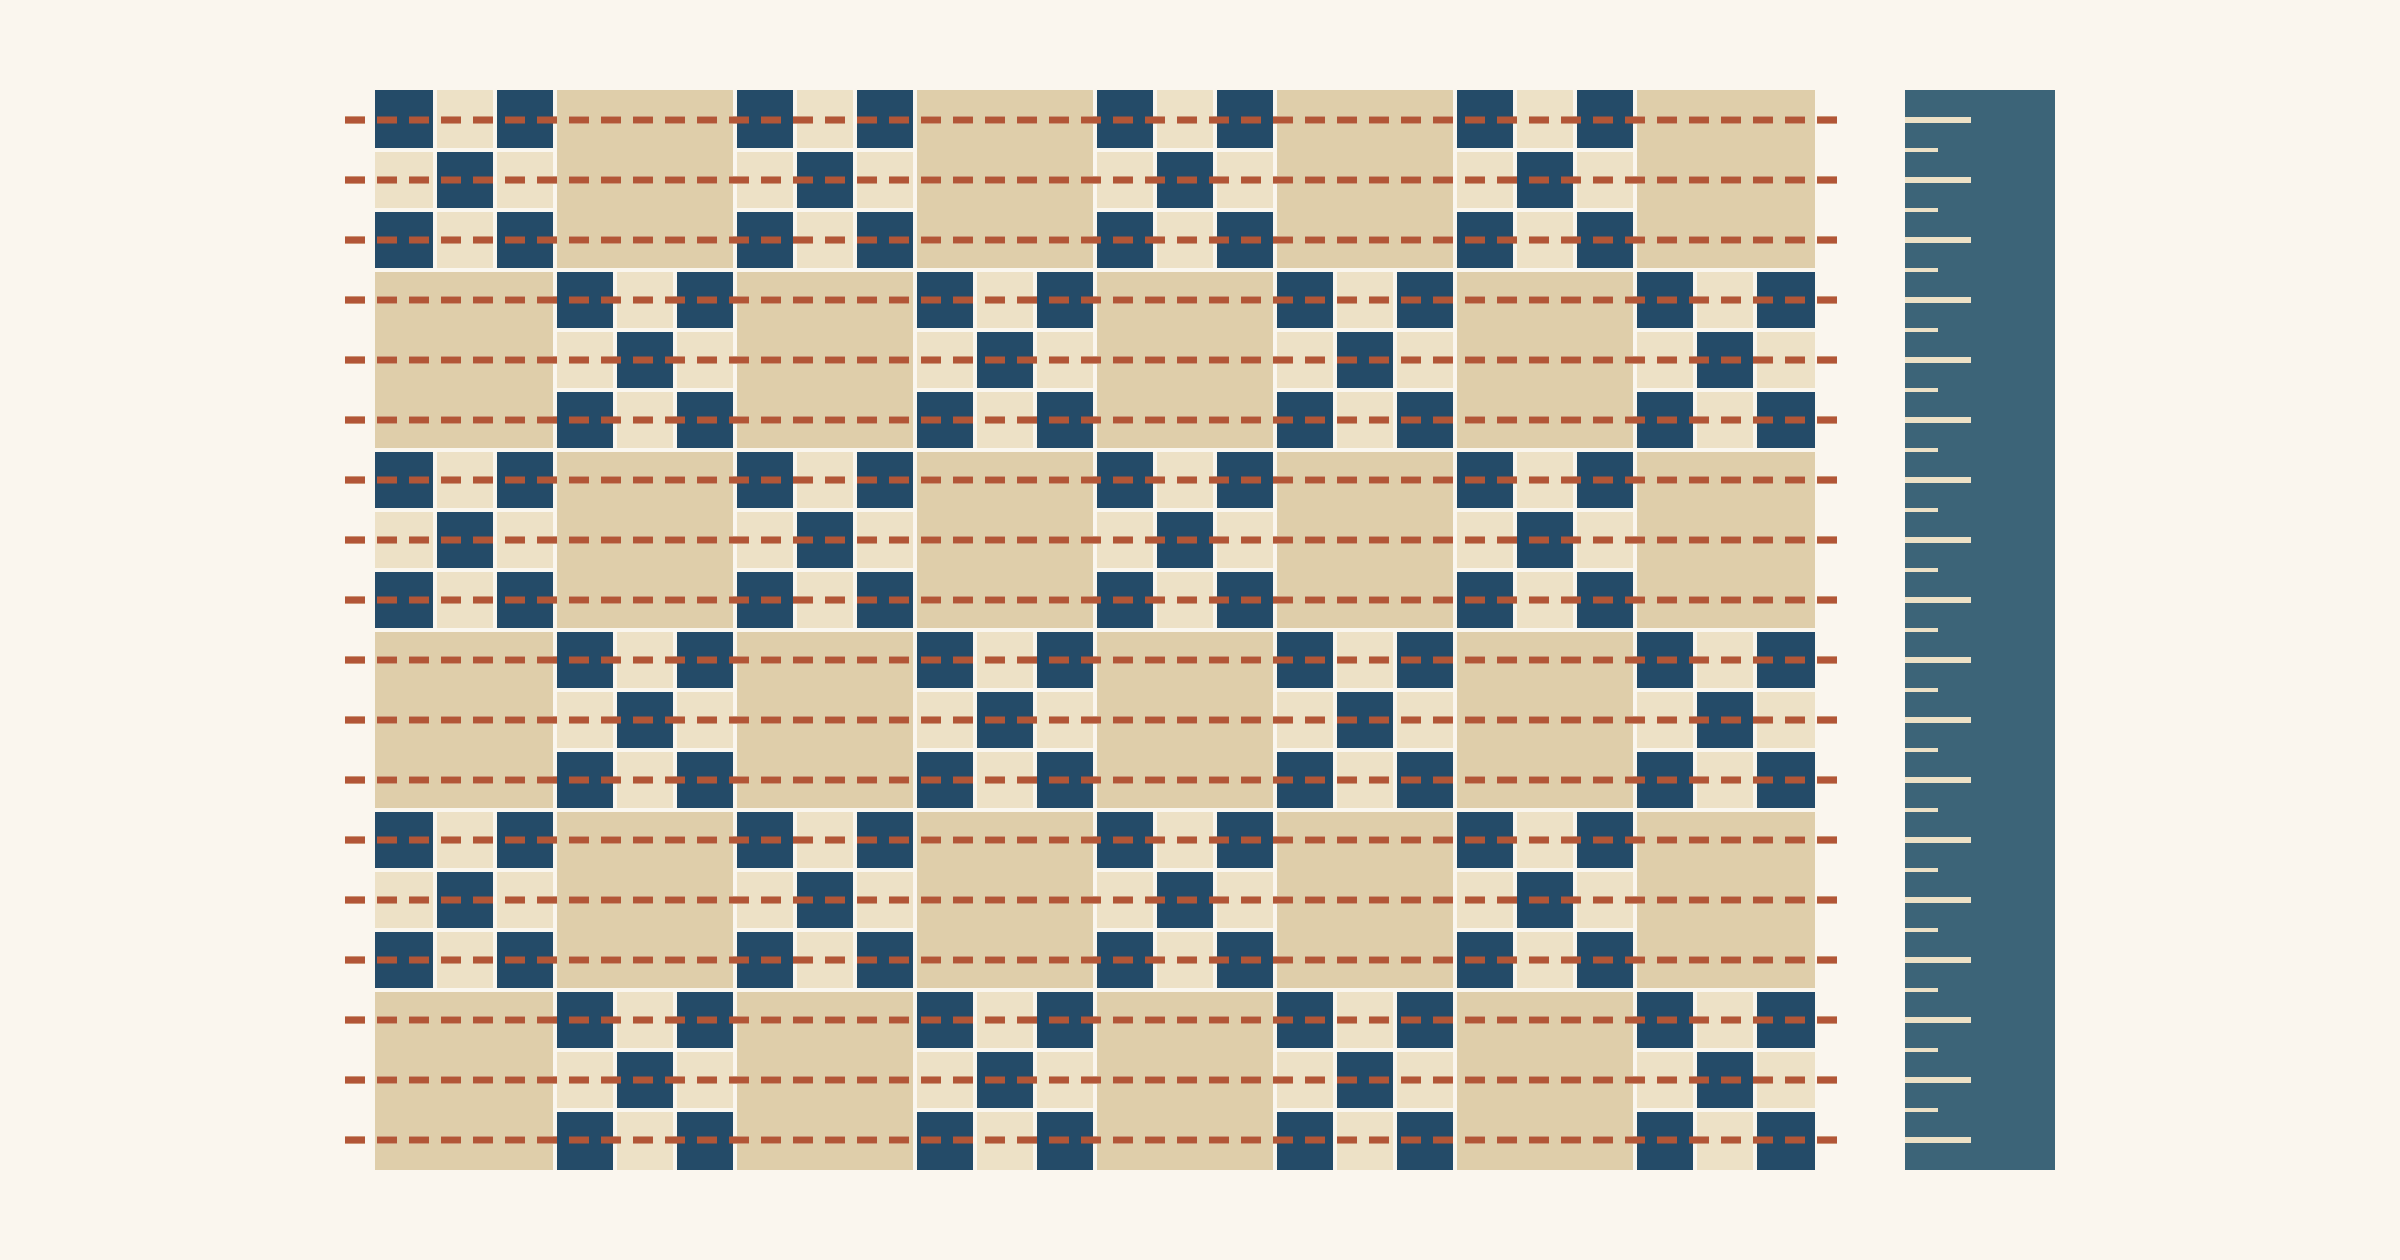
Most straight-line quilting sits 1 to 3 inches apart. Choose a spacing that repeats in every block, misses the seams and stays inside your batting's limit.
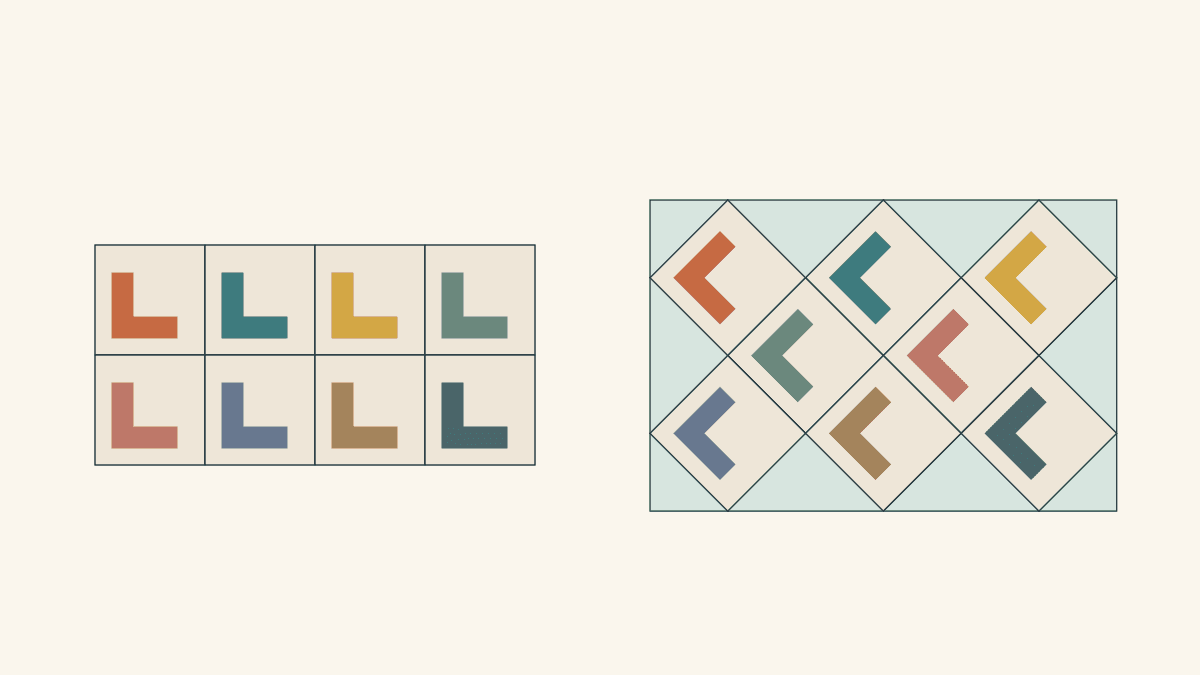
Compare the same eight blocks in two settings. See how turning them changes the motif direction, finished footprint and triangles needed at the edges.
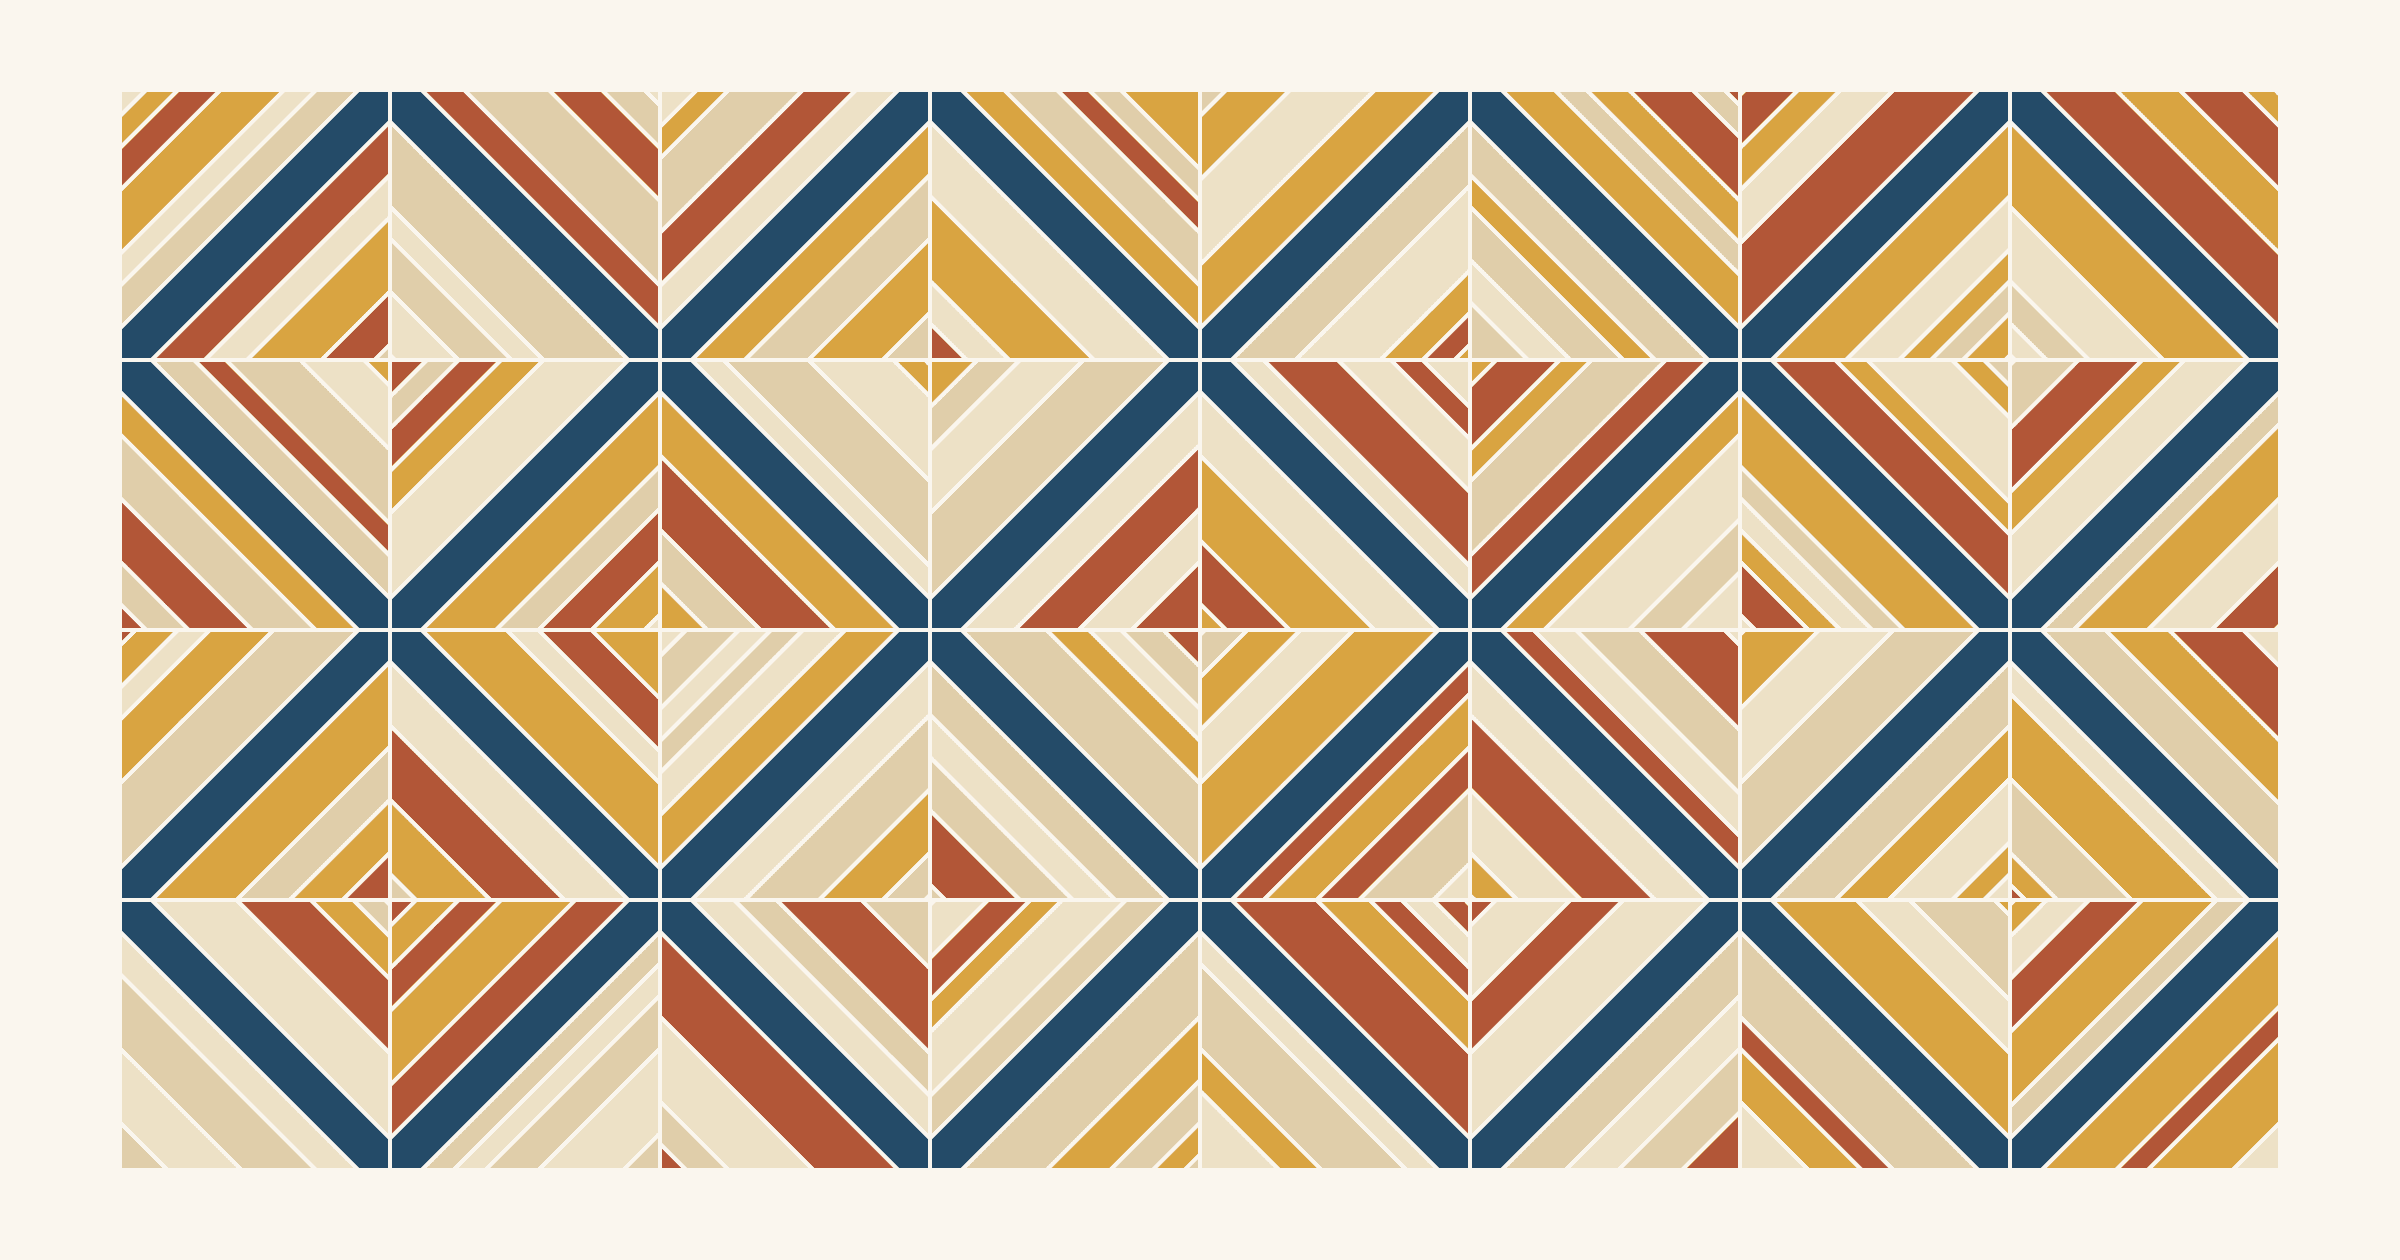
Cut 10 in foundations, trim to 9 1/2 in and keep strings 1 1/4 to 2 1/2 in wide. Then pick one color rule so 48 scrappy blocks read as one quilt.
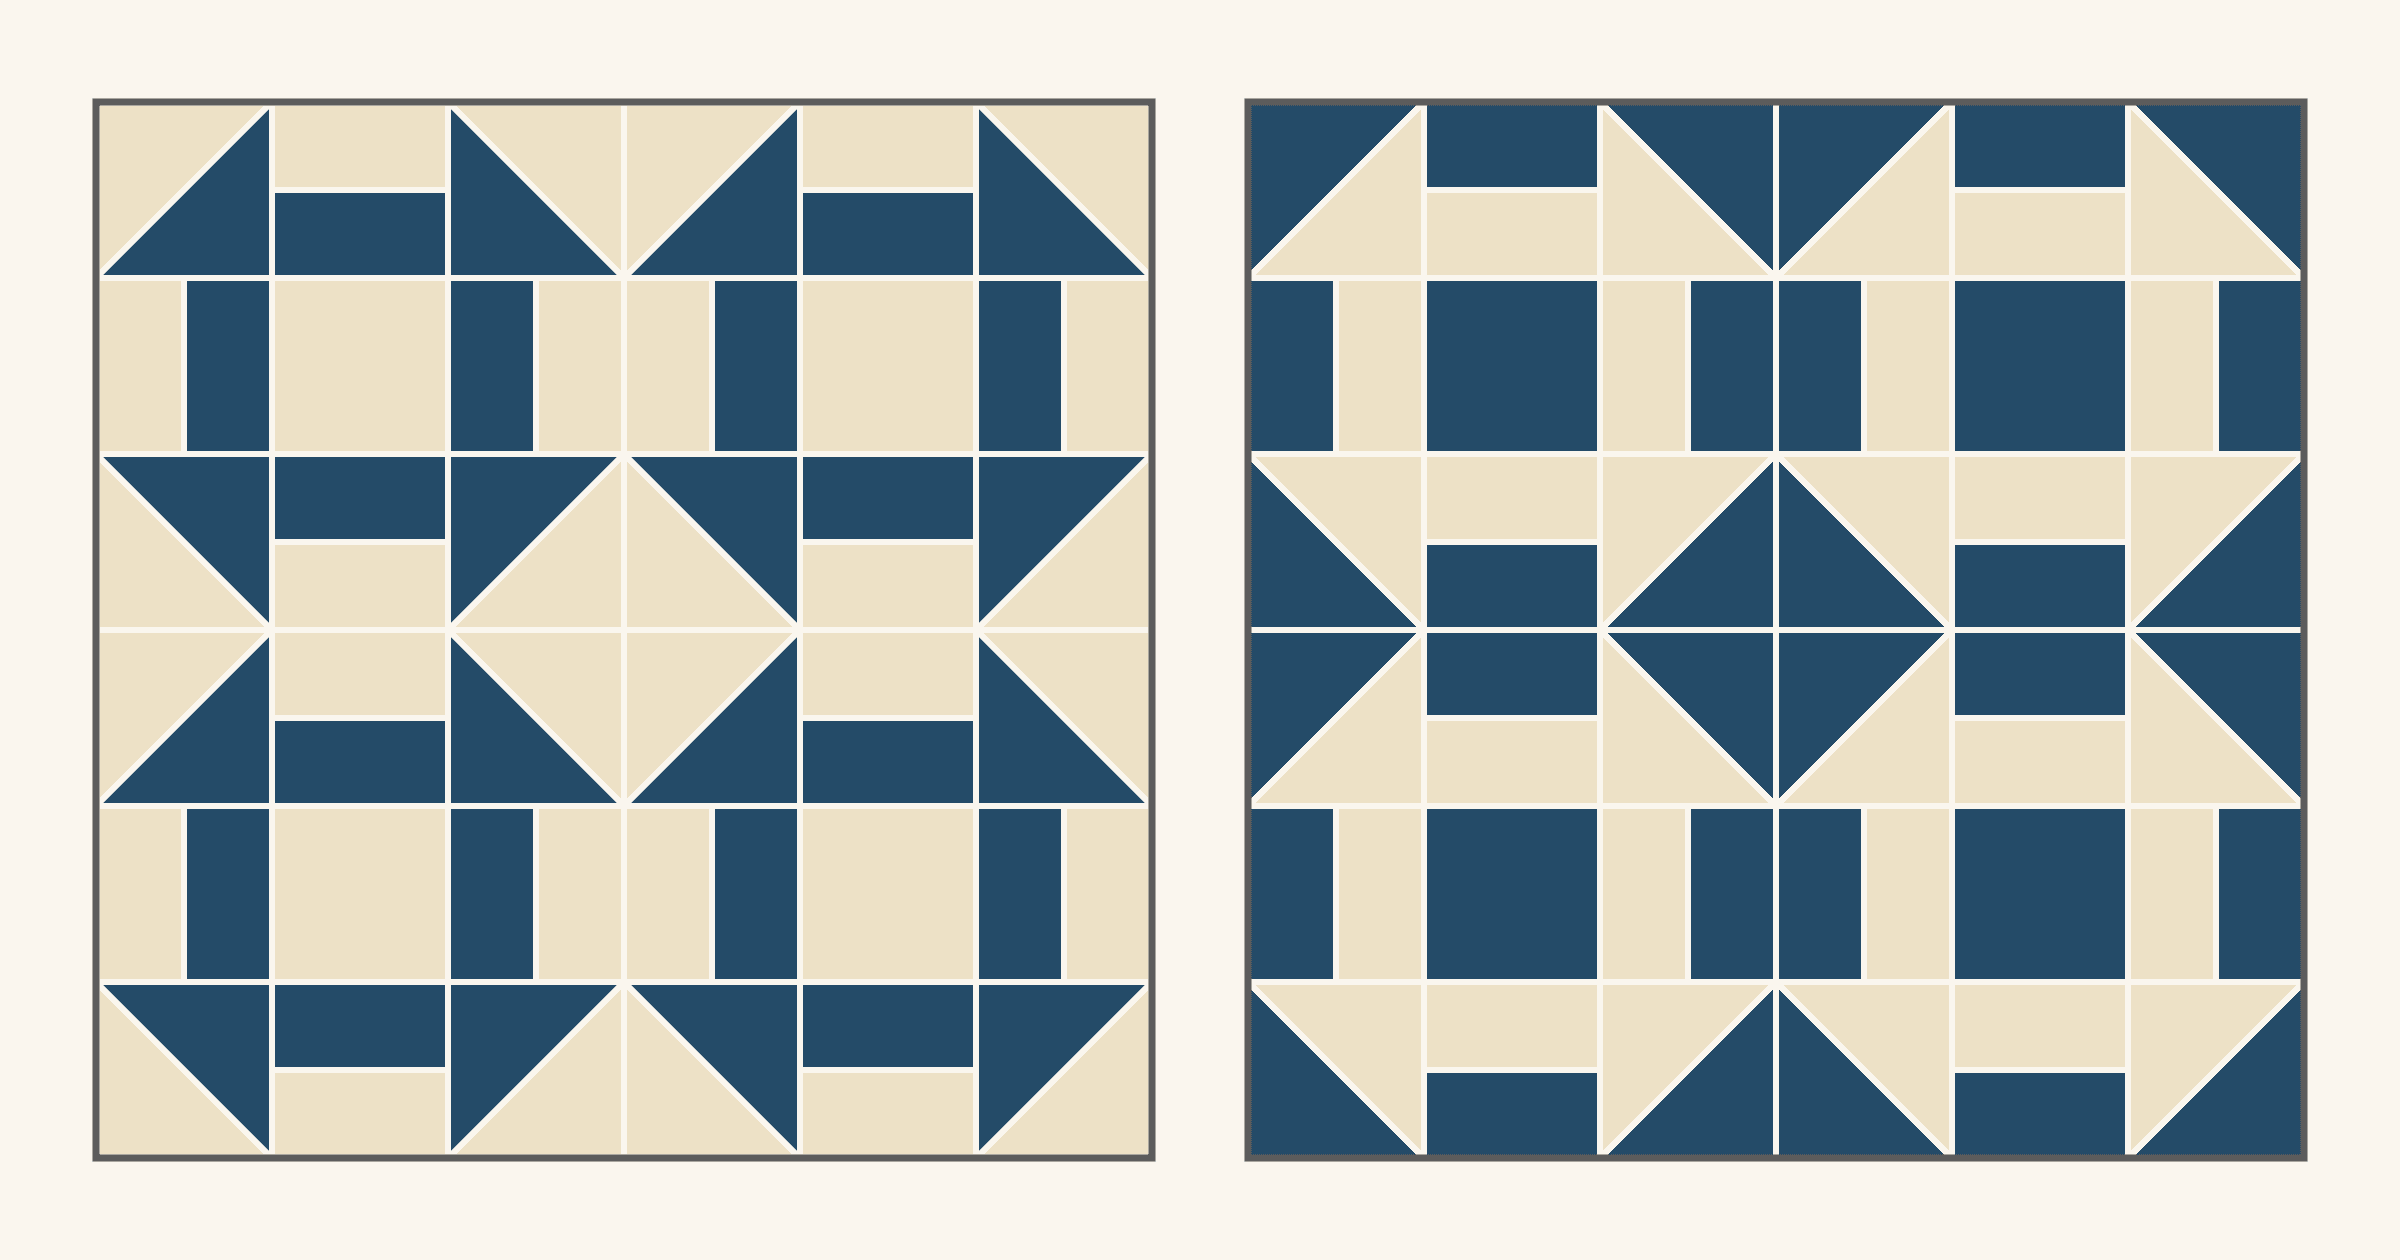
Which fabric should be the background in a two-color quilt? See three Churn Dash plans, the value gap to aim for, and the cuts to try all three.

Start with who made the quilt, where and when. Then add the recipient, quilter, pattern and care, with six labels to copy and a check of how much fits.
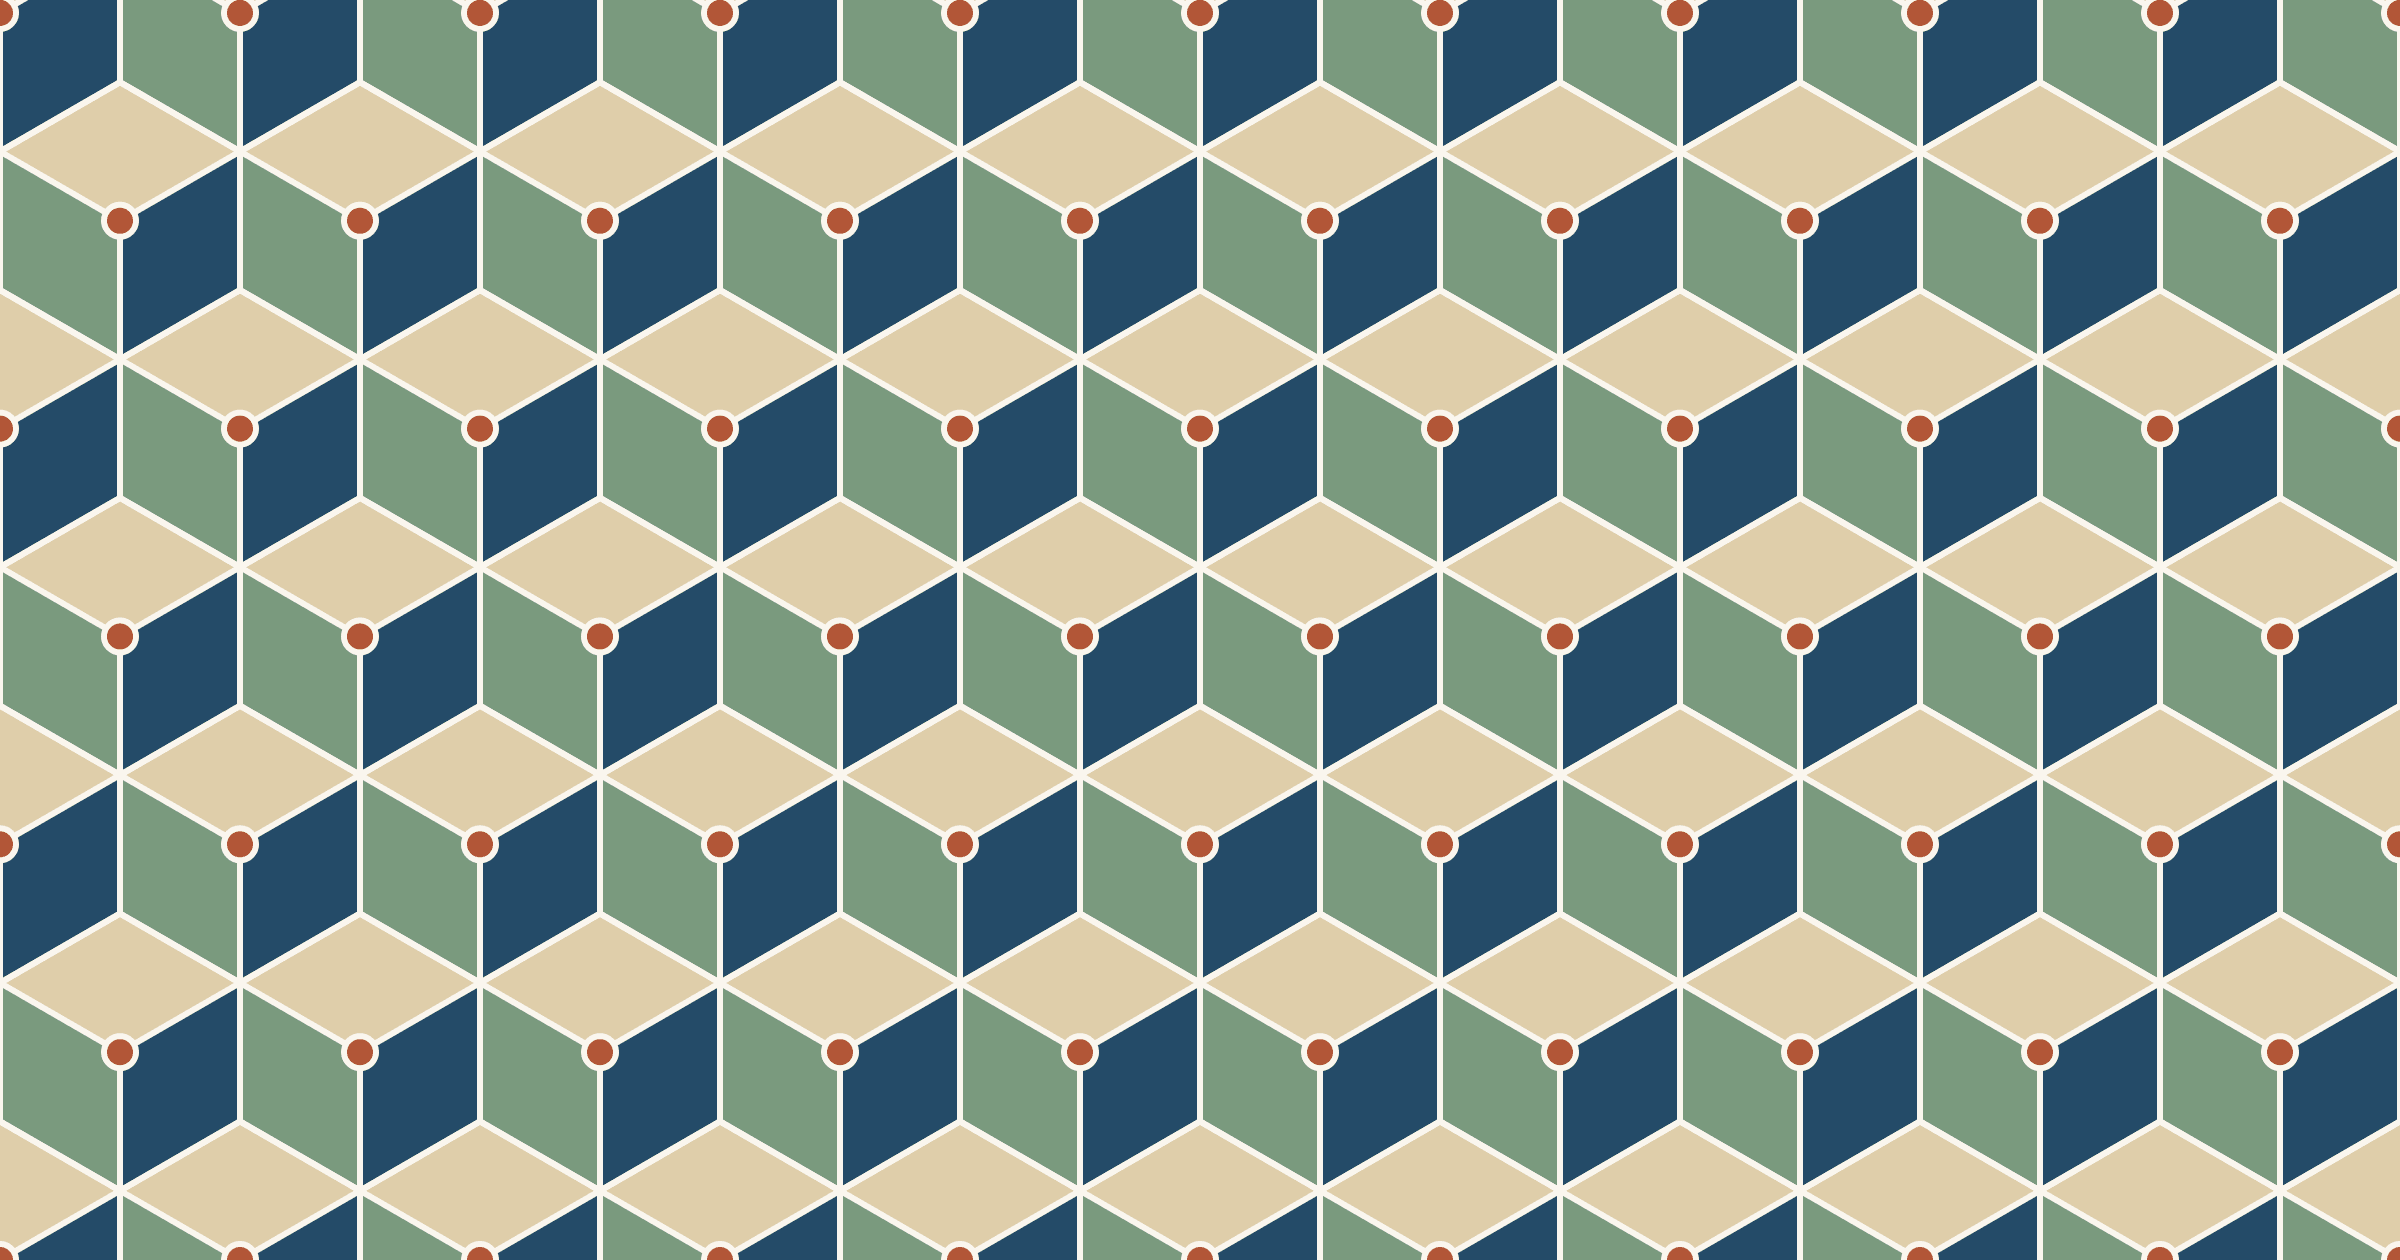
At a Y seam, stitching stops at a marked dot 1/4 in from the edges. Find each junction and plan which ends stop and what to sew first.
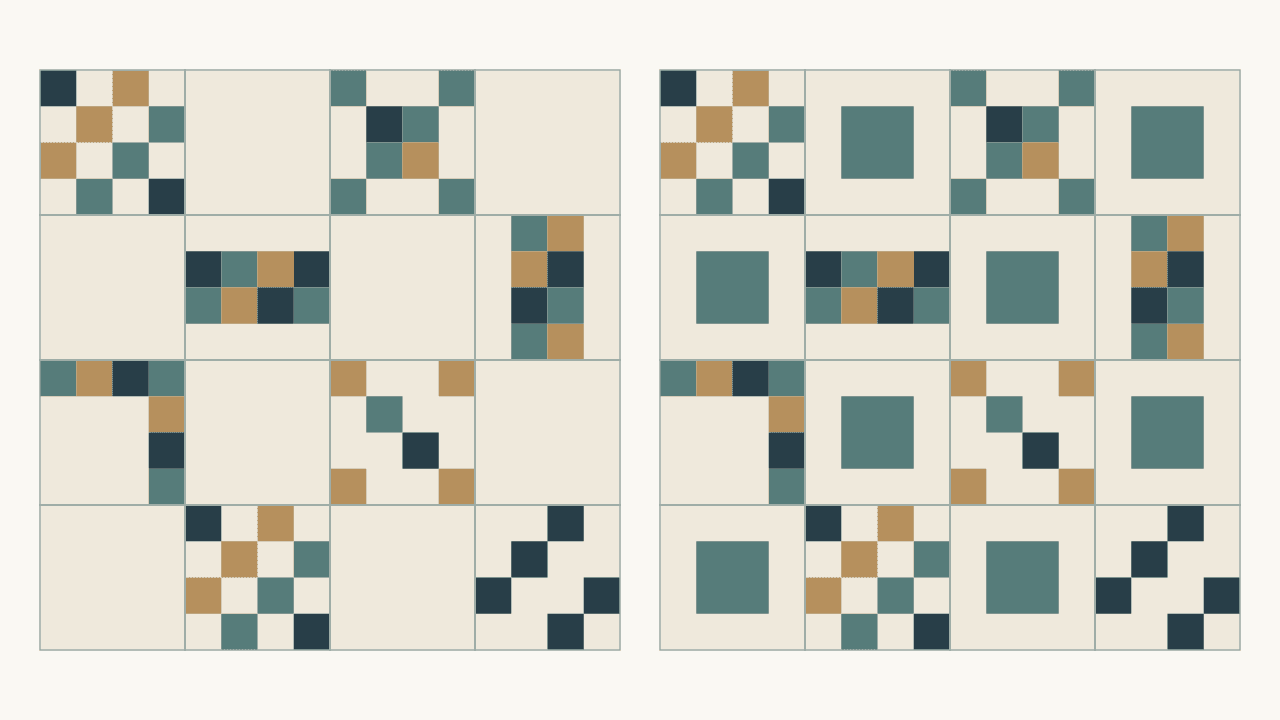
Plain alternate blocks give a busy sampler room to breathe; a simple repeated block adds rhythm. See how each changes your block count and quilt size.
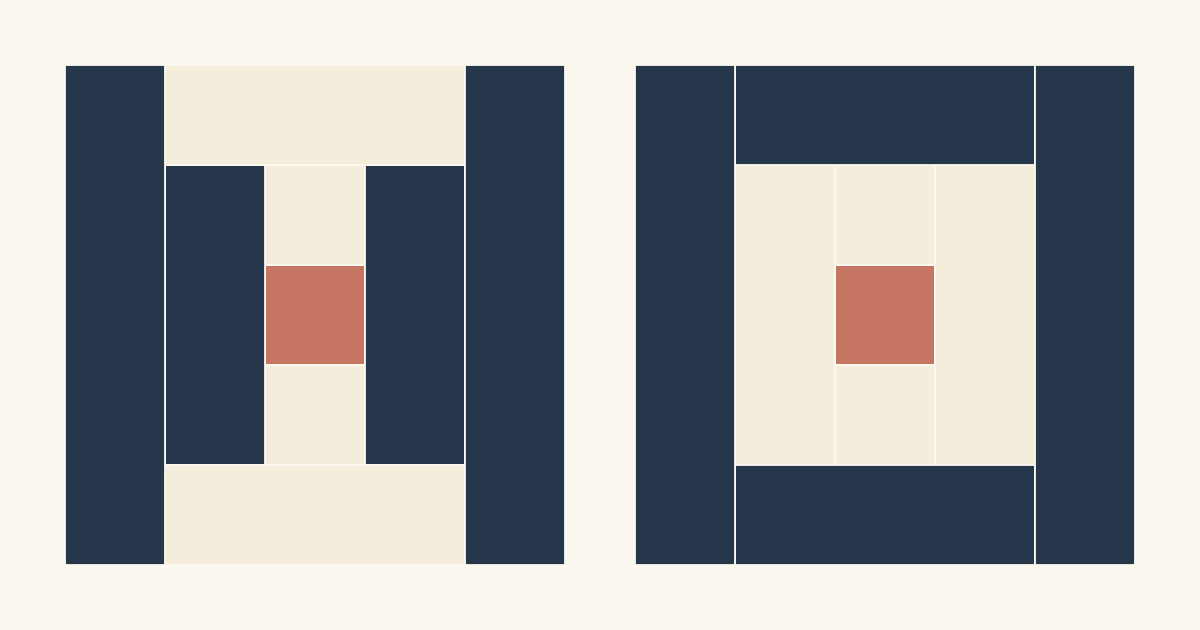
Put light fabric on one pair of opposite sides and dark on the other, or color by rounds for framed squares. Two 10-inch maps show how each one repeats.
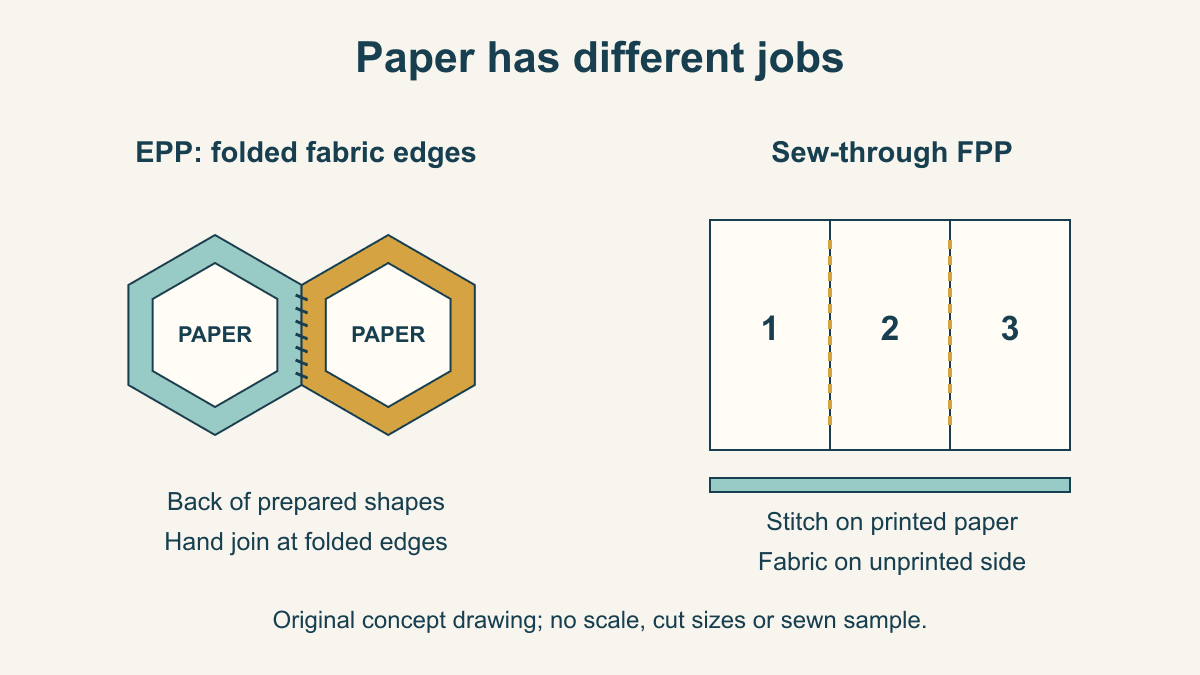
Compare what the paper does, where stitching happens and which project brief suits EPP or sew-through FPP before choosing a pattern.
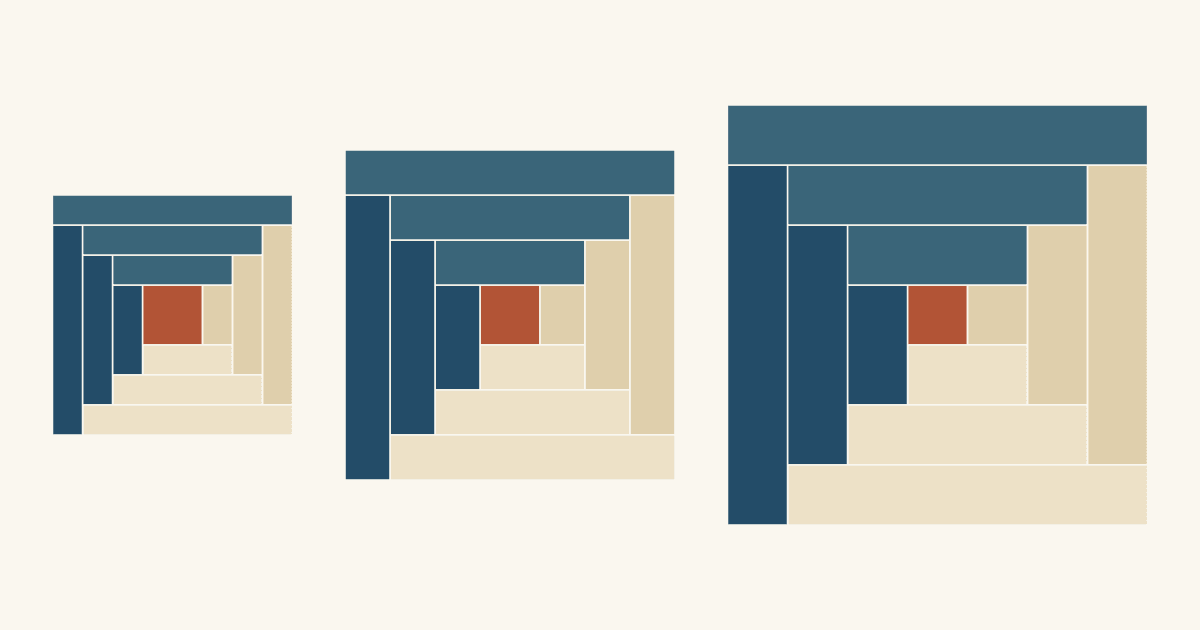
Most Log Cabin strips are cut 1 1/2 to 2 1/2 inches wide. See how each width changes block size, the center's weight and the number of seams.
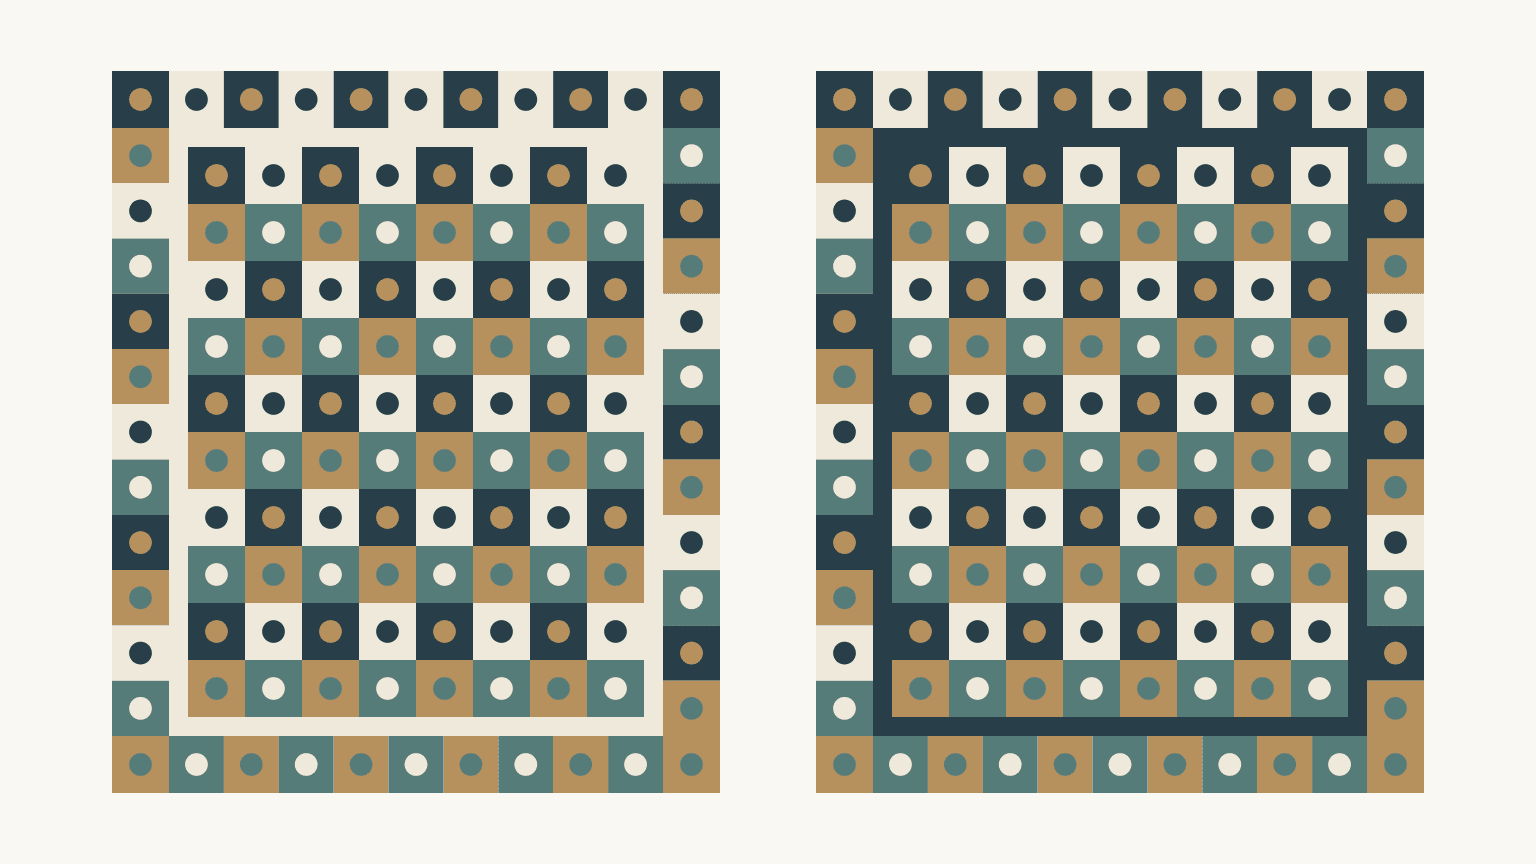
Most stop borders finish 1 to 1 1/2 inches wide. See one busy quilt with 1/2, 1 and 1 1/2 inch inner borders, then pick the width and value that separate your prints.

Record each fabric, batting and thread with its exact product name, label photo and care directions, so anyone can see how to look after the quilt.

Write down what you planned, what you measured, what worked and one change to try. A four-column finish log turns this quilt into a better next one.
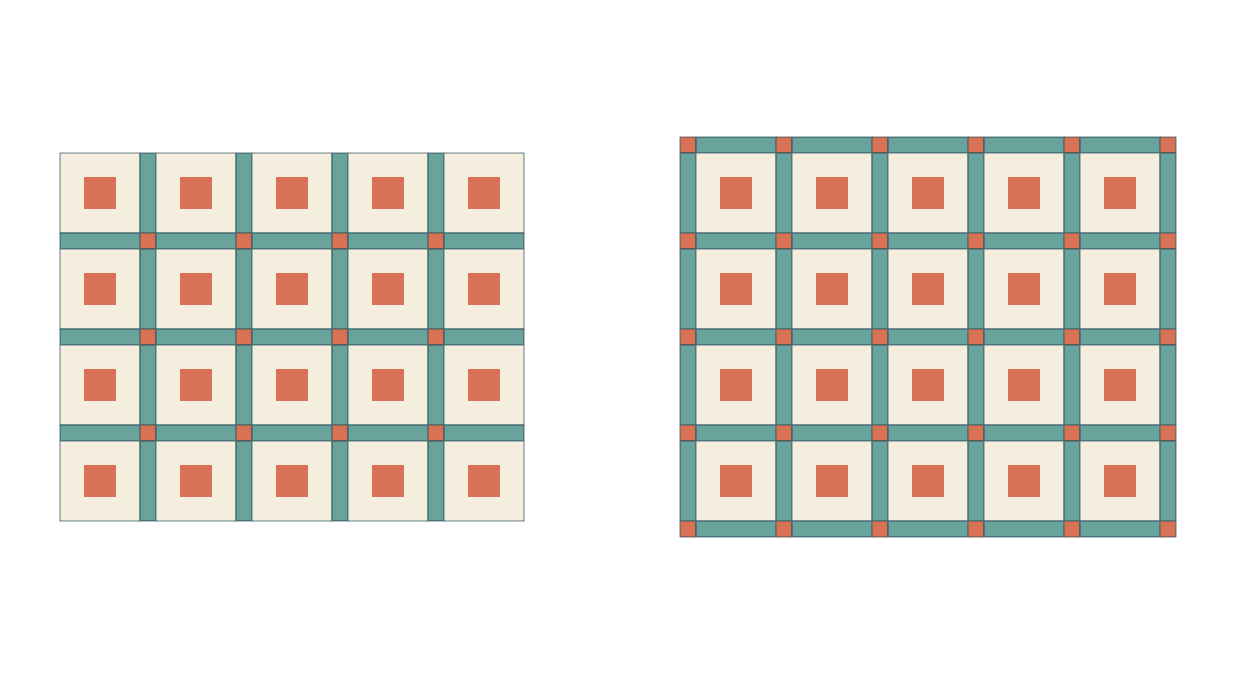
Inside the blocks you need (columns - 1) x (rows - 1) cornerstones; add an outer frame and it's (columns + 1) x (rows + 1). Worked for 20 blocks.
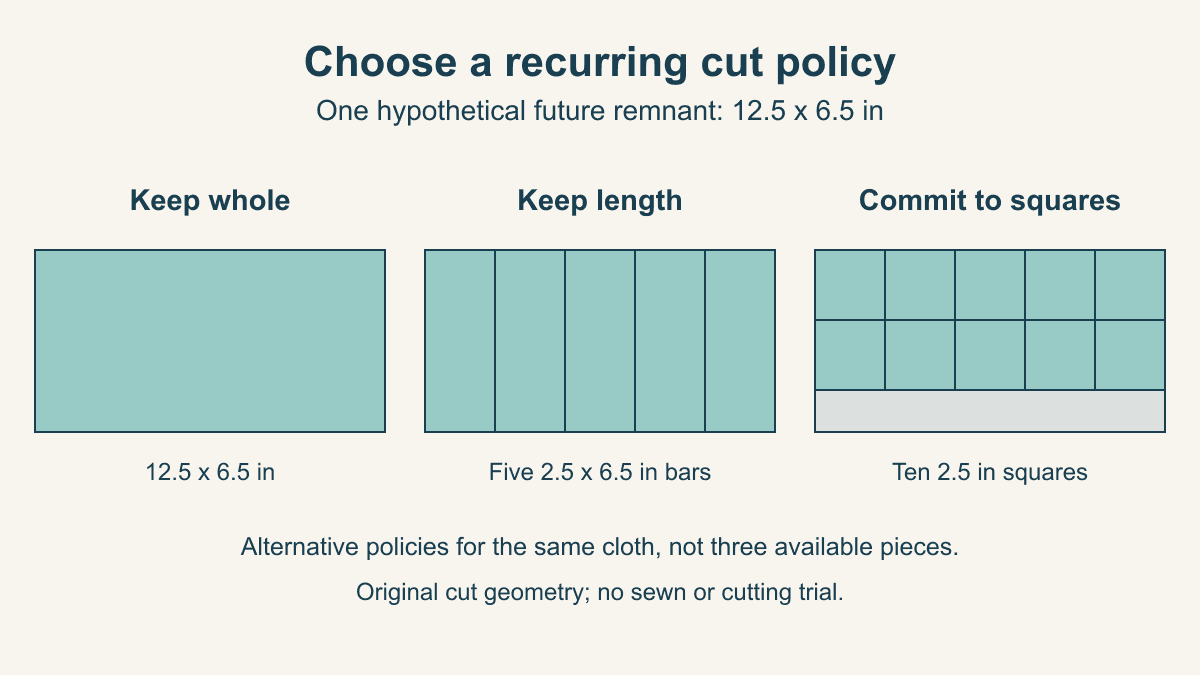
Choose recurring scrap cuts from the shapes you use, preserve useful exceptions, and compare three future policies on one measured example.
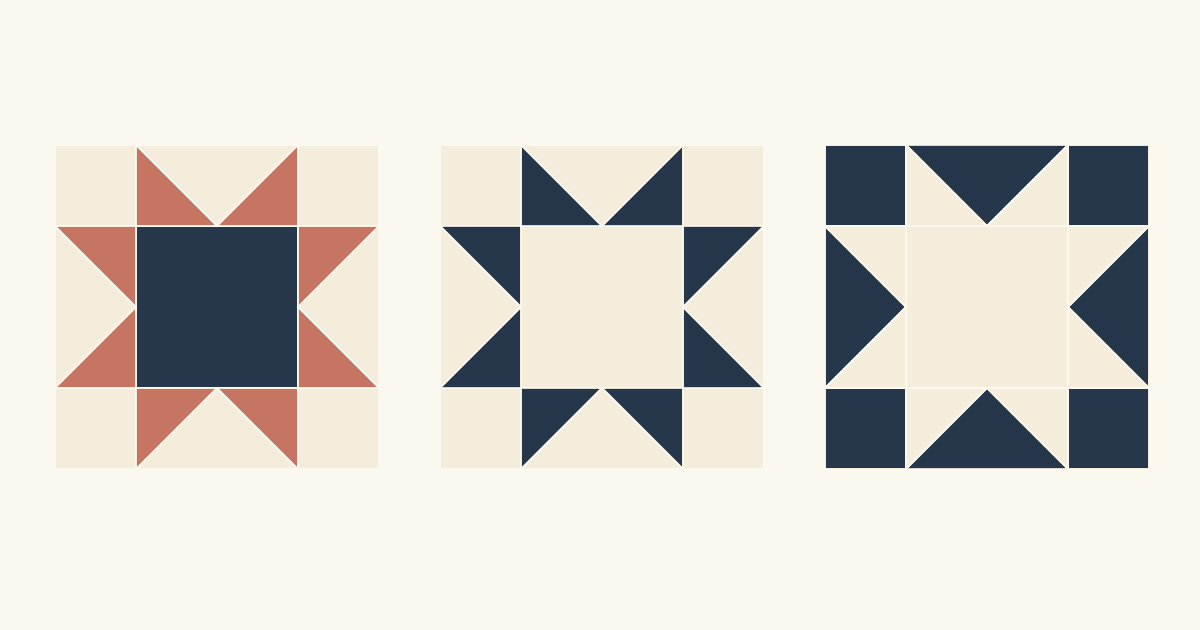
Most Sawtooth Stars use one fabric for the center and points on a contrasting background. See three placements on one 12-inch star and what each changes.
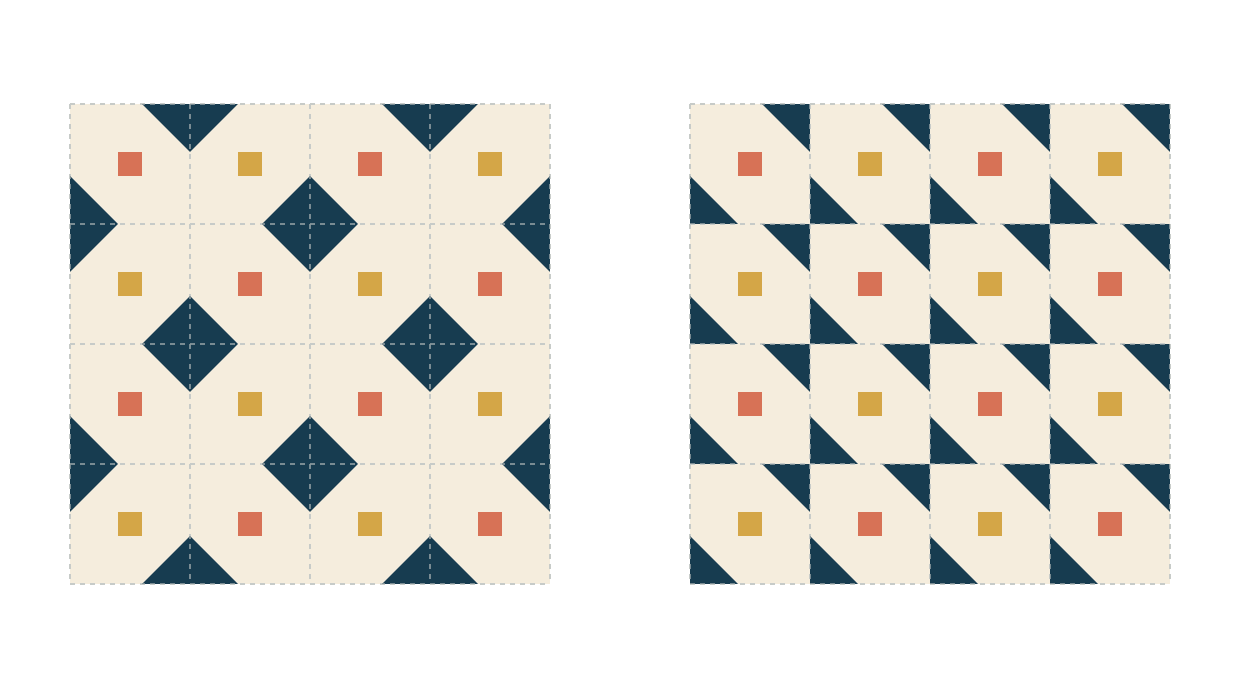
A secondary pattern forms where block corners meet. Trace it in two alternating-block maps and see how turning one block turns diamonds into wedges.
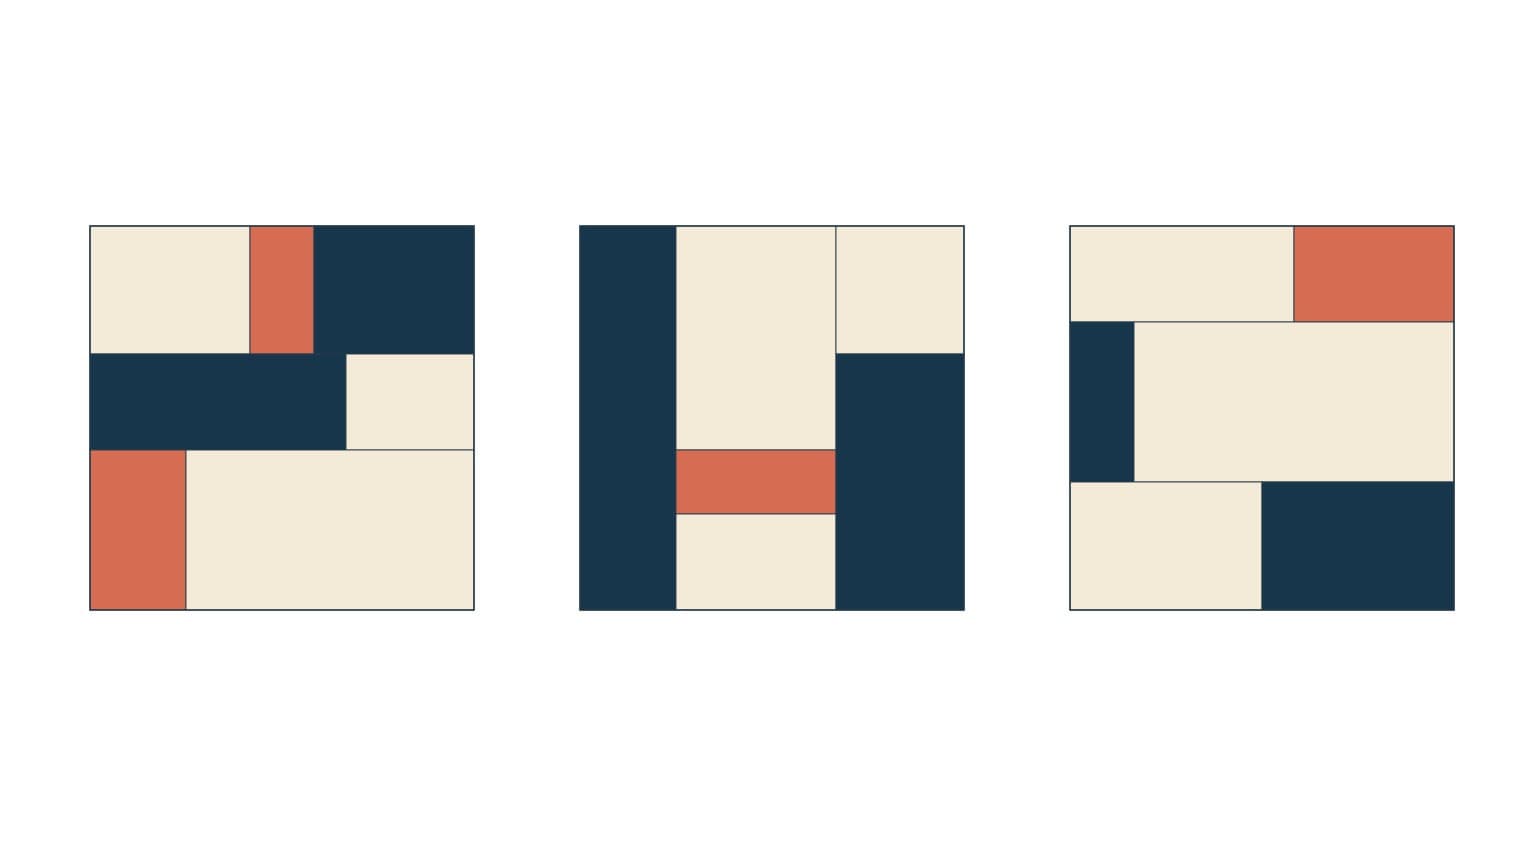
Pick one shape family, three fabrics with a job each and a finished size, then improvise inside them. Three 12-inch studies show how far one brief can go.
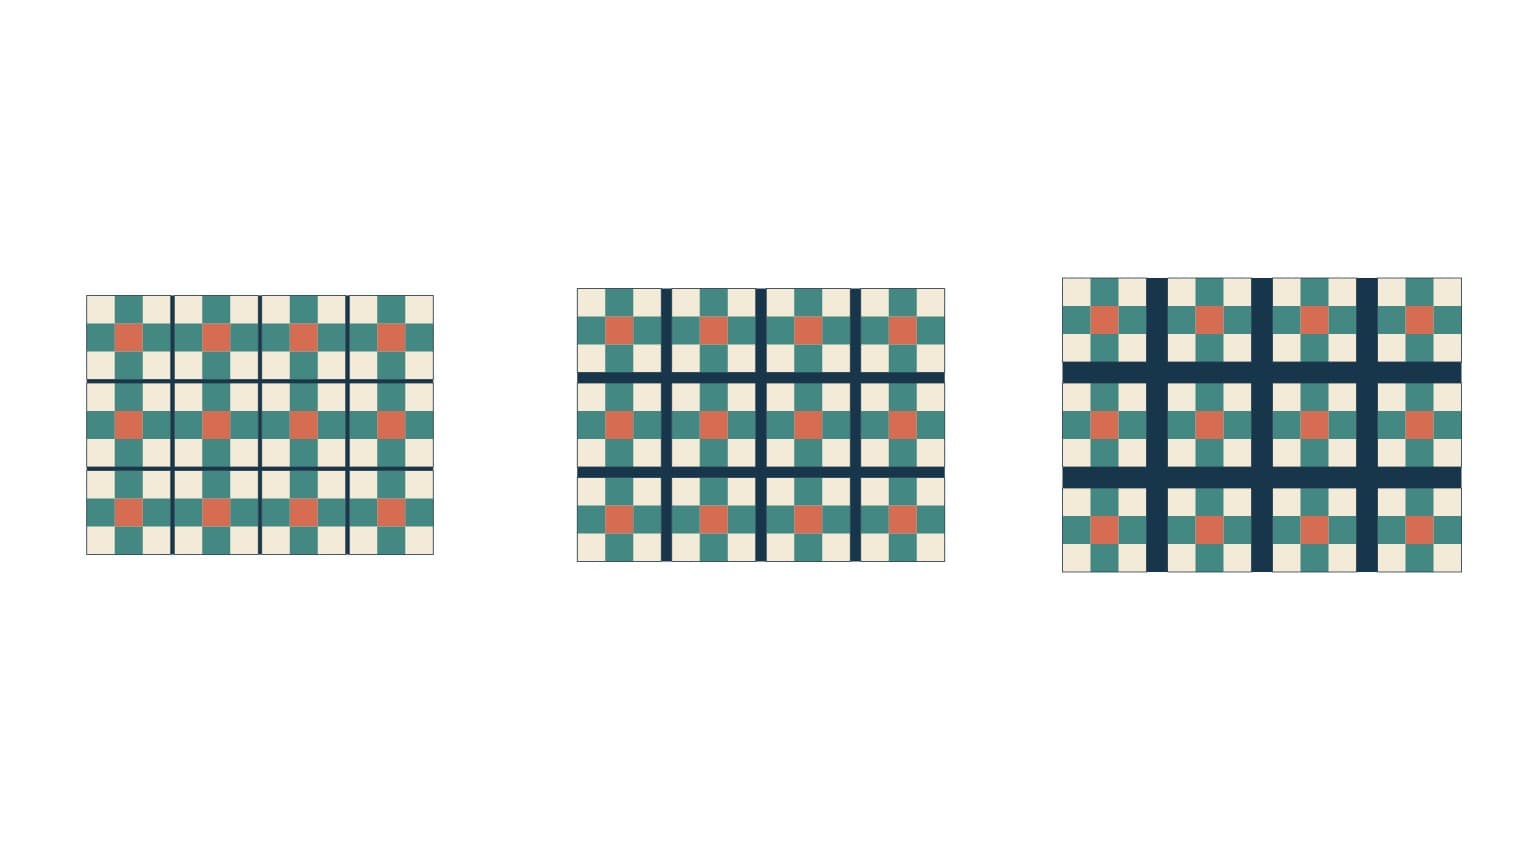
There's no single right sashing width. Repeat a measurement from your block, cut strips 1/2 inch wider than finished, and see what 1/2, 1 1/2 and 3 inches do.
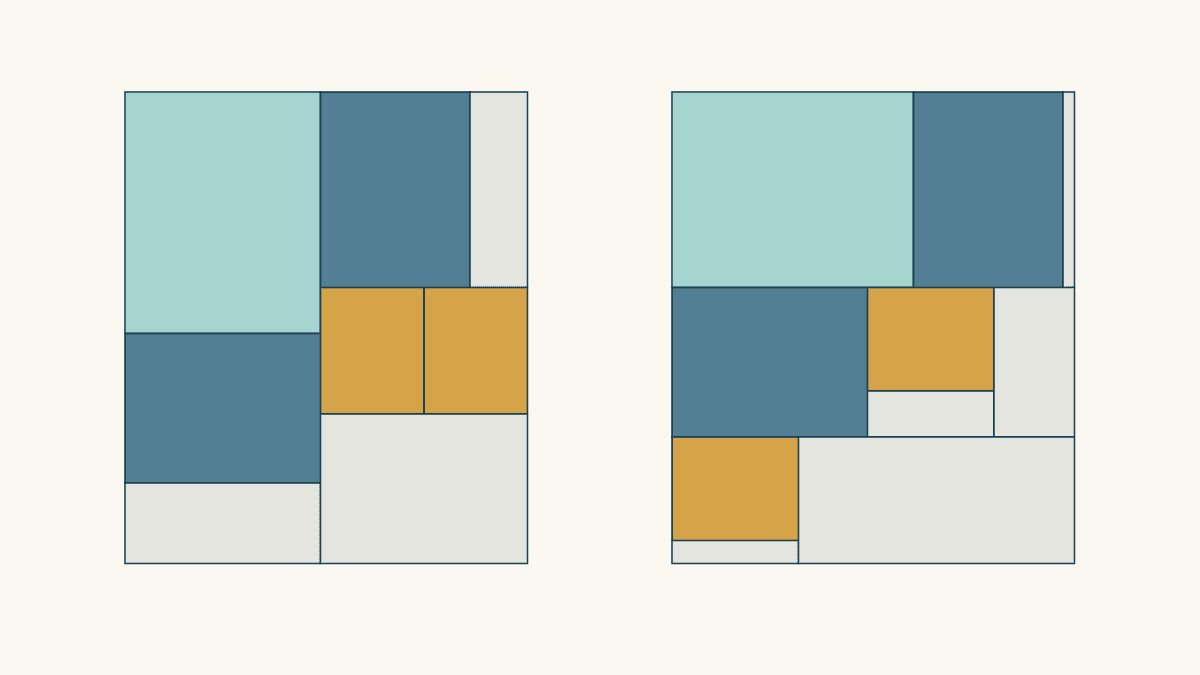
Measure the usable cloth, list every cut size and draw two maps before you cut. A five-rectangle example shows why one big leftover beats five slivers.
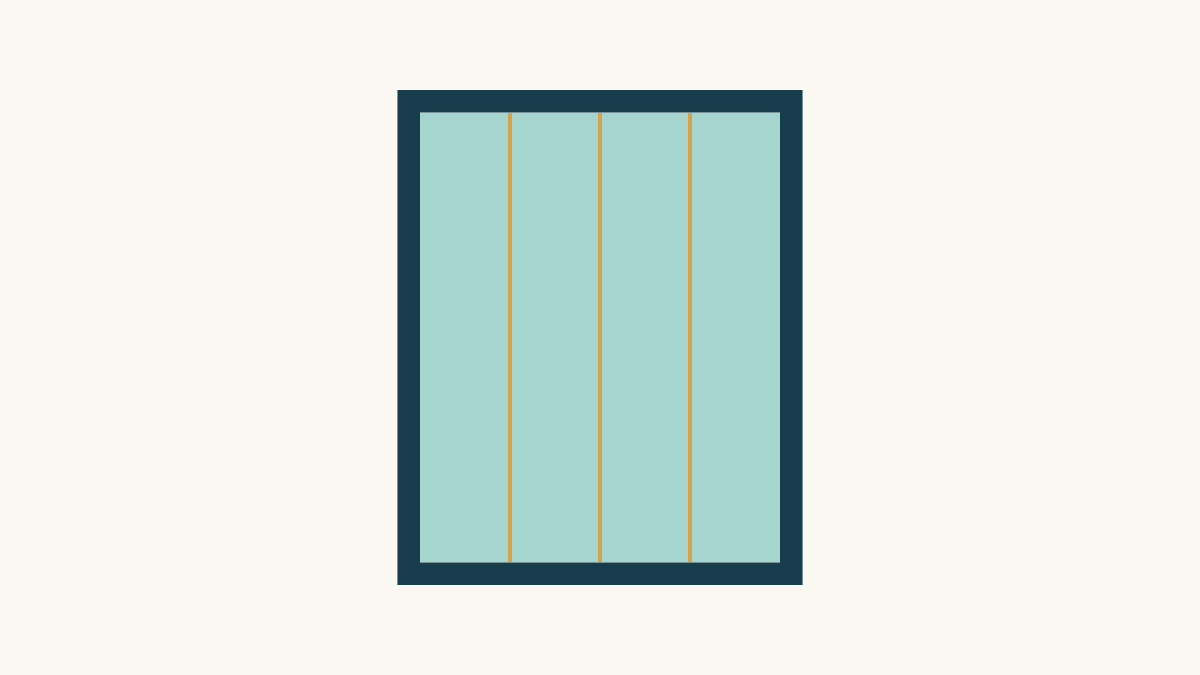
Measure the sewn top through the middle in three places and cut borders to the average. A worked example, the cut-width math and the second-pair check.
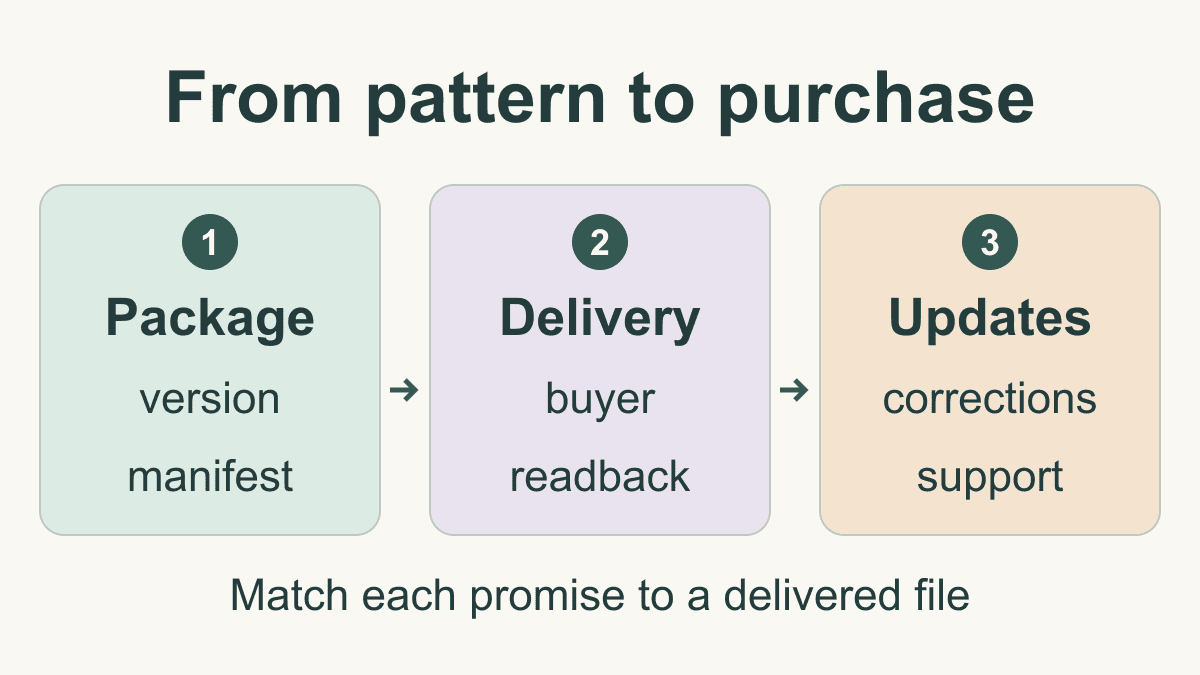
Start with PDF downloads. List exactly what buyers get, test the download as a buyer, and keep one place for corrections, with a three-file worked example.
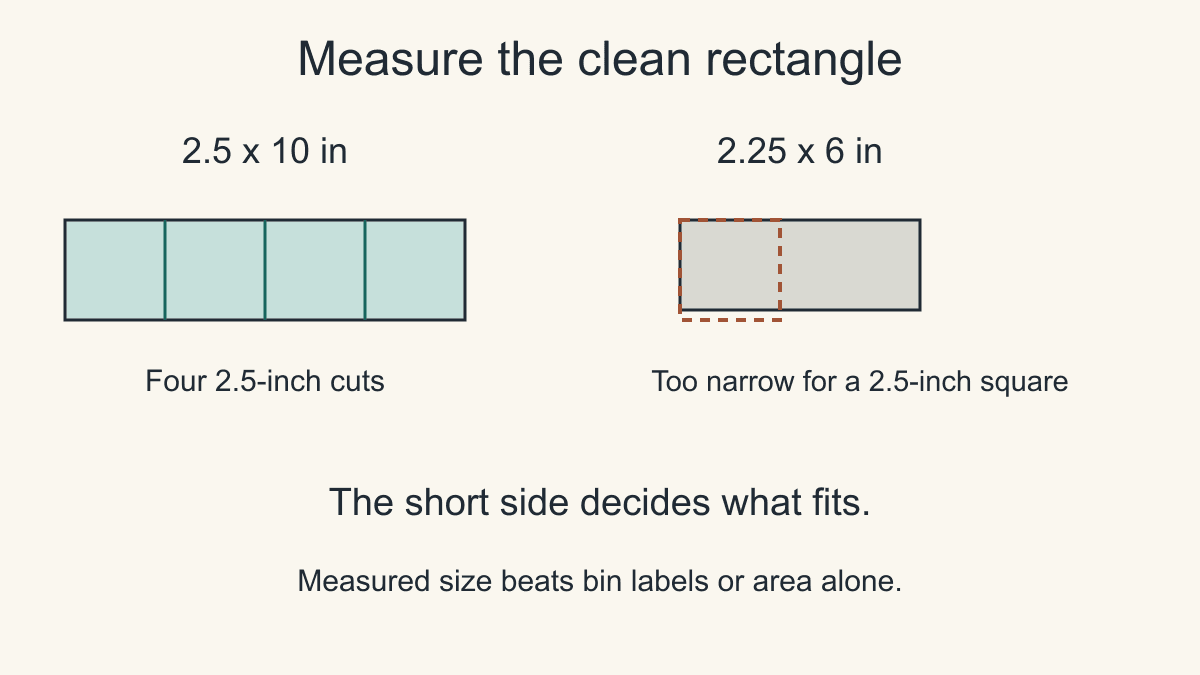
Sort scraps by the narrow side of their clean rectangle, count the cuts each piece gives for the pattern you want, and never count the same fabric twice.
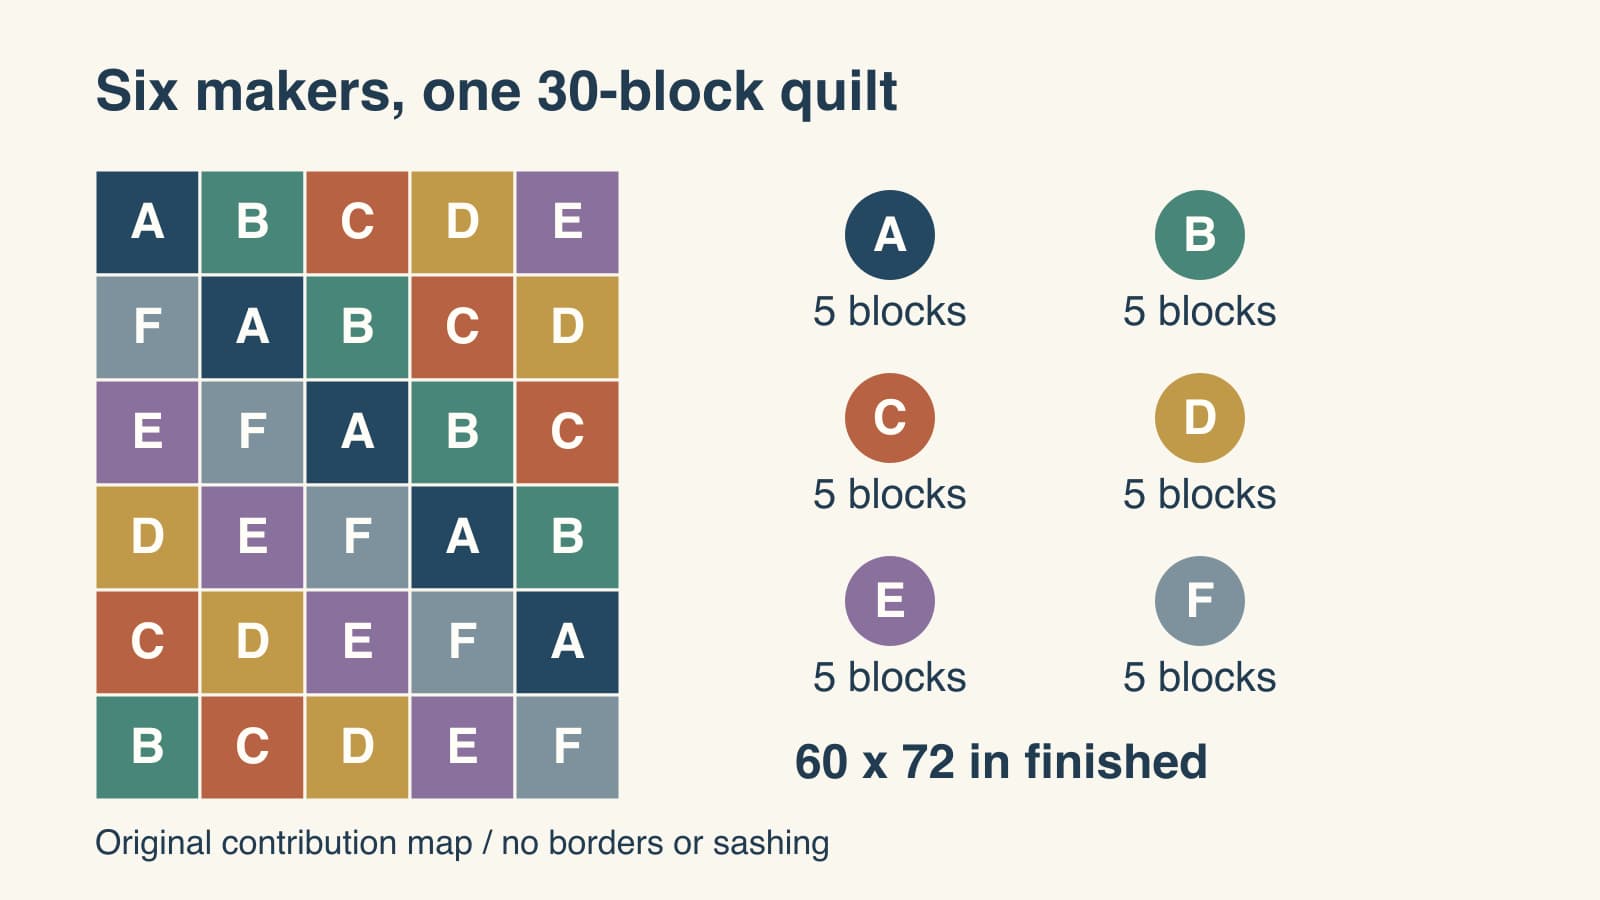
Six group quilt formats, from one shared contribution quilt to bees and round robins, plus a worked plan for six makers and 30 blocks.
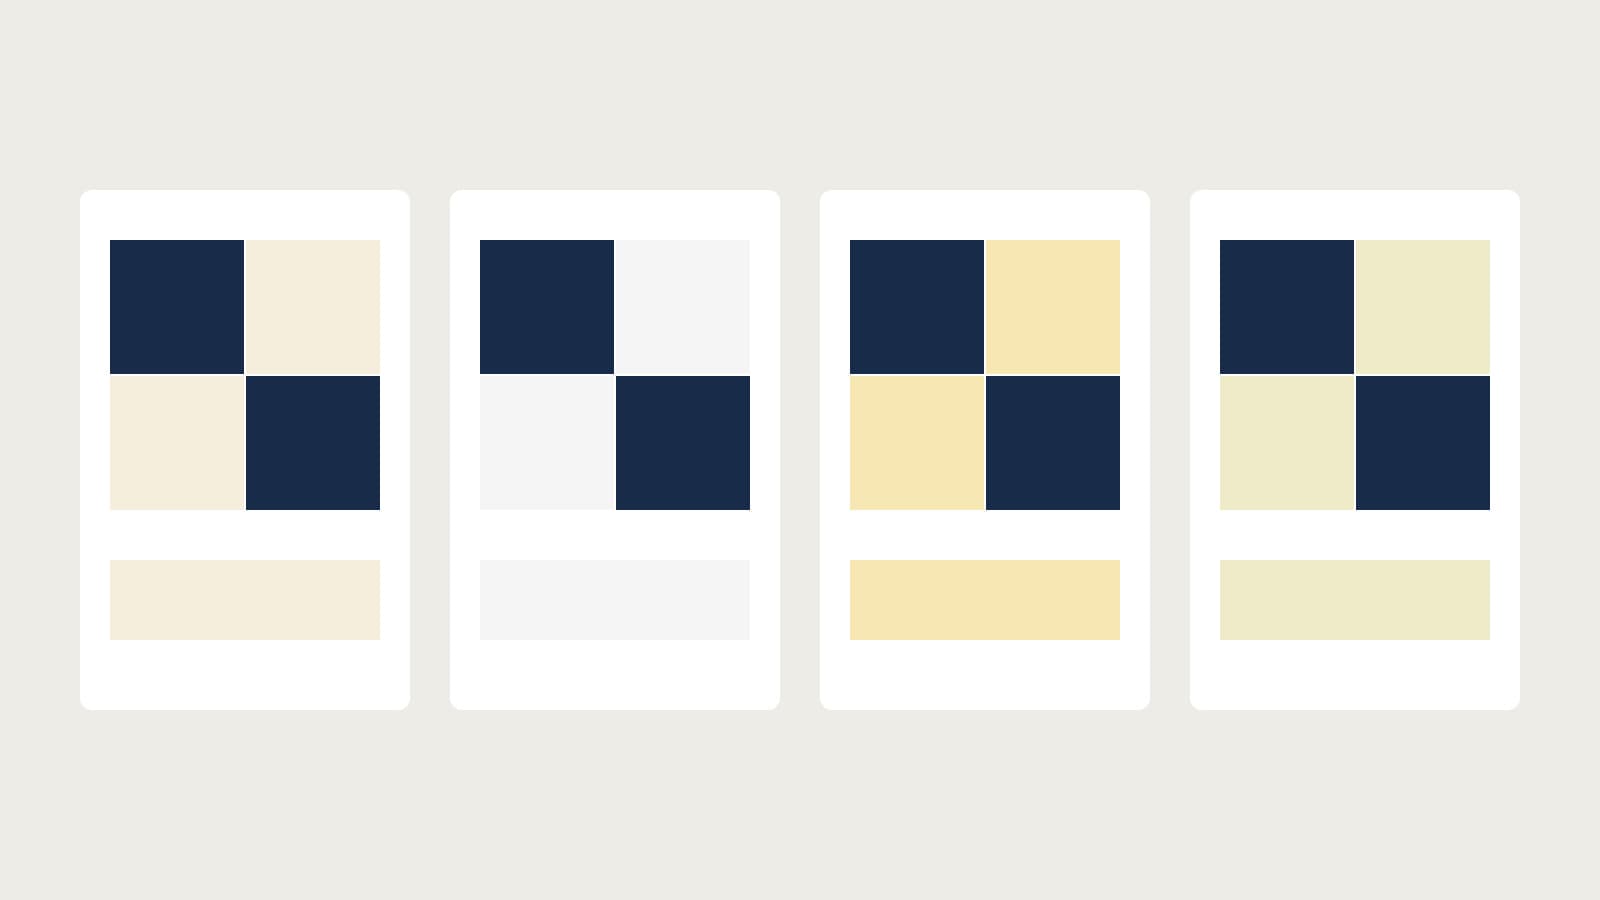
Shortlist three to five Kona, Bella or Pure Solids on screen, then check real fabric beside your quilt's other fabrics before you buy. A cream example shows how.
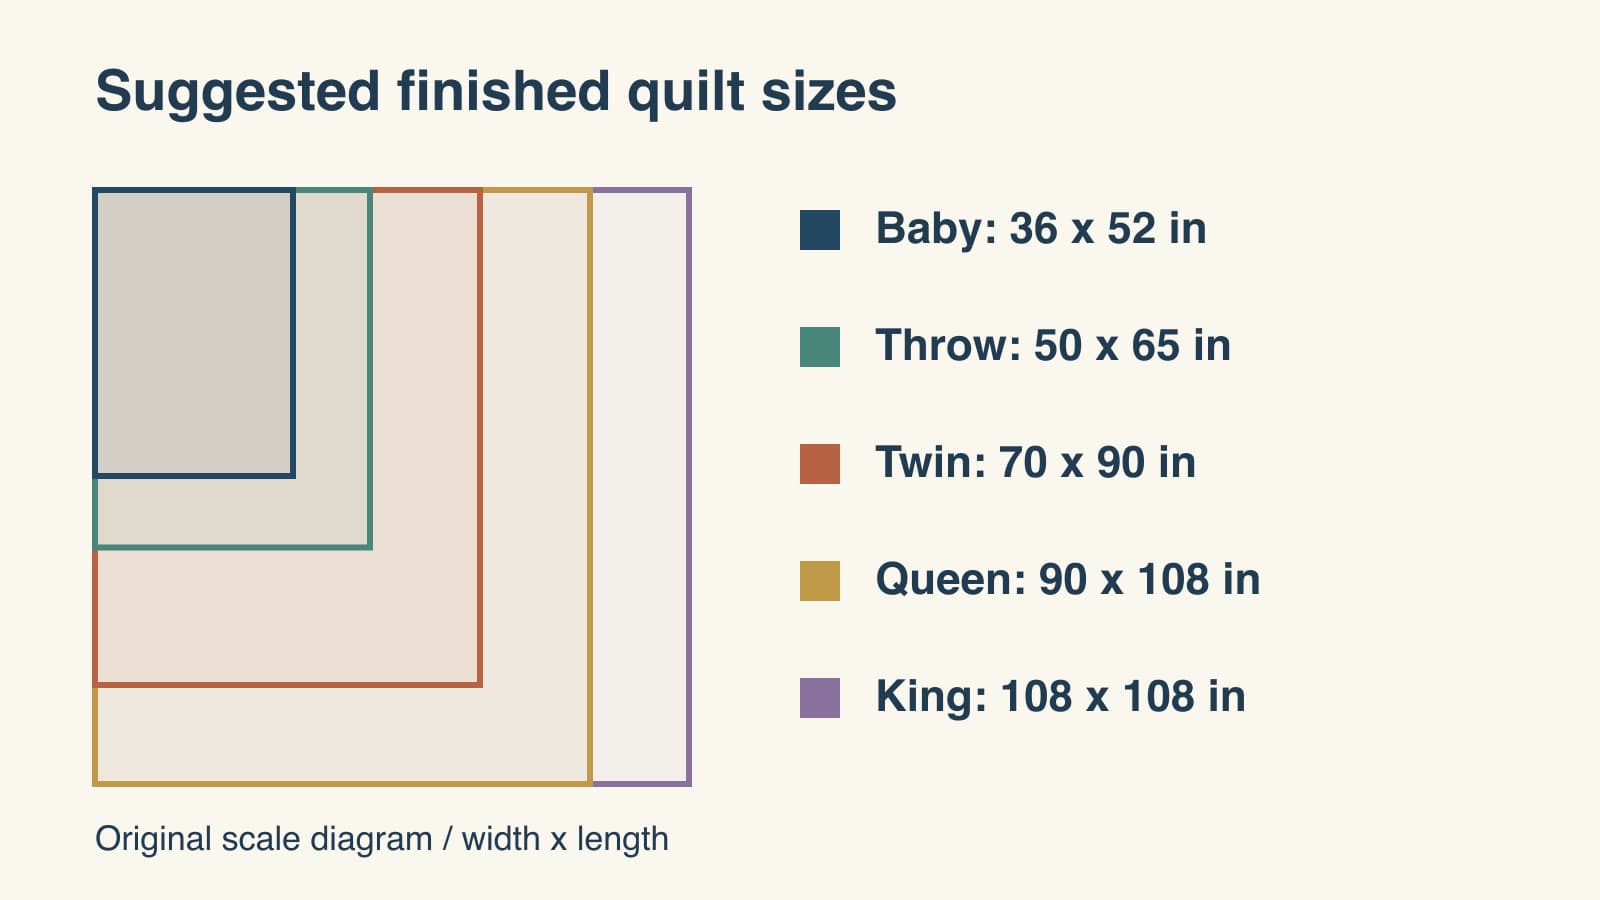
Baby 36 x 52, throw 50 x 65, twin 70 x 90, queen 90 x 108, king 108 x 108 inches. Then measure your bed's drop and count the blocks to get there.
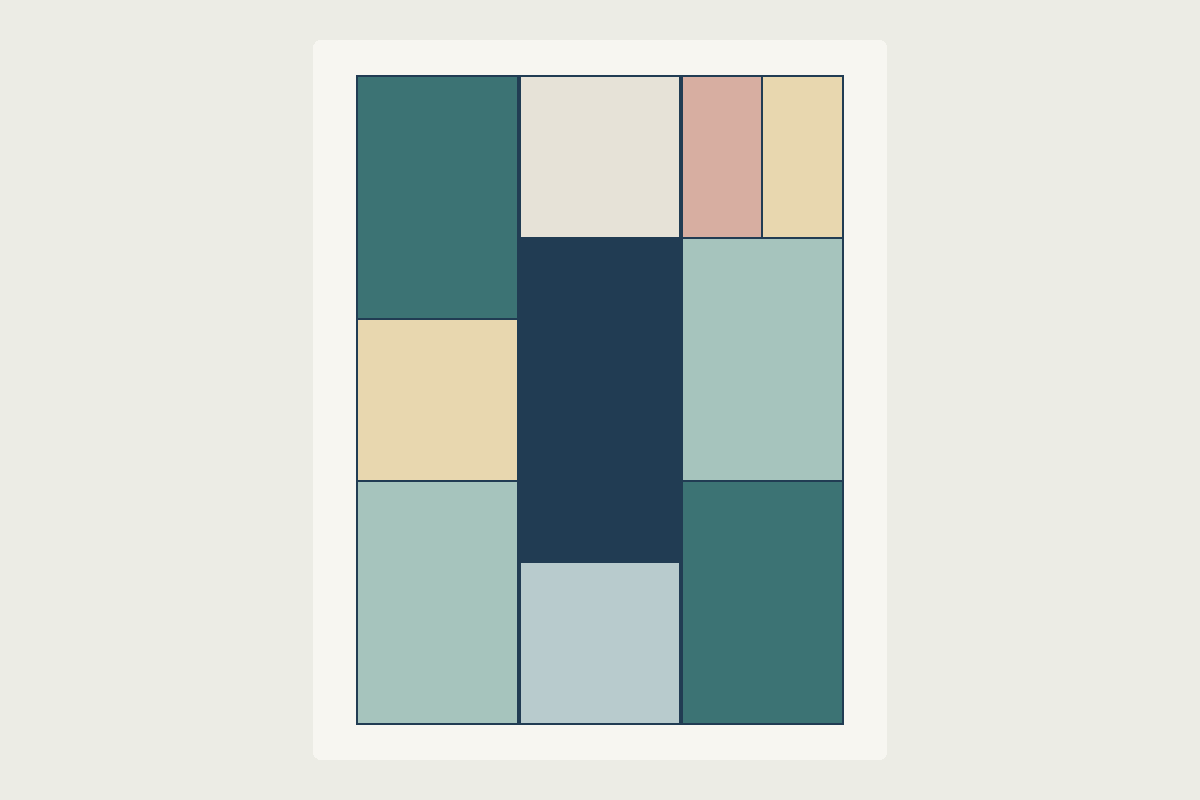
Stack mixed-size shirt panels in columns of one width, fill short spots with strips and sew each column first. A worked 36 x 48-inch plan with ten panels.
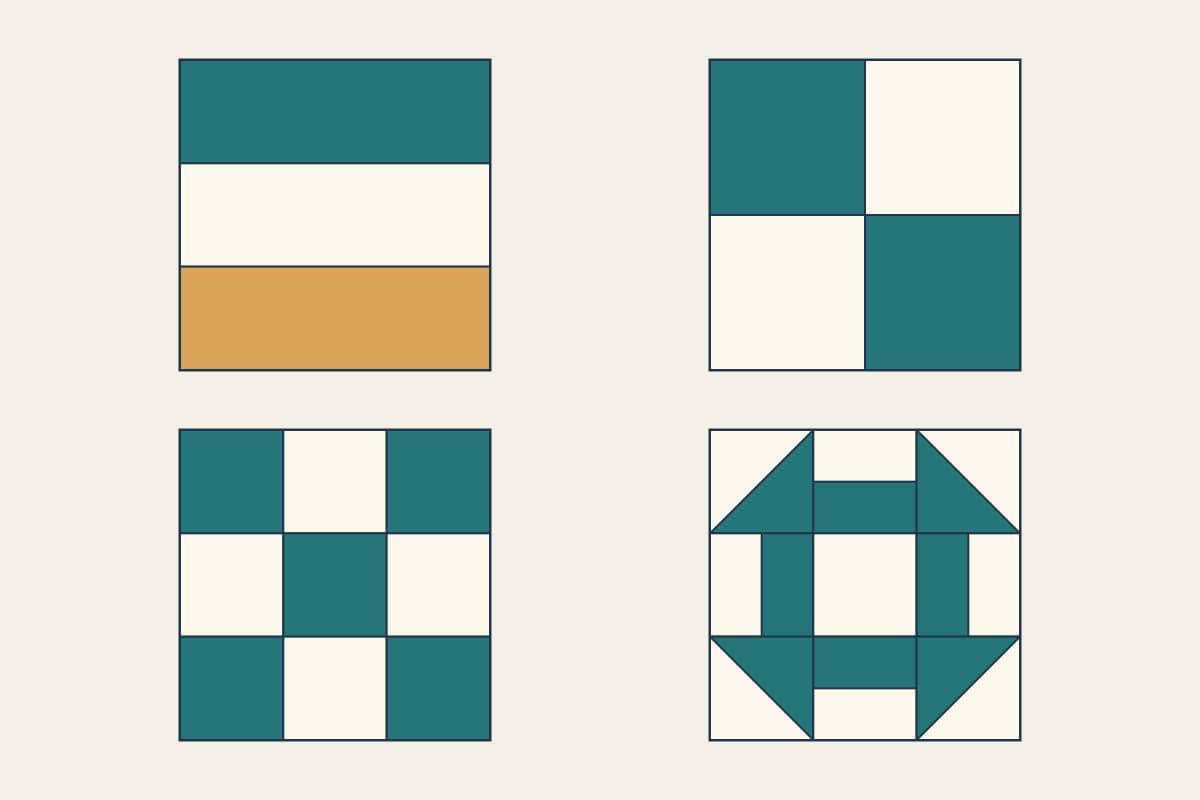
Sew Rail Fence, Four Patch, Nine Patch, then Churn Dash. Each adds one skill. Cutting sizes for 12-inch blocks and a six-block practice top.

Cut side triangles from a square 1 1/4 inches bigger than the block's diagonal, and corners from a smaller square. Formulas, a 13-block plan and the sewing order.
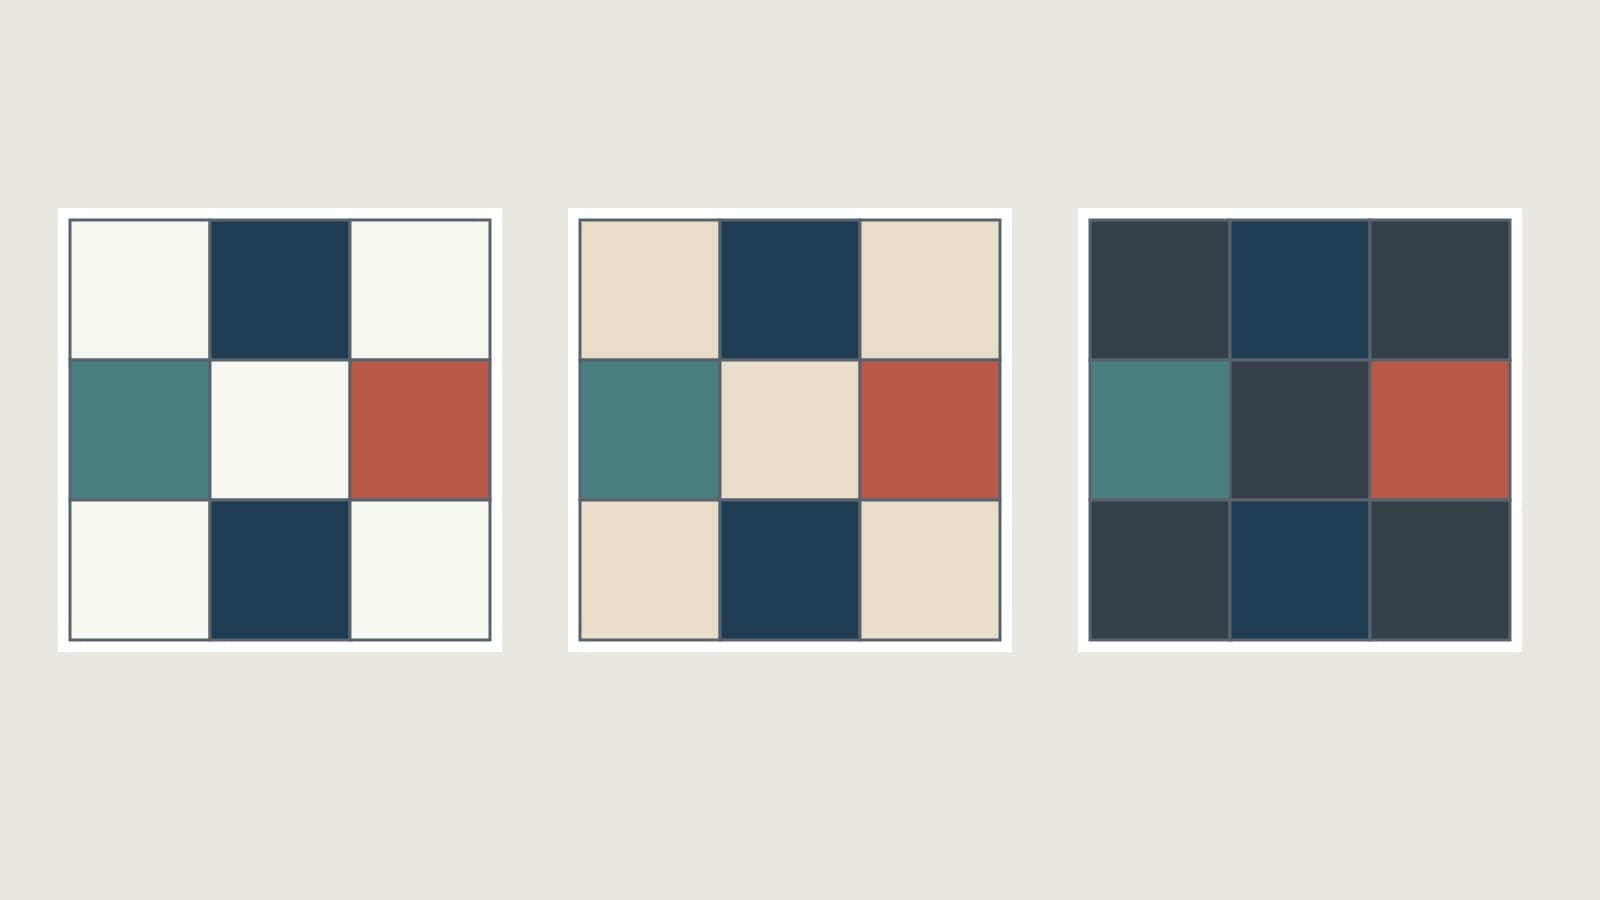
Pick the background that keeps your weakest edge visible. Test contrast first, then undertone and print, at the share of the quilt it really covers.
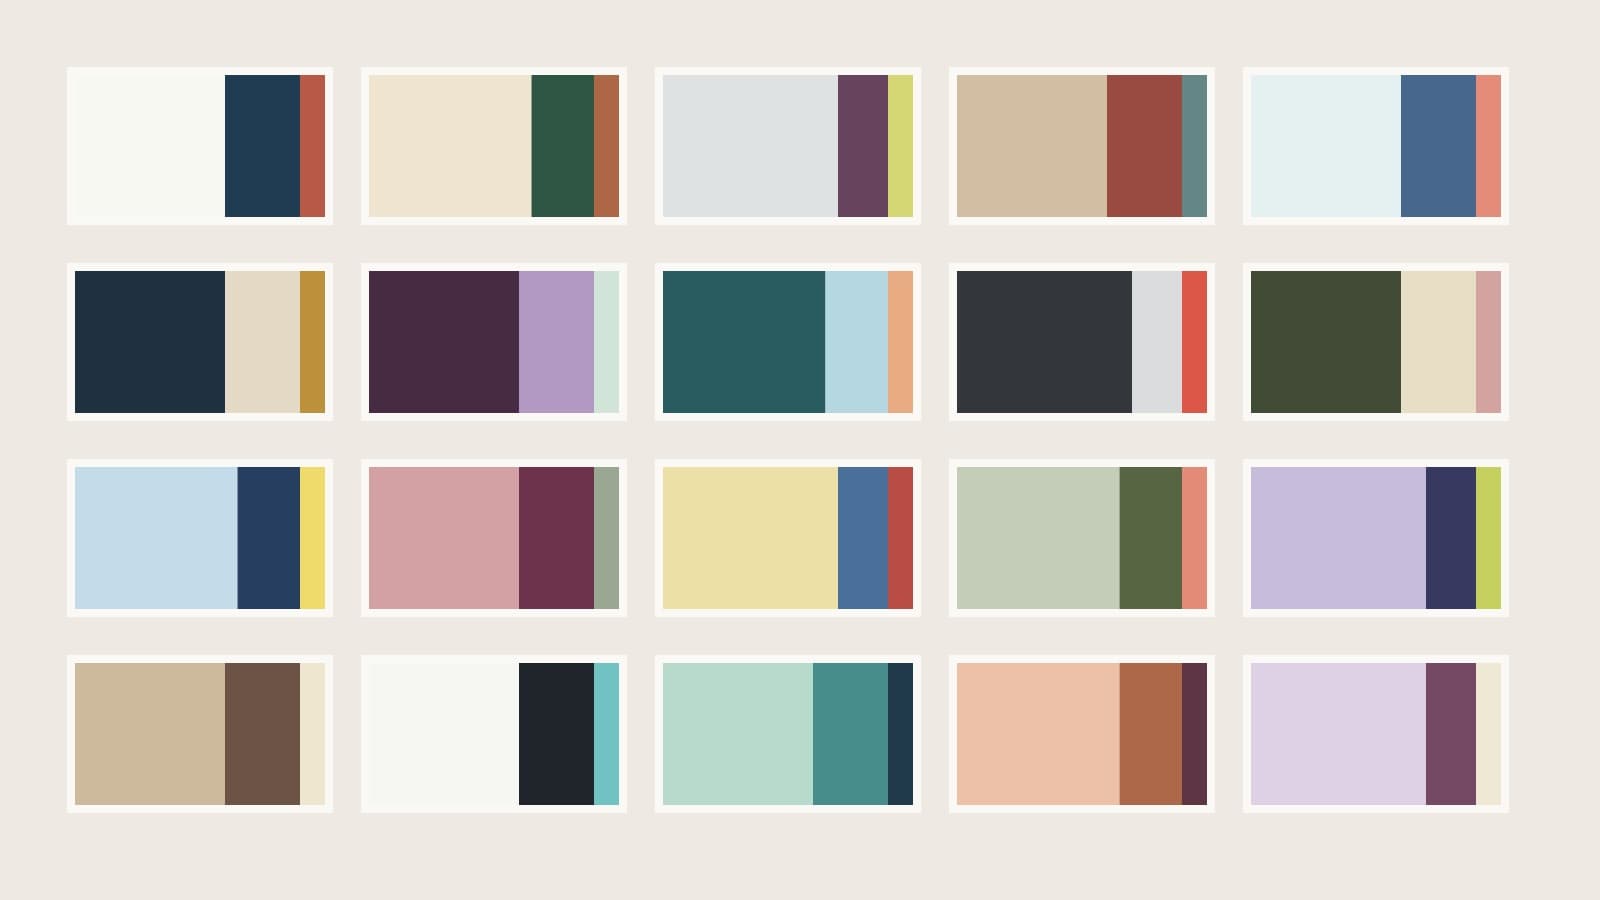
Twenty three-color quilt palettes, each split into a background, a support color and a small accent, with notes on where to put every color.
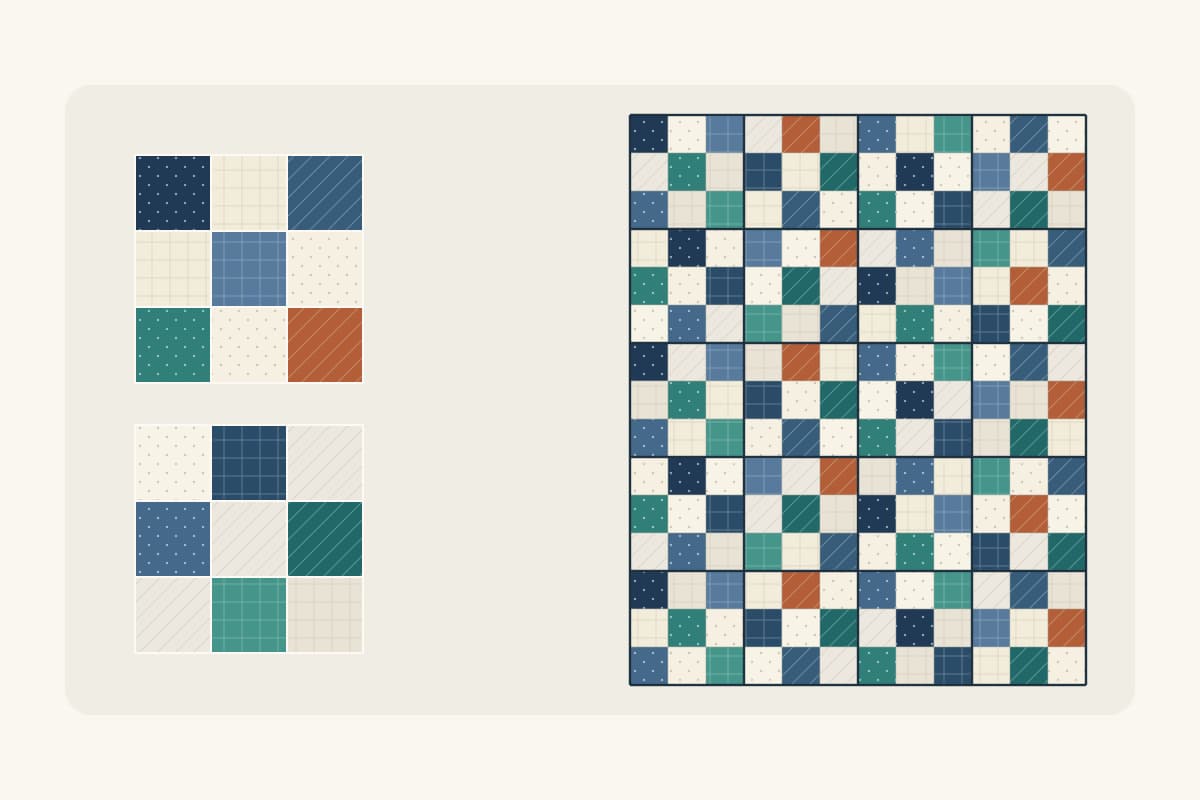
Give every scrap a job: keep two rules across the top and vary the prints inside them. A worked 36 x 45-inch nine-patch plan with the patch counts.
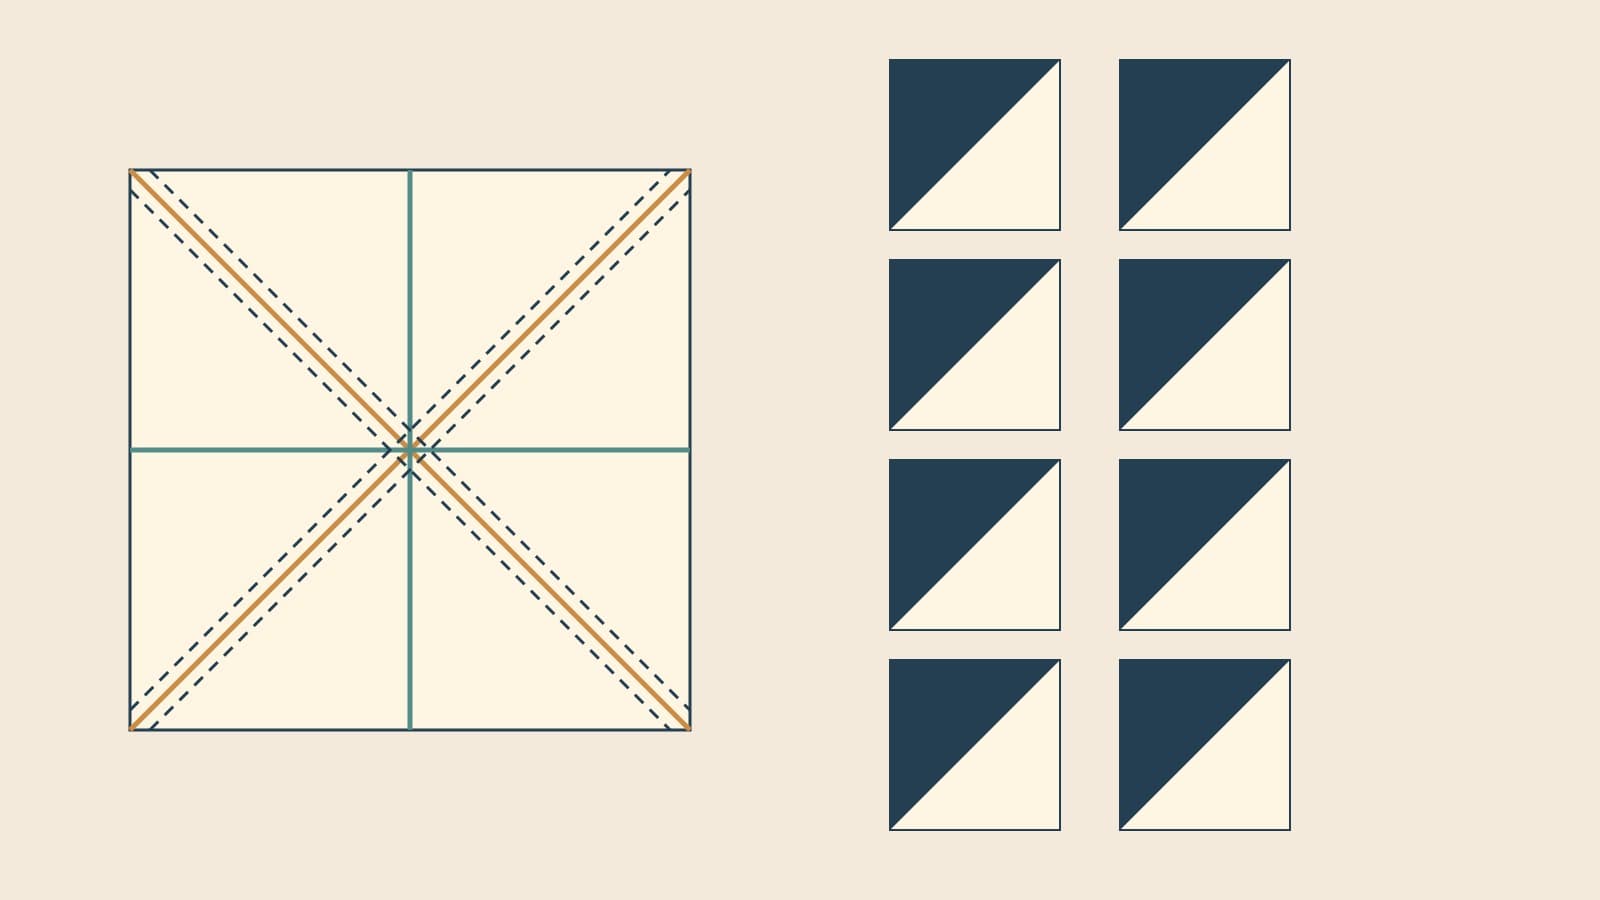
Cut two squares at twice the finished size plus 2 inches and you get eight HSTs with room to trim. A size chart, the cutting order and a 54-unit plan.
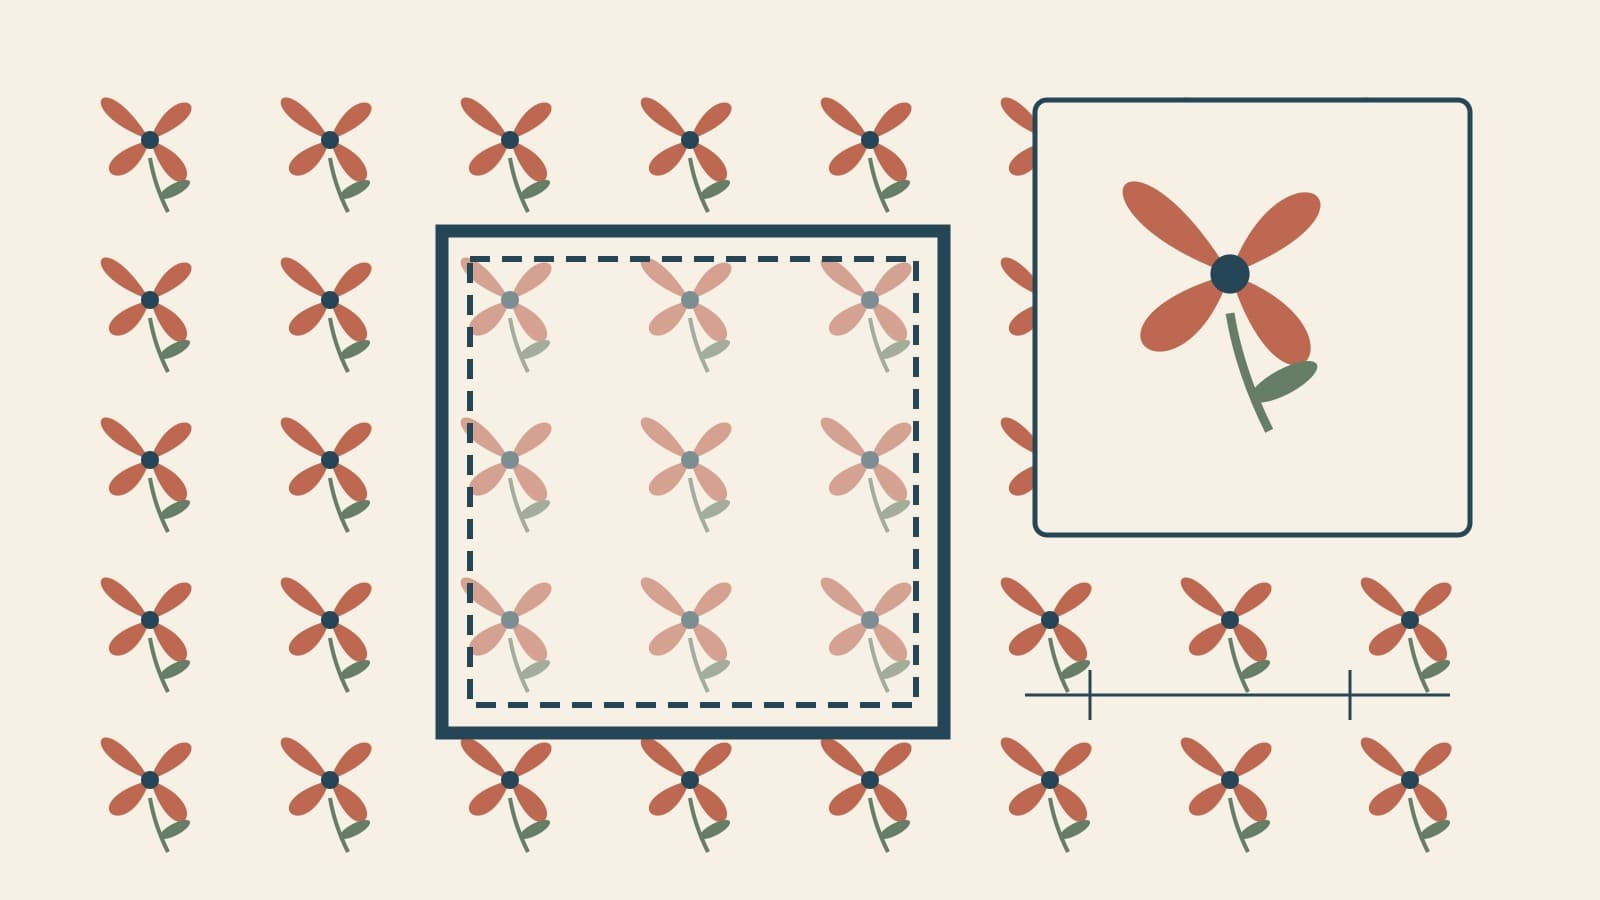
Frame the motif inside the finished size, cut a quarter inch bigger all around, and count the repeats before you buy. Worked through on a 4-inch square.
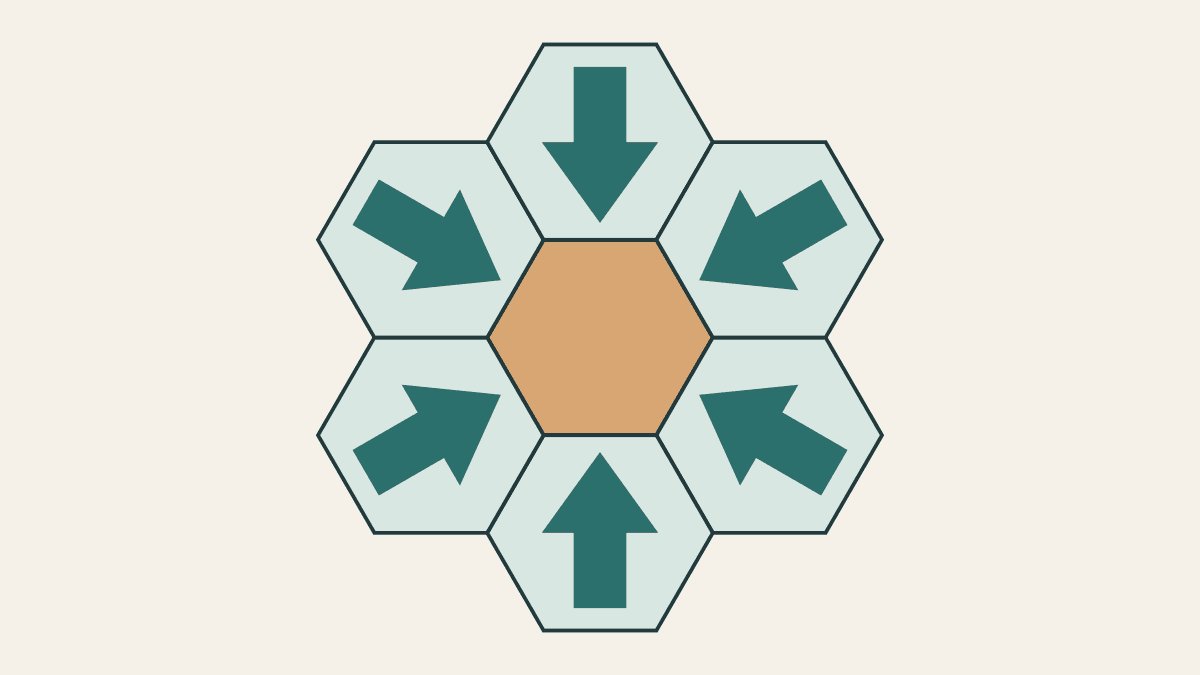
A fussy-cut rosette needs six matching repeats with room for the whole template. Map the repeat, mark your template and turn each piece 60 degrees.
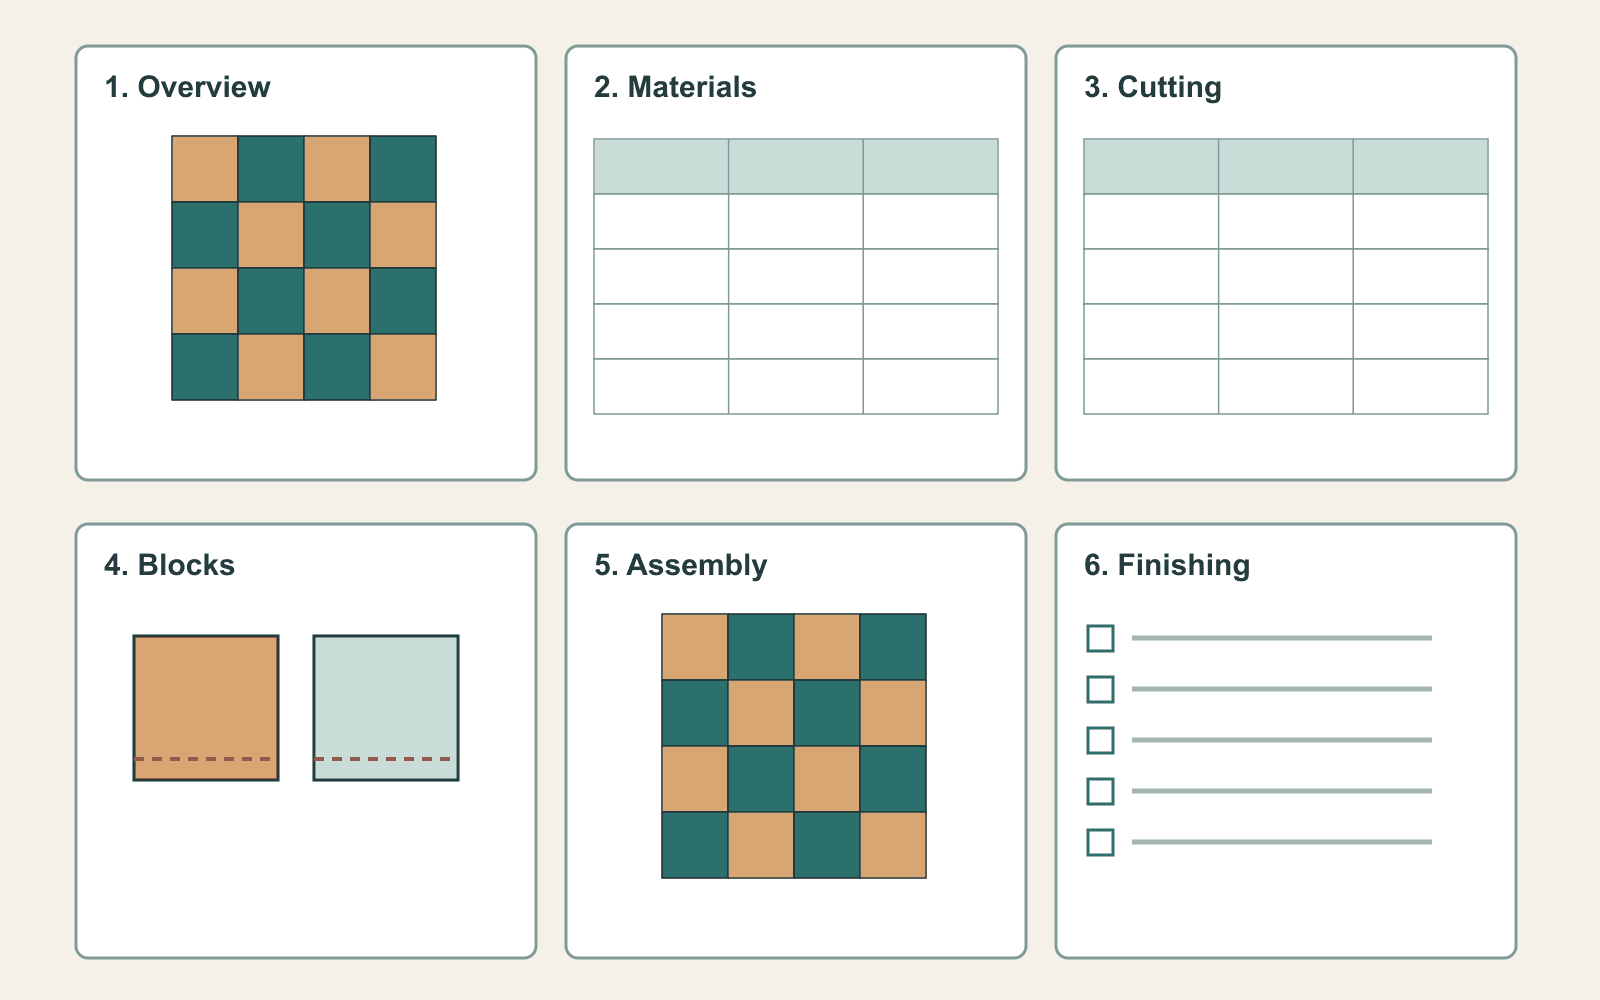
A pattern needs a finished size, materials, cutting, block steps and assembly. Plan the pages, check the math, draw each step and test it before release.
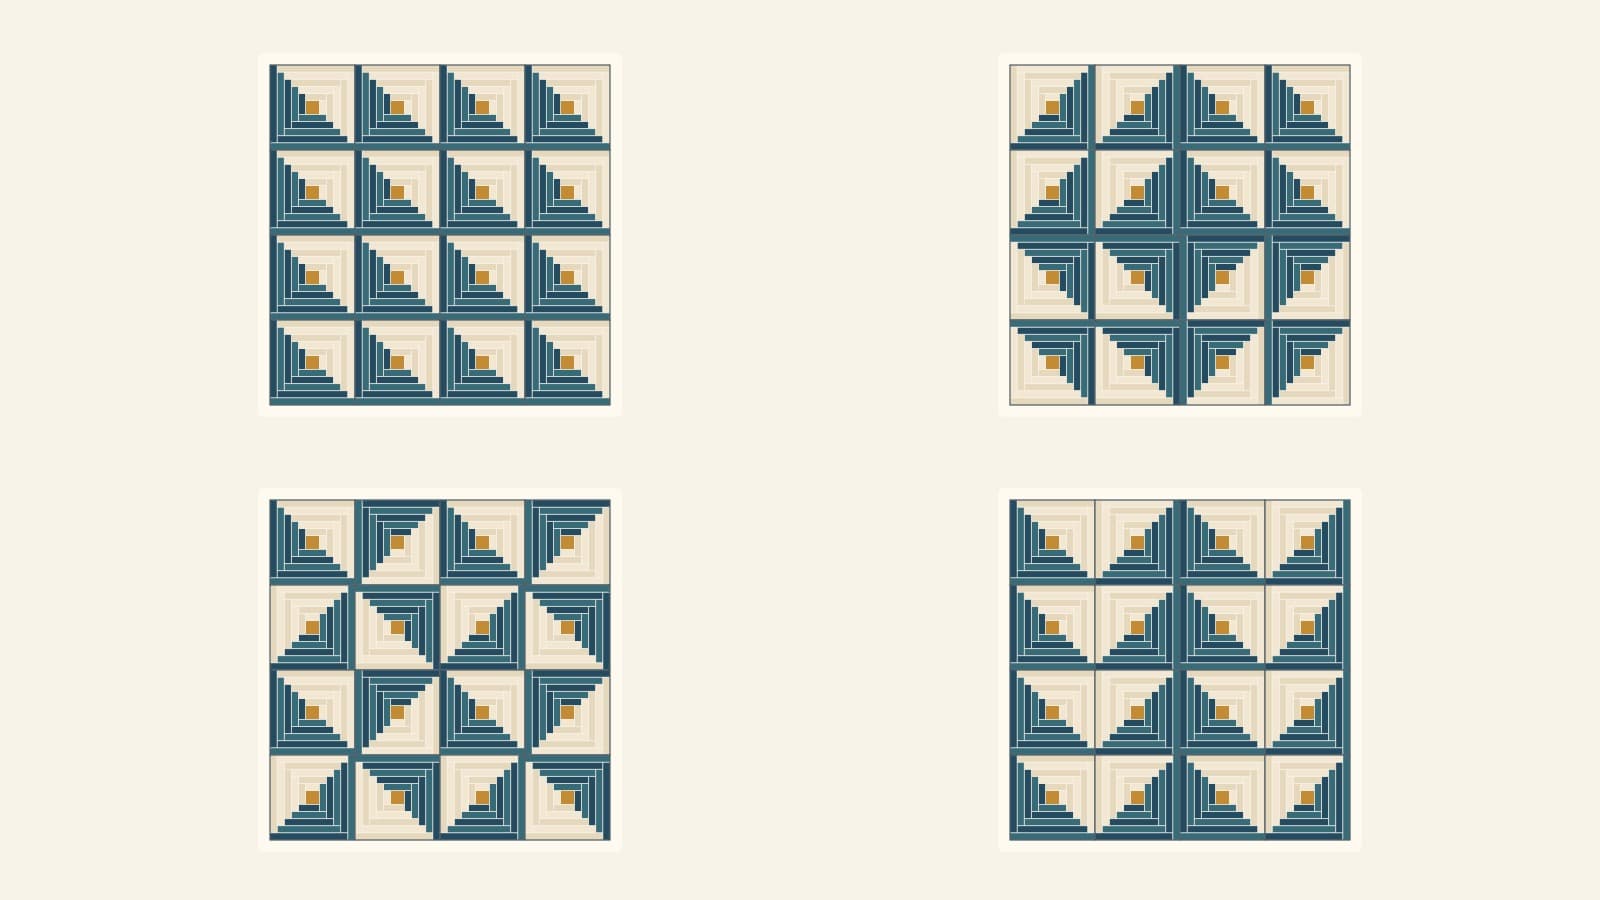
Turn sixteen identical Log Cabin blocks four ways: Straight Furrows, Barn Raising, pinwheels and chevrons. A rotation map for each, plus quilt sizes.
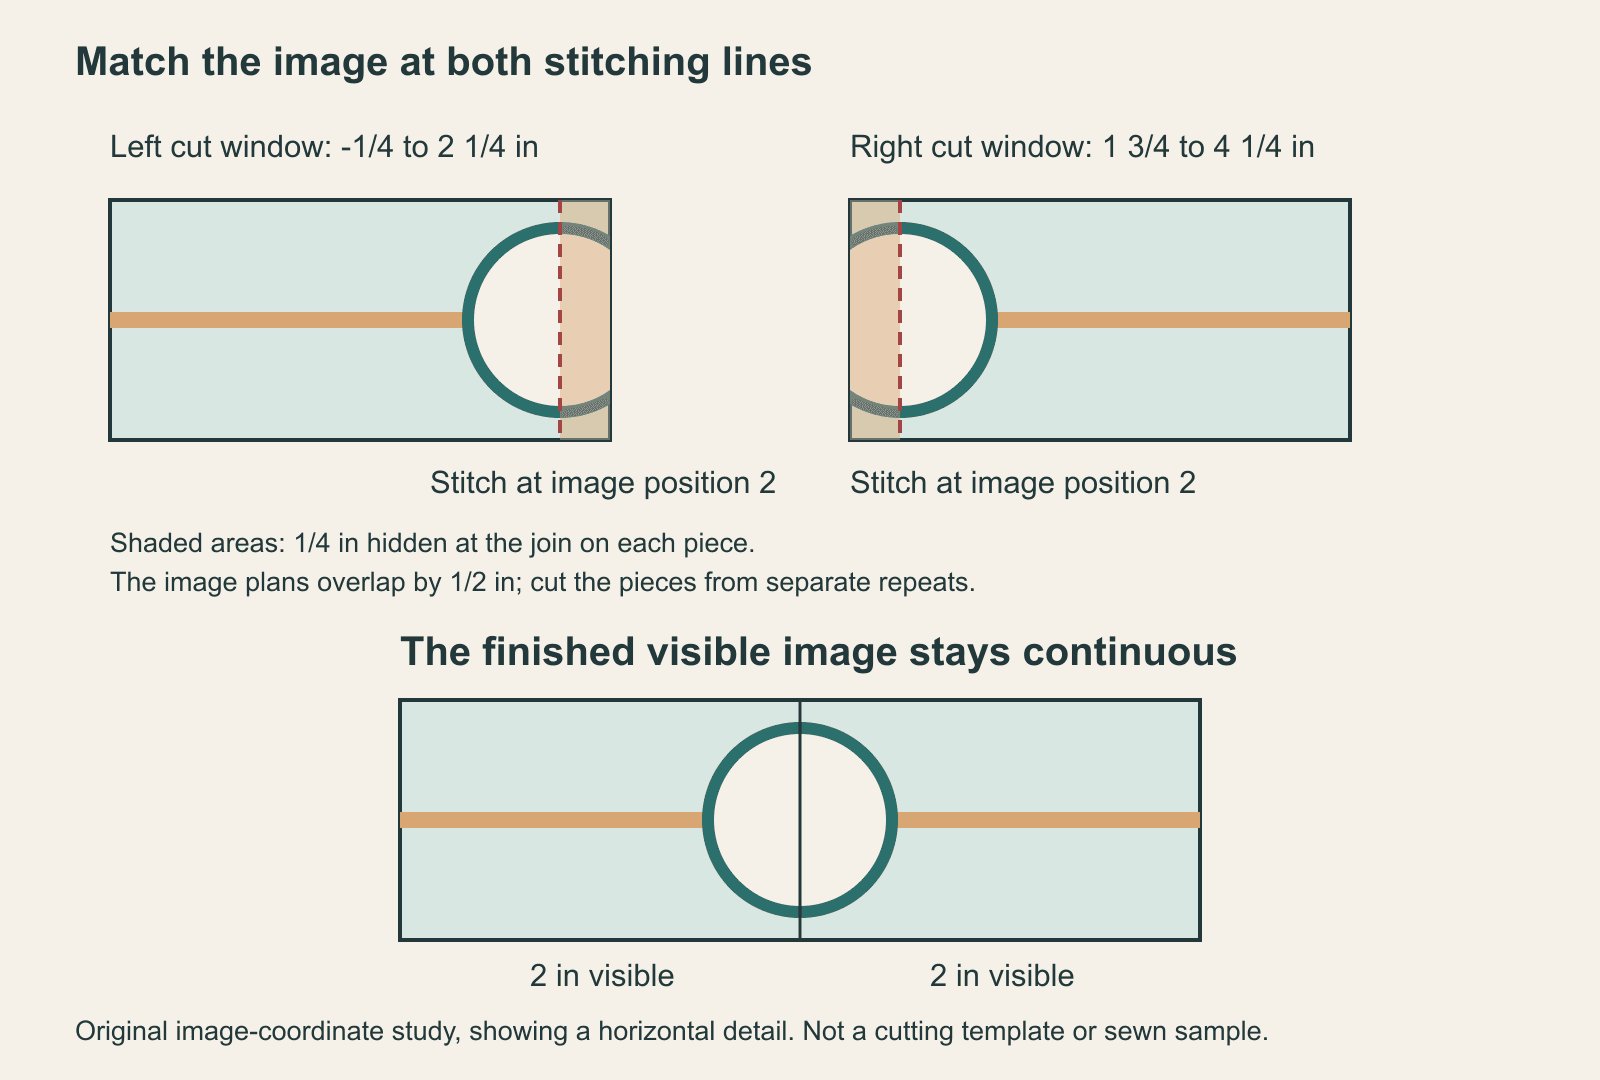
Line up the print at the stitching line, not the raw edge. A 4-inch worked example shows why the two pieces need separate repeats, plus a sample routine.
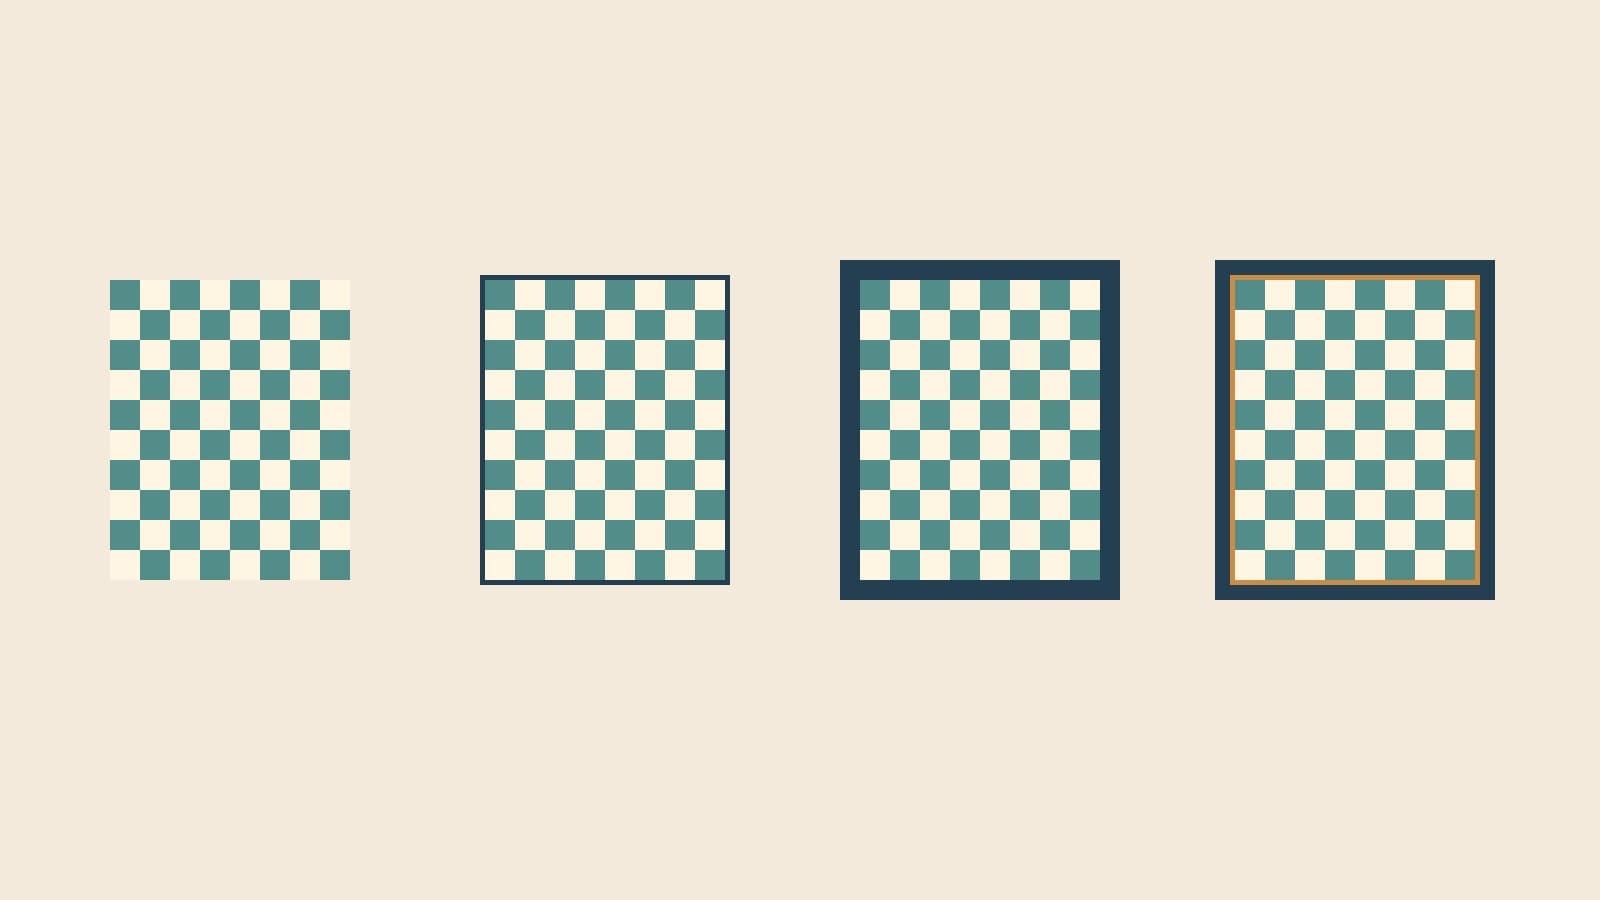
Start with a border a third to half your block size, then compare it with a 1-inch frame, two borders and no border on one quilt, with the size each adds.
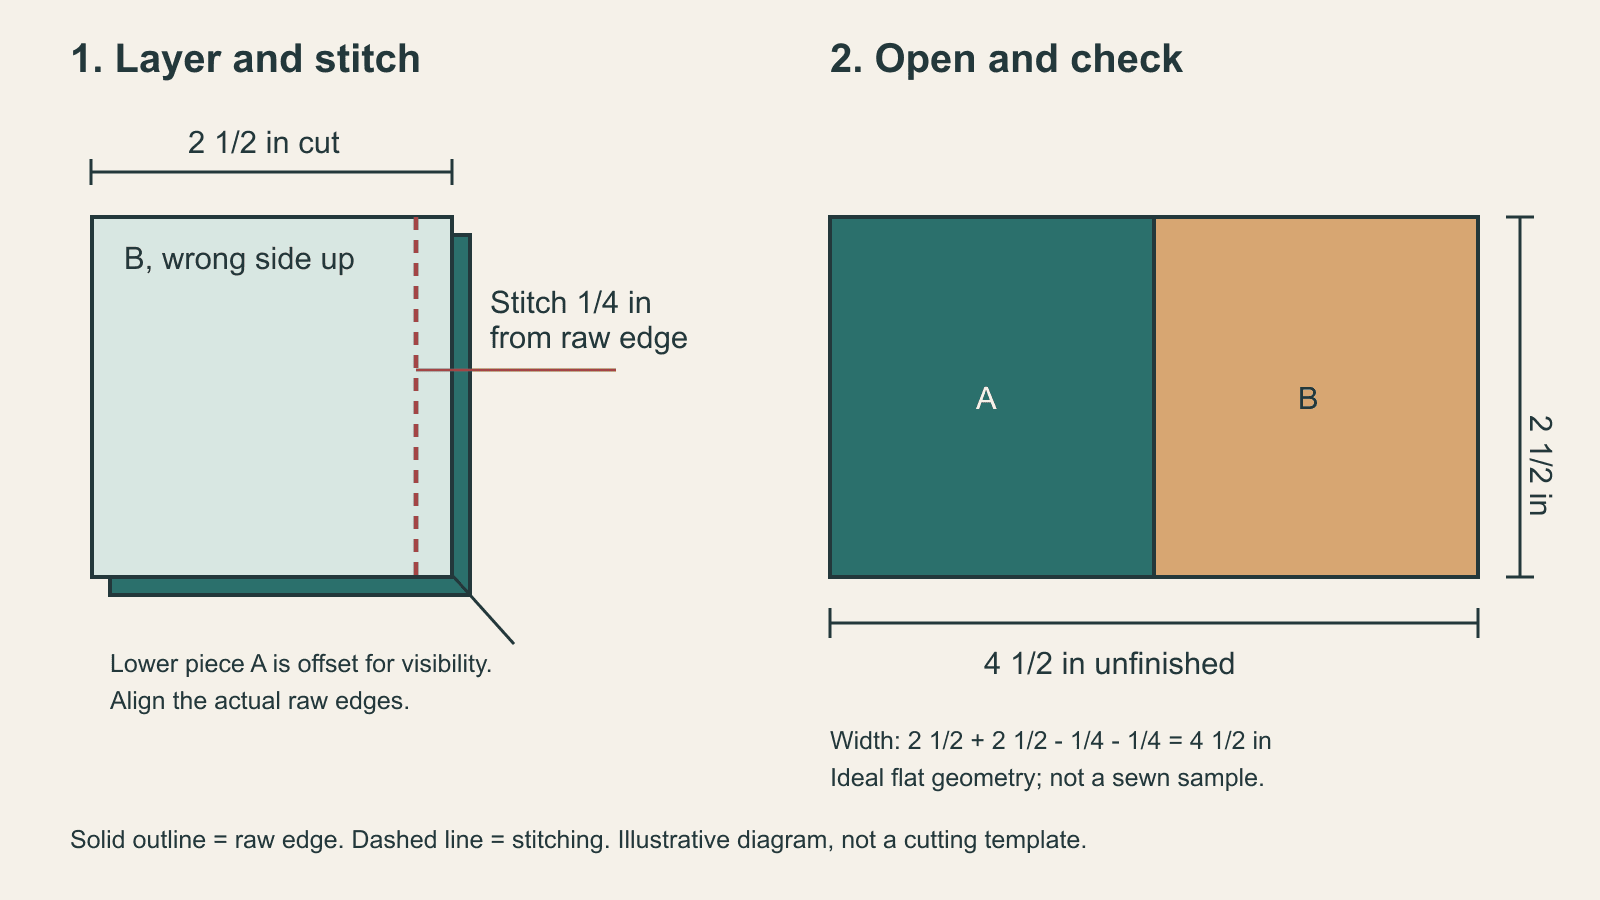
One action per diagram, a line key that tells stitching from cutting, and the size the unit should measure now. A two-square example shows how.
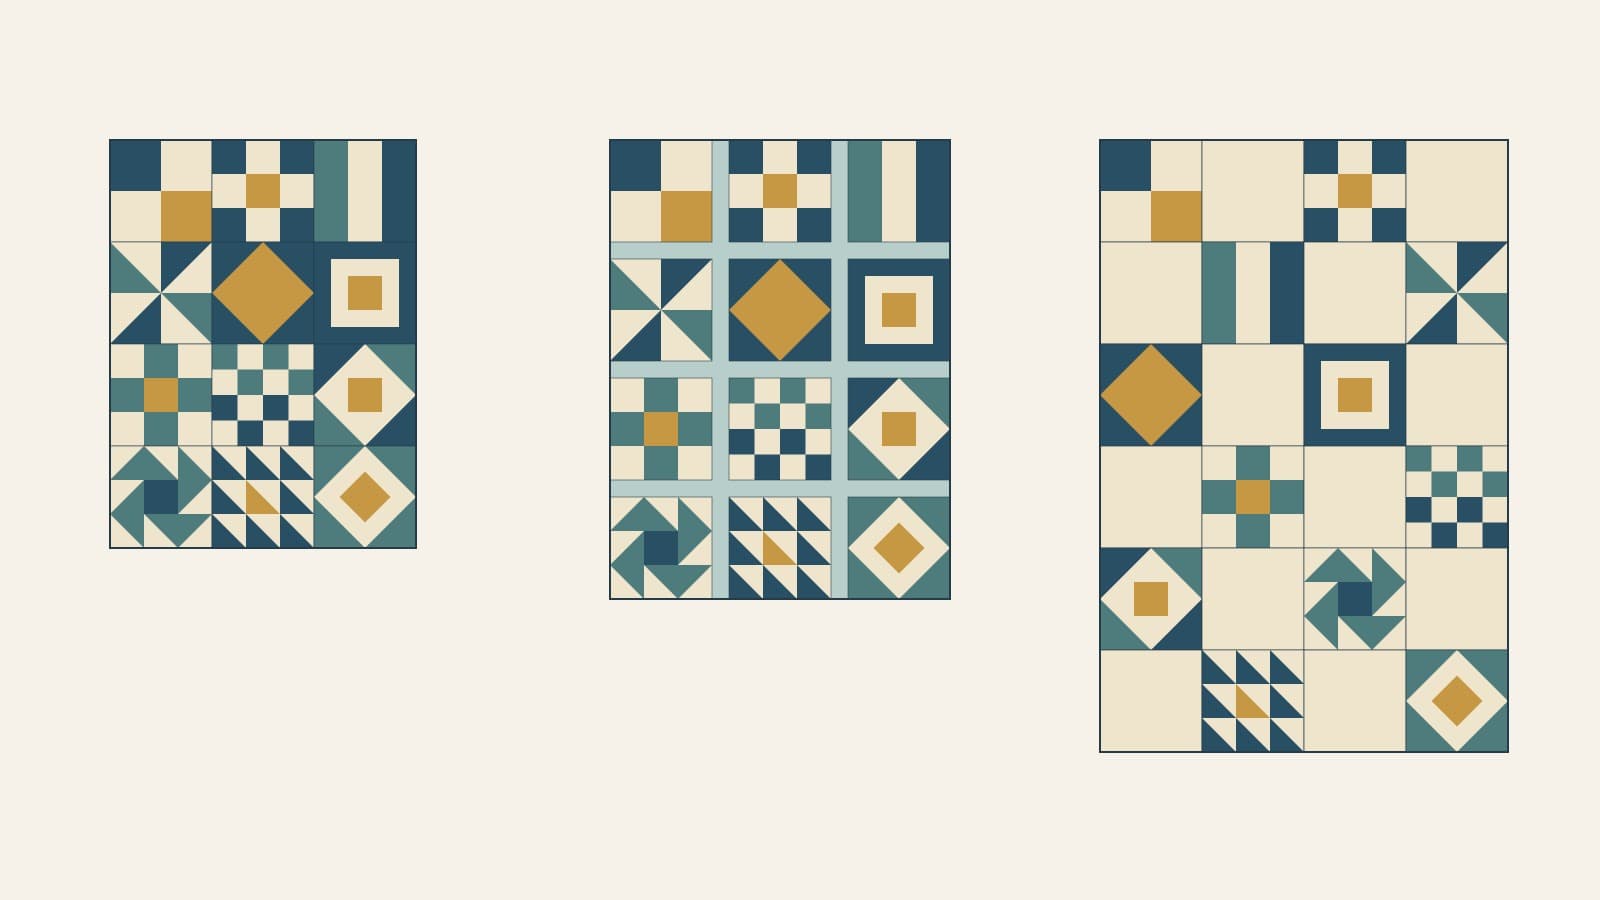
Twelve 12-inch sampler blocks make a 36 x 48, 40 x 54 or 48 x 72-inch center, depending on the setting. Compare all three and plan before block one.
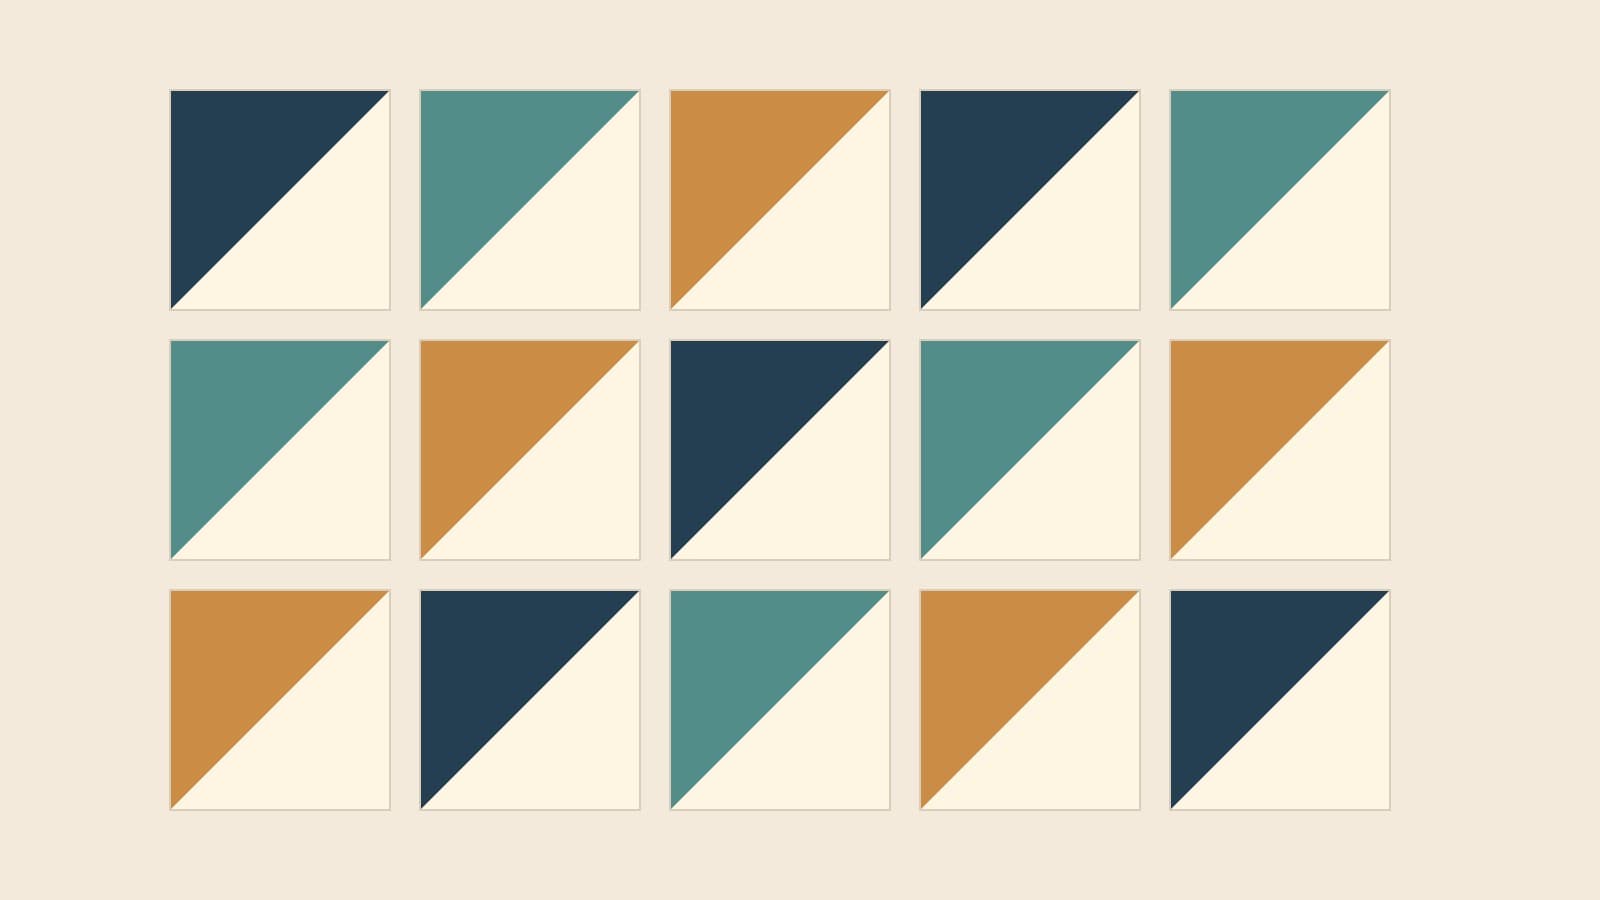
Cut squares 7/8 inch larger than the finished HST, or 1 inch larger to trim. A size chart, the trim routine and a 48-unit cutting example.
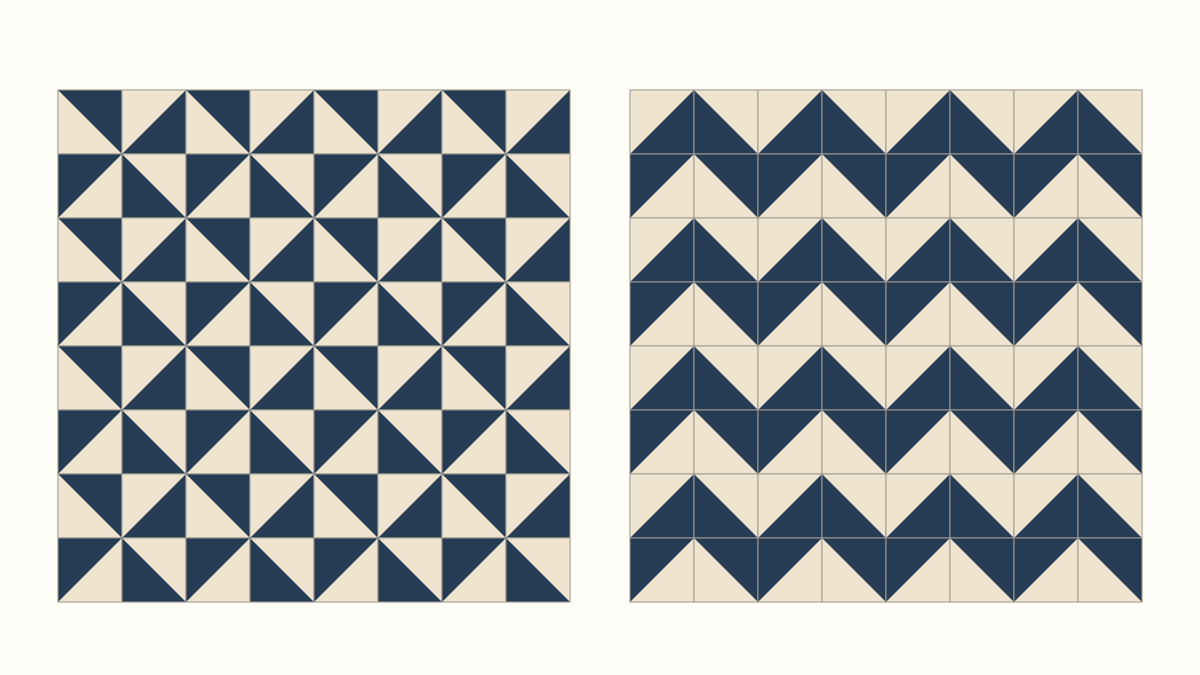
Turn the same 64 half-square triangles into pinwheels, chevrons, diamonds and paired geese, with exact orientation maps and a 48-inch finished example.
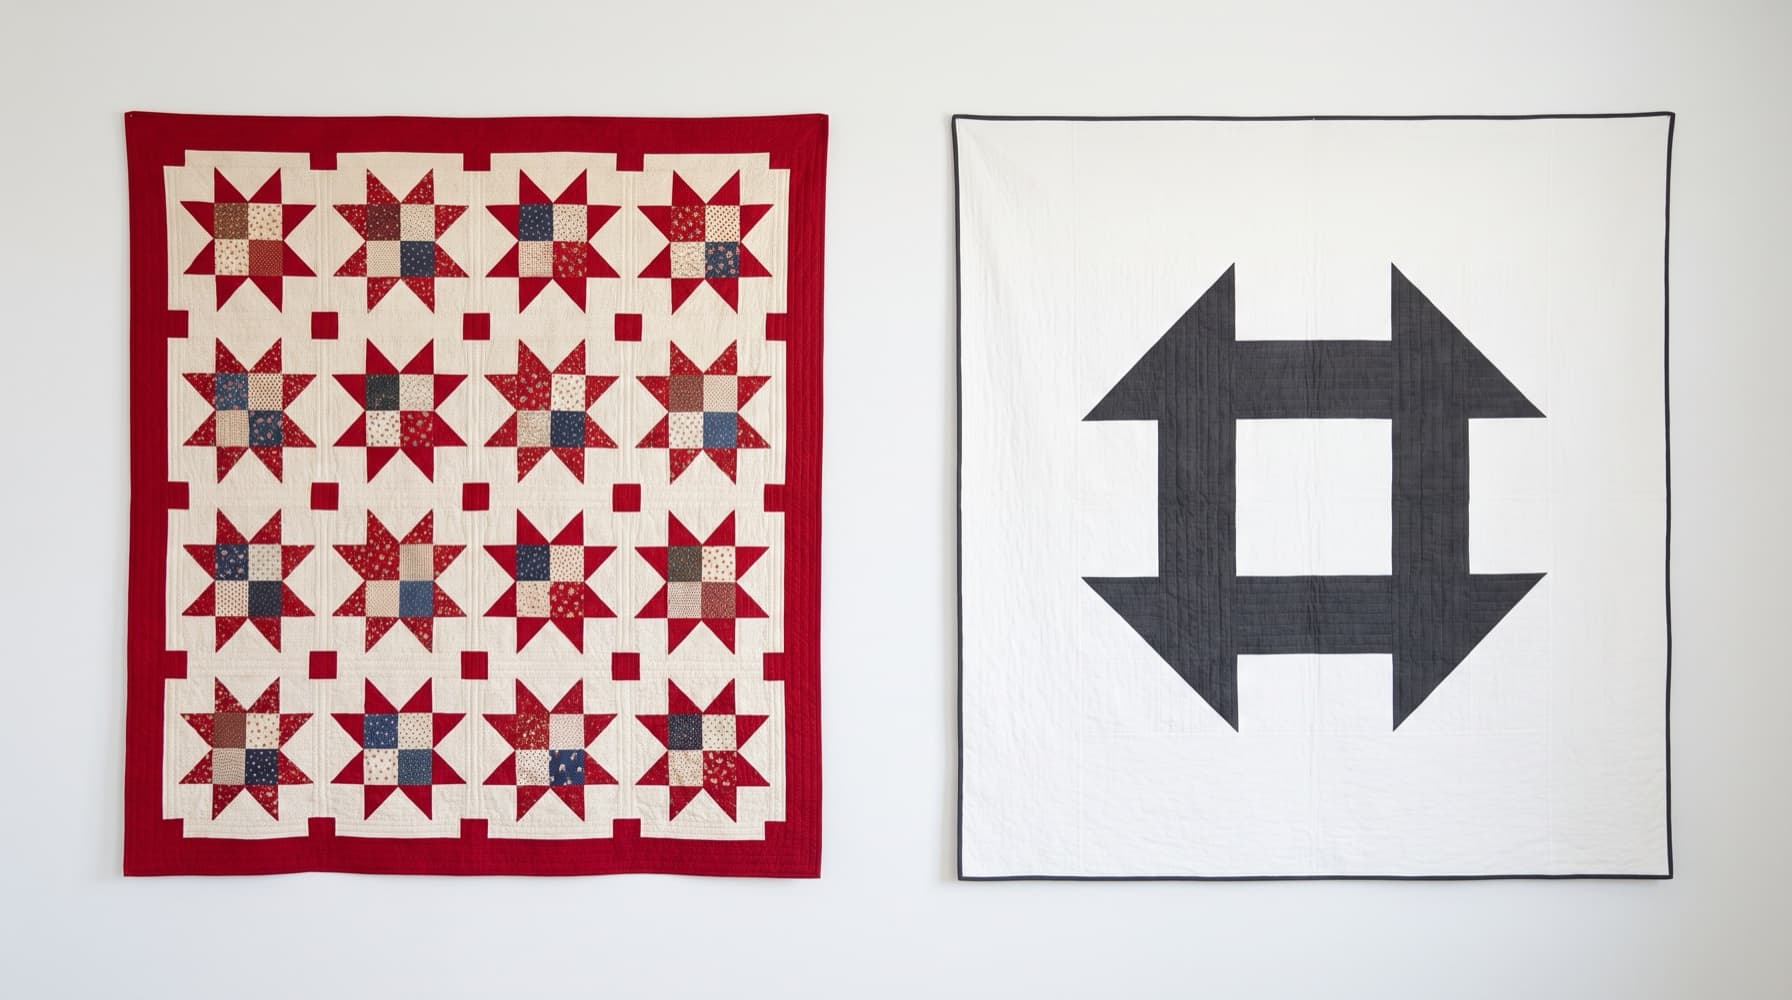
Compare modern and traditional quilts through repetition, scale and space, then try three checked layouts using the same Nine Patch.
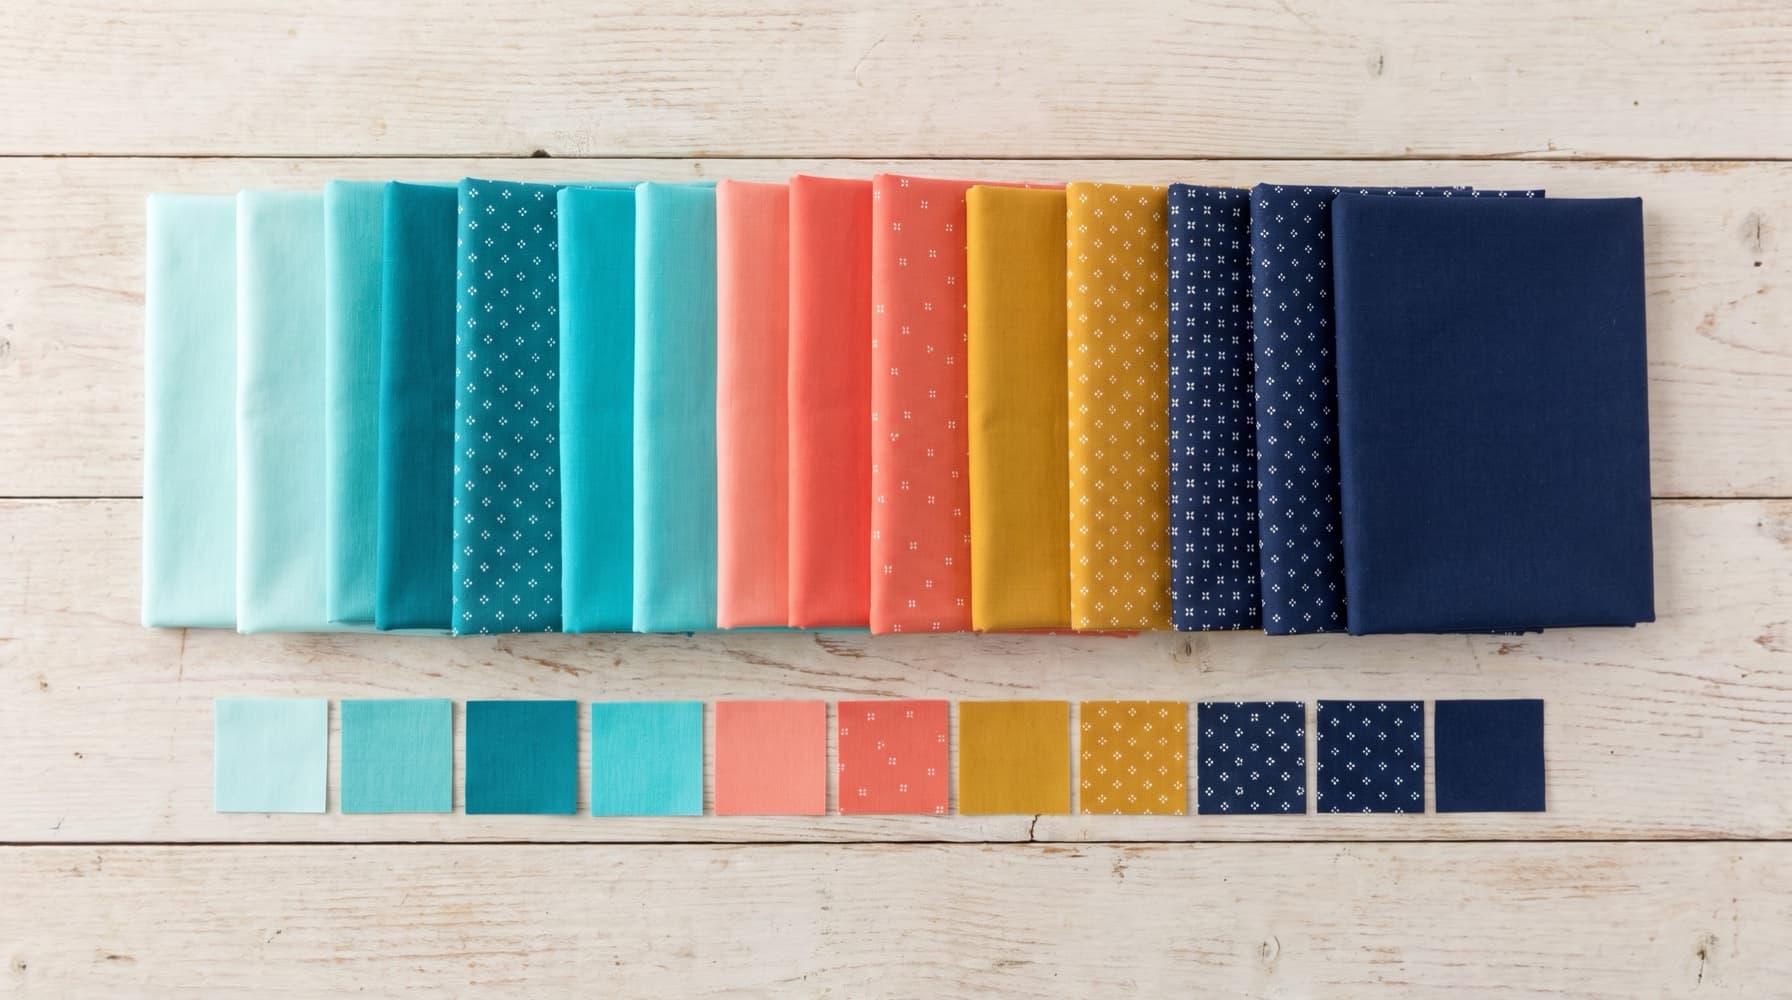
Choose the shapes you want to see, then compare value, hue and print scale. A nine-patch example shows how fabric roles become a measured plan.