


Batting Quilting Distance Planning: Gap Check
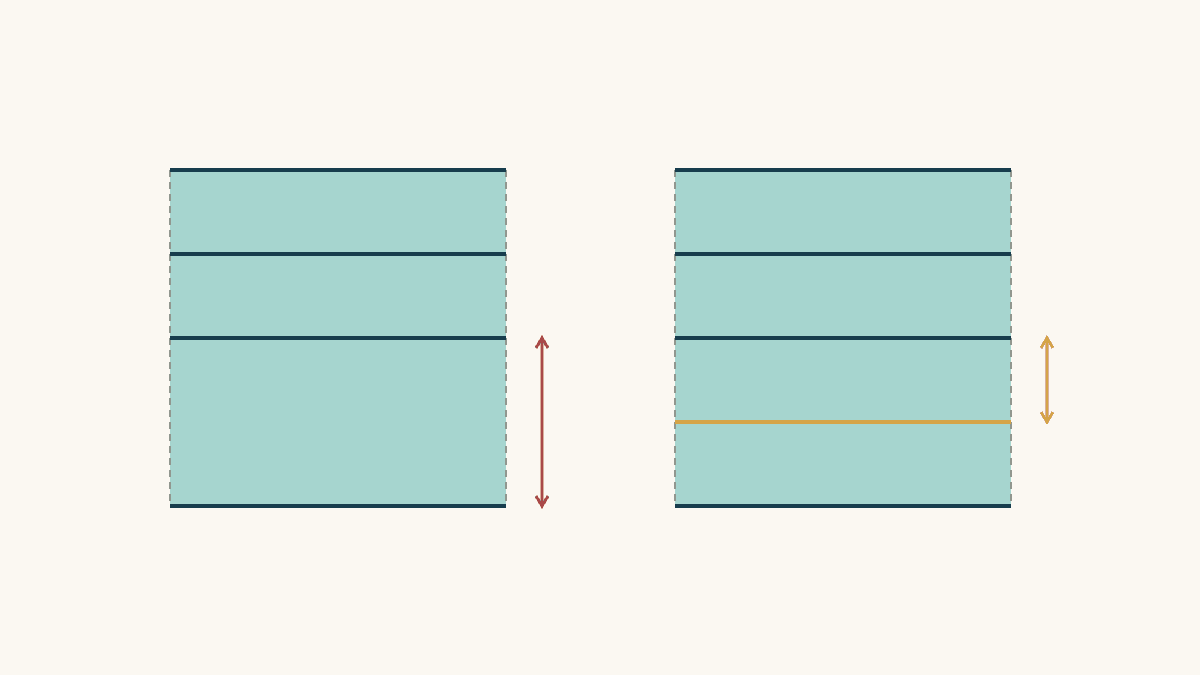
Batting quilting distance planning starts with the exact batting product's instructions, then checks the widest spaces your planned stitching leaves. A few closely quilted areas do not make a large empty area smaller. Check the whole plan before choosing how much extra stitching you want for appearance or texture.
The example below uses parallel lines in a measured interior window. Its largest neighboring-line gap is 6 inches, even though the midpoint of that gap is only 3 inches from a line. That distinction can change whether a plan meets a stated maximum spacing.
This is an original calculation and diagram, not a sewn or washed sample. It does not establish one universal way to interpret spacing for every curved motif, intersecting design or tied quilt. For those cases, ask the batting manufacturer how its instructions apply to your proposed layout.
Record the limit for the product you actually have
Keep the package or a photograph of its instructions with your project notes. Write down the product name, fiber blend or variant, and maximum quilting distance. Match an online reference to that exact product; a familiar brand name alone is not enough.
Here are three manufacturer statements checked for this article:
| Exact batting product | Manufacturer's stated spacing | Planning implication |
|---|---|---|
| Hobbs Heirloom Premium 80/20 Cotton/Poly Blend | 4 inches maximum | Check that neighboring parallel rows are no farther apart than 4 inches |
| Warm & Natural | Quilt or tie up to 10 inches apart | Its stated upper limit is different from the Hobbs product's |
| Quilters Dream Cotton | Stitching may be as far as 8 inches apart | Use this product's instruction, rather than a rule for all cotton batting |
Hobbs' Heirloom Premium 80/20 product page specifies 4 inches or closer and lists a 4-inch maximum in its product table. The Warm Company instructions for Warm & Natural allow quilting or tying up to 10 inches apart. Quilters Dream's Cotton product page gives an 8-inch maximum and permits closer stitching.
Those are product-specific statements, not a ranking or a promise about the feel of a finished quilt. Follow the instructions supplied with your batting; check with the manufacturer if its current package and online page differ. Record any advice you receive alongside your plan.
Our batting guide can help you compare materials. Once you have selected one, its own instructions supply the constraint for this spacing check.
Separate actual quilting from other lines
Make a sketch with one kind of mark for stitching that will pass through the quilt sandwich. Distinguish it from patchwork seams, block outlines, temporary basting and the boundaries of your drawing. A seam joining two patches in the top is not automatically a quilting line through all three layers.
Count a line only if you intend to quilt it. If your plan says “stitch along this seam,” include that proposed quilting track. If a seam is merely visible on the top, leave it out of the spacing calculation.
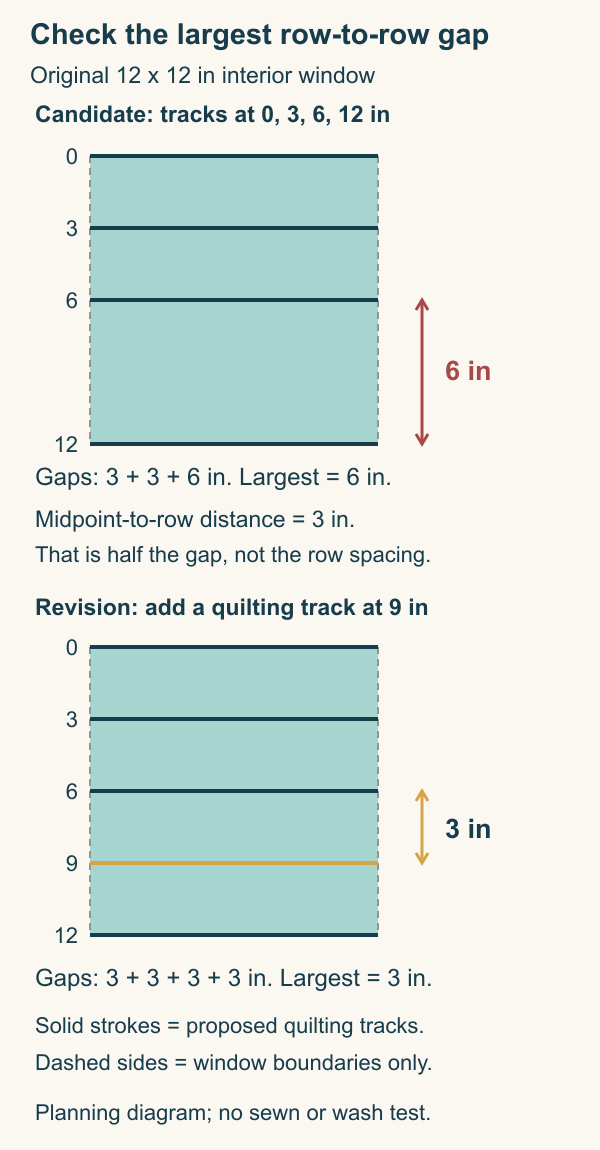
For this worked example, imagine a 12 x 12-inch window inside a larger quilt. Proposed horizontal quilting tracks cross the full window at positions 0, 3, 6 and 12 inches from its upper boundary. The tracks at 0 and 12 are planned stitching, not imaginary edges that hold the batting in place. The dashed vertical sides mark only the window's boundaries.
Using an interior window keeps the arithmetic clear. The actual quilt perimeter and the areas beyond this window still need their own check.
Calculate every neighboring gap
List the row positions in order and subtract each one from the next:
| Neighboring rows | Calculation | Gap |
|---|---|---|
| 0 to 3 inches | 3 - 0 | 3 inches |
| 3 to 6 inches | 6 - 3 | 3 inches |
| 6 to 12 inches | 12 - 6 | 6 inches |
The largest gap is 6 inches. The average is 4 inches because the three gaps total 12 inches, but the average hides the wider last space. For the simple parallel-row comparison, a 4-inch maximum applies to that widest space as well as the smaller ones.
It is also tempting to measure from the midpoint of the wide space to its nearest row. The midpoint is at position 9 inches. It is 3 inches from the row at 6 and 3 inches from the row at 12. That measurement describes half of the 6-inch gap. It does not turn those rows into stitching 3 inches apart.
For Hobbs Heirloom Premium 80/20, the proposed 6-inch row spacing exceeds the stated 4-inch maximum. Comparing this same simple spacing numerically with the other two products gives 6 less than 8 and 10. That comparison does not establish wash performance, approve a different kind of motif or override the instructions for your actual batting.
Revise the wide space, then recalculate
Add a full-width quilting track at position 9 inches. The revised row positions are 0, 3, 6, 9 and 12 inches. Subtraction now gives four gaps of 3 inches each:
3 - 0 = 3; 6 - 3 = 3; 9 - 6 = 3; 12 - 9 = 3.
The largest neighboring-row gap is now 3 inches, below the Hobbs product's 4-inch maximum for this simple layout. One added track divides the previously wide space into two smaller spaces. It does not require adding the same amount of extra quilting to areas that already met the limit.
This revision is a spacing demonstration, not a recommended finished design for every quilt. You may prefer a different layout. Whatever you choose, repeat the largest-gap check on the actual proposed stitching, rather than borrowing the 3-inch result from a drawing that no longer matches it.
Check that added tracks really reach the intended boundaries of the region. A line that stops halfway across leaves a different area on its other side. A decorative mark on a sketch only reduces the planned gap if it becomes stitching through the sandwich.
Check the rest of the quilt at the same scale
After the interior example, move across the full plan. Look especially at large blocks, wide borders and spaces where a busy stitched area gives way to a quiet one. Use finished quilt measurements to establish scale; the physical size of an image on your screen is not a fabric measurement.
Record the widest simple gaps region by region. If the drawing includes only straight parallel rows, subtraction from ordered positions is straightforward. If it includes curves, isolated motifs, ties or interrupted lines, this row-spacing calculation may no longer describe the manufacturer's intended limit. Send the manufacturer a dimensioned sketch and ask which distances need checking.
Check outer regions too. Do not silently treat the edge of the fabric, a dashed border or an unfinished binding line as completed quilting. State what stitching will actually be there and verify how the product's instructions apply at that edge.
Decide decorative density after the spacing check
A maximum distance tells you how far apart the manufacturer permits quilting for that product. It does not require every gap to equal that maximum. You may choose closer quilting for the look you want, while keeping the manufacturer's other instructions in view.
Hobbs describes closer quilting as producing a flatter, lower-loft appearance and wider spacing as allowing more loft in this 80/20 product. That is useful context for comparing options; it is not a substitute for seeing your own materials together. Prepare a sample with your selected top fabric, batting, backing and thread before committing to the quilt.
Keep separate notes for spacing compliance and the sample's appearance or handling. A calculation can verify a proposed gap. It cannot report how a sample feels, washes or stitches unless you actually make and assess that sample.
Keep a short spacing record with the project
Save the batting identity and source of its instructions, the dimensioned stitching sketch, the largest checked gap, and the revision that resolved any wider area. Note open questions for the manufacturer rather than replacing them with a general rule.
For the worked example, the record is simple: “Heirloom Premium 80/20; stated maximum 4 inches; initial parallel-row maximum 6 inches; added row at 9 inches; revised maximum 3 inches; remaining regions still to check.” That preserves the reason for the added line when you return to the project later.
Once the full spacing plan is settled, consider how you will execute its paths. The walking-foot and free-motion comparison explains the different handling responsibilities. Choosing a movement method is a separate decision from checking the batting's allowed distance.
Related posts
Quilting Tension Troubleshooting: Top and Back
Label both sides of a sample, check threading before the dial, and use a one-change log to narrow quilting stitch-balance problems.
Walking Foot vs Free Motion: Choose a Method
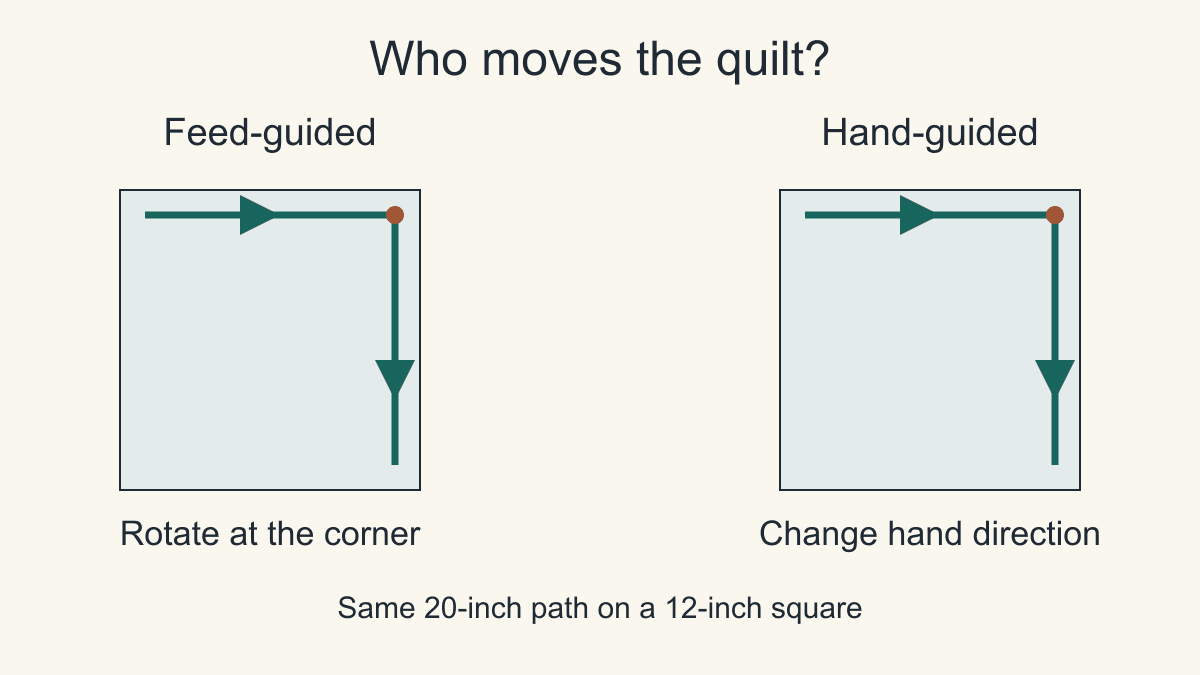
Compare fabric feeding, direction changes and stitch control, using the same measured path to choose a quilting method for your top.
Quilting Supplies for Beginners: Buy First, Add Later
Build a first-project kit by task: what to borrow, what to check, and what to buy, with a measured six-patch practice example.