


How to Make a Quilt Pattern Bigger: Three Plans
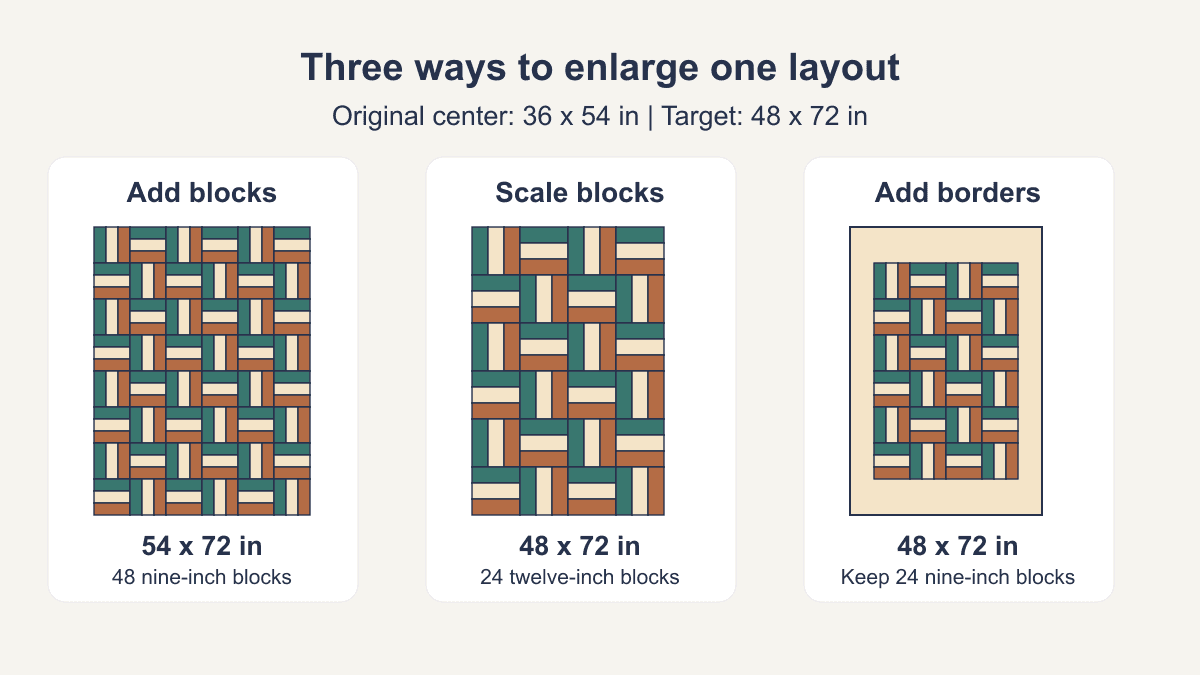
Deciding how to make a quilt pattern bigger means choosing what should stay the same: the size of each patch, the number of repeated blocks, or the existing center. Adding rows, enlarging blocks and adding borders preserve different parts of the design. Start with a finished target, then compare the changes before cutting.
We'll adapt an original 36 x 54-inch center toward a 48 x 72-inch target three ways. The examples are independently checked planning calculations and exact diagrams, not quilts we have sewn. They concern a pattern before construction or an unquilted center; enlarging an already quilted and bound quilt is a different alteration.
Identify the components before changing the size
Before revising quantities, use our quilt-pattern reading audit to identify the chosen size column, fabric roles and finished versus cut measurements. Those labels stay distinct through all three adaptations below.
Cuddle Cat Quiltworks' resizing guide starts by comparing the desired finished size with the pattern and identifying blocks, sashing, borders or larger sections. That breakdown tells you which changes the design can support.
Find any alternate sizes or adaptation notes the designer already provides. An approved larger option can save you from recalculating instructions that depend on a particular arrangement. Record whether the dimensions describe the center or the complete bordered top.
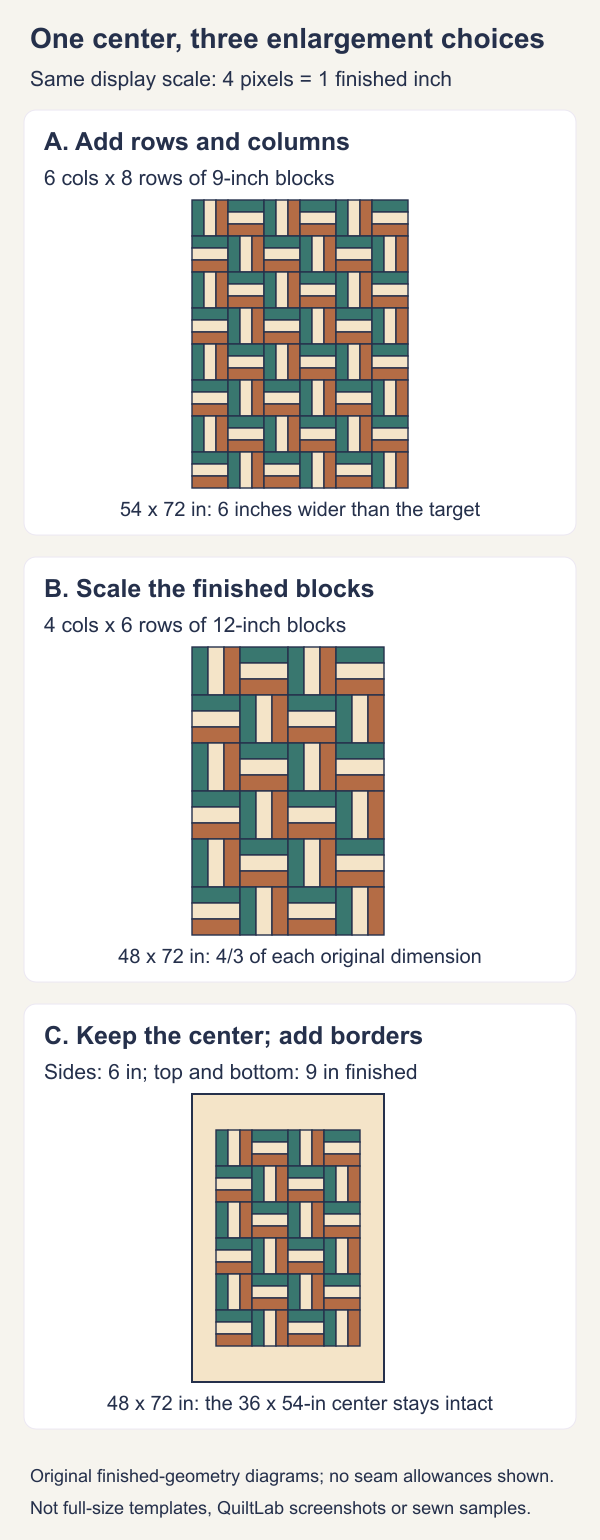
Our original center has four columns and six rows of 9-inch finished Rail Fence blocks. Each block contains three bars, each 3 x 9 inches finished. It has no sashing or borders. Alternating block orientations produce the arrangement shown in the diagrams.
- Width: 4 x 9 = 36 inches.
- Length: 6 x 9 = 54 inches.
- Blocks: 4 x 6 = 24.
- Bars: 24 x 3 = 72, with one bar of each of three fabric roles per block.
The target adds 12 inches of width and 18 inches of length. Those differences do not tell you which construction method to use. They give you a test for each proposed adaptation. If you need a starting target, our quilt size chart separates suggested sizes from a measured-bed decision; this article starts after that decision.
Option 1: keep the blocks and add rows or columns
Adding repeated blocks leaves their cutting and assembly instructions intact. Sylvia Schaefer's resizing lesson at Flying Parrot Quilts describes this approach for repeating block-based designs. It is less straightforward for a single picture, an asymmetric focal arrangement or a medallion whose rings depend on one another.
With 9-inch blocks, widths and lengths move in 9-inch steps:
| Proposed grid | Finished size | Block count | Fit against 48 x 72 target |
|---|---|---|---|
| 5 columns x 8 rows | 45 x 72 inches | 40 | 3 inches too narrow |
| 6 columns x 8 rows | 54 x 72 inches | 48 | 6 inches wider |
Choose the six-column version if the extra width is acceptable. It reaches the target length while exceeding its width. That is a recorded design tradeoff, not an exact 48 x 72-inch adaptation.
The new grid has 48 blocks, twice the original 24. It needs 144 bars, or 48 bars of each fabric role, instead of 24 per role. Each bar still finishes at 3 x 9 inches and, with quarter-inch allowances, is cut 3-1/2 x 9-1/2 inches.
Sketch the new grid before making those extra blocks. Continue the orientation sequence across all six columns and eight rows; do not merely attach an arbitrary block to every edge. Check any secondary pattern, directional print and deliberate focal position against the enlarged arrangement.
If exact width matters, keeping whole 9-inch blocks alone cannot provide it: 48 / 9 is 5-1/3 columns. You need another component or another strategy rather than a fractional instruction to "make five and a bit columns."
Option 2: enlarge the finished blocks, then add allowances
Keep four columns and six rows, but make each block finish at 12 inches. Both dimensions use the same scale factor:
48 / 36 = 72 / 54 = 4/3.
Multiplying the original 9-inch finished block by 4/3 gives 12 inches. Its three bars now finish at 4 x 12 inches, keeping the same proportions. The grid becomes 4 x 12 by 6 x 12 = 48 x 72 inches, with the original 24-block count.
For these ordinary rectangular bars, add fresh 1/4-inch allowances on the opposing edges after scaling. Julie Baird's patch-size explanation at Generations Quilt Patterns distinguishes finished geometry from the extra half inch required in each cutting dimension.
| Stage | Original bar | Enlarged bar |
|---|---|---|
| Finished geometry | 3 x 9 inches | 4 x 12 inches |
| Cut size | 3-1/2 x 9-1/2 inches | 4-1/2 x 12-1/2 inches |
| Assembled block, unfinished | 9-1/2-inch square | 12-1/2-inch square |
Multiplying the old cut width of 3-1/2 by 4/3 gives 4-2/3 inches, not 4-1/2. Multiplying its cut length gives 12-2/3, not 12-1/2. That operation enlarges the allowance too. Keep the specified seam width fixed while changing the finished design.
The assembled larger block provides a check: three 4-1/2-inch widths total 13-1/2 inches; two quarter-inch joins consume a total of 1 inch, leaving 12-1/2 inches unfinished. Joined into the chosen grid, the nominal raw top is 48-1/2 x 72-1/2 inches; the planned finished layout is 48 x 72. Neither figure predicts an exact post-quilting or post-washing size.
This simple recalculation applies to our rectangular study, not every quilt unit. Triangles require a method-specific starting size and trimming plan. Templates need their finished boundaries, grainlines and allowances checked separately. Kristina at Center Street Quilts explains that resizing an FPP foundation changes its printed seam allowance; copying a page larger is not a substitute for checking that allowance again.
If only the width ratio matched, the same scale factor would not necessarily meet the desired length. Our example works proportionally because both ratios are 4/3. Avoid stretching blocks differently in each direction without redesigning their geometry and construction.
Option 3: retain the center and add a measured frame
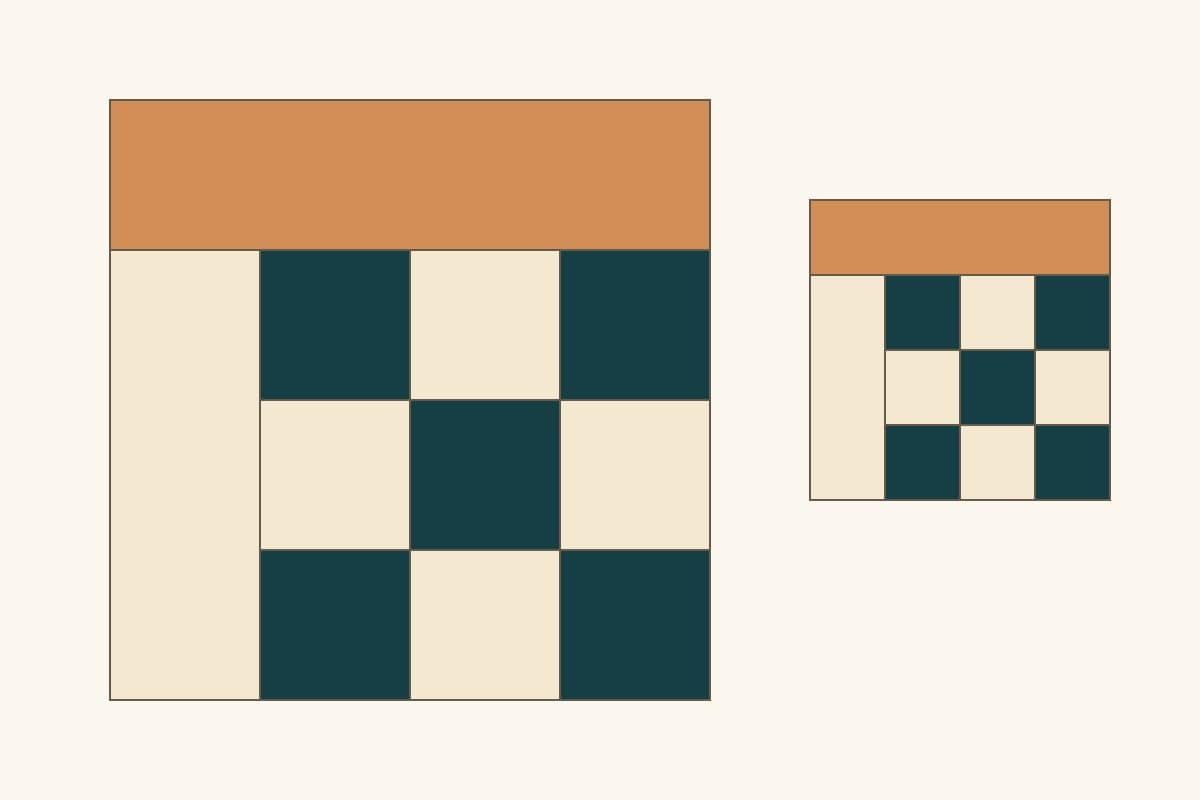
Keep the 36 x 54-inch center and its 24 nine-inch blocks. Allocate the extra width to the left and right sides, and the extra length to the top and bottom:
- Each finished side border: (48 - 36) / 2 = 6 inches.
- Each finished top and bottom border: (72 - 54) / 2 = 9 inches.
The result is 36 + 6 + 6 = 48 inches wide and 54 + 9 + 9 = 72 inches long. This is a manual finished-geometry plan. It does not specify QuiltLab border controls, strip cutting lengths, corner assembly or fabric purchases.
A single equal-width border cannot reach this target from this center. Six inches on all sides gives 48 x 66; nine inches on all sides gives 54 x 72. The wider top and bottom are a deliberate visual choice, not an allowance you can hide in the sewing.
Cuddle Cat Quiltworks' component approach also points out that a border-width change affects both opposing edges. Decide whether that much plain frame supports your design. If it overpowers the center, compare a different block count or a combined adaptation instead of automatically accepting the exact numerical fit.
When you move from this plan to fabric, use the measured raw top and the chosen assembly method. Our wavy-border troubleshooting guide covers measurement and attachment; those construction decisions are separate from the finished frame drawn here.
Recalculate fabric and finishing from the new pieces
A bigger area is useful context, but it is not a purchase-yardage multiplier. The exact-target top covers 48 x 72 = 3,456 square inches, compared with 36 x 54 = 1,944 originally: an area ratio of 16/9, about 1.78. Its perimeter grows from 180 to 240 inches, a ratio of 4/3. Area and edge length have changed by different amounts.
Neither ratio supplies a finished cutting or binding plan. Extra-block, scaled-block and bordered versions distribute fabric across different roles and shapes. The 54 x 72-inch extra-block version has twice the original finished area and twice the bars; the bordered version adds a separate frame while retaining the original bar inventory. Usable fabric width, strip arrangement, directional motifs, joins, trimming and purchase increments can change the actual requirements.
List each new piece size and quantity by role, then check a cutting arrangement on measured usable fabric. The mixed fat-quarter layout study demonstrates why equal area does not mean interchangeable cutting plans. Recheck backing, batting, binding and your intended finishing setup independently from the top.
Before batch cutting, make a representative block using the revised instructions and measure it after pressing. Keep a note of the original pattern version, chosen strategy, resulting dimensions and every recalculated size. That record lets you distinguish an intentional adaptation from a construction error and keeps the larger project consistent.
Related posts
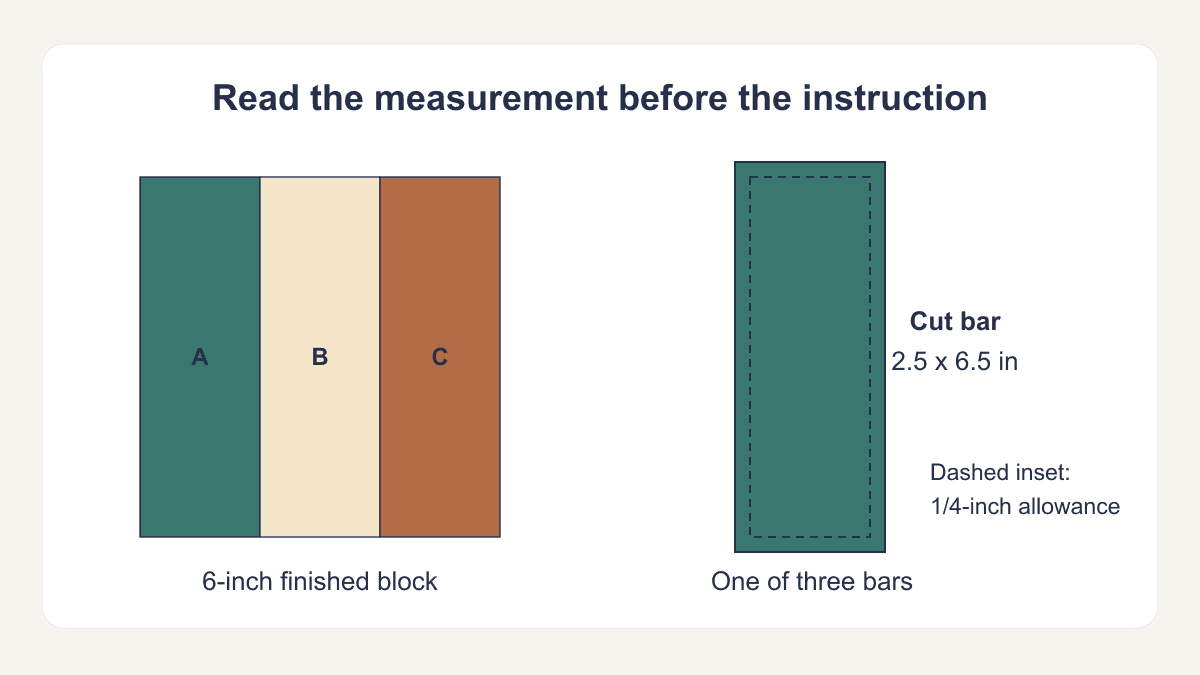
How to Read a Quilt Pattern Before Cutting
Audit sizes, fabric roles, cutting counts and assembly checkpoints on an original sample page before shopping or making your first cut.
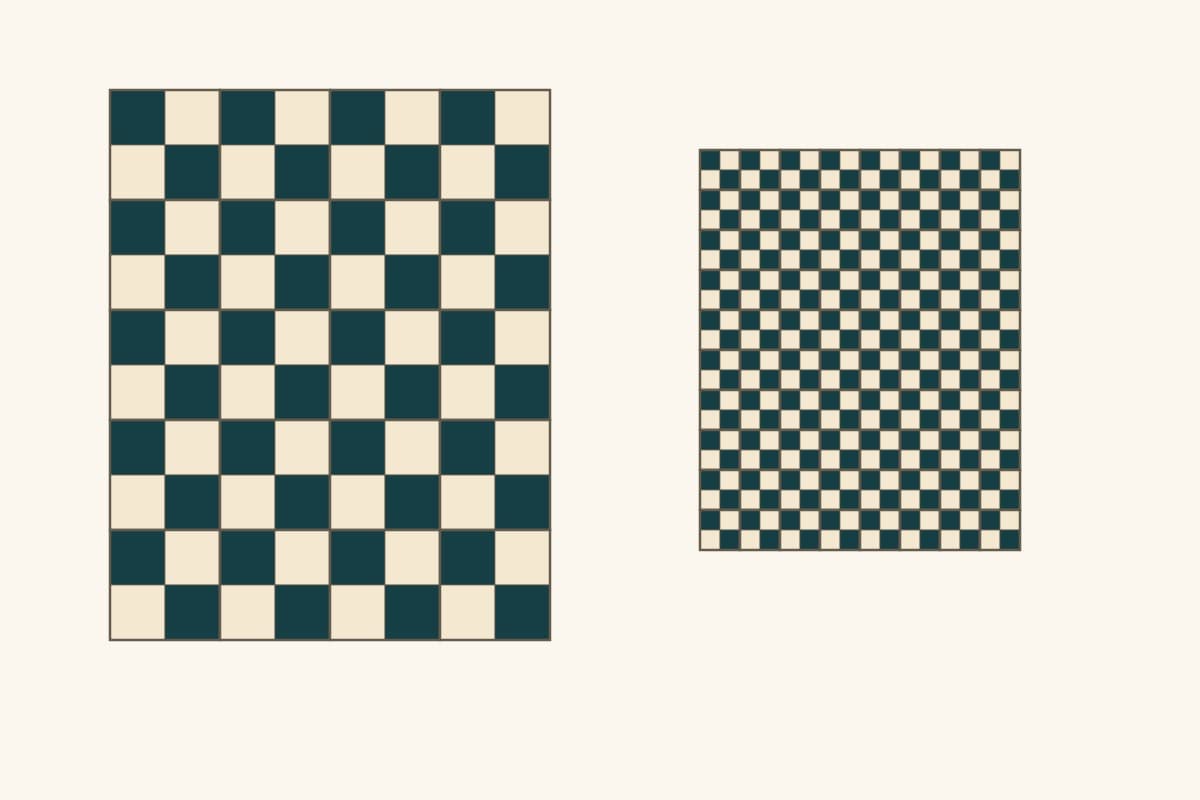
How to Design a Quilt: Size, Layout, Blocks and Fabric
Plan a quilt you can actually make: choose its finished size, compare block counts, assign fabric roles and check the design before cutting.
How to Design a Quilt Block: Grids, Units and Measurements
Draw an original block on a grid, check its assembly order, and turn finished measurements into a manual cutting plan with an 8-inch example.