


Write Clear Quilting Bee Instructions
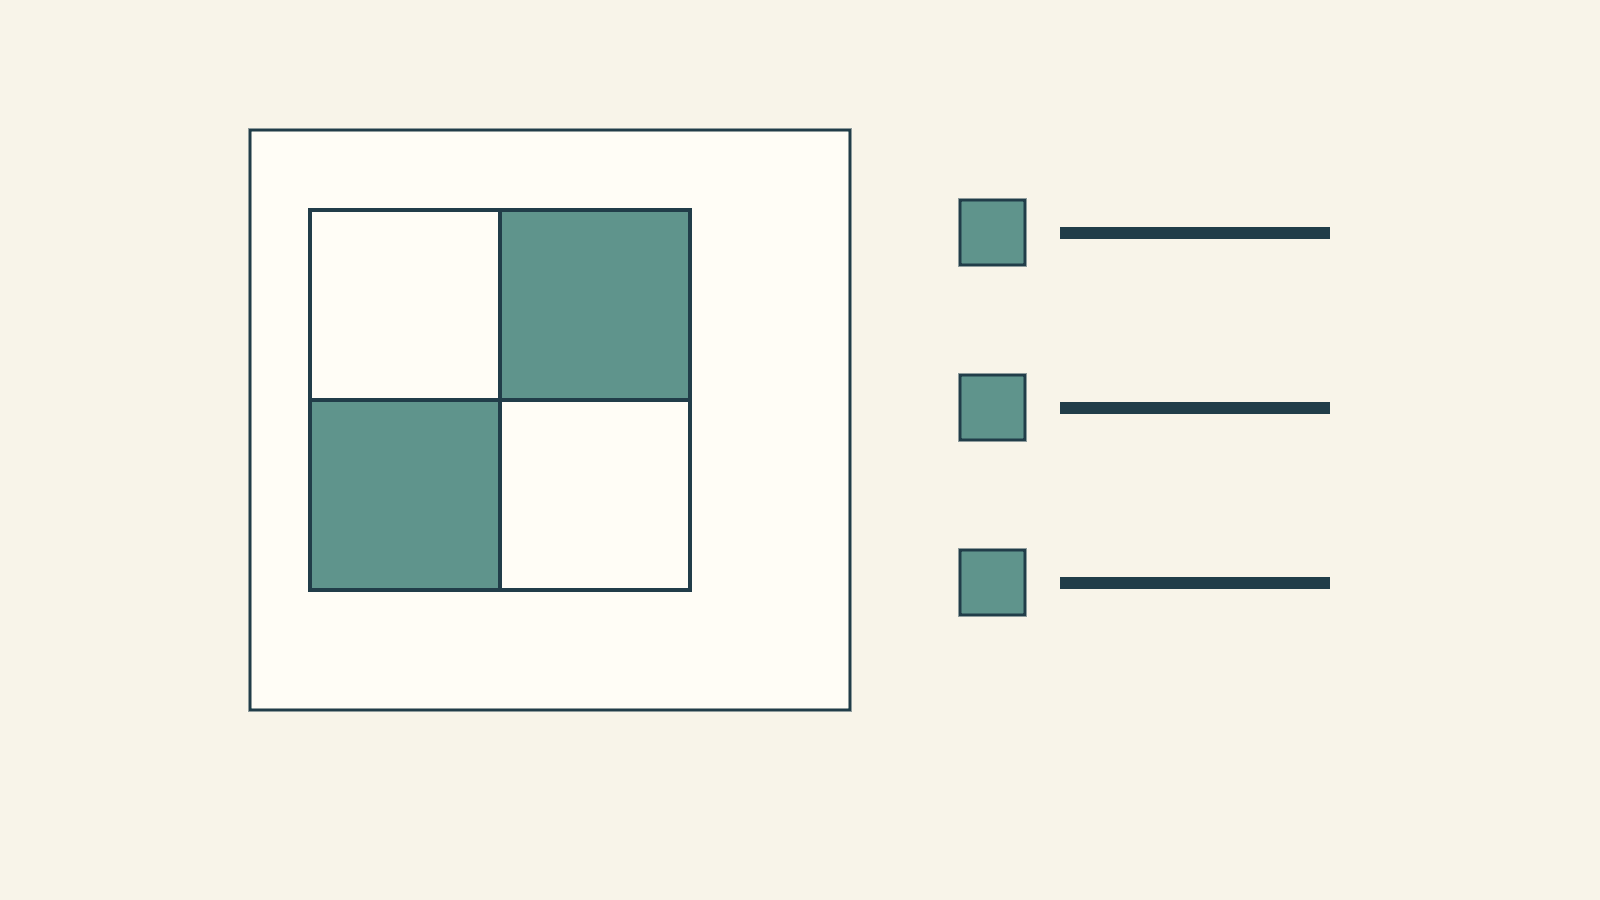
Good quilting bee instructions tell contributors exactly what block to return: its unfinished size, fabric roles, orientation, pressing requirements and handoff details. Link an accessible construction method, then make and measure one sample before asking everyone to cut a batch. A clear reference and an agreed checkpoint reduce mismatches.
Begin with your group's actual rules. A request that suits a small private collaboration may be too demanding for a particular bee, even when the block itself is simple.
Check the group's agreement first
Confirm how many blocks each participant has agreed to make, the size and technique limits, materials, timing and how questions reach the recipient. Do this before choosing a complicated block or buying fabric for everyone.
For example, Stash Bee's Queen Bee rules allow one requested block per participant, with extras optional, and set their own size and time limits. They also restrict demands for a specific fabric brand or line. Those are that program's rules, not defaults for every group.
Jane Kelly's bee etiquette guidance at Make Modern emphasizes clear directions, accessible patterns, trying the block and early communication. That is a useful starting point when your own group is agreeing on its request.
Our group-quilt overview helps choose a collaboration format. Here the task is narrower: writing the specification after the participants have agreed to contribute.
Name the block's three different sizes
Write cut, unfinished and finished beside every dimension that needs one. The most important number for the contributor's handoff is usually the unfinished block size, measured raw edge to raw edge.
A request for a "12-inch block" can be misunderstood. Does the recipient want a block that measures 12 inches now, or one that will finish at 12 inches after joining? State both and identify the one that will be checked before delivery.
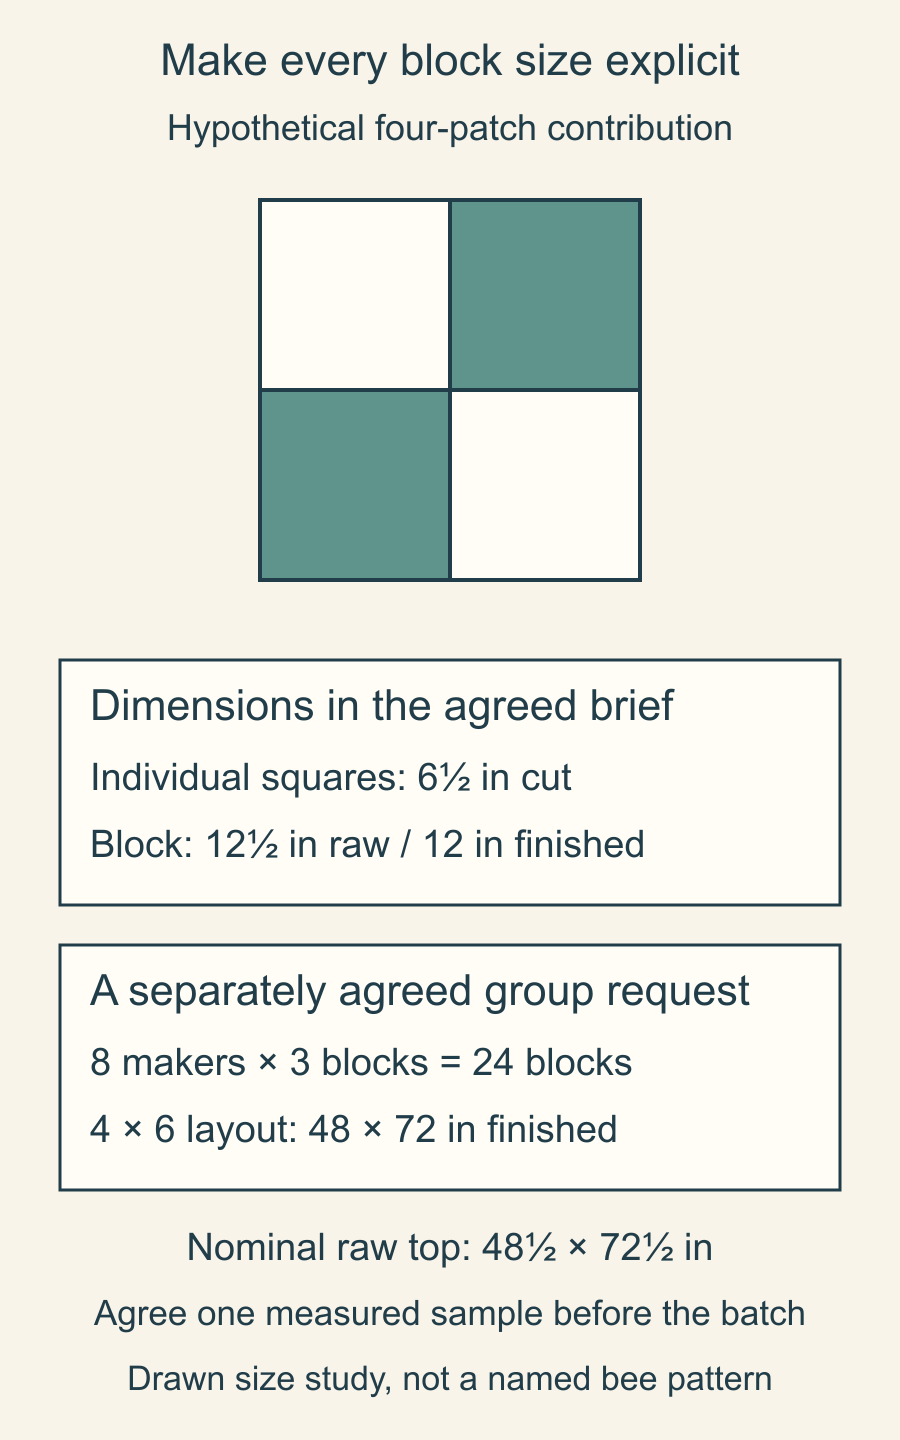
For a straightforward size study, consider a four-patch with two light and two dark squares. Natalia Bonner and Kathleen Whiting's Piece N Quilt four-patch tutorial includes a 12-inch finished example using 6 1/2-inch cut squares. Link the teacher's method rather than rewriting their whole tutorial into your request.
With quarter-inch joins, that block is nominally 12 1/2 inches unfinished and 12 inches finished. Specify which light/dark arrangement and rotation you want. A small labeled sketch can remove ambiguity that a color name alone leaves behind.
Describe fabric roles, not just a pretty palette
State what counts as light and dark in the block. Say whether prints are welcome, how directional fabrics should face, and whether the background should read as one value or contain visible variation.
Give the group enough freedom to use its agreed materials while keeping the design readable. If the exact cloth matters, confirm whether supplying it is part of your group's arrangement. Do not quietly turn a stash-based request into a shopping assignment.
Include any agreed fiber, prewashing or care requirements. These should be compatible with the selected method and intended quilt. Avoid importing another bee's material policy without asking your own participants.
Stash Bee's resources and tips illustrate the value of fabric examples, credited tutorial links and construction clarification. Its request for a real completed-block reference is particularly useful: a drawing cannot show what your chosen fabrics and seams actually produced.
Build one contribution specification
Here is a hypothetical private-group brief. Eight makers have separately agreed to contribute three blocks each. This is not a Stash Bee request; its three-block commitment would not match that program's standard rule.
The specification calls for the four-patch size above, with light squares at the top left and bottom right. The recipient will make and measure a sample and settle the pressing plan before releasing the request. We drew the study and have not sewn the sample.
| Field | Example specification | Confirm before the batch |
|---|---|---|
| Returned block | 12 1/2 inches unfinished | Actual width and height |
| Fabric placement | Two light and two dark squares | Labeled sample matches the intended rotation |
| Construction | Linked four-patch method | Seam and pressing directions are understood |
| Contribution | Three blocks per maker | Each person accepts this request |
| Questions | One named recipient/contact route | Ask before trimming or changing a step |
The complete group needs 24 blocks. At two light and two dark squares per block, the nominal count is 48 of each. That checks the request's scale; it does not include replacement pieces or establish shopping yardage.
A four-column, six-row layout of 12-inch finished blocks gives a 48-by-72-inch finished design. Its nominal raw top is 48 1/2 by 72 1/2 inches before the outside allowances are consumed. These layout numbers help the recipient plan; contributors still check their individual unfinished blocks.
Agree on the first-block checkpoint
Ask contributors to measure the first completed block in both directions and compare its placement with the reference. Decide how a photo or measurement should be sent and who will answer questions.
Stash Bee's participant rules direct makers to read the cutting, pressing and color instructions, check the requested size and contact the recipient when it is wrong. That stop-and-ask habit is worth building into your own agreement.
Do not tell a maker to stretch a small block or trim a large one automatically. The recipient needs to know whether the mismatch comes from a misunderstanding, construction or the specification itself. Resolve it before more pieces are cut.
Keep the pressing directions with the method. If you want a different press plan, try it in the sample and explain the change clearly. A vague instruction to press "as usual" can leave neighboring blocks incompatible.
Finish the request with a handoff note
Give one deadline or agreed handoff date, a way to identify each contributor and the destination details participants need. State whether blocks should be returned untrimmed, and keep the last confirmed instruction version easy to find.
Ask permission before sharing a maker's name or photographs publicly. Link the original pattern or tutorial in a way participants can access; do not distribute copied pattern pages as a shortcut.
Before sending your request, read it beside the actual sample. Can another maker identify the returned size, fabric roles, orientation and next contact without guessing? Fill those gaps first. A measured reference block and one clear instruction sheet give the collaboration a much better start.
Plan your next quilt
Lay out blocks and try colors in QuiltLab's grid editor before you cut.
Free forever, no card needed.
Get quilting tips by email
QuiltLab updates, tips and quilting inspiration. Unsubscribe anytime.
Related posts
How to Size a Quilt Block Pillow Front
Size a pillow front from your actual block, then account for borders, the closure seam and the panel's measured size after quilting.
Quilt Pattern Testing Checklist for a Useful Brief
Give testers an exact assignment, useful measurement checkpoints and a clear way to report questions before they start cutting.

Which Unfinished Quilt Projects Should You Finish?
Choose whether to finish, redesign, pause or repurpose an old quilt project using its current purpose, usable materials and next missing prerequisite.