


How to Size a Quilt Block Pillow Front
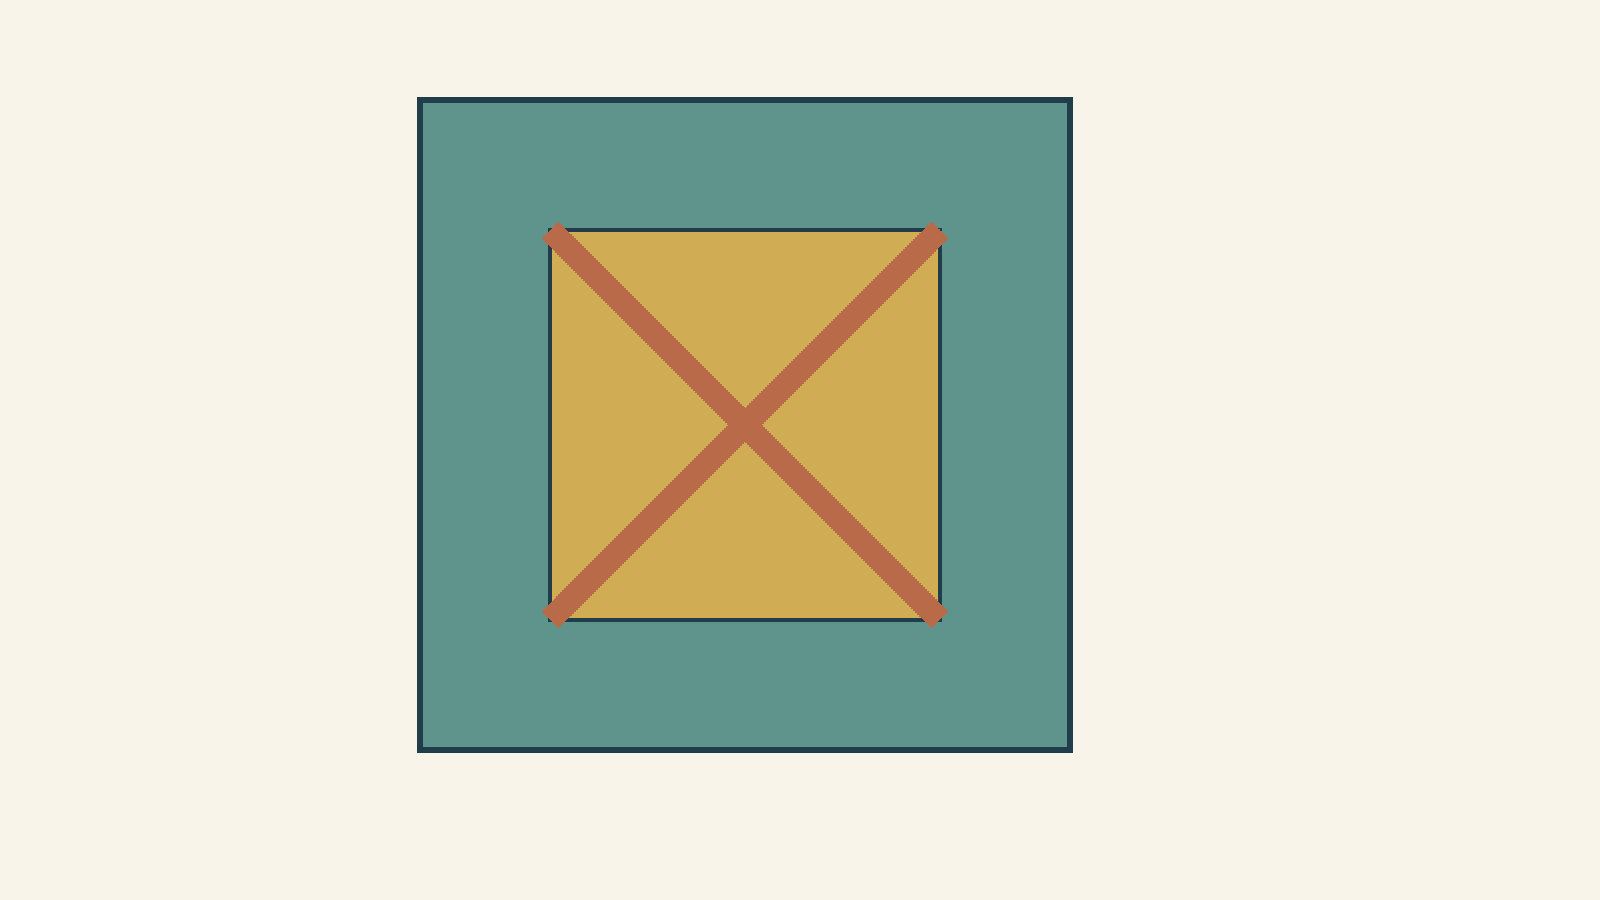
To turn a quilt block into a pillow, choose the finished cover size and closure method before adding borders. The patchwork joins and the seam that closes the cover may use different allowances. Budget for both, then measure the quilted panel before trimming it for assembly.
For a simple first plan, use a square block with enough room around its design for the chosen closure. Start from the block you actually have, rather than its pattern's finished-size label.
Choose the cover and closure together
Measure your insert and read the closure instructions you intend to follow. Decide how closely you want the cover to fit. Insert fullness, fabric, quilting and personal preference all affect that decision; the insert's label does not settle it by itself.
A turned envelope cover, a bound pillow edge and an invisible zipper can have different edge treatments. Do not borrow a front-panel measurement from one method and assembly directions from another.
Meghan Morris's quilted pillow cover tutorial uses a quarter-inch enclosure seam. Casey Chatham at Sew Worthy Mama distinguishes turning a quilt block into an envelope pillow from a bound-edge method. Those are useful examples of why the edge finish belongs in the plan early.
By comparison, Sunbrella's hidden-zipper pillow tutorial uses a half-inch perimeter allowance. It is an upholstery project, a useful reminder that another closure can use a different seam budget. Follow a complete, compatible closure tutorial when you sew; the calculations below explain front-panel sizing.
Label three sizes on your sketch
Write down the block's current raw-edge size, the desired cover size and the required raw front-panel size. Keep those labels visible while choosing borders.
A block described as 10 inches finished commonly measures 10 1/2 inches raw when it includes quarter-inch outside seam allowances. Measure yours across both directions. Check that it is square and identify any points or details close to the edges.
Here is our worked sizing study:
- Current block: 10 1/2 inches square, raw edge to raw edge.
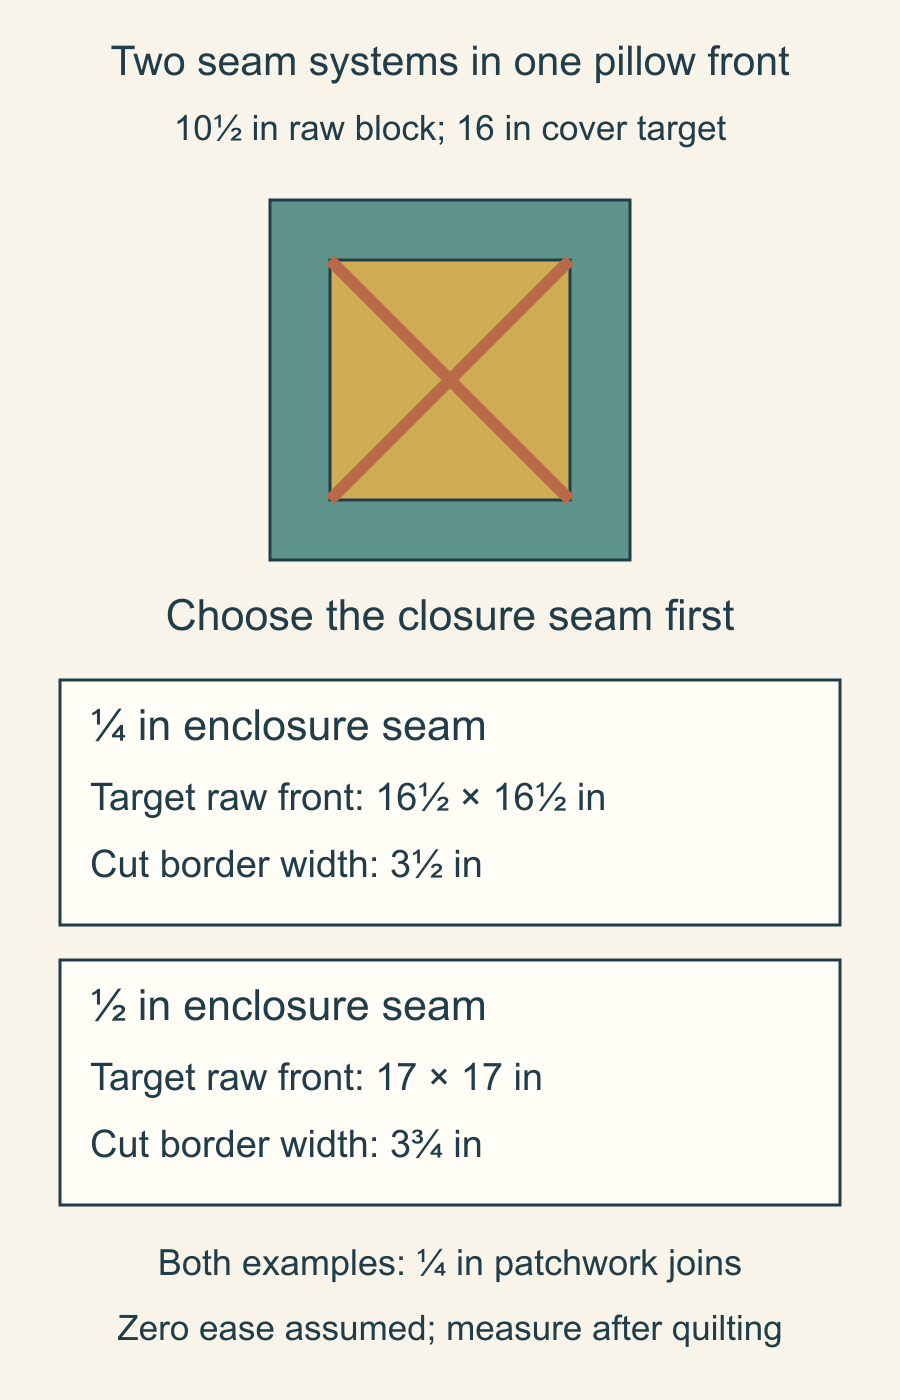
- Chosen cover target: 16 inches square, with zero ease assumed for this calculation.
- Patchwork joins: 1/4 inch.
- First closure case: a turned cover with a 1/4-inch enclosure seam.
These are drawn planning examples, not sewn fit tests. Treat the chosen cover dimensions as your design input, and confirm the actual quilted panel before using your closure instructions.
Work backward from the raw front
For a 16-inch finished cover with a quarter-inch seam on each outside edge, the raw front target is 16 1/2 inches square. The extra half inch is consumed when the front and back are joined around the cover.
The raw block is 10 1/2 inches wide. The front needs another 6 inches in total width after the side borders are joined. That means each side border must add 3 inches to the panel.
A quarter-inch joining seam uses a quarter inch from each of its two pieces, consuming half an inch of their combined width. Each side strip therefore starts 3 1/2 inches wide to add 3 inches after joining.
For this ideal, unquilted geometry, the front's pieces are:
| Piece | Count | Raw cutting dimensions |
|---|---|---|
| Existing block | 1 | 10 1/2-inch square |
| Side borders | 2 | 3 1/2 by 10 1/2 inches |
| Top and bottom borders | 2 | 3 1/2 by 16 1/2 inches |
Check the width: 10 1/2 + 3 1/2 + 3 1/2 - 1 = 16 1/2 inches. The final subtraction represents two joins, each consuming half an inch. After the side borders, the top and bottom strips span the new panel width.
This is the same measuring distinction discussed in our quilt-border planning guide, applied to a smaller project with an additional closure seam to consider.
What changes with a half-inch closure seam?
Keep the same 16-inch cover target and quarter-inch patchwork joins. Change only the enclosure seam to half an inch.
The raw front now needs 17 inches in each direction: 16 inches plus two half-inch outside allowances. Compared with the 10 1/2-inch raw block, that is 6 1/2 inches of added panel width, or 3 1/4 inches per side after joining.
Each cut border must therefore be 3 3/4 inches wide. It loses half an inch at its patchwork join and adds the required 3 1/4 inches. The side strips span the 10 1/2-inch block; the top and bottom strips span the new 17-inch panel.
For quarter-inch patchwork joins, the useful formula is: subtract the raw block width from the target raw front width, divide by two, then add half an inch. Use the same calculation for height if the center is rectangular.
Do not enlarge the patchwork seam to half an inch merely because the closure uses that allowance. They do different jobs in this plan.
Leave room for the quilting step
The dimensions above describe ideal pieced geometry. Quilting, handling and squaring can change the panel you actually have. Decide on any extra quilting margin from your chosen method before cutting the borders; the exact-size arithmetic does not include it.
Morris's tutorial includes quilting and trimming before cover assembly. Follow that sequence in the chosen instructions and measure the resulting panel. A raw front that has become too small cannot be restored by trimming it neatly.
Before cutting, also look at the outermost block details. A star point near the raw edge needs enough allowance to survive the enclosure seam. A wider border can give the motif breathing room, but only if you account for which part of that border will remain visible.
Make the back a separate, compatible plan
Use your closure tutorial to size the back pieces, overlap, hems or zipper opening. Front-panel arithmetic does not specify those pieces. Write the method and its seam allowance beside the front measurements so you can check that they still agree at assembly.
If you are comparing color choices, a Block Editor sketch can help you look at the center and frame. Keep the cutting and closure measurements in your own checked notes; a color sketch does not determine insert fit.
Choose one block, one cover target and one closure now. Mark the two seam allowances, calculate the raw front, and check that the design leaves room for quilting and trimming. That short plan is more useful than adding a border and hoping the pillow fits afterward.
Plan your next quilt
Lay out blocks and try colors in QuiltLab's grid editor before you cut.
Free forever, no card needed.
Get quilting tips by email
QuiltLab updates, tips and quilting inspiration. Unsubscribe anytime.
Related posts
Write Clear Quilting Bee Instructions
Specify block sizes, fabric roles and a first-sample check so contributors know what to make and when to ask before continuing.
Quilt Pattern Testing Checklist for a Useful Brief
Give testers an exact assignment, useful measurement checkpoints and a clear way to report questions before they start cutting.
Which Unfinished Quilt Projects Should You Finish?
Choose whether to finish, redesign, pause or repurpose an old quilt project using its current purpose, usable materials and next missing prerequisite.