


Quilt Size Chart: Baby, Throw, Twin, Queen and King
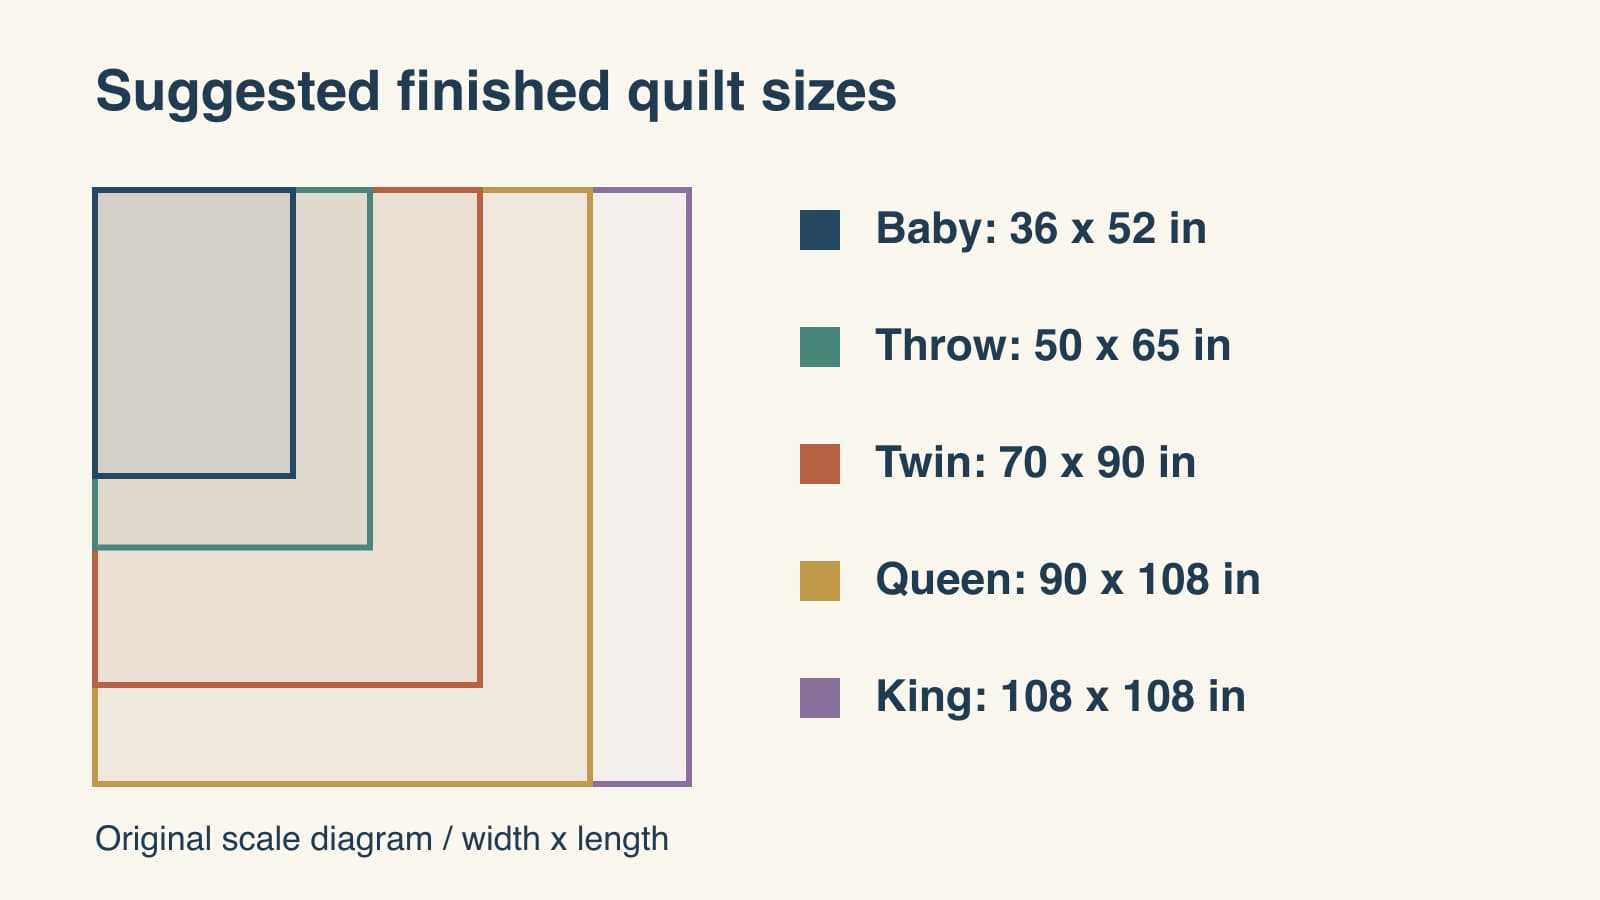
A quilt size chart gives you a starting point. The right finished size also depends on where the quilt will go: across someone's lap, over a mattress, below a deep bed, or tucked around pillows. Those uses need different amounts of cloth even when the label says "queen."
The chart below matches the suggested sizes in QuiltLab's precut calculator. Then we'll check a measured bed and compare three block counts for a queen-size target. All examples are planning calculations, not measurements from a quilt we sewed.
Suggested finished quilt sizes
Read every pair as width x length, in inches. These are quilt dimensions, not mattress dimensions. "Finished" here means the planned size after assembly seam allowances; it does not predict an exact measurement after quilting or washing.
| Quilt label | Suggested finished size | Start by checking |
|---|---|---|
| Baby | 36 x 52 inches | The intended use and recipient's needs |
| Throw | 50 x 65 inches | The person and chair or sofa |
| Twin | 70 x 90 inches | Mattress, side drop and foot drop |
| Queen | 90 x 108 inches | Mattress, desired drop and pillow treatment |
| King | 108 x 108 inches | Bed width, orientation and drop |
A 50 x 65-inch throw might suit a seated person but leave a tall person's feet uncovered when lying down. Lay a tape measure across the intended space before selecting it. A square king quilt has no longer direction to rotate into place; a rectangular design does.
Other charts can legitimately offer different quilt sizes. Overdale Fabrics' sizing guide gives separate UK and US references and explains how mattress depth, extra drop and pillow tuck change the answer. A size name is a useful search term, not a universal finished measurement.
The Baby row is a small-project reference, not a recommendation to place a quilt in an infant's sleep space. The US Consumer Product Safety Commission's safe-sleep guidance says to keep blankets out of that space.
Compare the mattress with the quilt
A mattress chart answers how large the bed surface is. A quilt chart also needs to account for cloth hanging beyond that surface.
APQS's quilt-size reference separates mattress dimensions from quilt dimensions and shows how three-sided drop and pillow tuck produce different results. Its US mattress references include the following:
| US mattress label | Reference width x length |
|---|---|
| Twin | 39 x 75 inches |
| Twin XL | 39 x 80 inches |
| Full/Double | 54 x 75 inches |
| Queen | 60 x 80 inches |
| King | 76 x 80 inches |
| California King | 72 x 84 inches |
Measure your actual mattress and bedding arrangement. Labels differ across countries, and a topper can change how far the quilt must travel before it reaches the bottom of the mattress. A California King is narrower and longer than the King reference; substituting one name for the other changes both directions.
For sizing, drop is the distance from the top edge of the mattress down to the quilt's intended lower edge. If the mattress is 12 inches deep and you want the quilt to extend another 3 inches below it, the total drop is 15 inches. Do not add the mattress depth again after using that 15-inch measurement.
Calculate a measured bed's target
For a quilt aligned with the head of the mattress, use:
- Quilt width = mattress width + left drop + right drop.
- Quilt length = mattress length + foot drop + any extra length chosen for pillow treatment.
That last allowance might be zero if pillows sit above the quilt. If you want a tuck or want the quilt to cover pillows, measure the arrangement you intend to use. An example chart's tuck allowance does not establish the amount your pillows need.
Suppose a measured mattress is 60 x 80 inches. The owner wants 15 inches down each side, 16 inches at the foot, and no pillow tuck:
- Width: 60 + 15 + 15 = 90 inches.
- Length: 80 + 16 = 96 inches.
This produces a 90 x 96-inch target, shorter than our suggested Queen size of 90 x 108. The additional 12 inches in the suggested size could be allocated to pillow treatment in this particular arrangement, but it is not automatically a universal tuck allowance.
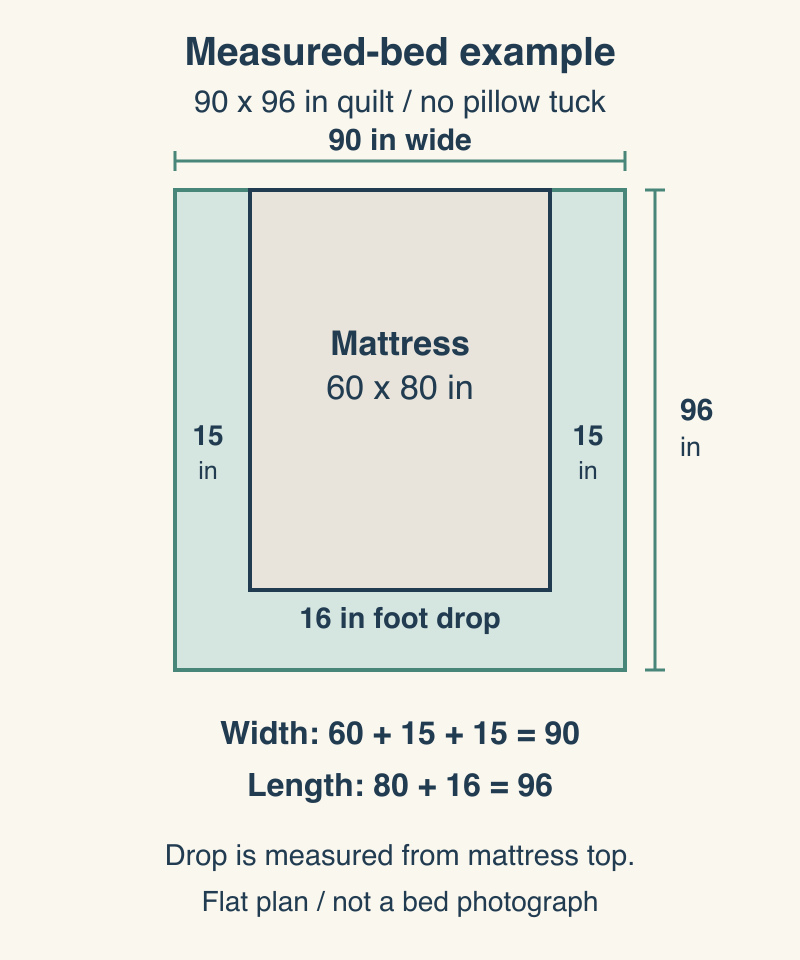
Inspect the footboard and the corners while measuring. Extra cloth that looks useful on paper may bunch against a footboard. If the desired drops differ on the two sides, record both rather than silently doubling one measurement.
Turn a target into a block count
For a straight grid with equal square blocks and no borders or sashing, multiply finished block size by the number of blocks across and down. Count blocks separately from patches inside them.
For a 90 x 108-inch target, three practical comparisons are:
| Finished block | Columns x rows | Grid's finished size | Blocks needed |
|---|---|---|---|
| 9 inches | 10 x 12 | 90 x 108 inches | 120 |
| 10 inches | 9 x 11 | 90 x 110 inches | 99 |
| 12 inches | 8 x 9 | 96 x 108 inches | 72 |
The first fits exactly. The second adds 2 inches of length. The third adds 6 inches of width. Those are deliberate tradeoffs to consider with the measured bed, rather than errors to hide under the word "queen."
With 12-inch blocks, seven columns would make only 84 inches of width. Eight columns provide 96 inches. On a 60-inch mattress centered beneath the quilt, those widths give 12-inch or 18-inch side drops respectively. Neither gives the 15-inch side drop in our measured example. You would need another design choice to reach 90 inches, such as a different block size or a separately planned border.
The calculation uses finished blocks. Julie Baird's block-drafting explanation distinguishes finished dimensions from cutting dimensions and adds half an inch per dimension for ordinary squares and rectangles sewn with quarter-inch allowances. A block intended to finish at 12 inches commonly measures 12.5 inches before joining, but its individual patches still need the chosen pattern's construction instructions. Do not multiply 12.5 by the grid count and call that the finished quilt size.
Sashing, borders and On Point settings change the calculation. Choose the core grid first; then account for those additions separately. Our On Point planning guide addresses the setting triangles that a rotated grid needs, and border ideas helps compare the outside frame.
Check the proposed dimensions in QuiltLab
In a new Grid quilt, use Properties > Layout to set the block W and H, Cols, Rows, and Standard orientation. For the exact queen example, enter 9-inch width and height, 10 columns and 12 rows. With no border, the planned grid is 90 x 108 inches. Compare those displayed dimensions with your worksheet before investing time in the full layout.
The Quilt Editor guide explains the measured grid and orientation controls. For this sizing check, leave borders absent and compare the plain grid only. If you subsequently add a border, check Overall as well as the quilt-top dimensions in the status bar.
The software dimensions describe the design. The number of blocks, their construction instructions, actual sewn measurements and the finishing allowances still deserve their own checks. If you're starting with your first block, the Nine Patch Chain walkthrough shows these distinctions in a complete worked project.
Record the size decision before choosing fabric
Keep a short note with the intended use, measured mattress or seating space, left/right/foot drops, pillow allowance, target width and length, and chosen grid. Then write the grid's actual result beside the target. "Queen, 90 x 108, 120 nine-inch blocks" is far more useful than "queen-size quilt."
Check the planned top against the workspace and finishing method you intend to use, too. A larger top may need a different way of supporting its weight at the machine. Batting for bed quilts covers another choice that affects how the finished quilt feels; batting-package dimensions are not themselves instructions for the finished top's size.
Use the suggested chart to narrow your options, the measured drops to choose a target, and the block count to make that target achievable. Save those numbers with the design so the size remains a decision you can explain.
Related posts
Easy Quilt Blocks for Beginners: A Four-Block Practice Path
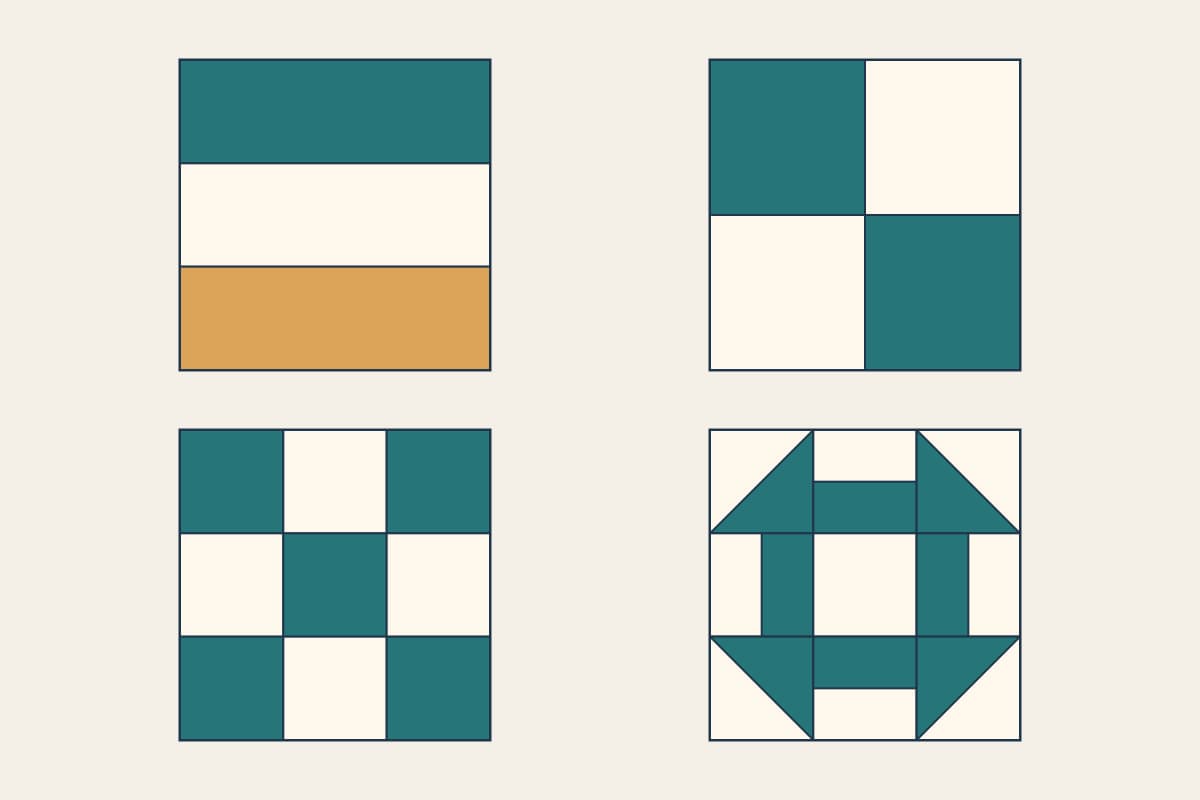
Choose your first quilt blocks by the skills they add: straight strips, one seam crossing, a nine-patch grid, then Churn Dash units.
Group Quilt Ideas: Choose a Format That Fits
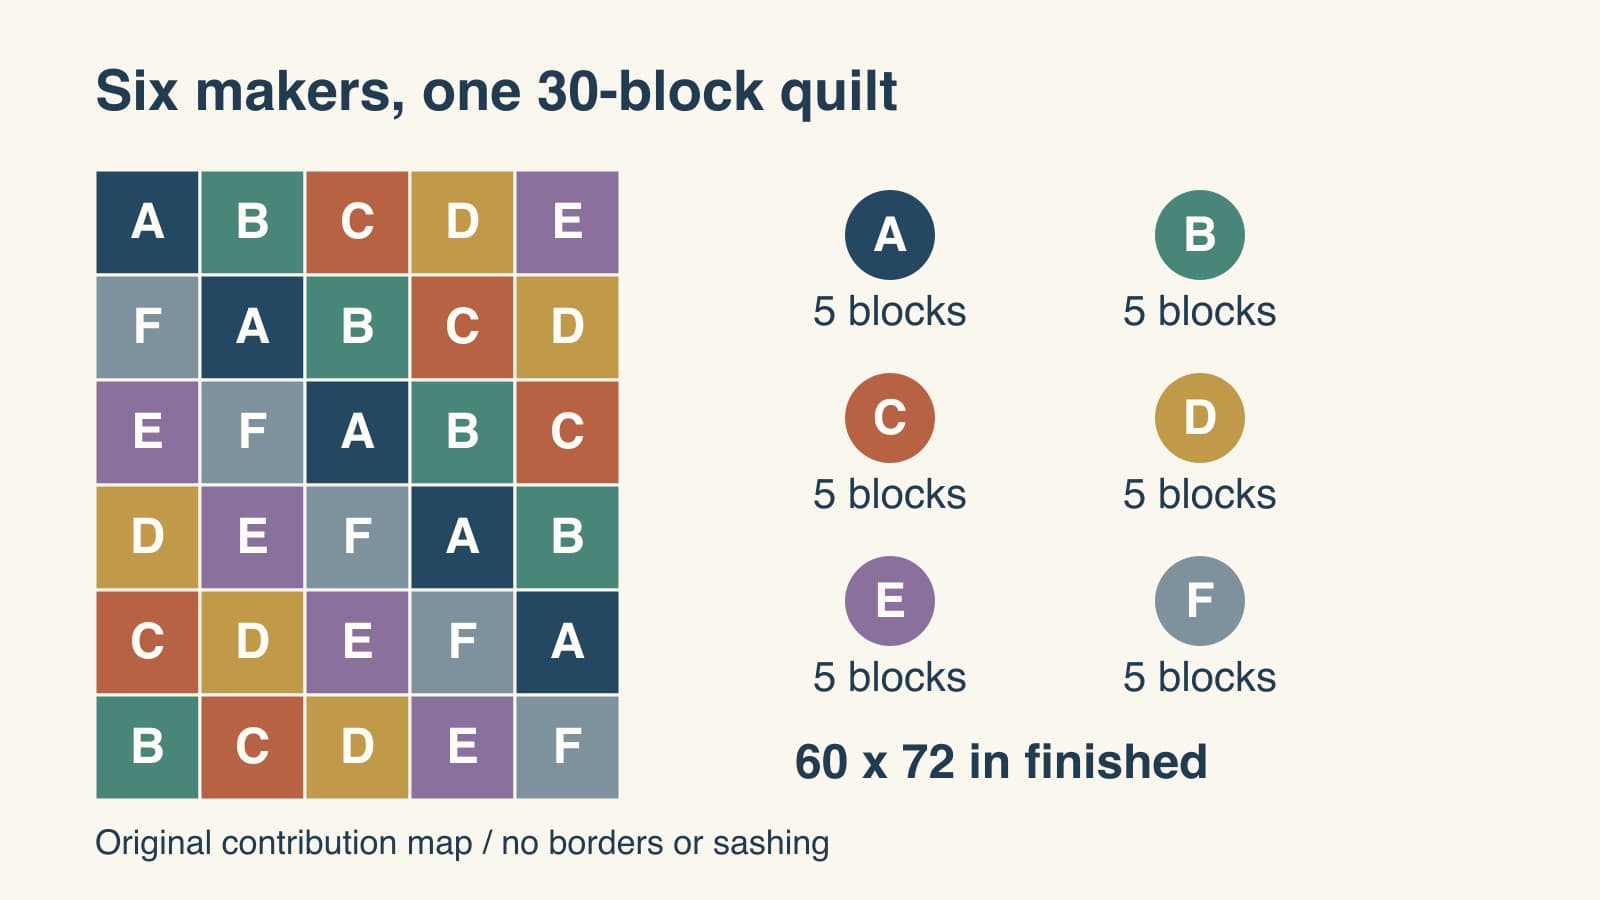
Compare contribution quilts, bees, round robins and shared challenges, then plan a 30-block group quilt with six makers and clear sharing boundaries.
T-Shirt Quilt Layout: Plan Mixed-Size Panels
Plan ten mixed-size shirt panels in a checked 36 x 48 inch layout, keep usable fabric separate from finished size, and choose a clear assembly order.