


Multi-Size Quilt Pattern Instructions That Stay Clear
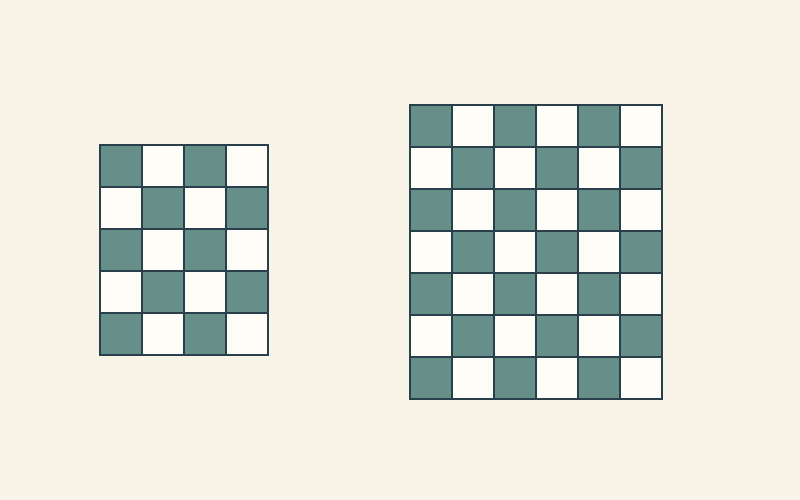
Choose one size order and keep it through the whole pattern. Give every size a clear name, repeat those names beside important counts and separate the steps that genuinely differ. A reader should be able to follow one size without repeatedly translating your notation.
For two sizes, Small (Large) can work well if that order never changes. The hard part is checking that every materials row, cutting quantity, diagram and assembly total follows the same convention.
Decide whether the sizes belong in one document
Start by comparing the work each size requires. Shared units and a different number of rows may fit a common set of instructions. A size with different units, border construction or assembly order may need its own section.
The designers in Meadow Mist Designs' 2016 roundtable on turning designs into patterns describe different approaches to multiple sizes. Christa Watson discusses her own four-size format; other contributors weigh complexity and awkward measurements. Treat those as design choices, rather than a requirement to offer a particular number of sizes.
Write a short description of what changes between your sizes before choosing the page format. If that description is hard to follow, a dense line of parenthetical numbers will probably be hard to follow too.
Put the size key where the numbers begin
Give the size names, intended finished dimensions and notation together. Avoid calling the same size Small on one page, Baby on another and Size A in a cutting table.
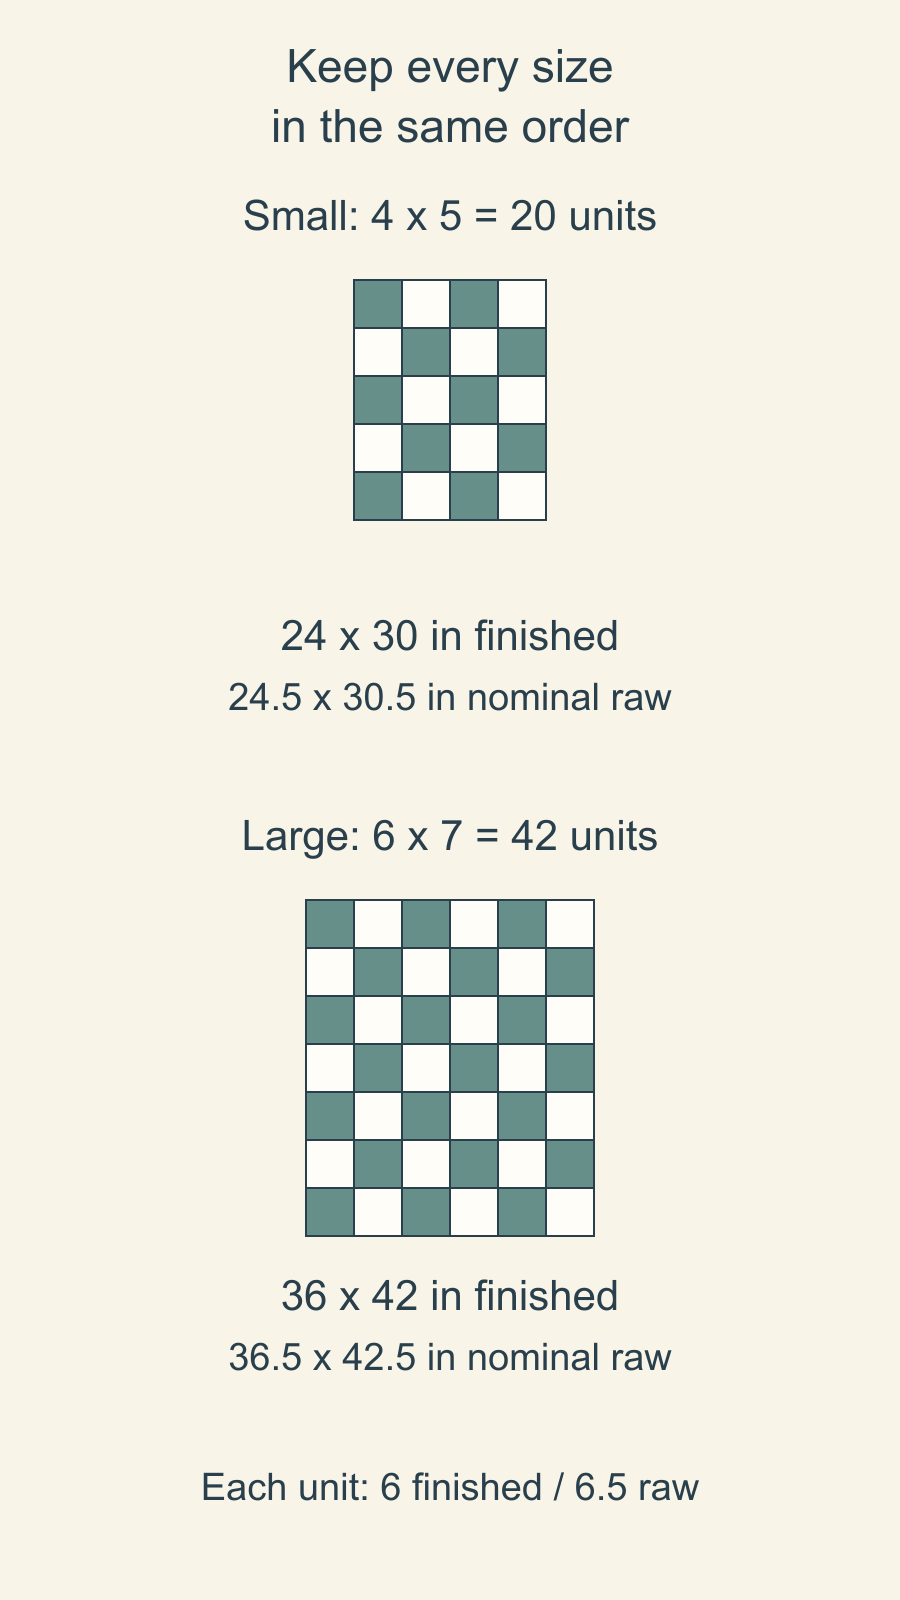
Here is a document-audit example with two sizes. It uses hypothetical units intended to finish at 6 inches, measuring 6.5 inches raw. We drew these layouts and have not sewn them; the exercise checks a document's counts and dimensions.
| Field | Small | Large |
|---|---|---|
| Columns | 4 | 6 |
| Rows | 5 | 7 |
| Total units | 20 | 42 |
| Finished layout | 24 x 30 inches | 36 x 42 inches |
| Nominal raw top | 24.5 x 30.5 inches | 36.5 x 42.5 inches |
Use these names in the file's size key. If you write quantities as pairs, identify the convention explicitly: "Numbers are given for Small (Large)." Keep that key close enough to the first paired numbers that a reader will find it.
Follow one count through the whole pattern
Small needs four times five units: 20. Large needs six times seven: 42. A line stating "Make 20 (42) units" agrees with the size key, but it is only one checkpoint.
Suppose the example alternates Type A and Type B units. Both layouts have an even total number of cells and equal counts of the two types. Small therefore needs 10 of each; Large needs 21 of each.
Now trace those counts through the relevant sections. The unit-making page should ask for 10 (21) Type A units and 10 (21) Type B units. The top-assembly page should use 4 (6) columns and 5 (7) rows. The totals should still be 20 (42).
If one section changes to Large (Small), the individual numbers may look plausible while directing the reader to the wrong quantity. Checking the arithmetic alone will miss that notation error.
Check finished and raw dimensions separately
The finished Small layout is four 6-inch units across and five down: 24 by 30 inches. Its raw units are 6.5 inches, but joining them consumes part of those raw dimensions.
With nominal quarter-inch seams, each join consumes half an inch across the two pieces. Small's raw width is four times 6.5, minus three joins of half an inch: 24.5 inches. Its raw height is five times 6.5, minus four such joins: 30.5 inches.
For Large, six raw units across give 39 inches before joining. Five joins consume 2.5 inches, leaving 36.5 inches. Seven raw units down give 45.5 inches; six joins consume 3 inches, leaving 42.5 inches.
Label the intended checkpoint. "Top measures 24 x 30" is ambiguous if the reader is measuring a raw top that still includes the outside seam allowances. The document should say whether a number describes a cut piece, a joined raw unit or the finished design.
Our guide to reading a quilt pattern covers those distinctions from the reader's side. Use that same clarity when you write the size chart and measurement checks.
Give an exception its own instruction
Parentheses are useful for changes in quantity. They become harder to use when sizes take different actions.
For example, a hypothetical instruction might say that Small uses one arrangement while Large adds another unit type. Give that difference a named heading such as "Large only: additional units," followed by a clear point where the reader returns to the shared instructions.
Avoid hiding a changed construction method in a footnote beside a quantity. A reader may correctly choose the Large number while following a Small-only diagram.
Cheryl Brickey's lesson on illustrations and text separates material requirements, cutting, block assembly, top assembly and finishing. That structure gives you useful places to audit each size. Keep a list of which sections are shared and which need a size-specific instruction or drawing.
Make diagrams and labels agree
Show the size name beside a layout drawing, not only in a distant legend. If the drawing shows Small's four columns, say so. Do not let a Large reader count the example's columns and assume that count applies to them.
Use text labels as well as color to distinguish sizes. A printed page, photocopy or reader's fabric choices may not preserve the colors you used while designing the document.
Keep fabric-role labels separate from unit-type labels where the same letter could mean two things. A line about Fabric A should not require guessing whether you meant a Type A block.
Sherri McConnell's pattern-writing advice includes using consistent templates, reading instructions aloud and involving another proofreader. A size-by-size read is a practical way to apply that advice: follow Small from beginning to end, then repeat the exercise for Large.
Audit one complete route before adding another size
Make a brief record for each size: materials, cuts, unit counts, layout, measurement checkpoints and any special steps. Compare the record with the actual pages, including diagram captions and references to other sections.
For Small in this example, follow 10 Type A and 10 Type B units into five rows of four, then a nominal raw top of 24.5 x 30.5 inches. Repeat Large separately: 21 of each type, seven rows of six and 36.5 x 42.5 inches raw. A section that sends you to the other size's number breaks that route, even when both numbers appear on the page.
If you decide to change the design's dimensions, revisit the quantities and instructions as well as the size label. The quilt-pattern enlargement guide explains the separate design decisions behind a larger quilt.
Choose one size in your draft now. Read only its numbers and applicable steps, and mark every place where you had to consult a key or infer an exception. Make those decisions explicit before asking someone else to follow the pattern.
Plan your next quilt
Lay out blocks and try colors in QuiltLab's grid editor before you cut.
Free forever, no card needed.
Get quilting tips by email
QuiltLab updates, tips and quilting inspiration. Unsubscribe anytime.
Related posts
Large Star Quilt Planning: Choose the Star Before the Margins
Compare 36-inch and 48-inch stars on one quilt top, then check the center print, background and fabric-width constraints.
Nested Star Quilt Design: Keep Every Ring Visible
Compare three nested star sizes, choose contrast at each shared edge, and check which fabric survives in the narrowest ring.
Pieced Quilt Border Math: Fit Whole Motifs
Fit complete border motifs around a measured center, compare end caps with resizing, and keep repeat phase clear at the corners.