


Pieced Quilt Border Math: Fit Whole Motifs
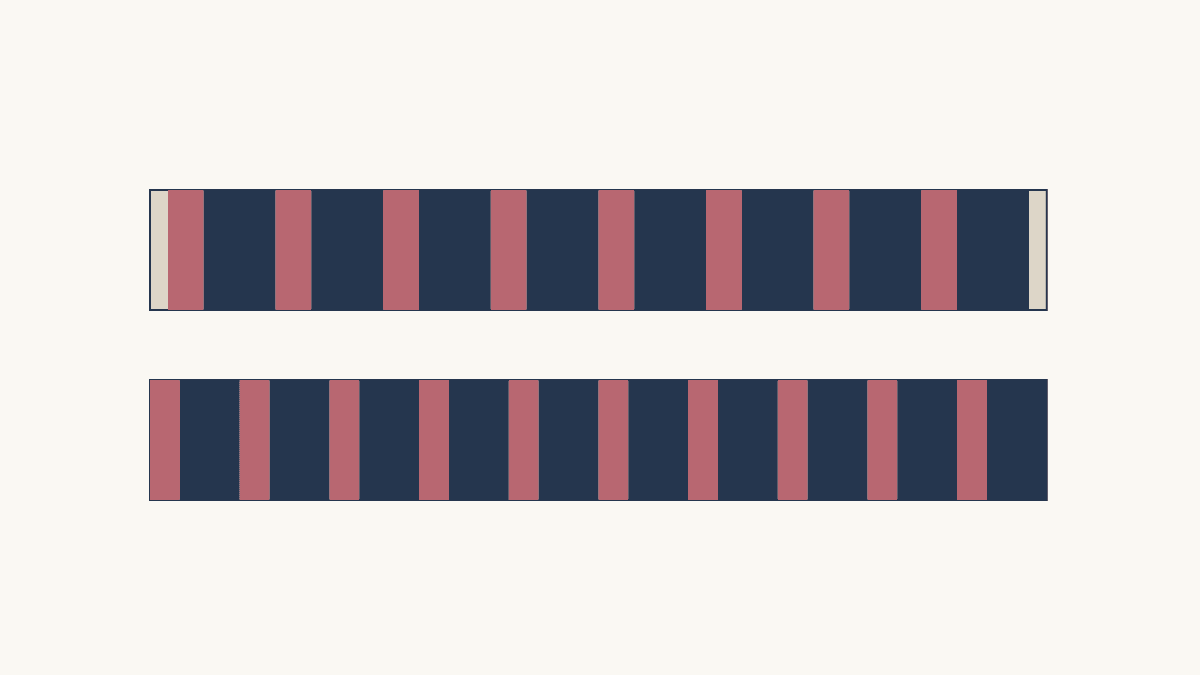
Divide a finished border run by the length of one complete finished motif. For a 50-inch run and a 6-inch motif, start with eight whole motifs and a 1-inch plain cap at each end. That keeps the motif intact. Resize it or change the center only if those caps don't suit the design.
The key is defining the repeat correctly. One patch may be only part of a motif. Count from a recognizable starting point to the next matching starting point, including every patch between them.
Identify the whole motif
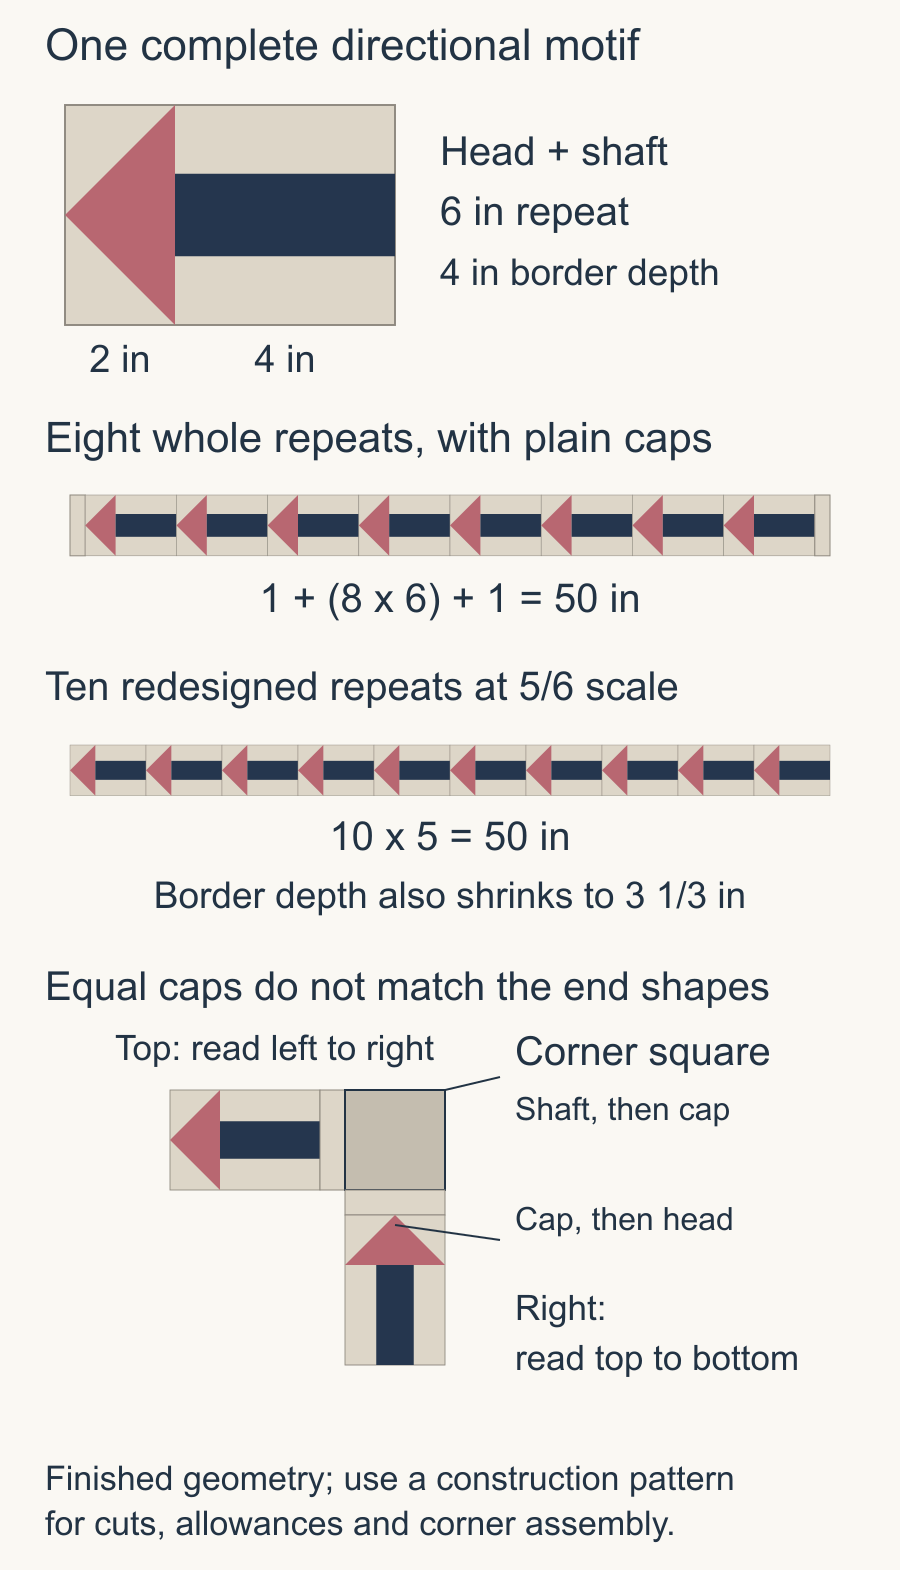
Our planning motif is an arrow: a 2-inch-long triangular head followed by a 4-inch shaft, inside a 6-by-4-inch finished unit. The rose head and navy shaft form one recognizable shape. Count all 6 inches when fitting the repeat, rather than treating either colored section as an interchangeable strip.
The arrow points toward the head end. Reading a row from left to right gives head, shaft, head, shaft. Turning the row around changes which section arrives at each corner.
Audrey's pieced-border measuring lesson at Quilty Folk distinguishes finished repeat width from raw size and keeps the corner arrangement outside the side-repeat count. That is a useful starting habit: draw one entire unit, mark its start and end, and name the section you are measuring.
Our piano-key border article handles strip inventory, mixed key widths and adjustable end keys. Keep an arrow, bird or other compound motif whole when fitting a border: trimming its head is a different visual change from narrowing a plain key.
Measure between the corner decisions
Our example needs a 50-inch finished border run between its corner pieces. The 6-inch motif does not divide that run evenly:
50 divided by 6 is 8 complete repeats with 2 inches left.
That leftover belongs to the border design. Do not quietly spread it across the seam allowances. Decide where it goes and show it on the sketch.
We will keep the motif intact and place a 1-inch finished plain cap at each end. Eight repeats supply 48 inches; the two caps supply the remaining 2 inches.
| Part | Quantity | Finished length each | Total |
|---|---|---|---|
| Complete motif | 8 | 6 in | 48 in |
| Plain end cap | 2 | 1 in | 2 in |
| Full run | 1 | 50 in | 50 in |
The complete raw strip would measure 50.5 inches if its two end joins each need a quarter-inch allowance. Individual patches need their own allowances too. Adding half an inch to the finished run does not supply a complete cutting list.
Check the phase at both ends
Mark the head end of the first repeat. Follow the strip to its last repeat. At the left end, a plain cap comes before a head; at the right end, a shaft comes before the cap. Equal caps center the repeated section, but the shapes beside them differ.
Set that drawn strip beside the planned corner squares. Does each corner need the same motif beside it? If so, you may need a deliberately mirrored construction or a different end arrangement. Merely reversing a strip changes its order; it does not mirror every asymmetric shape within the cloth.
For a simple perimeter map, read each run clockwise around the quilt:
| Run | Read from | First motif section | Last motif section |
|---|---|---|---|
| Top | Left to right | Head | Shaft |
| Right | Top to bottom | Head | Shaft |
| Bottom | Right to left | Head | Shaft |
| Left | Bottom to top | Head | Shaft |
At the top-right corner, the top run ends with a shaft and cap, while the right run begins with a cap and head. The other corners repeat that relationship. If you wanted two heads facing each corner, this map won't do it. You would need to redesign the direction changes and check the middle of each side too.
Try the top and side runs together on paper. Label the corner pieces and the strip starts before making four interchangeable-looking stacks. Keep the direction of a print within each piece on a separate note; rotating a geometric arrow doesn't promise that a printed bird stays upright.
Compare caps with redesigning the repeat
A second option is ten 5-inch motifs: 10 times 5 fills the 50-inch run exactly. But these are new motifs, not the same 6-inch units squeezed together.
A proportional redesign uses a scale factor of 5/6. The 2-inch head becomes 1 2/3 inches long, and the 4-inch shaft becomes 3 1/3 inches long. The 4-inch border depth also shrinks to 3 1/3 inches, changing the corner size. Keeping the old depth would be a separate redesign, with different proportions.
Those are finished design dimensions. Don't round the two thirds-based lengths independently and assume ten motifs will still total 50 inches. You would need suitable construction sizes, allowances and a sewn check. That is why plain caps are the simpler starting choice here.
Ask what the smaller feature costs you. A tiny point may become harder to preserve. A print that fit the larger patch may lose its focal image. A mathematically even count can be a less practical border than eight intact motifs with quiet caps.
Linda Griepentrog's American Sewing Guild border article connects border width with print scale and seam allowances. Use the actual fabric and the intended visible patch when comparing these options.
Consider changing the center early
Before the center is sewn, a 48-inch finished joining edge would accept eight unchanged 6-inch repeats. That removes the caps without shrinking the motif.
Whether it is a good choice depends on the center. Can you change its framing strip, or would reducing it damage the main design? A border should not rescue its own arithmetic by cutting off important center points.
This is easiest to settle while both parts are plans. Once the center and border strips are sewn, use actual measurements and treat those pieces as fixed. Chris Kirsch's fitting-pieced-borders lesson shows how a plain spacer can connect existing work with a measured difference.
Our medallion planning article handles the broader sequence of center and border sizes. Here, the reason to revise that sequence is the intact motif and its phase at the corners.
Test a rectangular top in both directions
Do not assume the side calculation also works at the top. A 50-inch horizontal run and a 62-inch vertical run each leave 2 inches after dividing by 6, but they use different counts:
| Finished run | Whole 6-inch motifs | Plain caps | Length check |
|---|---|---|---|
| 50 in | 8 | 1 in each end | 1 + 48 + 1 = 50 in |
| 62 in | 10 | 1 in each end | 1 + 60 + 1 = 62 in |
With 1-inch caps at both ends, both runs share the same phase. That makes the corner conversation simpler. If the second direction had a different remainder, you would need to compare unequal caps or another deliberate solution.
Write one line for each direction: joining length, full-repeat count, leftover amount and end arrangement. Include whether the measurements are finished design sizes or actual raw sewn sizes.
Save a small border map
Your final plan should show one whole motif with an arrow, the count along each side, every cap and the four corner pieces. Mark which seams must preserve a point or a print reference.
Then sew a representative unit using the chosen method and measure it. Repeated small size differences accumulate; the planning arithmetic cannot correct them after a long strip is assembled.
Choose your whole motif now and mark its start. Count complete repeats between the actual corner decisions before cutting a border's worth of pieces.
Plan your next quilt
Lay out blocks and try colors in QuiltLab's grid editor before you cut.
Free forever, no card needed.
Get quilting tips by email
QuiltLab updates, tips and quilting inspiration. Unsubscribe anytime.
Related posts
Large Star Quilt Planning: Choose the Star Before the Margins
Compare 36-inch and 48-inch stars on one quilt top, then check the center print, background and fabric-width constraints.
Nested Star Quilt Design: Keep Every Ring Visible
Compare three nested star sizes, choose contrast at each shared edge, and check which fabric survives in the narrowest ring.
Working in a Quilt Series: Change One Choice
Compare three band studies with the same size, colors and colored area, then choose one question to carry into a small quilt series.