


T-Shirt Quilt Layout: Plan Mixed-Size Panels
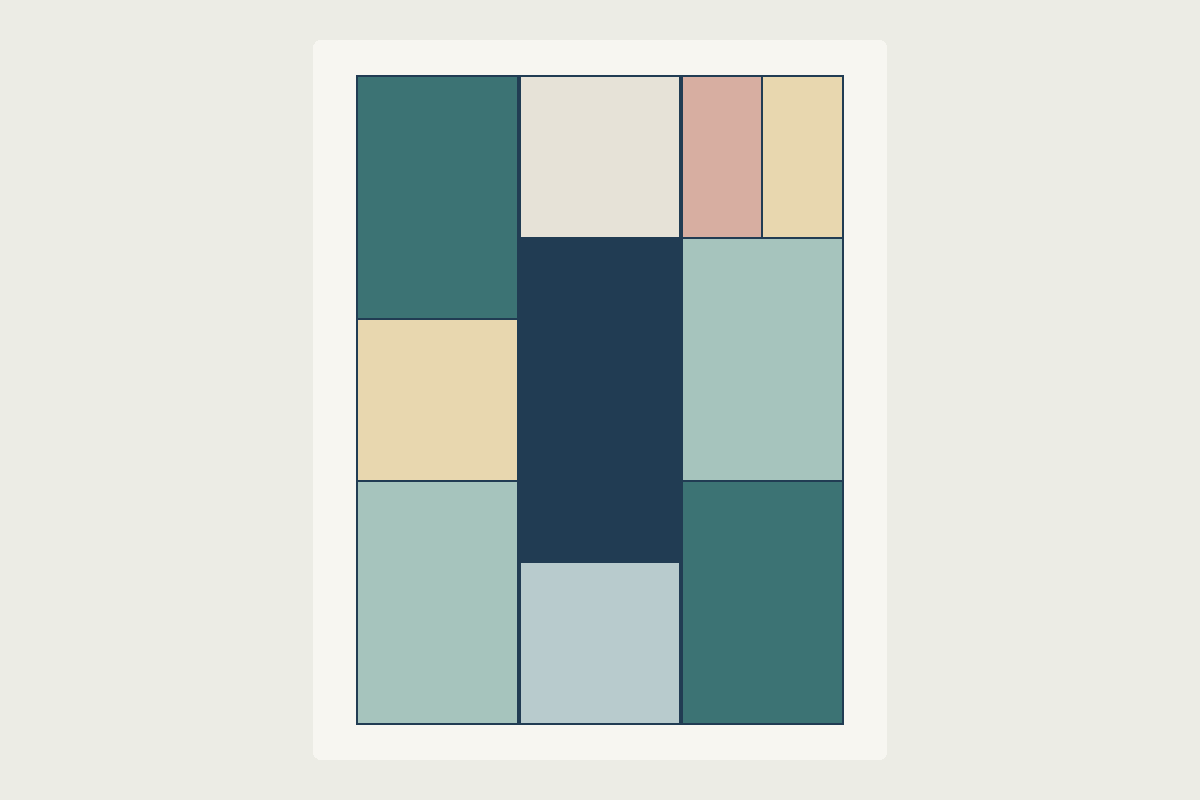
A useful T-shirt quilt layout gives each graphic enough room and gives you a way to assemble the pieces. Those are separate checks: rectangles can fill a drawing perfectly while the cut pieces still lack seam allowances or enough usable shirt fabric.
Here is an original 36 x 48 inch finished layout for ten panels of different sizes. It is a measured planning example with hypothetical fabric dimensions, not a quilt made from actual shirts or a sew-tested pattern. The cover and diagram use flat colors to identify pieces; they contain no photographed shirt graphics.
Choose a layout structure before solving every gap
Three useful approaches handle mixed graphics differently:
| Approach | How sizes fit | Main decision |
|---|---|---|
| Equal outer blocks | Frame smaller panels to a common size | How much surrounding fabric each graphic needs |
| Shared-width columns | Stack different heights within a few column widths | Where each column can be sewn as one unit |
| Puzzle layout | Combine several sizes into larger sections | Which subassemblies must be completed first |
Too Cool T-shirt Quilts, founded by Andrea Funk, describes cutting its puzzle-style blocks to suit each graphic. That is a useful reason to consider varied sizes. It does not require you to copy the company's layout or construction method.
For a first mixed-size plan, columns make the joining order easier to inspect. Our example has three 12-inch finished columns. The horizontal seams occur at different heights, so it looks less like a uniform grid, but each column can still be assembled before the long joins.
Choose the largest or most important graphic's location first. Then place smaller panels around it. Color and reading direction also matter: keep text upright and check whether several dark shirts form one heavy cluster. A paper mockup is enough for this first pass.
Keep three measurements separate
Record these for each proposed panel:
- Finished size: the visible rectangle after its quarter-inch allowances are used in the joins or at the outer edge.
- Cut size: finished width plus 1/2 inch, and finished height plus 1/2 inch, for this rectangular, quarter-inch-seam example.
- Usable fabric: the continuous area available after your chosen preparation method, with the wanted graphic positioned safely inside it.
A finished 12 x 18 inch panel therefore needs a 12-1/2 x 18-1/2 inch cut rectangle. A printed graphic that is itself 12 inches wide does not automatically fit: decide how much visible space you want around it, then check that the larger cut rectangle is available.
Draw the finished outline and cut outline on separate paper templates. The quarter-inch strip outside each finished edge will be consumed. Keep any lettering or signature that must remain visible inside the finished outline, with whatever additional breathing room you choose.
This article starts from usable rectangles. Garment condition and stabilization need their own material-specific preparation decisions. Moore's Sewing's T-shirt layout handout from Sewing Tech Talk with Cathy connects compatible finished-size units with added seam allowances and cautions that some printed or polyester designs may not tolerate heat. Follow the actual material and preparation product's directions; the layout dimensions do not establish a universal interfacing or pressing recipe.
Build the ten-panel example
Label panels A through J so their positions remain clear when you move them. The last column starts with two narrow panels, G and H, joined side by side into one unit.
The usable dimensions below are invented inputs for this example, not measurements of real shirts. Substitute your own verified usable dimensions before making a cut.
| Panel IDs | Finished size, inches | Cut size, inches | Assumed usable area, inches |
|---|---|---|---|
| A, C, I, J | 12 x 18 | 12-1/2 x 18-1/2 | 14 x 20 each |
| B, D, F | 12 x 12 | 12-1/2 x 12-1/2 | 14 x 14 each |
| E | 12 x 24 | 12-1/2 x 24-1/2 | 14 x 26 |
| G, H | 6 x 12 | 6-1/2 x 12-1/2 | 8 x 14 each |
Every assumed usable rectangle is larger than its required cut. That establishes space for these cuts, but it does not prove that a particular logo is centered, undamaged or clear of the seam line. Check its protected outline separately.
Arrange the columns as follows, from top to bottom:
- Left: A, B, C, with finished heights 18 + 12 + 18 = 48 inches.
- Middle: D, E, F, with finished heights 12 + 24 + 12 = 48 inches.
- Right: the G/H unit, I, J, with finished heights 12 + 18 + 18 = 48 inches.
Each column finishes 12 inches wide. Together they finish 36 inches wide. There is no sashing or border in this version.
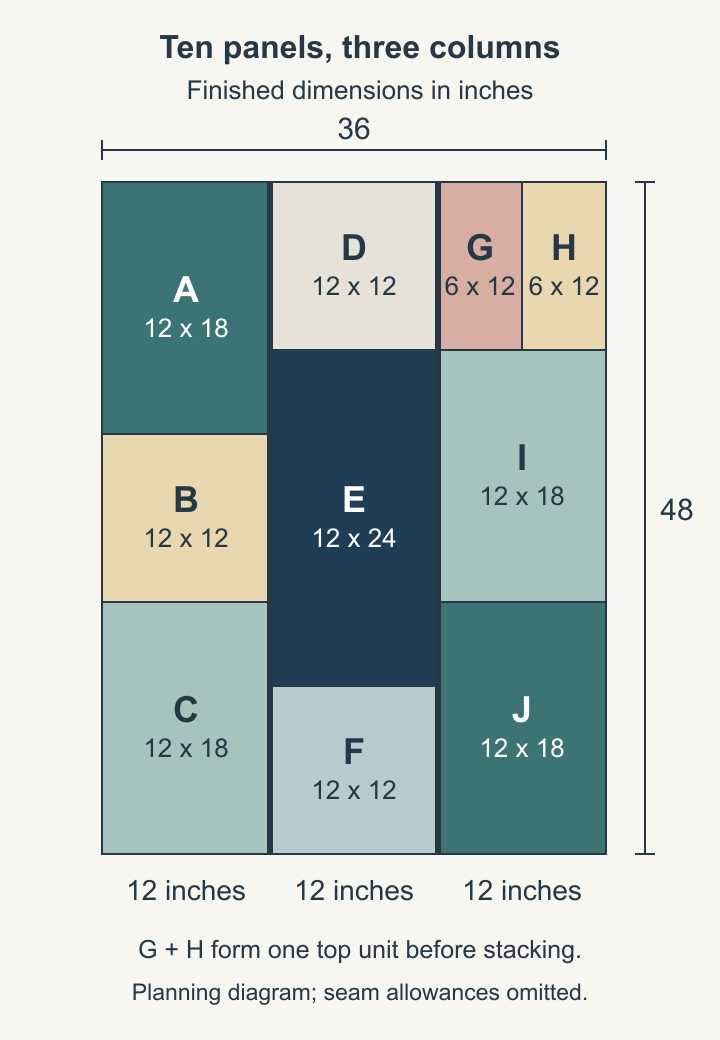
As an area check, four 12 x 18 panels contribute 864 square inches; three 12 x 12 panels contribute 432; E contributes 288; G and H together contribute 144. The total is 1,728 square inches, equal to 36 x 48. The drawing also has to have no overlaps or gaps; the matching total alone would not prove that.
Write the assembly order before cutting
First join G and H along their 12-1/2-inch raw edges. Their combined raw width is 6-1/2 + 6-1/2 - 1/2 = 12-1/2 inches. The joined unit should measure 12-1/2 inches square before it enters the right column.
Then assemble each column. Two joins consume half an inch each from the combined cut heights:
- Left: 18-1/2 + 12-1/2 + 18-1/2 - 1 = 48-1/2 inches.
- Middle: 12-1/2 + 24-1/2 + 12-1/2 - 1 = 48-1/2 inches.
- Right: 12-1/2 + 18-1/2 + 18-1/2 - 1 = 48-1/2 inches.
All three columns should now measure 12-1/2 x 48-1/2 inches unfinished. Joining them uses two more quarter-inch seams, so the raw top should measure 36-1/2 x 48-1/2 inches. Its nominal finished area is 36 x 48 after the outside allowances are used.
This order avoids inset seams: complete G/H, complete each column, then join whole columns. Mark top and bottom, and check column lengths before joining. If a column comes out short, diagnose the cuts, stretching and seam width; do not stretch it to match a longer neighbor.
The plan leaves backing, batting, binding, quilting and material preparation separate. Use the actual completed top and your quilting method's required overhang when planning those supplies. The backing and binding guide explains the next measurement checks.
Adapt a panel without cropping its graphic
Suppose a panel can finish only 10 x 18 inches, but its assigned column needs a 12 x 18 unit. Add a 1-inch finished strip on each side. Cut the shirt rectangle 10-1/2 x 18-1/2 inches and two coordinating strips 1-1/2 x 18-1/2 inches.
The joined raw width is 10-1/2 + 1-1/2 + 1-1/2 - 1 = 12-1/2 inches. That unit can replace A, C, I or J. The filler adds width without pretending the original shirt has more usable area.
Kris Driessen's T-shirt quilt lesson at Phoebe Moon describes filler strips and smaller blocks as ways to connect unequal panels. Use that principle to solve a specific missing dimension, then recalculate the individual cut pieces.
If you prefer space between the three columns, two 1-inch finished vertical sashing strips change this example's width to 12 + 1 + 12 + 1 + 12 = 38 inches. Each strip is cut 1-1/2 inches wide and must match the measured column length. The nominal height stays 48 inches. Horizontal sashing within columns would also change their heights and needs a new plan.
Use QuiltLab for measured rectangles
Open a new Freeform quilt, then choose Draw rectangle and drag a piece on the canvas. Select it to inspect Shape X, Shape Y, Shape width and Shape height. These controls allow a measured rectangle plan; the Quilt Editor guide explains starting a separate Freeform document.
For a plan like the diagram, set the Freeform quilt's finished area to Width 36 and Height 48 inches. Changing that area does not resize or reposition existing pieces. Use finished rectangles, then set each selected shape's size and location. For example, A is 12 x 18 inches at X 0, Y 0; B begins at X 0, Y 18. Keep rotation at zero while checking these axis-aligned coordinates. Verify each rectangle's numbers rather than relying on how neatly it appears to touch its neighbor.
Shape Fabric > Pick fabric can assign a library fabric. In our current product check, a selected rectangle accepted a solid swatch and retained it after saving and reopening. That check supports solid-color planning; it does not demonstrate placement of a photographed shirt graphic or prove a shirt's usable dimensions.
Freeform starts another document. It does not convert an existing Grid quilt or bring that grid's placements into the new design. Keep your original design saved, and confirm the new document's saved state before leaving it.
Keep a layout record you can use at the table
Before cutting, retain the labeled layout, panel dimension table, protected graphic outlines and joining order together. Keep the chosen preparation instructions with them. If a panel changes size, update both its cut requirement and the column totals.
A paper mockup or measured rectangle design is the place to try variations. Once the desired graphics, usable fabric and subassemblies agree, you have a layout that can guide the next construction decisions without sacrificing a shirt simply to fill a hole.
Related posts

How to Set Quilt Blocks on Point: Triangles and a 13-Block Example
Plan an on-point quilt with 13 blocks, check side and corner triangle cuts, and keep straight grain and a quarter-inch allowance at the edges.
Eight at a Time Half Square Triangles: Batch Math
Plan eight-at-a-time half-square triangles with an oversized starting-square rule, a clear cutting sequence, and a 54-unit color-pair example.
Fussy Cutting: Plan the Motif Before You Cut
Frame the print, protect the seam allowance and count usable repeats. A four-inch square example, plus a QuiltLab preview before you cut.