


Directional Quilt Border Corners: Upright or Around?
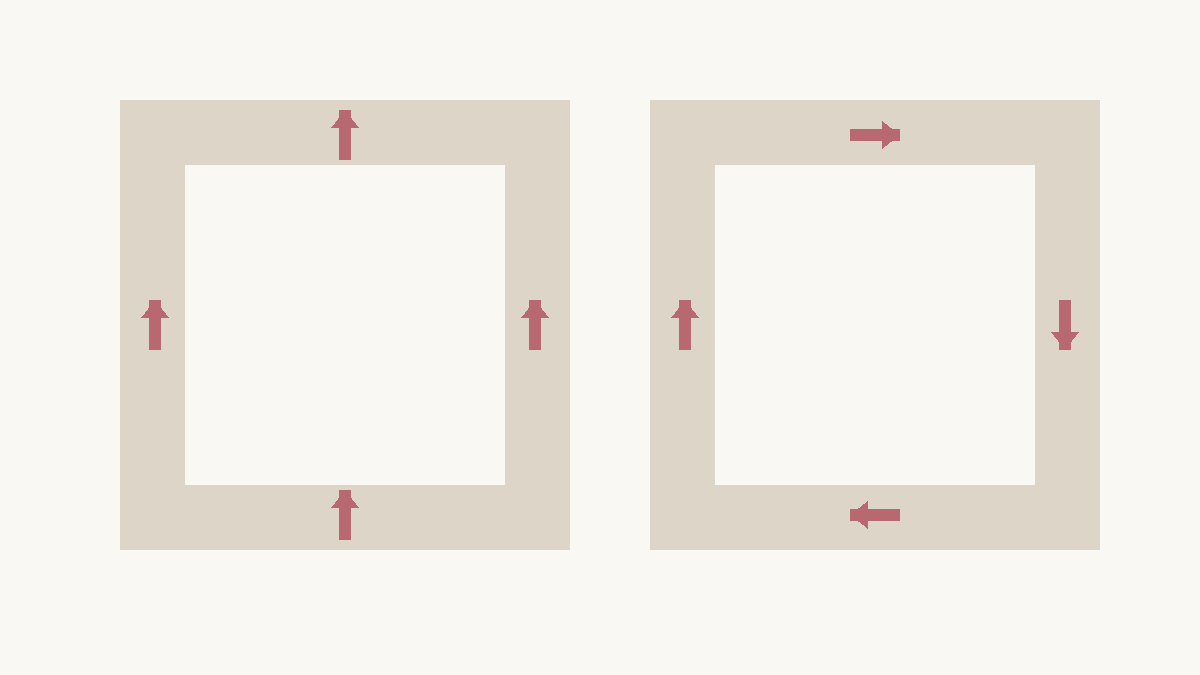
Decide whether your border pictures should stay upright when the quilt hangs, or turn around the quilt like a continuous frame. Those are different layouts. A mitered corner can join matching print bands, but it cannot make every directional picture satisfy both goals.
For figures, trees or words, mark the quilt's top first. For a stripe or a repeating path, sketch all four sides together. The corner method follows that orientation decision.
Name the viewing direction
Place a small paper arrow at the top of the quilt sketch. This is the front view: the same view you will use when checking the finished design.
Now draw an arrow inside one border motif. A tree's arrow can point from roots to treetop; a train's arrow can point toward its engine. That makes direction visible even if the real print is busy.
Krista Moser's Borders That Frame article distinguishes tree borders kept upright from a train design traveling around a mitered frame. These examples answer different visual questions. Use the one that matches how you want your own print to behave.
Our directional-print block article deals with orientation inside blocks. A border adds the challenge of four long runs and four places where they meet.
Compare the two arrow maps
In an all-upright layout, every picture points toward the quilt's top. The trees along the bottom stand up, and so do the trees along both sides. The print may need to be cut from different places or orientations to do that.
In a clockwise frame, the top arrows point right, the right-side arrows point down, the bottom arrows point left and the left-side arrows point up. The direction turns at every corner.
| Border side | All-upright pictures | Clockwise frame |
|---|---|---|
| Top | Up | Right |
| Right | Up | Down |
| Bottom | Up | Left |
| Left | Up | Up |
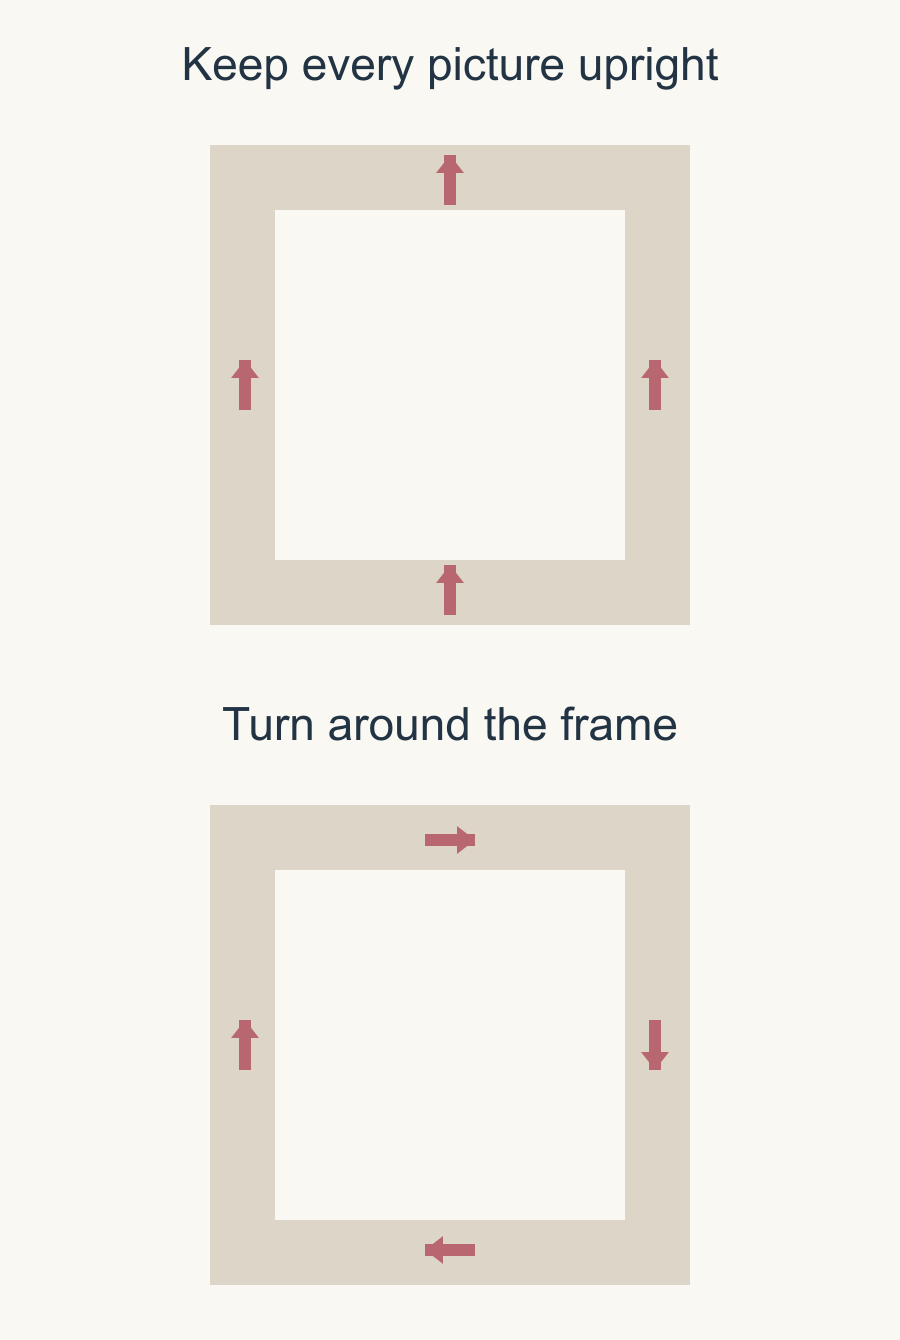
Notice that one side happens to agree in these two maps. That does not mean the remaining strips can be swapped freely. Label every side, including the top edge of each strip.
Separate stripes from pictures
A border print can contain several bands: a narrow line, a floral stripe and a quiet outer margin. Matching those bands across a miter is one task. Matching the pictures within the bands is another.
Dawn Cavanaugh's APQS mitered-corner lesson emphasizes cutting consistent print bands and checking the corner before trimming. If the floral stripe sits half an inch farther from the inner seam on one strip, the diagonal join will reveal that offset.
Measure from a consistent print reference to the intended inner stitching line. Repeat the check along the length, because a printed line and fabric grain may not agree perfectly.
Then inspect the pictures near the corner. A stripe may flow beautifully while a bird is upside down. Decide which feature deserves priority rather than assuming a good stripe match solves the whole design.
Make four paper strips first
Cut paper strips to the planned visible border width. Draw a simple version of the print band and repeat your arrow or picture along it. Mark the inner edge and the strip's name: top, right, bottom or left.
Lay them around a rectangle. Fold the proposed corners and photograph the full frame from above. You can now compare the quilt's top with each motif's top without handling long fabric strips.
Keep that front view fixed while you check the four meeting pairs:
- Top-right: the top strip's right end beside the right strip's top end.
- Bottom-right: the right strip's bottom end beside the bottom strip's right end.
- Bottom-left: the bottom strip's left end beside the left strip's bottom end.
- Top-left: the left strip's top end beside the top strip's left end.
At each pair, check the motif arrows first, then the print bands at the proposed seam. Mark a corner that needs a particular picture or a deliberate pause. Rotating the whole sketch to inspect one corner shouldn't change which edge you have labeled top.
For an all-upright layout, ask whether the actual fabric contains the required sideways cuts and enough repeated motifs. A direction printed along the selvage may give you long runs for one pair of sides but shorter available runs for the other pair.
For a turning frame, check whether the corners need mirrored pictures. A simple arrow turning clockwise is easy to sketch. An asymmetric animal or lettering may not have a matching counterpart in the print.
Check the corner with the cloth
After the paper map works, audition the actual cloth at the finished width. Include the seam allowances outside that visible window.
Linda Griepentrog's American Sewing Guild border guidance discusses how motif scale and seam allowances affect a fussy-cut border. A large picture may need more width than the narrow stripe you first planned.
Bring two intended strips together at the corner before cutting away excess. Inspect the print bands, the pictures and the amount of each picture that would disappear into the seam.
Our print-matching article explains the separate problem of registering print details. Use those references together with the four-side orientation map, especially when the print itself has a staggered repeat.
Choose the corner method afterward
If keeping every picture upright matters most, corner squares or a butted arrangement may give the design a useful pause. The change in direction is explicit instead of pretending to be continuous.
If a broad stripe should flow around the frame, a miter may suit it. You still need the actual print repeat, extra fabric and the construction method's allowances. The diagram alone does not calculate those purchases.
Our mitered-versus-butted border guide compares the construction choices. Bring your chosen arrow map to that decision rather than choosing a miter first and trying to repair the pictures later.
Label what must stay consistent
Keep a border sheet with four items: the quilt's top, every strip's name, the intended picture direction and the print reference measured from the inner seam.
Add a note beside each corner that needs a particular motif. If you cannot find enough matching windows in the actual fabric, revise the border now. A planned pause, corner square or simpler band is easier to work with than a promise the print cannot fulfill.
Your next step is to mark the quilt's top, label the four border strips and draw the motif direction on each. Check the four meeting pairs, then audition the first cloth corner with its seam lines visible.
Plan your next quilt
Lay out blocks and try colors in QuiltLab's grid editor before you cut.
Free forever, no card needed.
Get quilting tips by email
QuiltLab updates, tips and quilting inspiration. Unsubscribe anytime.
Related posts
Centering Fussy Cut Motifs: Fix the Shift First
Use two print landmarks to tell a simple shift from a rotation or mismatched repeat before cutting the next batch.
Fussy Cutting Border Prints: Keep the Whole Band
Choose a border print by its finished visible band, preserve calm margins, and check repeat phase before cutting long strips.

Kaleidoscope Quilt Fabric Repeats: Plan Eight Wedges
Find eight matching print windows, keep the same wedge reference, and preview the octagon before cutting a batch.