


Matching Prints Across Quilt Seams: Plan the Visible Join
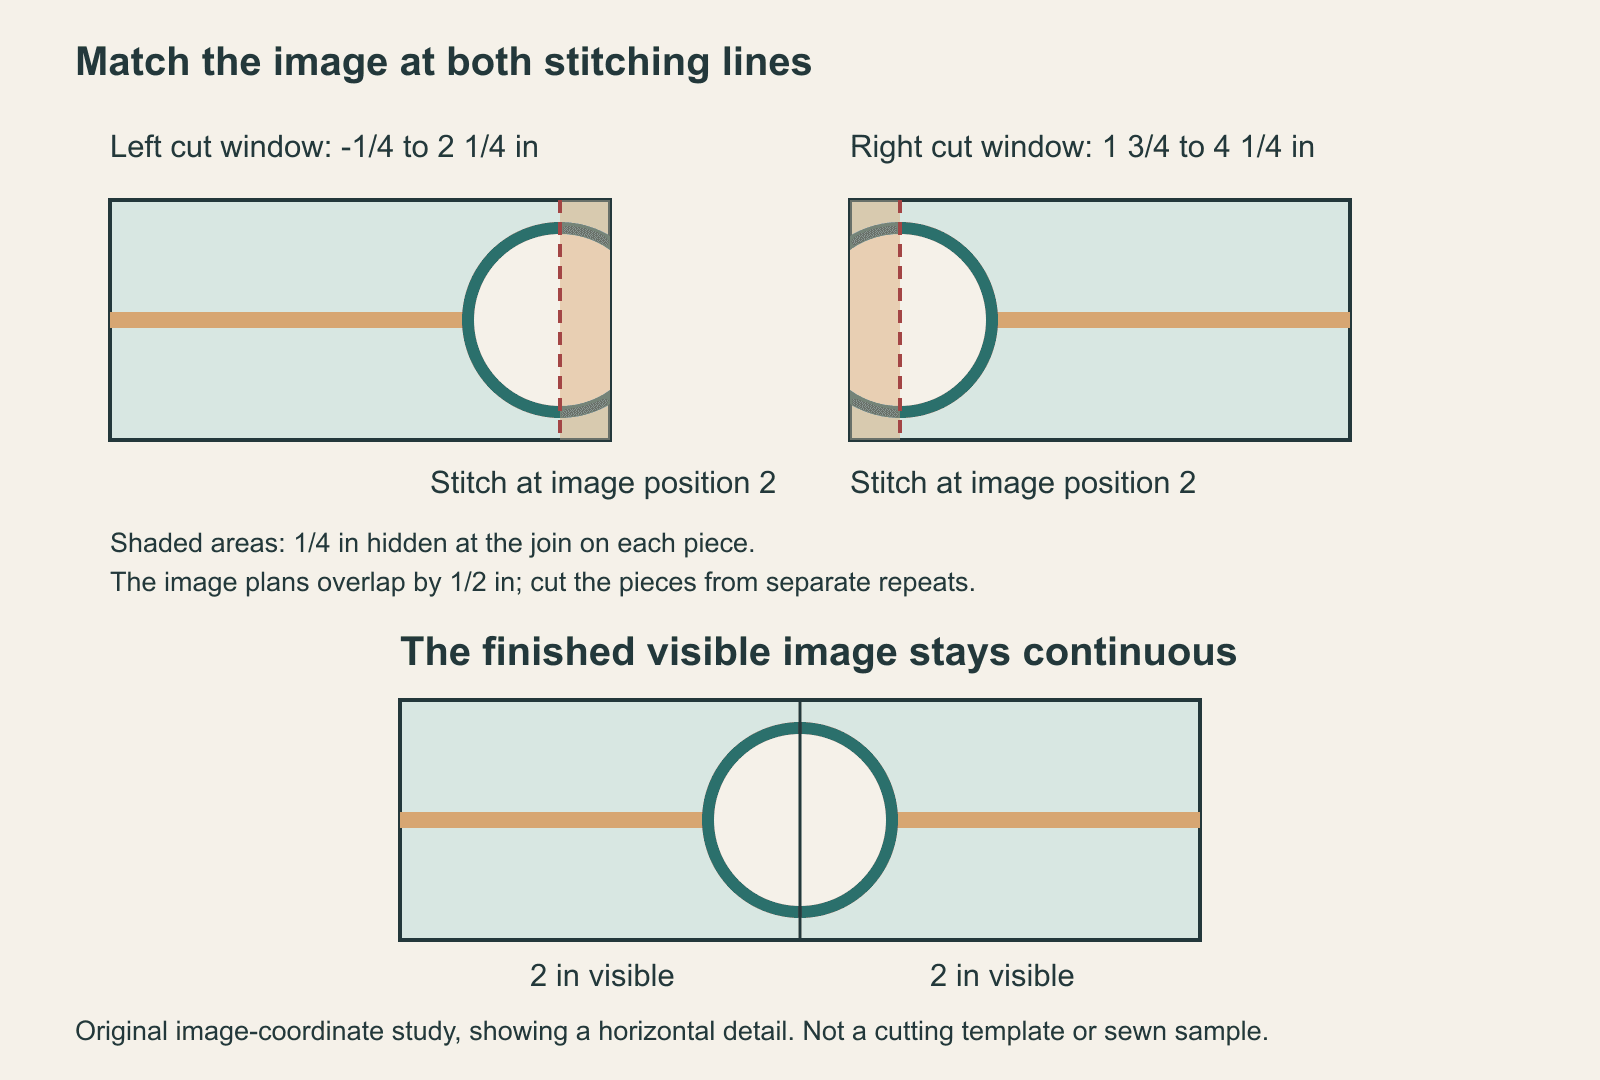
Matching prints across quilt seams depends on the image at the stitching lines, not simply the image at the raw edges. Two pieces that look continuous when their cut edges touch can lose a strip of the picture when their allowances disappear into the seam.
Plan the visible join first, add the required allowance on each piece and locate those two windows in separate repeats of the fabric. The original example below explains that geometry with a quarter-inch pieced seam. It is a planning study, not a tested quilt pattern or a cutting template.
Decide whether continuity is worth the extra fabric
Not every print needs matching. A scattered small floral may hide a join without exact alignment. A face, large flower, stripe or architectural line crossing a seam makes a mismatch more obvious.
Choose one important detail to preserve and consider where the seam will cross it. A seam through a quiet area may be easier to match than one through a tiny high-contrast outline. You can also deliberately separate the images with another fabric rather than trying to conceal the join.
Matching a printed motif is different from nesting patchwork seams. Nesting aligns the geometry of pieced units; here, the target is a printed detail that may lie anywhere inside those units. Check both if the design needs both.
Our fussy-cutting overview covers framing individual patches. This companion concerns the point where the visible print leaves one patch and continues into the next.
Find the true repeat and mark its direction
Lay the fabric in a single layer with its right side visible. Find a distinctive detail, then find another occurrence with the same surrounding artwork. Check several landmarks rather than trusting one similar flower or butterfly.
Meghan Morris's quilt-backing tutorial at A Piece of Quiet Quilts describes initially mistaking similar butterflies for the true repeat. She also records fabric lost while positioning the match. The lesson for a pieced motif is to locate the exact repeat before deciding how much cloth is usable.
Mark "top" on a paper plan and keep both pieces oriented the same way unless you intentionally want a rotated image. Record the horizontal and vertical distances between matching landmarks. A repeated motif may occur in alternating colors or in offset rows; those alternatives do not automatically make interchangeable windows.
Leave the grain direction on the plan. Do not pull or distort one piece until its print appears to match another. If the print and fabric behave differently at different occurrences, you may need to choose another pair or make the join intentionally visible.
Show the seam line before the cut line
For a straight seam, imagine the two finished visible areas meeting at one boundary. Extend each piece beyond that boundary by its required seam allowance. Both pieces need an allowance; adding it to just one side does not preserve the intended image.
Here is an original coordinate example. Two patches each contribute 2 inches of finished width to a continuous 4-inch image. Call the image's left edge 0 and its right edge 4. The visible join is at position 2. Using quarter-inch allowances on every edge produces 2 1/2-inch cut squares for this square-only example.
| Piece | Visible image span | Cut-window image span |
|---|---|---|
| Left patch | 0 to 2 inches | -1/4 to 2 1/4 inches |
| Right patch | 2 to 4 inches | 1 3/4 to 4 1/4 inches |
The negative coordinate simply means the left patch includes cloth outside the intended final image. The two cut windows share the image interval from 1 3/4 to 2 1/4 inches, a 1/2-inch overlap in the image plan. That overlapping artwork supplies the two allowances hidden at the join.
You cannot cut overlapping windows out of the same physical occurrence and obtain two complete pieces. Find equivalent windows in separate repeats, or use separately printed copies if that is your chosen fabric method. The overlap describes matching image content, not permission to count one scrap twice.
When the pieces are sewn, their stitching lines both correspond to image position 2. The opened two-square unit has a nominal 4 1/2-inch unfinished width: 2 1/2 + 2 1/2 - 1/4 - 1/4. Its outside allowances remain. After future outer seams, the two pieces contribute the intended 4-inch finished width.
This is ideal flat geometry. Actual thread, folding, pressing and fabric behavior need checking on a sample before you rely on the placement.
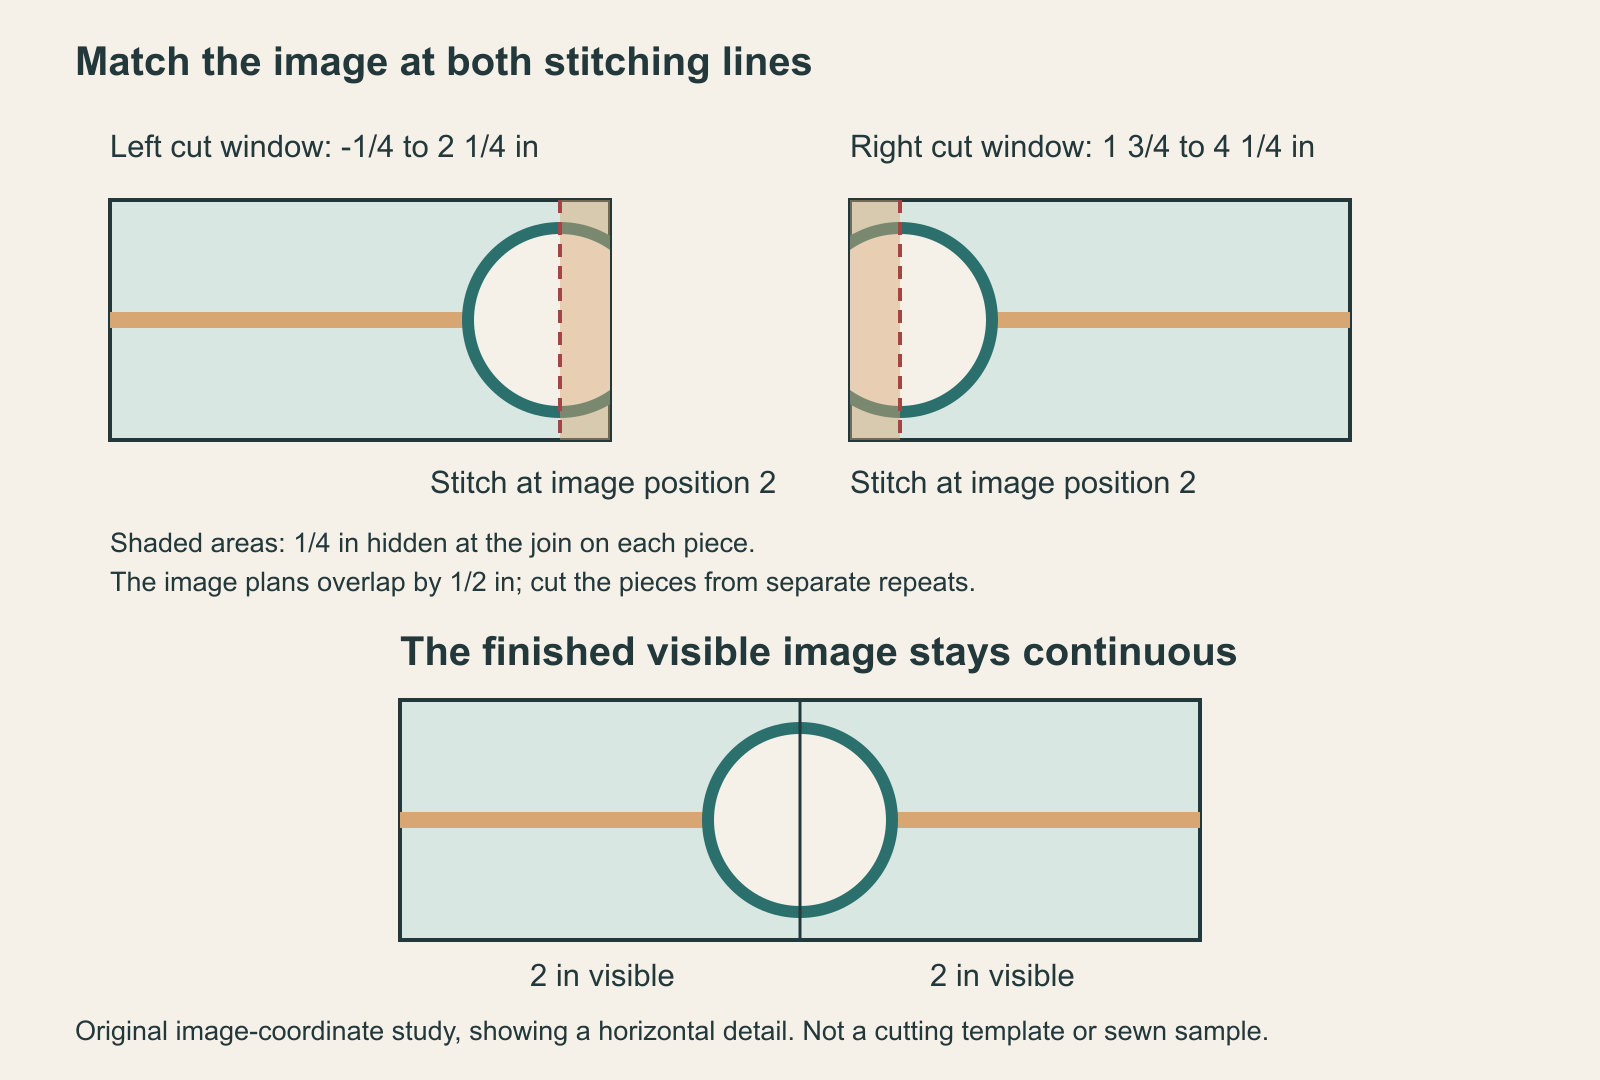
Why matching raw edges can remove part of the picture
Suppose you cut consecutive windows from one image, make their raw edges look continuous and then join those edges with quarter-inch allowances. Sewing hides a quarter inch of artwork from each side: 1/2 inch of the source image disappears at the seam.
A circle crossing that seam may look narrowed; a branch may jump from one position to another; a stripe may lose its spacing. The seam can be straight and accurately sewn while the image is still wrong.
Match at the visible boundary represented by the stitching line. If you fold an allowance under for a right-side preview, match at the fold rather than the outer raw edge. Recheck the full cut boundary around both pieces: a convincing fold preview can still leave insufficient fabric on another edge.
Borrow the alignment principle, keep your project's allowance
Rachel Thomeczek's print-matching tutorial at Suzy Quilts folds one backing edge, aligns the print along that fold, holds the position and stitches the crease. It demonstrates why the intended seam boundary is the useful visual reference.
That tutorial is for quilt backing and uses a larger seam allowance than the quarter-inch example here. Keep the allowance required by your own pattern or service. Do not copy a backing fold dimension into a pieced block, or trim an allowance away merely to make the image look continuous.
Likewise, a glue-assisted method needs materials appropriate to the actual fabric and a separate trial. Hand basting is another way to hold the alignment. Sue's print-matching tutorial at Super Mom No Cape! shows folded-edge matching and hand basting, followed by inspecting the opened seam. Her example also includes unpicking a section that was stitched on the wrong side of the intended line.
Make a sacrificial sample before the main cuts
Use two spare occurrences of the print for a small trial. Do not use the only complete face or flower you need in the final design as the first experiment.
- Choose two repeat windows. Mark the intended visible seam position and the top direction on the paper plan.
- Confirm the allowance. Check the cut boundaries on both pieces and mark the stitching lines using a method suitable for the fabric.
- Preview the join. Fold one allowance under at the intended stitching line and place that fold over the other piece's corresponding image position. Inspect more than one landmark along it.
- Hold the match. Pin or baste using the selected method. Keep the fabric flat and avoid stretching it to force agreement.
- Sew the trial. Sew the intended line, open the pieces and press as your project requires.
- Inspect the result. Compare the printed detail across the join, measure the unit and note any displacement from the plan.
This sample procedure is a planning check for you to perform, not a claim that we sewed the original example. If the result fails, change one variable at a time: the selected repeat, marked line, holding method or seam position. Record the change before trying the next pair.
Diagnose what moved
| What you see | Check first | Next decision |
|---|---|---|
| Match is wrong everywhere | Raw edges were matched instead of seam lines | Redraw the visible windows and allowances |
| Match starts well, then drifts | Fabric slipped or landmarks are not a true repeat | Recheck the print and holding method |
| Picture matches, unit is too small | Seam adjustment changed the planned dimensions | Restore the required size and relocate the windows |
| One detail matches, another does not | Similar motifs or printing variation | Select another repeat or accept a visible join |
Keep measurements and motif matching as two checks. A visually convincing image that changes the block size can create trouble in the surrounding quilt. A correctly sized unit with a displaced motif may be structurally usable but not the composition you wanted.
Preview composition, then return to the cloth
If you want a digital framing comparison, the Swatch Editor guide explains how to size a source image to a measured fabric area. The Block Editor guide covers pieces and fabric fills; Fabric > Tools > Fussy Cut lets you move the print within a fabric-filled piece.
Keep the seam model outside that preview. It does not prove that two physical repeats align, generate cutting templates or add your chosen allowance to the cloth. Use it to compare the desired visible image, then confirm the actual windows and sample with your ruler and fabric.
For a whole quilt, decide which joins deserve exact matching and reserve those repeats before cutting less demanding pieces. A clear visible boundary, complete allowances and one checked trial give you a more useful starting point than raw edges that happen to look continuous.
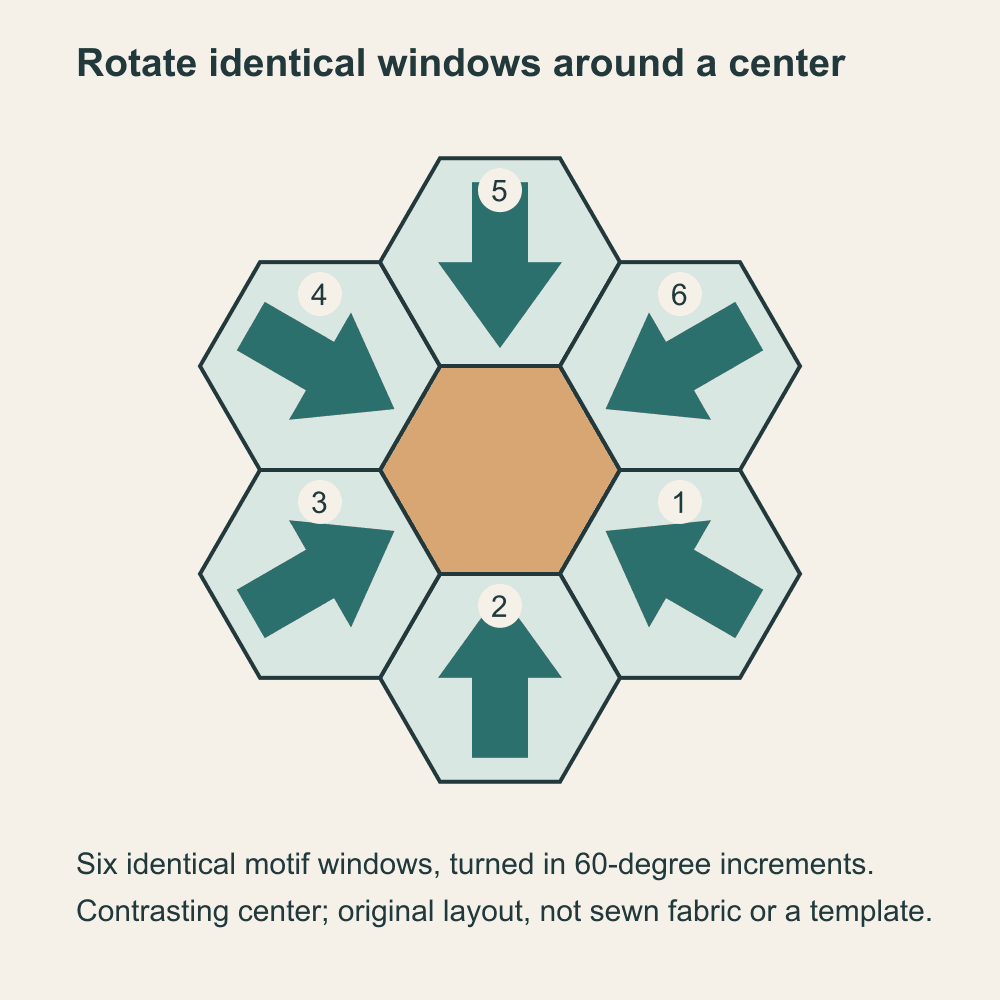
If the design repeats a motif around a center rather than continuing it across one straight seam, our hexagon rosette repeat plan maps six matching windows and their rotations. Choose the appropriate physical template and assembly method for that different layout.
Related posts
Eight at a Time Half Square Triangles: Batch Math
Plan eight-at-a-time half-square triangles with an oversized starting-square rule, a clear cutting sequence, and a 54-unit color-pair example.
Fussy Cutting: Plan the Motif Before You Cut
Frame the print, protect the seam allowance and count usable repeats. A four-inch square example, plus a QuiltLab preview before you cut.
Fussy Cutting Hexagons: Plan Repeats for a Rosette
Count six matching motifs, record their orientation and preview a hexagon rosette before cutting the fabric.