


How to Test a Scant Quarter Inch Seam
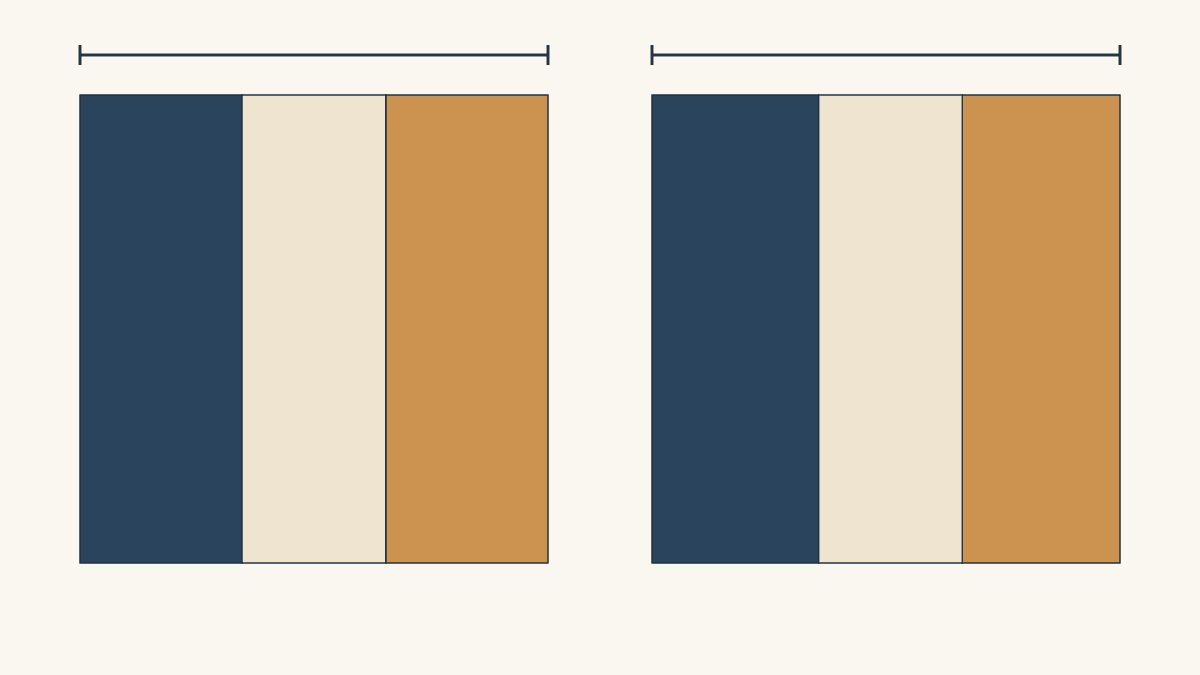
Test your seam with the fabric, thread and pressing method you plan to use. Sew three accurately cut 2-1/2-inch-wide strips together, press them, and check for a 6-1/2-inch overall width and a 2-inch center. Measure in several places before keeping the setup.
A scant quarter inch seam is a little narrower than a full quarter inch. The useful setting is the one that gives your pressed pieces the dimensions the pattern expects. Start with a small test, make one change at a time, and confirm the result with fresh pieces before sewing a batch.
Make a setup card before you adjust anything
Write down the machine, foot, needle plate, thread, needle and current guide or needle setting. Add the fabric preparation and how the pattern asks you to press. Keep those choices steady through the comparison.
Brittany Lloyd's scant-seam lesson at Lo & Behold Stitchery explains why thread and the fabric's fold can affect the pressed result. She recommends testing with the project thread and pressing method. A setting that worked with one combination deserves another check when that combination changes.
Use a ruler you can read comfortably, a contrasting center strip and the actual project fabrics where possible. Prepare the fabric as you will for the quilt. If you starch the project cloth, for example, use the same preparation for this test.
Check the cut widths first. A narrow strip changes the result before the machine has sewn anything. Keep one spare strip beside the test so you can recheck its width without trying to measure fabric hidden inside a seam.
Sew a small test you can measure clearly
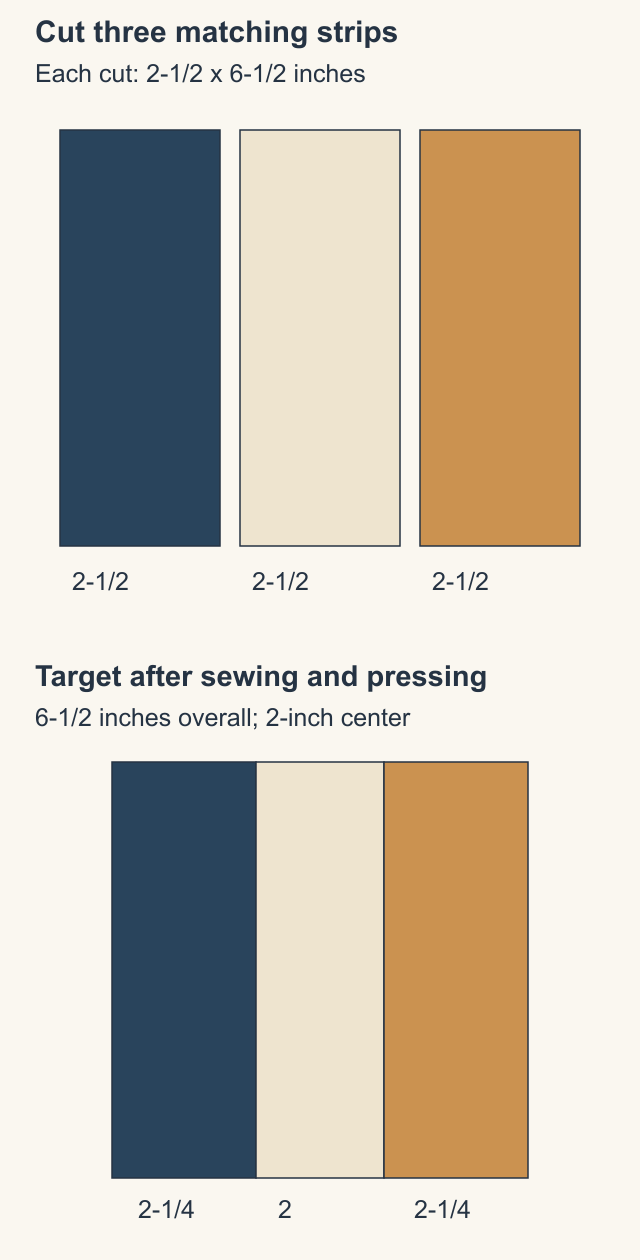
Julie Cefalu's test at The Crafty Quilter uses three 2-1/2 x 6-1/2-inch strips. That length gives you room to check the same seams near the beginning, middle and end.
- Cut three strips to those dimensions. Measure each at more than one point.
- Put two strips right sides together and sew their long edges with your current setup.
- Press as you intend to press the project, opening the fabric fully at the seam.
- Add the third strip to the other side of the center strip and press again.
- Let the unit lie flat, then measure without pulling it wider.
Guide the raw edges consistently instead of pushing them hard against a guide. Keep the fabric supported so its weight doesn't drag it sideways.
We drew these diagrams and haven't sewn them; the trial readings below are a hypothetical example of a calibration record.
Check three places, then check the bands
For these cuts, the expected pressed width is 7-1/2 - 1 = 6-1/2 inches. Two joins each take a nominal quarter inch from both adjoining pieces, accounting for one inch altogether.
The center loses an allowance on each side, leaving 2-1/2 - 1/2 = 2 inches. Each outside strip loses an allowance on one side, leaving 2-1/4 inches visible. The outer raw edges still include the allowances for a future join.
Lee Heinrich's quarter-inch lesson at BERNINA WeAllSew uses the two-inch center and 6-1/2-inch total as checkpoints. Add a consistency check by measuring across the unit one inch from the beginning, at the middle, and one inch from the end. For our 6-1/2-inch strips, those positions are 1, 3-1/4 and 5-1/2 inches along the seam.
At each position, look for fabric still tucked at the fold, a seam that wanders, or raw edges that slipped apart. If the unit narrows toward one end, one global setting change may not solve the feeding problem.
Let one trial answer one question
Use a fresh sample when testing a changed setting. Keep the old one labeled so you can compare it with the new result.
Here is how a record could develop. The width entries run from the beginning station to the middle and end stations.
| Trial | Only change | Pressed row widths | Next action |
|---|---|---|---|
| A | Current setup | 6-3/8, 6-3/8, 6-3/8 inches | Check cuts and folds; then try a narrower permitted setup |
| B | One smaller needle-to-guide distance | 6-1/2, 6-7/16, 6-3/8 inches | Keep the setting; improve consistent edge alignment |
| C | More consistent feeding | 6-1/2 at all three stations | Check every band, then make a confirmation sample |
| D | Fresh pieces; no setup change | 6-1/2 at all three stations | Record the successful setup and retain the sample |
Trial A is consistently short. Trial B starts at the target but loses width along the seam. Treating those as the same problem would lead to more adjusting without fixing the variation.
Before changing needle position, check the instructions for your machine, foot and plate. Heinrich specifically cautions about single-hole plates. Use a compatible permitted adjustment or ask your dealer for help; there is no universal needle-position number for every machine.
Don't change the guide, thread and pressing routine all at once. You'd lose the link between the change and its result. If a different pressing method is required for the pattern, use that method for a new calibration rather than carrying over the old card.
Catch two errors that cancel each other
A correct total is encouraging, but it doesn't prove that both seams are in the right place. The center can measure correctly too while one outside band is wider than the other.
Consider an ideal width calculation in which one seam consumes 3/16 inch from each adjoining piece, and the other consumes 5/16 inch. Their combined consumption is still one inch across the row. The center loses 1/2 inch, so it still measures two inches.
But the outside bands become 2-5/16 and 2-3/16 inches. One is 1/16 inch wider than its target and the other 1/16 narrower. The two wrong allowances have canceled in the overall measurement.
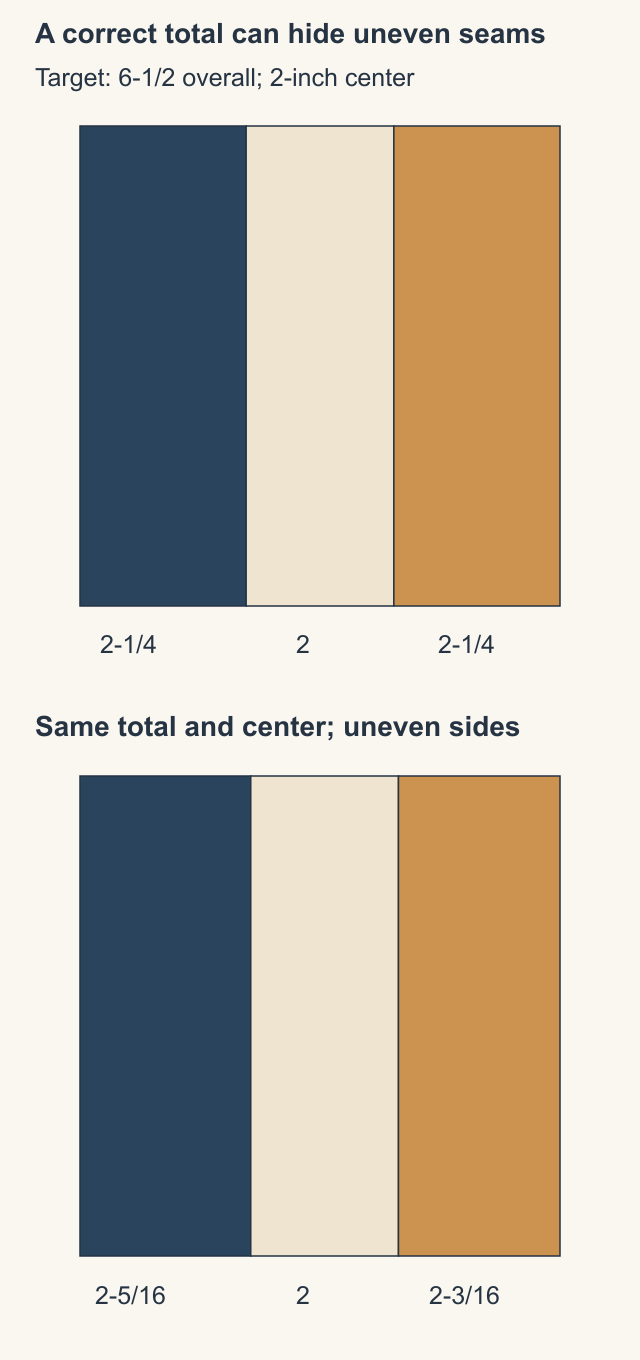
Use those numbers to understand the check, rather than as instructions to set either allowance. Real pressed width includes fabric and thread effects. Measure the separate bands and inspect both seam paths when an apparently correct row still looks uneven.
Keep the result you can repeat
When a test passes, sew another with fresh verified cuts and unchanged settings. Check all three stations and all three bands again. Keep the accepted sample with its setup card and the project instructions.
Retest after a meaningful change in fabric, thread, foot or pressing. A photograph of the setup can help you return to it, but the fresh pressed sample is the useful check.
If your existing blocks are already short, follow our small-block troubleshooting guide to trace cutting, seams, pressing and trimming separately. Our pressing comparison helps you choose the pressing approach before calibrating. When you're ready to batch strips, the strip-piecing plan covers counts and usable sewn length.
Write your setup card now, cut three test strips, and check the pressed result before cutting the rest of the quilt.
Related posts

Freezer Paper Foundation Paper Piecing or Sew-Through?
Compare sewing through a foundation with sewing beside folded freezer paper, using one simple unit and a realistic plan for sixteen repeats.
Pinked Edges on Precuts: Where to Measure the Seam
Peaks or valleys? Compare Moda and C&T guidance, then use a three-strip check to choose a consistent seam reference for your actual precuts.

Wonky Log Cabin Quilt Blocks That Trim to One Size
Keep the irregular strips and still make blocks that fit. Plan an 8-inch finished block, check the trimming square and protect the outer seams.