


Fussy Cutting: Plan the Motif Before You Cut
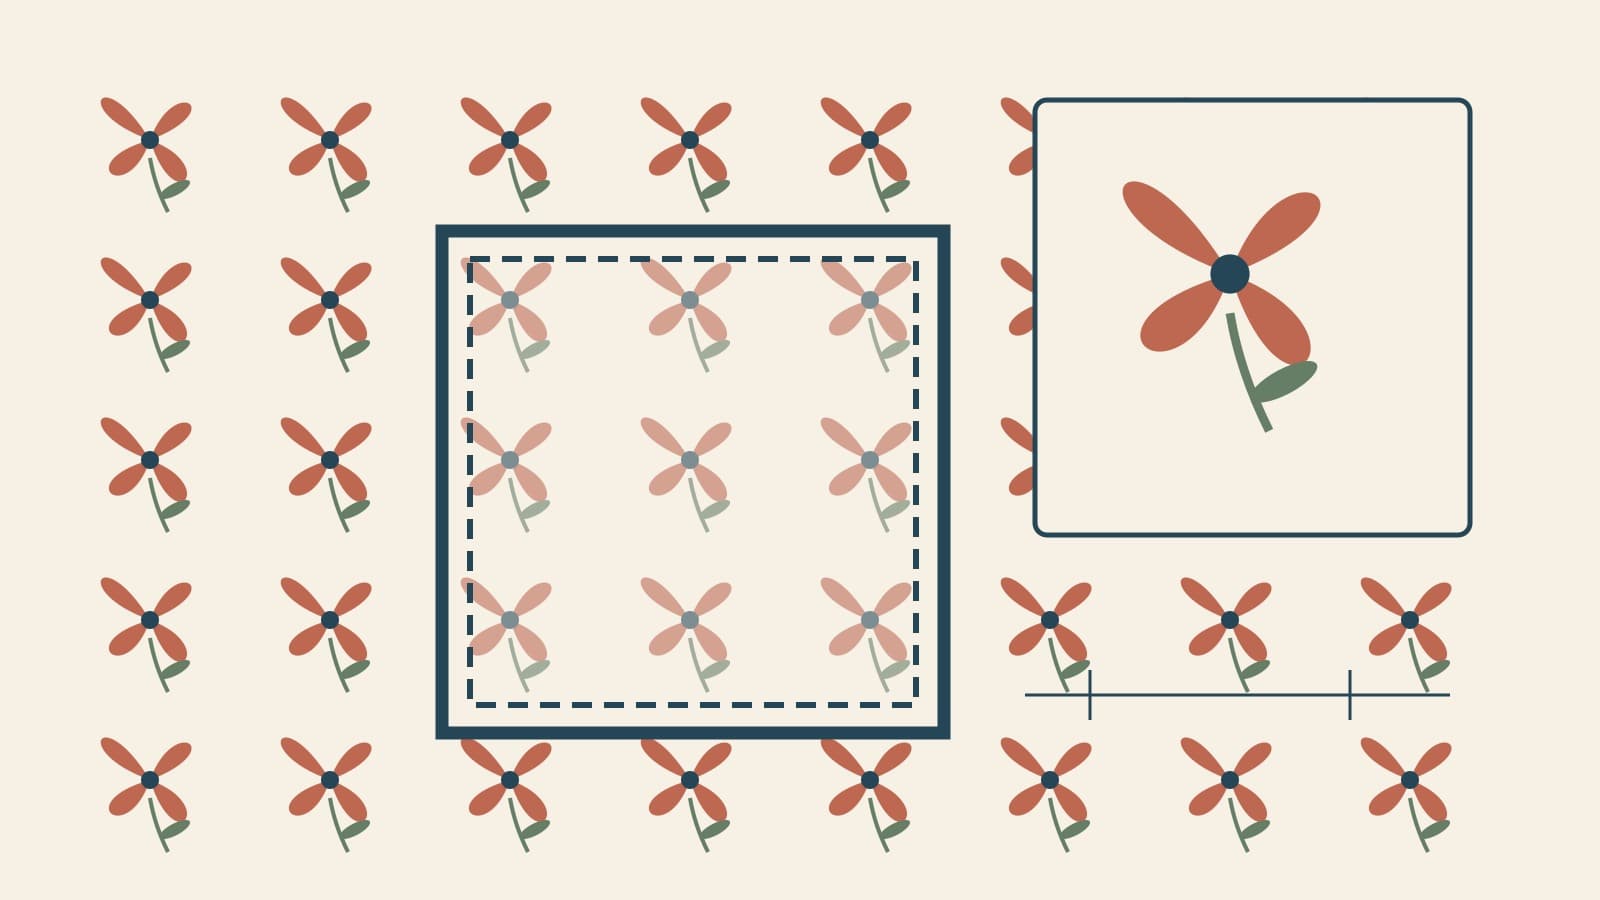
A flower looks centered in a freshly cut square, then loses a petal when the seams are sewn. Fussy cutting solves the placement problem by choosing exactly which part of a print belongs inside a patch. It also creates two planning jobs: protecting the motif from the seams and finding enough usable repeats in the cloth.
Start with one square. The example below uses a 4-inch finished patch, quarter-inch seams and a hypothetical floral print. The diagrams explain the measurements; they are illustrations, not printable cutting templates or photographs of a sewn quilt.
What is fussy cutting?
Fussy cutting means deliberately positioning a patch around a selected fabric motif instead of cutting wherever a strip or grid happens to land. Annie's fussy-cutting guide describes using a viewing window to choose the design, then adding the seam allowance around the finished shape.
You might isolate a bird, keep a face out of a seam, or repeat the same flower in several block centers. The chosen image can be centered, offset or cropped intentionally. What matters is deciding where the sewn edges will fall before cutting.
An easy first project is a single picture square surrounded by contrasting fabric. Repeating an identical motif in a star or an English paper-pieced arrangement adds another requirement: each patch must capture the same portion of the print.
Choose the motif and its finished frame
Lay a paper window over the actual fabric and move it around. Ask three questions:
- Does the motif fit? Check its full width and height, including stems, lettering or an animal's ears.
- Which way is up? Decide whether directional images should all face the same way in the quilt.
- What surrounds it? A second flower at the edge can look accidental even when the main flower is centered.
Laura Loewen's Boulder Modern Quilt Guild presentation on fussy cutting distinguishes print scale, directionality and repeat. Those are separate decisions: a small tossed print behaves differently from a large, upright illustration. A larger motif may need a larger patch rather than a tighter crop.
Look at the framing window beside the fabrics that will surround it. If the printed image blends into the background, our color theory guide explains how value contrast helps separate adjacent fabrics.
Keep the finished window separate from the cut edge
For a square that finishes at 4 inches with a 1/4-inch seam on each side, the cut size is:
4 + 1/4 + 1/4 = 4 1/2 inches.
The visible window is 4 inches square. The outer cut boundary is 4 1/2 inches square. Put the details you want to preserve inside the smaller window, with a little room to spare if the framing allows it.
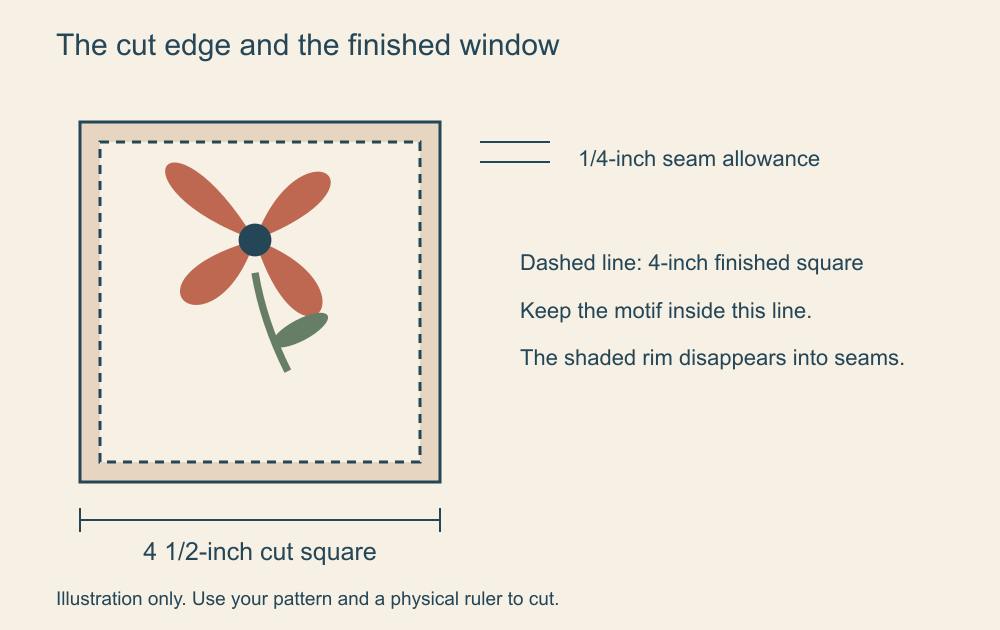
For this example, imagine the full flower measures 2 3/4 inches wide and 3 1/4 inches tall. Centered in the 4-inch finished window, it leaves 5/8 inch on either side and 3/8 inch above and below. Those margins are measured from the finished window, not the cut edge.
The same arithmetic gives these square sizes:
| Finished square | Seam on each side | Cut square |
|---|---|---|
| 3 inches | 1/4 inch | 3 1/2 inches |
| 4 inches | 1/4 inch | 4 1/2 inches |
| 6 inches | 1/4 inch | 6 1/2 inches |
Make one repeatable cut before cutting a batch
Gather a ruler, cutting mat, rotary cutter or fabric scissors, and a window made from paper or template plastic. Scrapish's fussy-cutting tutorial shows both a ruler-based method and a cardboard viewing window, working with a single layer of fabric so the chosen image stays visible.
For our square, mark both the 4-inch finished frame and the 4 1/2-inch cut boundary on a transparent template. If using an opaque paper window, use it to choose placement, then measure the outer cutting boundary with the ruler. Cut around the outer boundary, keeping the motif inside the finished frame.
For matching patches, mark a few recognizable features on the transparent template: perhaps the flower center and the tip of one leaf. Align those marks with the next occurrence of the print. Check each one rather than assuming every printed motif has exactly the same dimensions. The editors of American Patchwork & Quilting recommend checking motif variations and using template marks to repeat placement.
Watching the template move over the cloth can make this easier to understand. In Fat Quarter Shop's tutorial with Jen Kingwell, Kingwell demonstrates fussy-cutting methods and templates. Use the video to see the positioning process, while taking your dimensions from your own pattern.
Sew the first patch into its surrounding pieces before committing the rest of the fabric. That gives you a physical check of the framing and your seam allowance. The arithmetic here is a planning example, not a report of a sew-tested pattern.
Count usable motifs before estimating fabric
Fussy-cut yield depends on where the print repeats, not just how many squares fit into the fabric's area. Linda Franz's Inklingo discussion of fussy-cutting fabric requirements explains why repeat size and the number of matching pieces affect the amount needed. There is no single extra-yardage multiplier that works for every print.
Consider a hypothetical 24-by-24-inch usable rectangle with the same flower repeating every 6 inches horizontally and every 8 inches vertically. Suppose the motif centers lie 3 inches from the left edge and 4 inches from the top edge, then repeat at those intervals. Each has room for a 4 1/2-inch cut square.
There are four usable centers across and three down: 4 x 3 = 12 framed patches. None of their cut boundaries overlap.
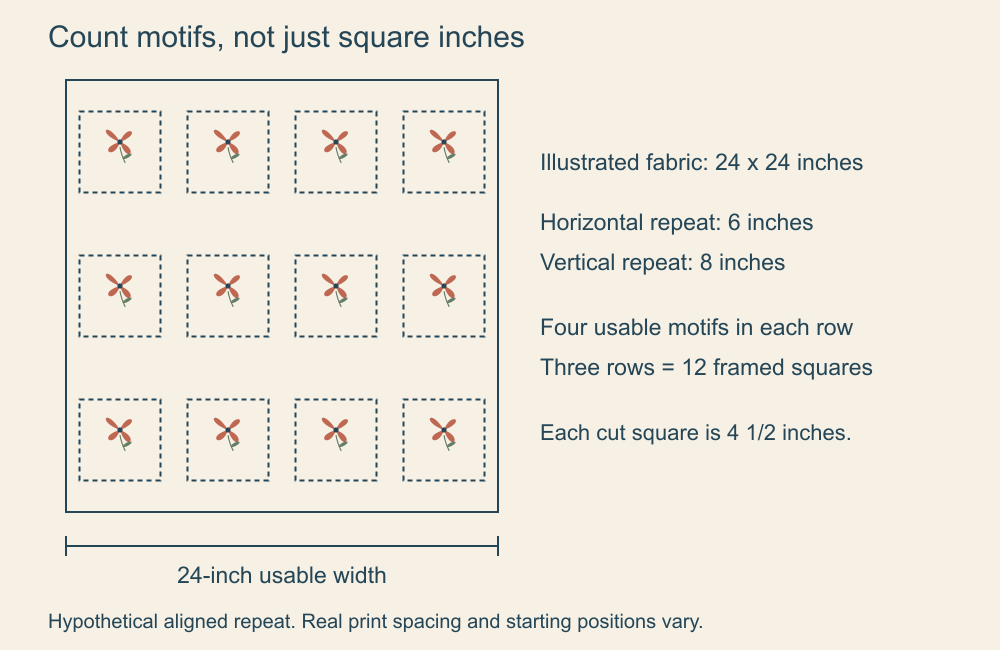
Without caring where the flowers land, five 4 1/2-inch squares fit across that same rectangle and five fit down, yielding 25 squares. Counting 25 for the fussy-cut plan would overstate what this particular print provides.
If your layout needs 14 matching flowers, locate at least two more usable occurrences on additional cloth. Do not shrink the seam allowance to make the count work. Before buying, measure the repeat in both directions and check the fabric's actual usable width and starting position. Allow for incomplete motifs and your own cutting margin. Save the leftover spaces for smaller patches that do not need the same framing.
Preview a fabric placement in QuiltLab
A digital preview can help you compare framing before taking the ruler to the cloth. Its scale depends on the image and dimensions you supply, so begin with a measured area of the actual print.
- Prepare the swatch. In the Swatch Editor, use File > Upload Image, crop to the fabric area you measured and set its width and height to that area's physical dimensions. Save the swatch. The Swatch Editor guide covers the crop, dimensions and save controls.
- Make a sample piece. Open the Block Editor and draw one square. Select it and use the Draw panel's measurements to make it 4 inches wide and 4 inches high for this finished-size preview. Follow the Block Editor guide for drawing and selection.
- Apply the print. With that piece selected, open the Fabric tab and choose your saved fabric for its fill.
- Move the print inside the piece. In the Fabric tab's Tools section, choose Fussy Cut. Drag within the unlocked fabric-filled piece to adjust which part of the print it shows. Compare the motif against the patch edges.
Keep the physical template beside you. A cropped photograph with incorrect dimensions can make a motif look smaller than it is. The preview does not establish how many repeats are available on your cloth, and it is not a cutting template. Work out the 4 1/2-inch cut boundary separately using the pattern and ruler.
Before you cut the remaining patches
Check that the motif fits inside the finished outline, that the cut outline includes the required allowance, and that every repeat has enough fabric around it. Keep directional images consistent with your layout. Compare the first sewn patch with the framing you intended, then repeat the same template placement.
For more discussion while planning, episode 529, "Fussy-Cutting Tips," of the American Patchwork & Quilting podcast covers fabric choice, making templates and working with panel prints; the publisher's page links to the episode's listening options.
Choose one motif, frame one patch and count the usable repeats before committing to a whole quilt. If you want to compare its placement digitally, start with the editor guides above and check current QuiltLab access options.
Related posts
Half-Square Triangle Quilt Layouts: One Block, Many Quilts
One half-square triangle, seven named layouts. How to orient each unit, plus a 48-inch 8 × 8 you can try in QuiltLab before you sew.
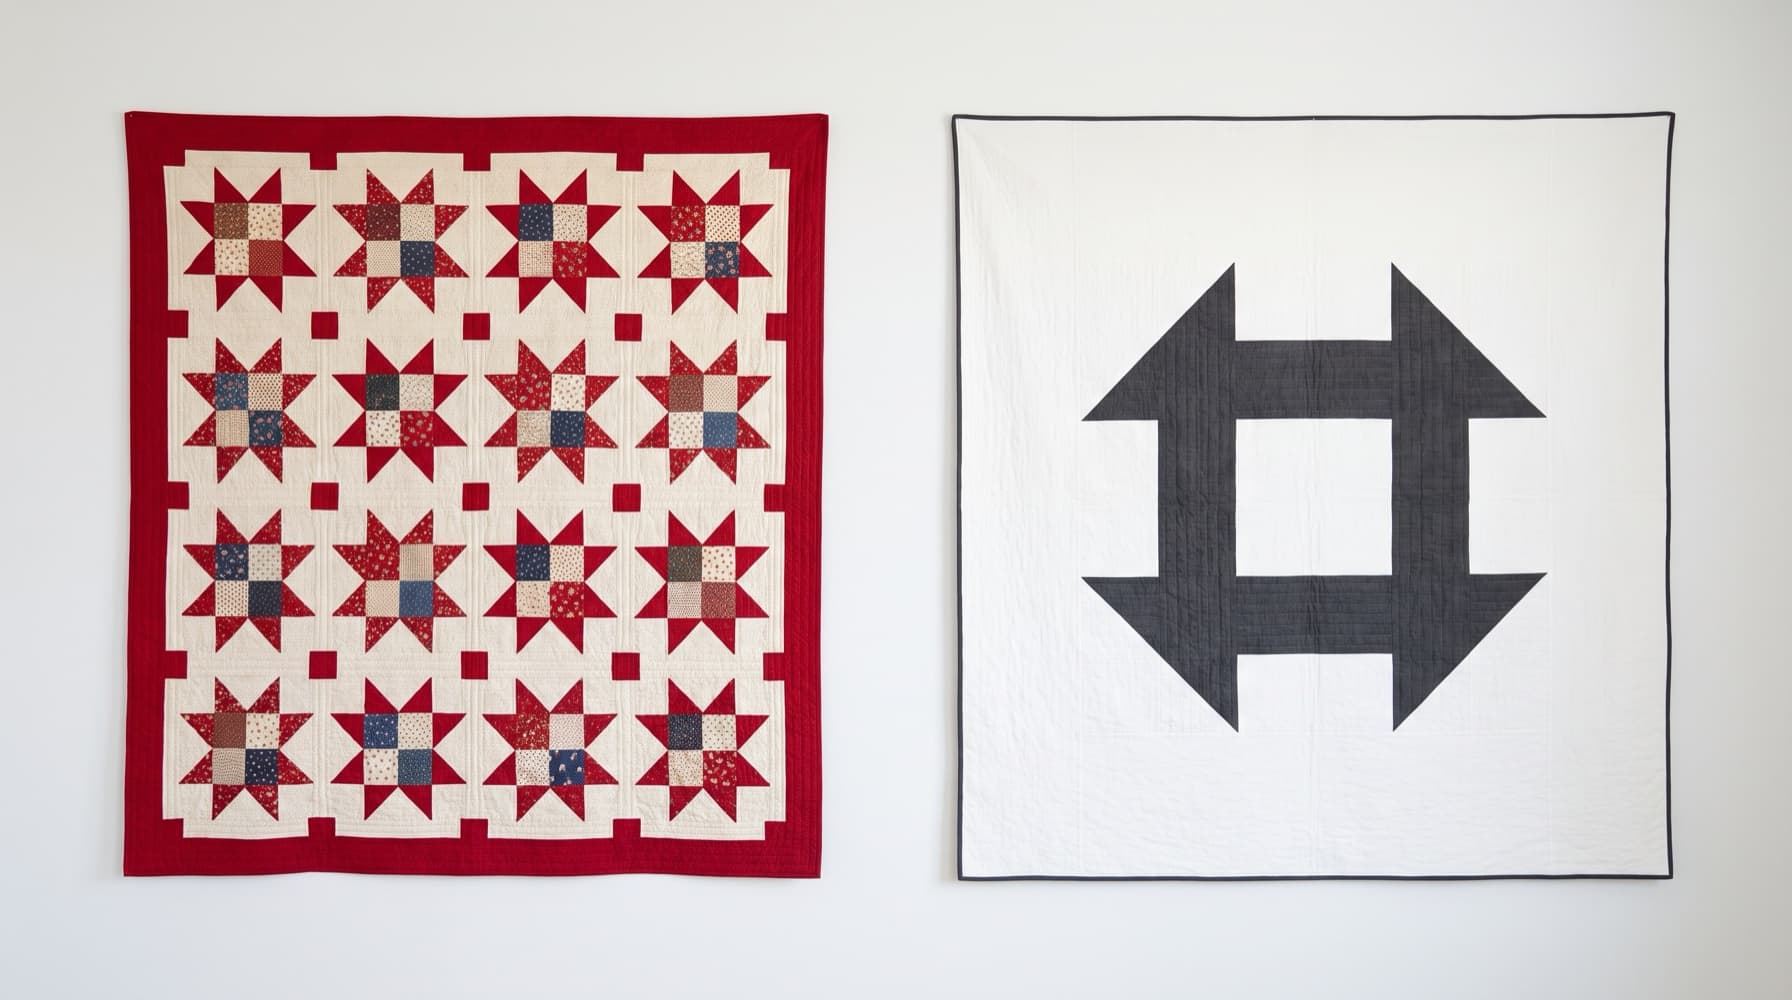
Modern vs. Traditional Quilts: What Actually Separates Them
Fabric choice isn't what makes a quilt modern. Layout, scale, negative space and quilting do. Here's how to tell the two styles apart, and how to borrow from both on purpose.
Color Theory for Quilters: Value, Hue and Choosing Fabrics That Work
Most quilt color problems are value problems. This guide covers the four properties of fabric color, the classic schemes, and a fabric-pull process you can use on your next project.