


Alternate Blocks for Sampler Quilts: Plain or Pieced?
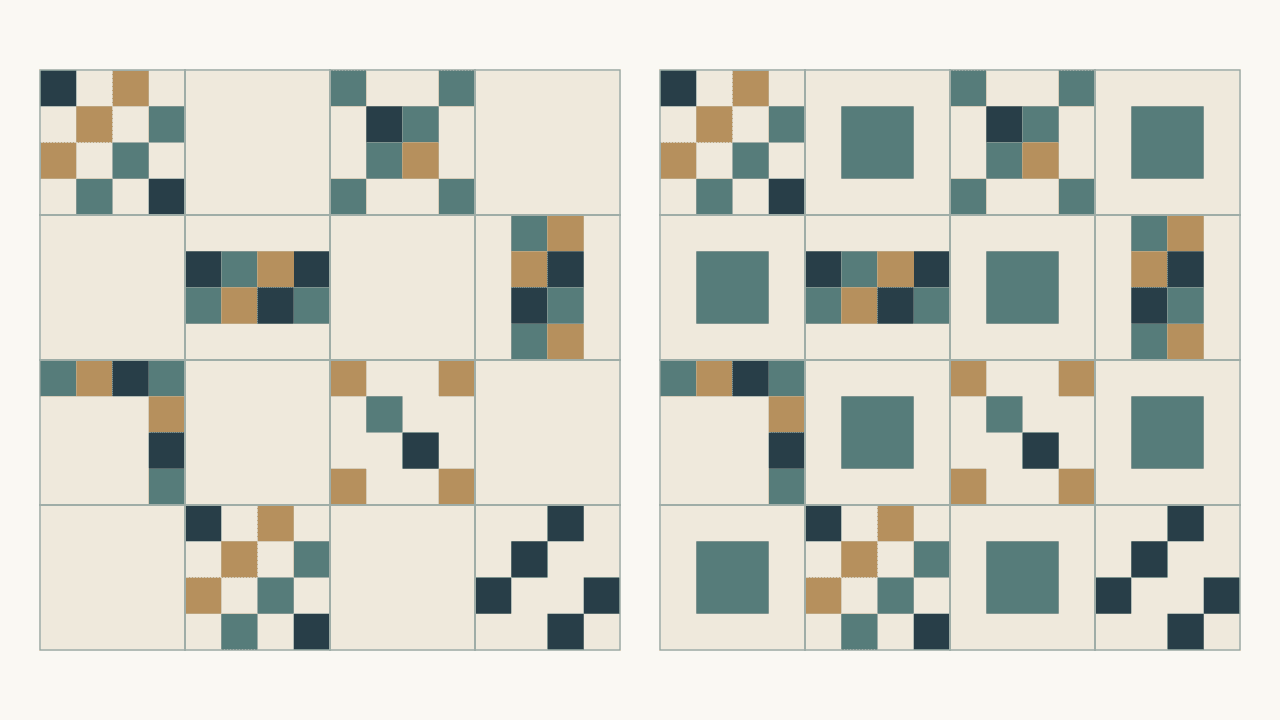
Alternate blocks help when sampler blocks crowd each other. Set them in a checkerboard with plain squares for the most breathing room, or with one simple repeated block to tie the collection together. As Sandi puts it in her Piecemeal Quilts lesson on alternate blocks, "Sampler quilts especially benefit from some spacing between the blocks."
For most samplers, start with plain alternates cut from your background fabric. They're the simplest to make and give each block the most room. The catch is the count. In a checkerboard every sampler block needs a partner, so 16 sampler blocks need 32 positions.
Below, we compare three 48-inch settings, then work out what it takes to keep all 16 blocks. We drew these diagrams for this article and haven't sewn them.
Decide what feels crowded
Lay out your blocks with no spacing first. Then name the problem. Do motifs from neighboring blocks merge? Do diagonals running in different directions fight each other? Do busy prints hide where one block ends and the next begins?
Sandi's lesson separates two effects. Plain squares create space, which "allows each block to be seen individually." A repeated companion block creates unity: even a busier one "still looks busy, but because there is a definite pattern" the quilt reads as less confusing.
So write your goal in one sentence. "I want each block to read on its own" points to plain squares. "I want one shape to connect the collection" points to a repeated block. If both matter, try a sparse repeat beside plain squares and compare. Another complicated block won't add breathing room.
Our sampler quilt layout overview compares direct settings, sashing and alternate blocks. This article stays with full alternate blocks: which kind helps, and what it costs in space.
Compare three settings at 48 x 48 inches
Our study uses four columns and four rows of 12-inch finished blocks. Sixteen positions make a 48 x 48-inch quilt center before borders and binding. Eight sampler designs appear in each option.
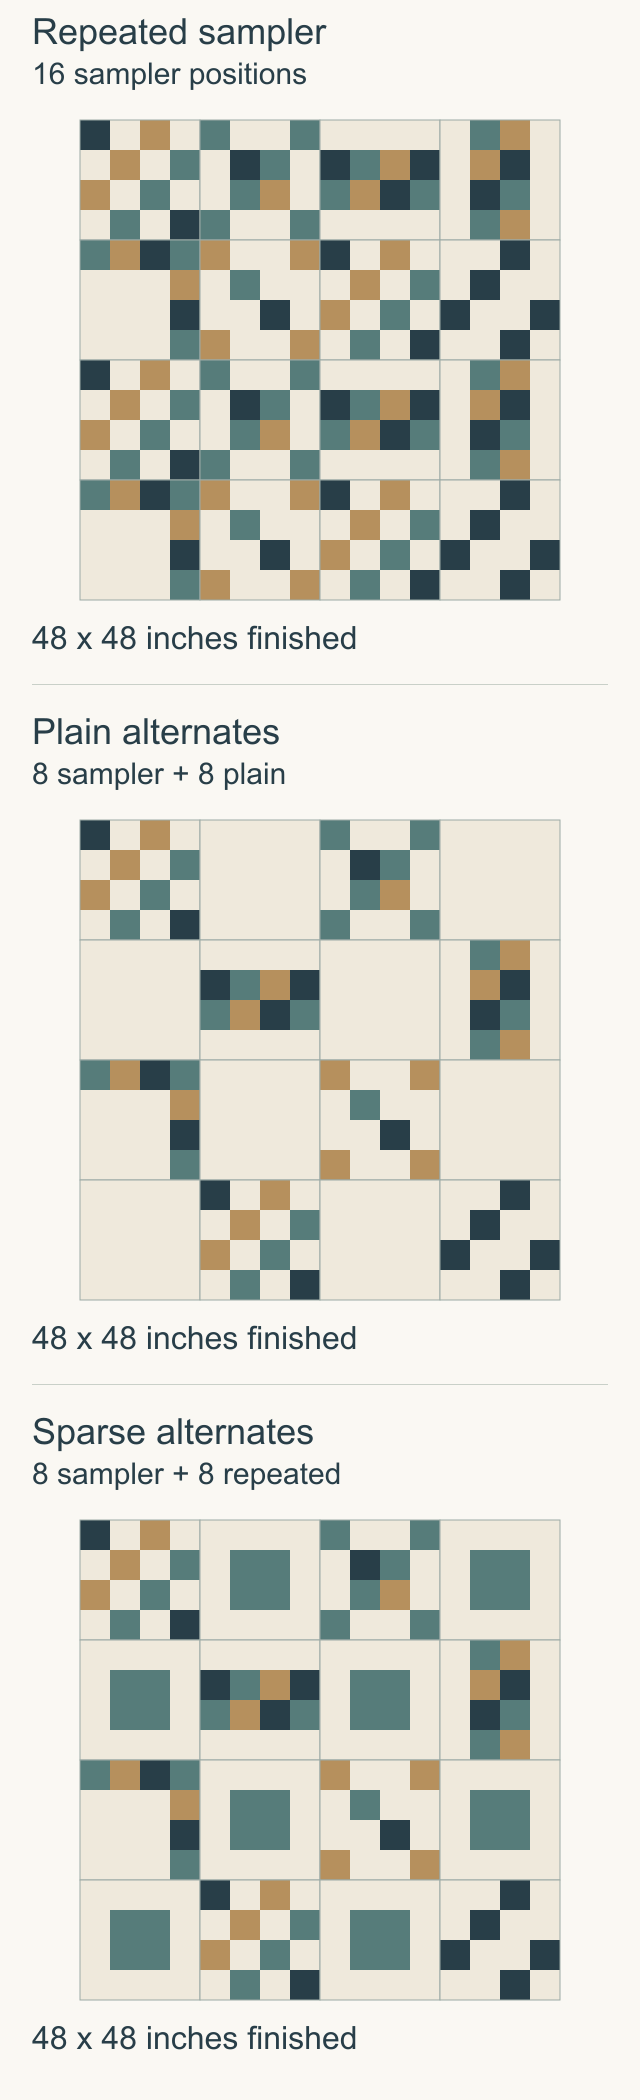
| Setting | Sampler positions | Companion positions | Finished size |
|---|---|---|---|
| Sampler blocks only | 16 | 0 | 48 x 48 inches |
| Plain alternates | 8 | 8 plain | 48 x 48 inches |
| Sparse repeat blocks | 8 | 8 repeated | 48 x 48 inches |
Holding the size still shows the trade clearly. The alternate settings look calmer, but they hold half as many sampler blocks. If you made 16 different blocks, either alternate setting at this size leaves eight of them out.
Plain alternates give the most breathing room
In the plain setting, sampler blocks and cream squares alternate in a checkerboard. Every sampler block shares all four sides with plain squares. Samplers still touch at their corners, so they aren't fully isolated.
Each 12-inch position covers 144 square inches of the finished top. Eight plain squares cover 8 x 144 = 1,152 square inches, half of the 2,304-square-inch quilt center. That's half of what you see, not half the yardage, since some sampler blocks also contain cream. Still, that's a lot of one fabric on view, so audition a large piece of it.
A plain block doesn't have to be a solid. A quiet print works if its motifs stay quiet at 12-inch scale. Check several parts of the repeat, since one large dark motif can break up the pause you wanted. Our guide to quilt background fabric covers how to judge print density.
Plain squares also show off quilting. Plan a motif for them, and keep within your batting's maximum quilting distance.
A sparse repeated block adds rhythm
Our repeated companion is a cream 12-inch block with a 6-inch teal square in the center. Nothing reaches its outside edges, so it stays quiet where it meets the sampler blocks.
The teal covers 36 of 144 square inches, or 25% of each companion. The cream covers the other 108 square inches. Across eight companions, that's 864 square inches of quiet space, 37.5% of the quilt center. Area isn't the whole story, though: eight dark accents can draw more attention than their size suggests.
A repeated block can also build a pattern across the quilt. In Melissa Mortenson's sampler layout roundup at Polka Dot Chair, one 16-block option alternates the samplers with identical blocks that "create an Irish chain when laid out together."
Use a repeat when you want a steady beat without another dense motif. Check three things at full quilt scale:
- The repeat supports the sampler blocks instead of being the first thing you see.
- Its outside edges stay quiet beside the busiest sampler edges.
- Its accent color already belongs in the collection.
Edges matter most. Carolyn Gibbs suggests making sampler blocks with the same or similar background fabric, and notes that some blocks have a more continuous background than others. Lay the companion beside your busiest edges before you decide a shared background has solved the problem.
If the accents take over, lower their contrast first and keep the shape. If that isn't enough, try a smaller accent. Change one thing at a time so you can see which change helped.
How big the quilt gets when you keep all 16 blocks
Say you've already made sixteen 12-inch sampler blocks and want a plain square beside each. You now need 16 + 16 = 32 positions. A checkerboard of four columns and eight rows holds 16 of each and finishes at 48 x 96 inches before borders.
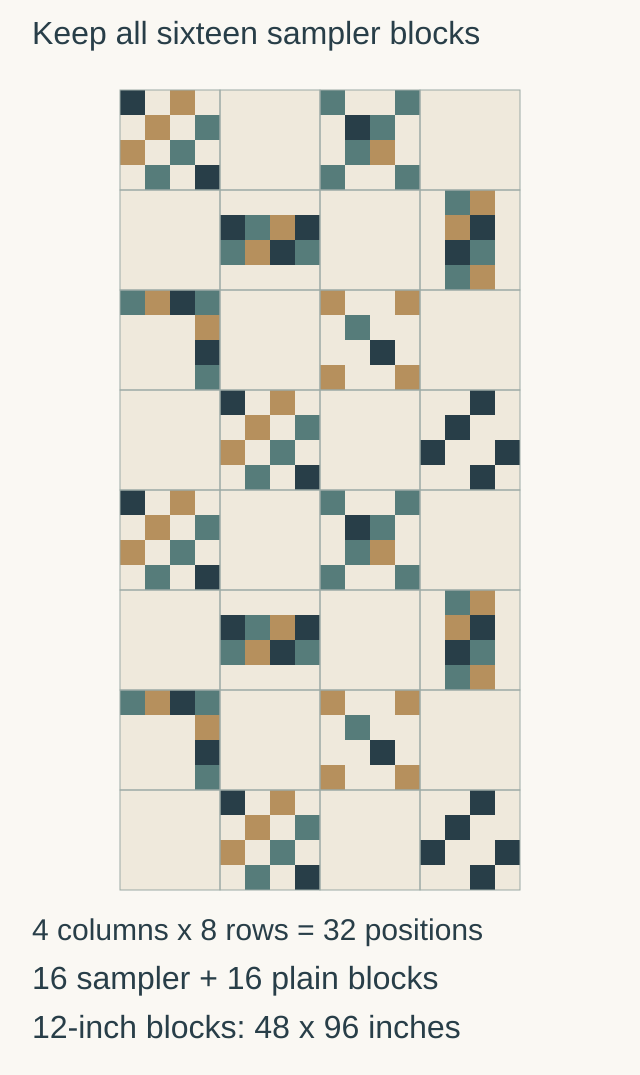
That's twice as long as it is wide. If that shape doesn't suit the quilt you have in mind, other grids are worth counting:
| Grid | Positions | Split | Finished size |
|---|---|---|---|
| 4 columns x 8 rows | 32 | 16 + 16 | 48 x 96 inches |
| 5 columns x 7 rows | 35 | 18 + 17 | 60 x 84 inches |
| 6 columns x 6 rows | 36 | 18 + 18 | 72 x 72 inches |
An odd grid never splits evenly. In a 5 x 7 checkerboard, put the samplers on the 17 positions and make 18 plain squares; one sampler position is left to fill. A 6 x 6 checkerboard is square, but it has 18 sampler positions for your 16 blocks.
Fill spare spots on purpose. You could make another block or two, repeat a favorite, or use a plain square and accept a break in the checkerboard. Each changes the rhythm, so mark it on your layout map before you buy setting fabric.
You can also keep the 48 x 48 size and choose your best eight blocks. The rest can go on the back or into a second quilt.
Test with your own blocks
Use the blocks themselves or photos of them. Lay out two rows with your busiest, quietest, lightest and darkest blocks. Try plain squares in the gaps, then your proposed repeat block at the same size. Keep the sampler blocks in the same spots and orientations for both trials, and photograph each one.
Then measure your sewn blocks. A 12-inch finished block with 1/4-inch seams should measure 12 1/2 inches unfinished. Blocks from different patterns often drift, so trim or adjust them to one size before you cut the alternates.
Plan the grid in QuiltLab
You can count positions and check the finished size before cutting. In the Quilt Editor, start a Grid quilt with 12-inch blocks, four columns and four rows. Draw a plain 12-inch block in the Block Editor, then place it and your sampler blocks in a checkerboard. The Layout heading shows the finished size, so changing the rows to eight shows the 48 x 96-inch version at once.
Quilt Editor guide →Grid layouts, block size, borders and finished dimensionsWhen the count and the size both work, cut your alternate blocks from the fabric you auditioned.
Related posts
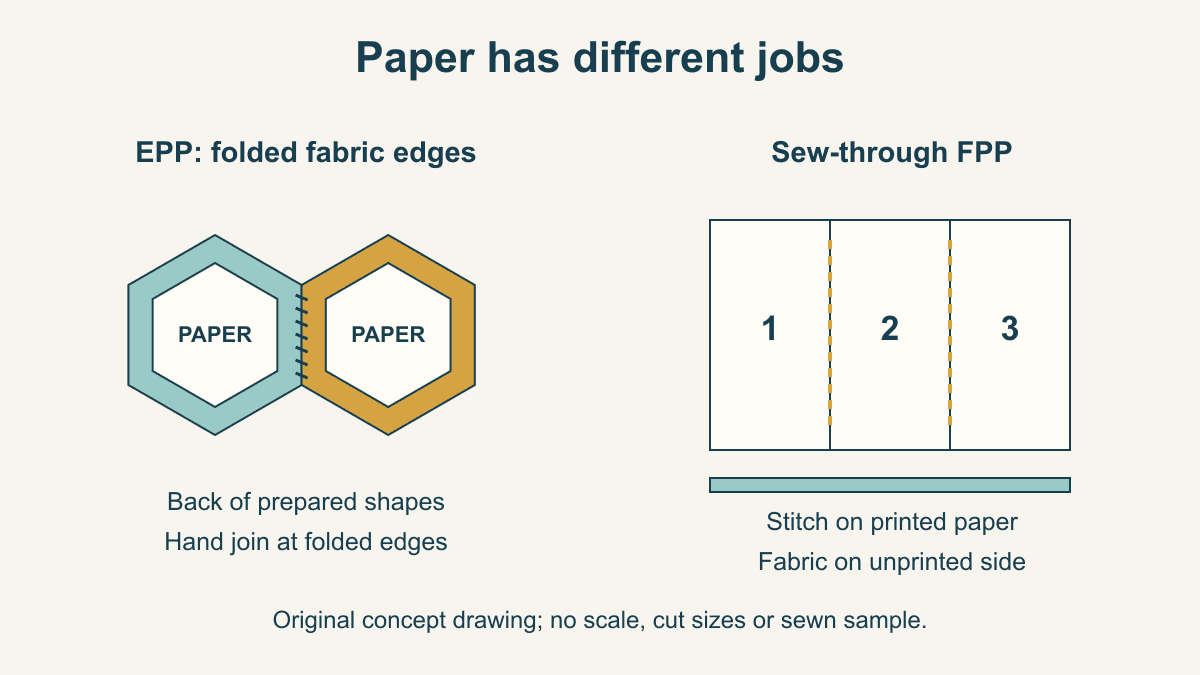
English vs Foundation Paper Piecing: Which Should You Try?
Compare what the paper does, where stitching happens and which project brief suits EPP or sew-through FPP before choosing a pattern.
Log Cabin Strip Width: How Wide Should Logs Be?
Most Log Cabin strips are cut 1 1/2 to 2 1/2 inches wide. See how each width changes block size, the center's weight and the number of seams.

How to Keep a Quilt Materials Record Before the Labels Are Gone
Record each fabric, batting and thread with its exact product name, label photo and care directions, so anyone can see how to look after the quilt.