


How Wide Should a Narrow Inner Quilt Border Be?
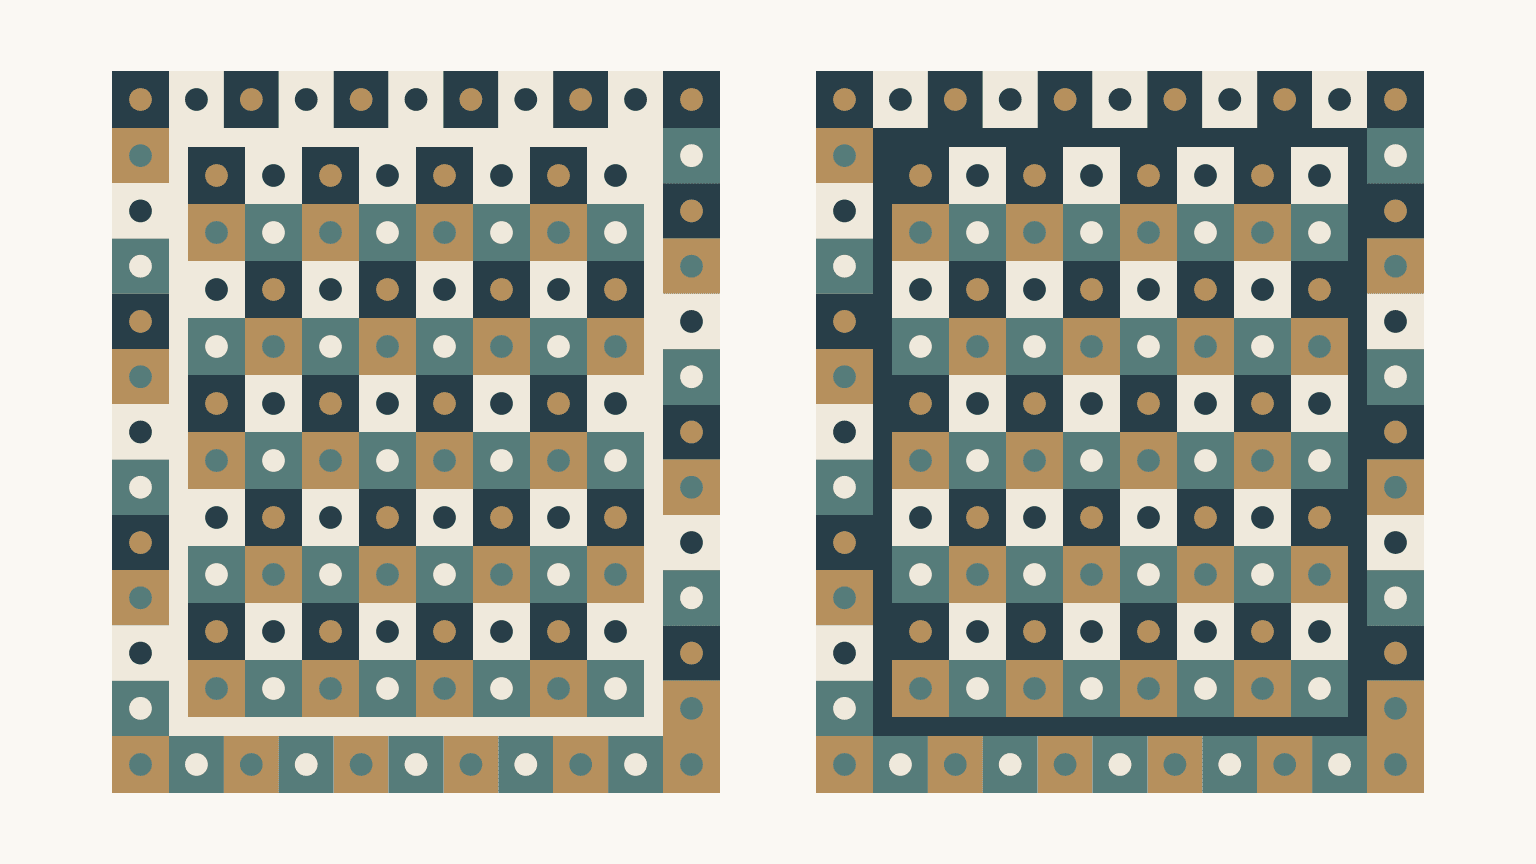
Most quilters make a narrow inner border, often called a stop border, 1 to 1 1/2 inches finished. GE Designs' border guide gives that range and describes the strip as a visual pause between the quilt center and the outer border. For a busy center beside a busy outer print, start at 1 inch. Then check its value against both fabrics, because value decides whether the strip shows up at all.
Go narrower when the two prints already contrast and you only want a fine line. Go wider, or pick a stronger value, when they still blur together. The rest of this guide shows how each choice looks on one quilt, how much size it adds, and how to audition real fabric.
We drew the diagrams below for this article: a 24-by-30-inch busy center and a 3-inch patterned outer border, at one scale. They haven't been sewn.
Decide what the inner border has to do
A stop border earns its place when the center and outer border run into each other. That happens when both have lots of small marks, share similar values, or put strong motifs right at the seam. A quiet strip breaks those connections.
Name the problem before you audition anything. "The little dots in the outer print merge with the checks at the center's edge" gives you something to look for after each change. "It needs one more fabric" doesn't.
Our quilt border ideas post covers overall widths, multiple borders and corners. Here the outer print is already chosen, and the only question is the small strip between.
Compare widths at the same scale
Here's the same quilt with no inner border and with cream inner borders finishing at 1/2 inch, 1 inch and 1 1/2 inches. All four share one scale, so the wider versions really are larger.
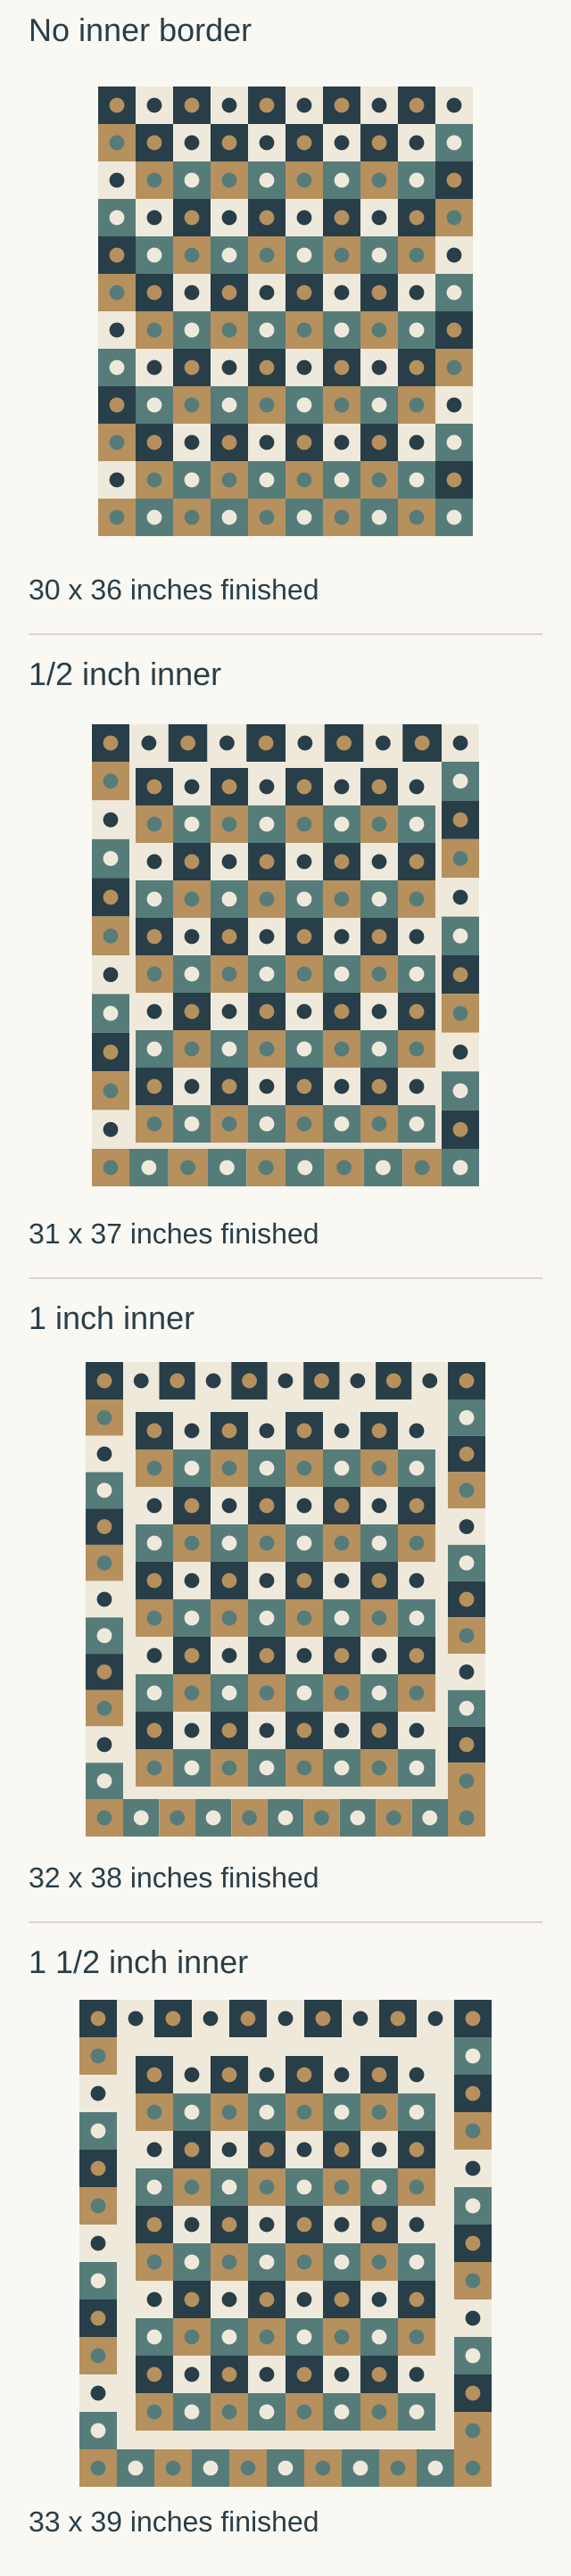
No inner border. The marks run straight across the seam, so center and border read as one field. Keep this if that continuous look is what you want.
1/2 inch. A thin outline. It separates the two areas, but where pale squares touch the pale strip, the line breaks up and your eye has to work.
1 inch. A clear pause. The center reads as its own panel without the strip taking over. This is the width to try first.
1 1/2 inches. The strip becomes part of the framing in its own right. Try it when the prints are very busy and 1 inch still blurs.
Look from across the room, then up close. The right width fixes the problem you named without becoming the thing everyone notices.
Check how much size it adds
Every inner width grows the quilt on all four sides. Here the outer border stays 3 inches finished, so only the inner width changes. All sizes are finished, not cut.
| Inner finished width | Center plus inner | With 3-inch outer | Inner border area |
|---|---|---|---|
| None | 24 x 30 inches | 30 x 36 inches | 0 square inches |
| 1/2 inch | 25 x 31 inches | 31 x 37 inches | 55 square inches |
| 1 inch | 26 x 32 inches | 32 x 38 inches | 112 square inches |
| 1 1/2 inches | 27 x 33 inches | 33 x 39 inches | 171 square inches |
At 1 inch, the center plus inner border measures 26 x 32 = 832 square inches. Subtract the center's 24 x 30 = 720 square inches, and the strip covers 112 square inches.
Going from 1/2 inch to 1 inch adds 57 square inches; going from 1 to 1 1/2 inches adds 59. The steps grow because the strip's perimeter grows too. A small change in width touches the whole frame.
The 1-inch version finishes at 32 by 38 inches before binding. If your project can't take the extra size, trim another dimension, such as the outer border, before you cut.
Test value at one width
Once a width looks right, hold it and try light, medium and dark. Here the strip stays at 1 inch, so every top is 32 by 38 inches. Only the value of the strip changes.
Shannon Brinkley's value lesson explains how lightness and darkness control what stands out. A stop border has two edges to check: center to strip, and strip to outer print.
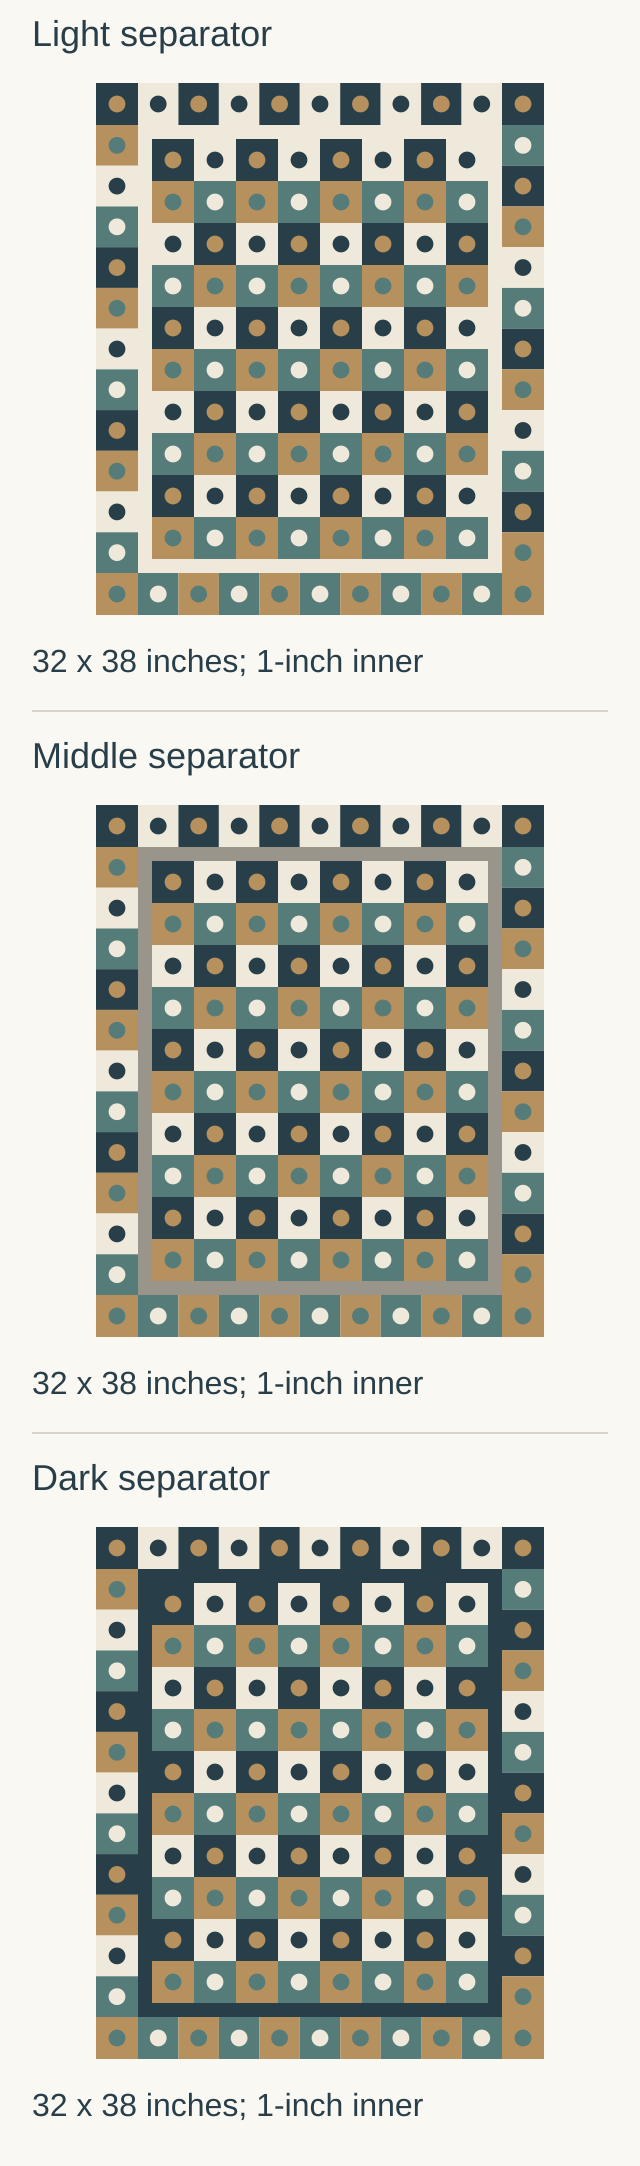
Light makes a crisp line beside the dark squares, but pale squares melt into it.
Medium gray contrasts least with the teal and gold squares, so the line reads softer.
Dark outlines the light squares sharply and swallows the darkest ones.
No value wins everywhere. Decide which edges must stay crisp. If a pale flower sits at the edge of your center, a light strip may hide its petals even when it looks good elsewhere. If the outer print has dark motifs touching the seam, check that a dark strip doesn't swallow them. Look at all four sides; a print can behave differently at the top than at the bottom.
Audition the real fabric
Fold the candidate fabric to show only the finished width. Lay it between the real center and a generous piece of the outer print. Check a long stretch and a corner, since a small scrap can fool you.
Linda Griepentrog's border article for the American Sewing Guild points out that print scale matters: a large motif can't be read in a narrow strip. For a stop border, that usually means a solid or a quiet small print. A sliver of a big floral turns into one more busy mark.
Change one thing at a time. Compare values with similarly quiet fabrics first. Once you know the value, compare a solid against a gentle print in that value.
Photograph each option in the same light, and step back to see the whole quilt. A black-and-white version from your phone's photo editor shows value clearly; the color photo keeps the hue. Screens shift color, so make the final call with the cloth in your hands. Our color theory for quilters guide covers the wider fabric pull.
Keep it straight when you sew
A narrow strip shows every wobble. A small difference in seam allowance is easy to see on a 1-inch border and very easy to see on a 1/4-inch one. Sew a test piece with your chosen fabrics before cutting long strips. For very skinny borders, Barbara Robson's narrow-border how-to shows how she sews a 1/4-inch finished border by stitching along the previous seam line.
Measure the real sewn center before cutting border lengths. Our wavy borders guide walks through that measurement, and your cut lengths come from it.
Plan the quilting too. HollyAnne Knight at String & Story notes that skinny borders still need a quilting plan. Choose stitching that keeps the pause quiet, and space it to suit your batting.
Try it on your own quilt
Write down the width, the fabric and why it works: "1-inch light solid, separates the dark edge marks; pale motifs checked on all four sides." That note will help more than a fabric name alone.
To compare widths on your own design before you cut, open the quilt in QuiltLab's Quilt Editor. Under Borders in Properties, choose Add border twice. Borders are listed from the quilt top outward, so set the first to 1 inch and the second to your outer width. Give each a solid color or fabric. Change the inner width or color, and the quilt's finished size changes with it. The Quilt Editor guide shows where the border controls live.
Related posts
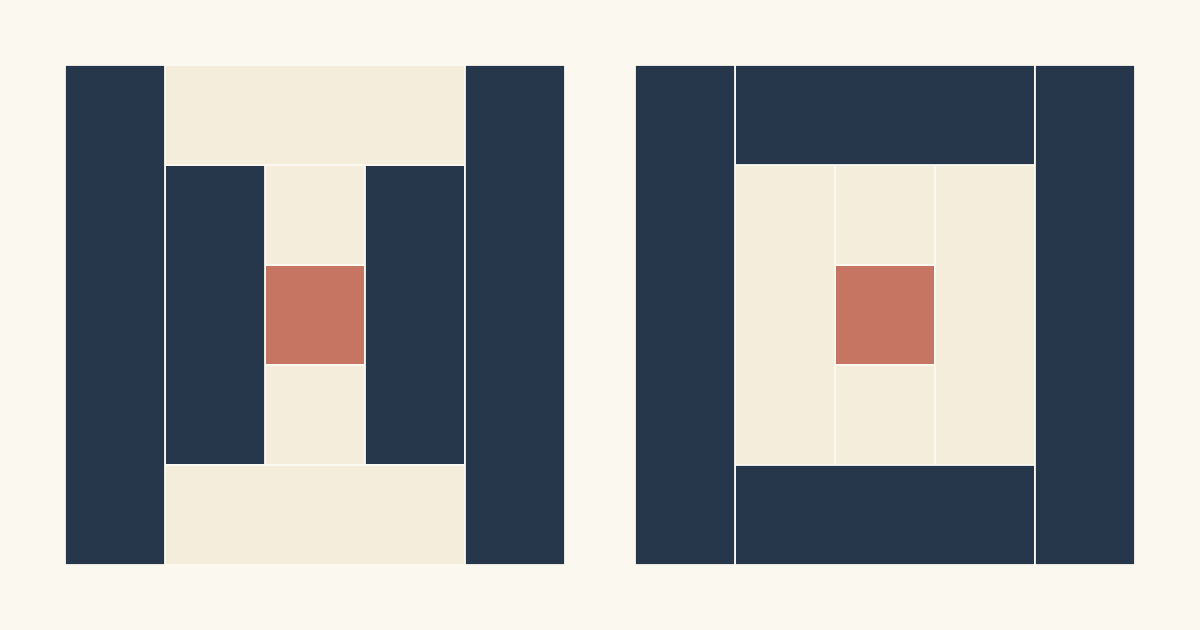
Courthouse Steps Color Placement: Where Do Lights and Darks Go?
Put light fabric on one pair of opposite sides and dark on the other, or color by rounds for framed squares. Two 10-inch maps show how each one repeats.
Sawtooth Star Color Placement: Which Part Should Be Dark?
Most Sawtooth Stars use one fabric for the center and points on a contrasting background. See three placements on one 12-inch star and what each changes.
How Secondary Patterns in Quilts Form
Compare two alternating-block studies and trace the corner pieces that create a larger motif across four block boundaries.