


How to Make a Quilt Pattern Smaller Without Losing the Center
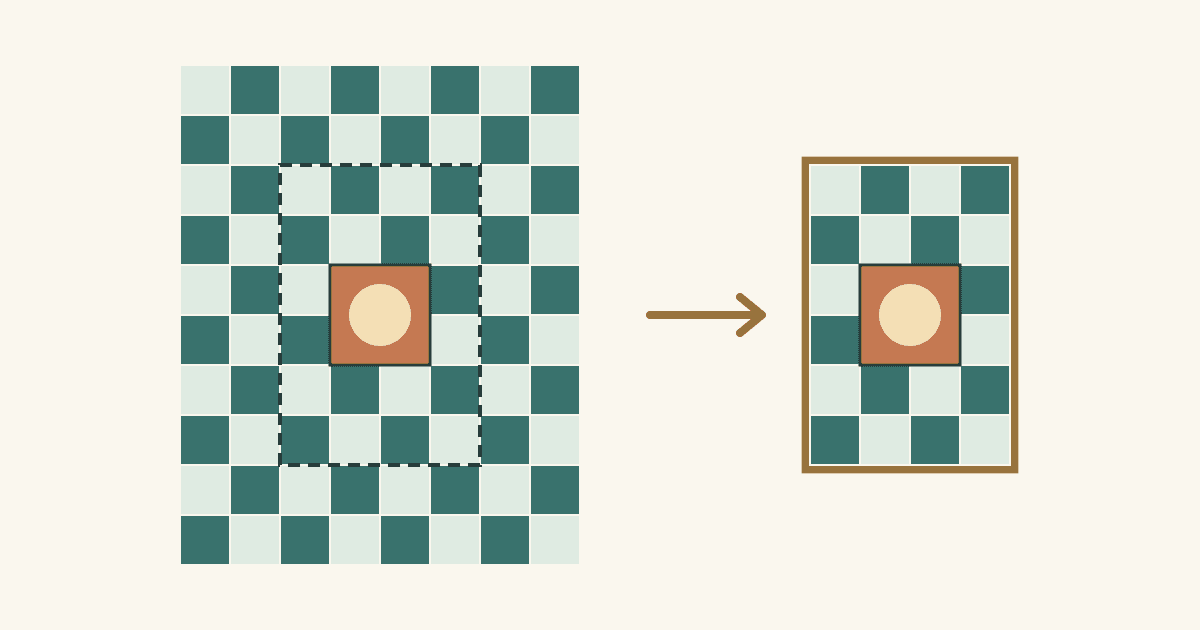
To make a quilt pattern smaller, make fewer blocks: drop whole rows and columns until the quilt is the size you want. Brittany Lloyd of Lo & Behold Stitchery lists it first, ahead of removing sashing or scaling down the whole design. It's the method we recommend for most block-based patterns, because every cut size stays the same. Shrink the blocks themselves only when the design can't lose a row, and plan to recalculate every piece.
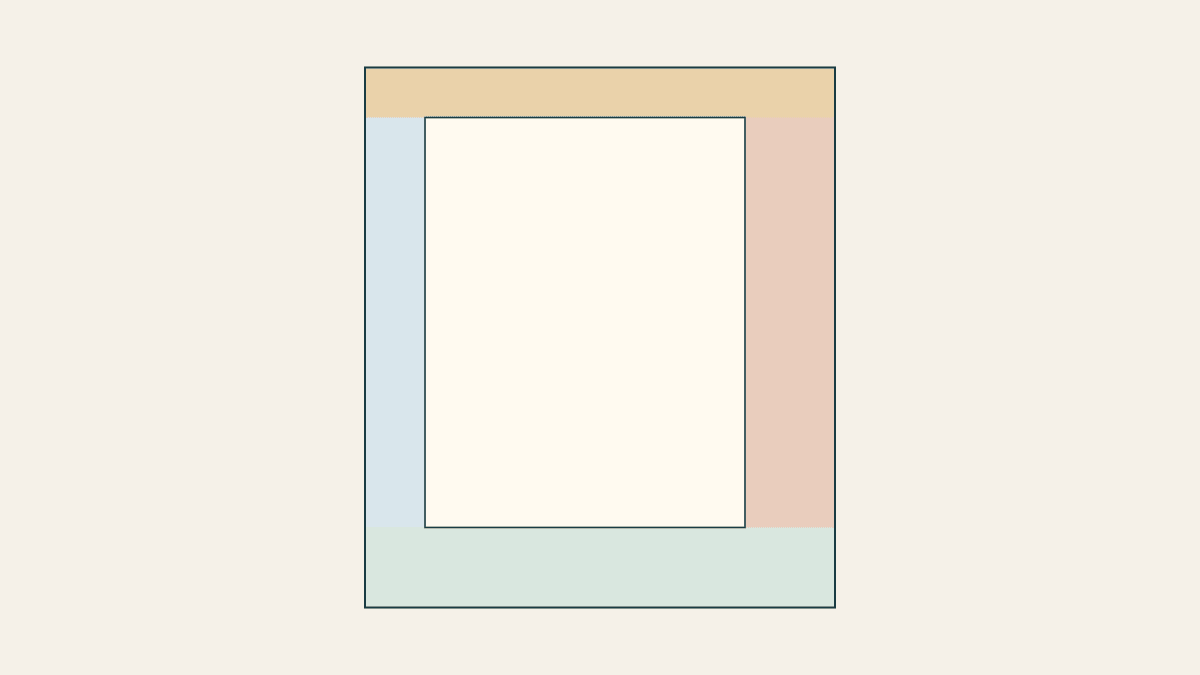
Below, we take a 48 x 60-inch throw down to a 26 x 38-inch wall quilt and keep its 12-inch center panel at full size. We drew these diagrams for this article; they haven't been sewn.
Decide what has to stay
Check the pattern for a smaller size first. Many designers include a wall or baby option, and their numbers are already worked out. Our pattern-reading guide helps you sort finished sizes from cut sizes before you change anything.
Then mark the part of the design you can't lose. That might be a center panel, a medallion, a picture block or a border treatment. If the pattern has sashing, narrowing it or leaving it out is another way to lose a few inches, and Lloyd's guide covers that too.
In our example, the center panel is the point of the quilt. So the rule for this adaptation is simple: keep the 12-inch center and the 6-inch squares; remove what surrounds them.
The example throw
Our throw is a grid of 6-inch finished squares, eight across and ten down. That makes 8 x 6 = 48 inches wide and 10 x 6 = 60 inches long.
A 12-inch focal panel sits in the middle, filling the space of four squares. The other 76 cells alternate light and dark. The panel is cut as one piece, so it counts once in the inventory.
Drop whole rows and columns around the center
Sylvia Schaefer of Flying Parrot Quilts calls changing the block count the easiest way to resize a pattern built from repeating blocks. Our example applies it around a center that stays put.
Keep the middle four columns and six rows. That means removing two columns from each side and two rows from the top and bottom. The field becomes 4 x 6 = 24 inches wide and 6 x 6 = 36 inches long.
Remove the same number of rows or columns from opposite sides, and the center stays centered. Here, the 12-inch panel inside a 24-inch width leaves 6 inches on each side. Inside a 36-inch length it leaves 12 inches above and below. That's one square at each side and two above and below.
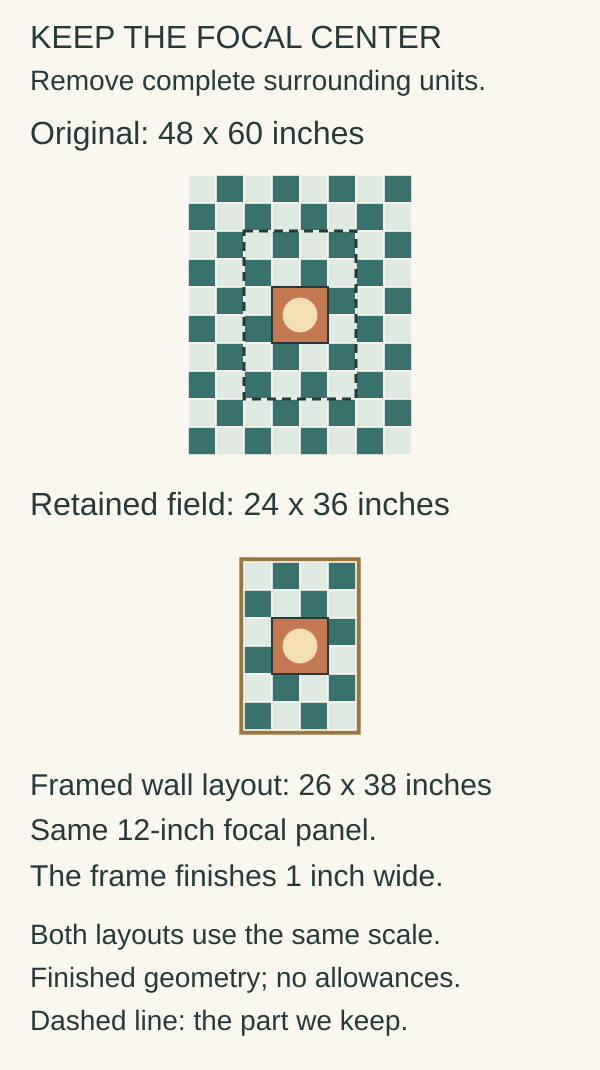
Now recount the pieces. This is where it's easy to slip.
| Piece | Throw | Wall quilt | Change |
|---|---|---|---|
| 6-inch grid cells | 80 | 24 | 56 removed |
| Cells under the panel | 4 | 4 | Same |
| 6-inch squares to cut | 76 | 20 | 56 fewer |
| 12-inch focal panel | 1 | 1 | Same |
Twenty-four cells remain, but the panel already fills four of them. You need 24 - 4 = 20 squares, not 24.
In our checkerboard, those 20 squares split evenly: 10 light and 10 dark. Count them on your own sketch. A pattern with uneven color placement can lose more of one fabric than another.
Check the new edges
Print or sketch the full layout and cover the removed rows with paper. Look at what's left as its own quilt. Is the picture complete? Does a path or chain stop halfway? Does a directional print still face up?
In our checkerboard, the new edge follows whole squares, so it works. Patterns with secondary designs need a closer look. If two neighboring blocks form a star where they meet, dropping one column can leave half-stars along the edge. You can keep one more full repeat, crop in a different spot, or design a deliberate edge unit. Any of those changes the piece count, so recount.
On-point layouts finish with side and corner setting triangles, and the count changes when the grid does. Our on-point setting guide covers that math.
Add a frame and work out the cut sizes
We added a 1-inch finished border all the way around. It gives the cropped edge a clean stopping point. The wall quilt finishes at 24 + 2 = 26 inches by 36 + 2 = 38 inches.
With quarter-inch seams, add 1/2 inch to each finished dimension of a square or rectangle. Julie Baird explains this in her patch-size guide at Generations Quilt Patterns. So:
- Cut the squares 6-1/2 inches.
- Cut the panel 12-1/2 inches.
- The sewn center should measure 24-1/2 x 36-1/2 inches.
- Cut two side strips 1-1/2 x 36-1/2 inches and sew them on first.
- The top is now 26-1/2 inches wide, so cut the top and bottom strips 1-1/2 x 26-1/2 inches.
Measure your pressed center before you cut the border strips, and use what you measure. Our guide to wavy borders shows how.
Make a new fabric list
Don't scale the old yardage by area. The pieces don't shrink evenly: the panel stays at one, the squares drop from 76 to 20, and the border is new. Make a fresh cutting list and fit it to the width of fabric you have.
The balance of the quilt changes, too. The panel took up 144 of 2,880 square inches in the throw, or 5%. In the 26 x 38-inch wall quilt (988 square inches) it takes up about 14.6%. That's nearly three times the share, which is why the center reads so much stronger in the small version.
Recalculate backing, batting and binding for the new size. If the quilt will hang, add a sleeve to the list.
When to shrink the blocks instead
Some quilts can't lose a row. A single picture, a medallion built outward in rounds, or a layout with only three blocks across all fall apart when you crop them. For those, scale the blocks.
Work in finished sizes. Multiply each finished measurement by the same factor, then add the seam allowance back. To turn a 12-inch block into a 9-inch block, multiply by 0.75. A 3-inch finished square becomes 2-1/4 inches finished and is cut 2-3/4 inches. Triangles use different seam additions, so recalculate them with the method your pattern uses.
Danielle's block-resizing lesson at Mix Measure Make walks through that method for pieced blocks. She also covers what happens when patches get very small. For paper piecing and templates, Schaefer suggests printing at the scaled percentage and redrawing a fresh 1/4-inch seam allowance with a ruler.
For most block-based quilts, though, start by removing rows and columns. It keeps the pattern's cut sizes and its instructions.
Your next step
Sketch your crop, write the new piece count beside the pattern you started from, and sew one test unit before you cut everything. Keep both lists together so you don't mix up the throw and wall quantities.
If you'd like to try a few crops first, the Quilt Editor can help. In a Grid quilt, set the block size, columns and rows, then add a border with its finished width. Border widths add to the quilt size, so you can check a 26 x 38-inch result before you cut. Going the other way? See how to make a quilt pattern bigger.
Related posts
Choosing Quilt Block Size: Which Size Fits Your Quilt?
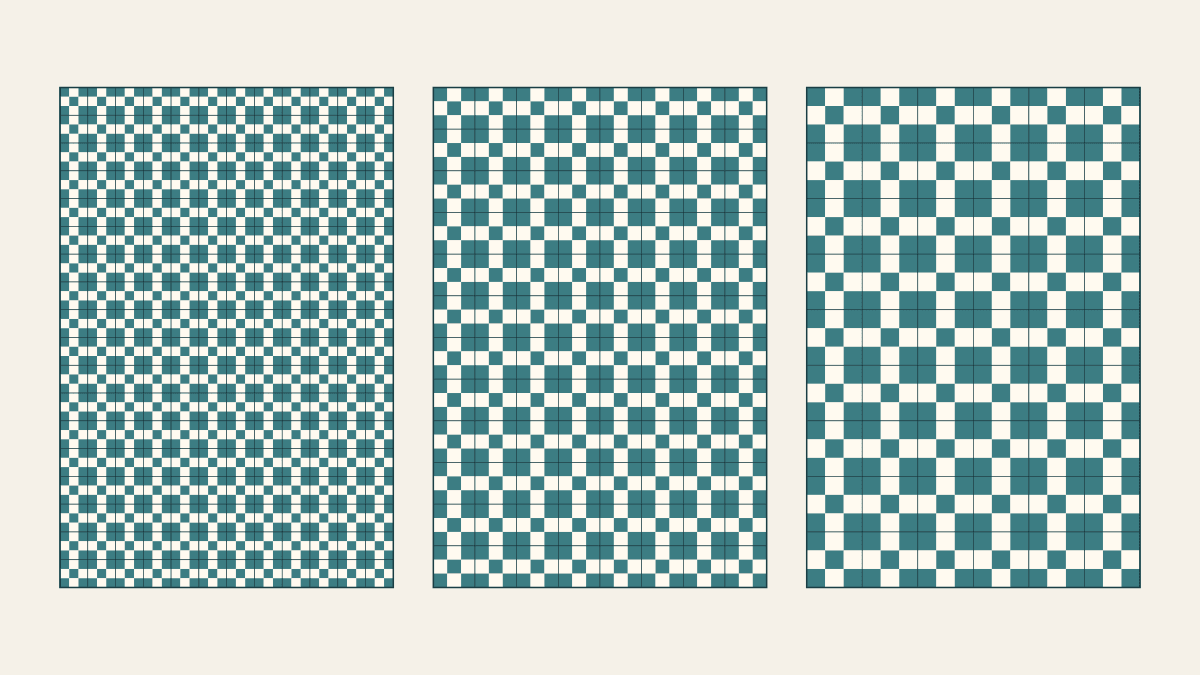
Compare three Nine Patch scales for one quilt footprint, count the joining work for a stated method, and audition prints at patch size.
How Long Does It Take to Make a Quilt? Work Out Your Own Time
A simple throw often takes two to four weeks of spare-time sewing. Here's how to time one batch of blocks and turn it into hours and a finish date.
Planning a Bed Quilt That Fits Your Bed
Build a measured bed worksheet with unequal drops, pillow allowance, floor clearance and orientation checks before choosing a quilt pattern.