


Design a Pieced Quilt Back with Leftover Blocks
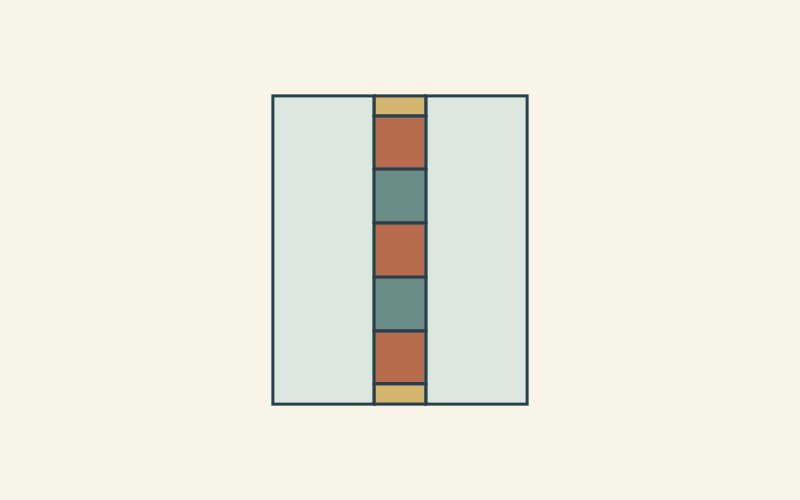
Give leftover blocks one clear role on the back: a broad stripe with quiet fabric around it. For a pieced quilt backing design, start with the measured top, your quilter's margins and the actual leftover-strip size. Confirm the sketch with your quilting service before preparing the panels.
The dimensional check comes first: does the completed back provide enough extra fabric on every side for loading and trimming?
Ask about the back before designing it
Get the service's margin, seam and orientation requirements first. The Quilting Studio's preparation page, for example, asks for at least four inches beyond each side of the top. It also says specific pieced designs cannot be guaranteed to remain centered after quilting. Those are the conditions used in the calculation below; your chosen provider's requirements take precedence.
Ask whether the proposed leftover-block stripe and its existing seams are acceptable. The strip might contain many quarter-inch patchwork joins even if the service wants wider joins between large backing panels. A design that works arithmetically still needs suitable materials and sound seams.
For the wider loading checklist, see preparing a quilt for longarm quilting. The purpose here is the backing composition and its dimensions, rather than another general preparation list.
Inventory the strip you actually have
Our paper study starts with five nominal 12.5-inch raw blocks already joined into a strip using four quarter-inch seams. Each join consumes a quarter inch from each neighbor, or half an inch across the pair.
The inherited strip therefore measures 5 * 12.5 - 4 * 0.5 = 60.5 inches long and 12.5 inches wide. Measure a real strip instead of assuming it reached that number. If it is narrower, shorter, stretched or uneven, redraw the study using the usable measured size.
Look at its outer edges too. Will a new half-inch seam cut into points intended to end at a quarter-inch seamline? If so, this version isn't suitable without a different border or panel plan. Don't sacrifice the blocks' motifs just to make a calculation come out neatly.
The example that follows is a dimensional design study, not a sew-tested cutting recipe. Its existing blocks must tolerate the new joins before it can become a construction plan.
Set the required backing rectangle
Suppose the measured raw top is 48.5 by 60.5 inches. Under the example provider's four-inch-per-side requirement, the backing must reach:
- Width:
48.5 + 4 + 4 = 56.5inches. - Height:
60.5 + 4 + 4 = 68.5inches.
That is eight inches added to each overall dimension. Adding four inches only once would leave too little for two sides.
The 60.5-inch leftover strip is shorter than the required 68.5-inch back. A narrow stripe can still work if the added ends are planned with their own seam allowances, rather than counted as finished extensions.
Keep inherited and new seam allowances separate
Dawn Cavanaugh's APQS backing lesson recommends half-inch joins between backing sections and pressing those seams open. For this study, all new end-filler and main-panel joins use that half-inch allowance. The four joins already inside the block strip retain their inherited quarter-inch allowance.
On paper, two raw five-inch end fillers supply the extra length. Each new join consumes one inch in total: half an inch from the filler and half from the existing strip.
60.5 + 5 + 5 - 2 * 1 = 68.5 inches
Raw 4.5-inch fillers would reach only 67.5 inches with these new half-inch joins. That is why the inherited strip's seam allowance must not quietly become the allowance for the new backing sections.
For the width, two raw 23-inch side panels around the raw 12.5-inch center give:
23 + 12.5 + 23 - 2 * 1 = 56.5 inches
| Paper-study component | Raw dimensions | Allowance used at its new join |
|---|---|---|
| Existing five-block strip | 12.5 by 60.5 in | Half inch where new sections attach |
| Two end fillers | Each 12.5 by 5 in | Half inch |
| Two side panels | Each 23 by 68.5 in | Half inch |
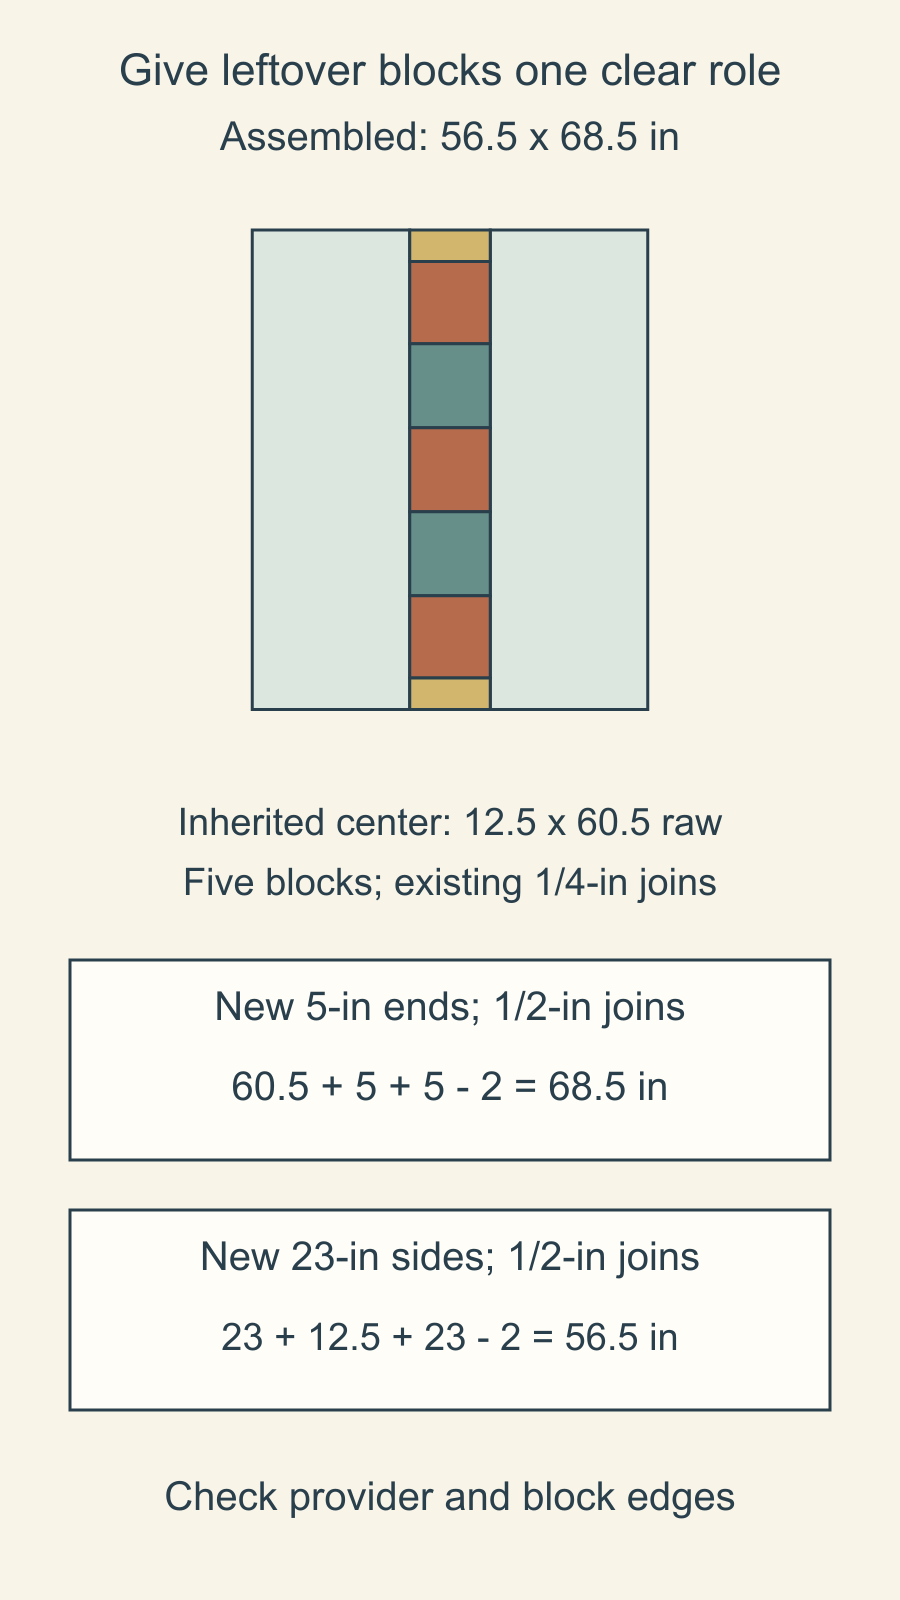
The assembled stripe is narrower than its raw 12.5-inch width because its two side joins consume half an inch each. The visible filler lengths change for the same reason. Check how those changes affect the motifs before approving the layout.
Give the stripe room to move visually
Keep a pieced stripe's important details away from an intended trimming boundary. A back that looks good only when every edge lands in exactly the same place as the top asks too much of a flexible quilt sandwich.
Discovery Sewing Studio's preparation instructions ask makers to designate a directional backing's top and explain that an unmarked pieced back may be loaded in the direction best suited to quilting. Include a right-side drawing with your top edge identified and ask the service to confirm the arrangement.
Treat the stripe as its own composition. A deliberately broad quiet field can make it read clearly even if its final position shifts a little. If a centered motif is essential, discuss that requirement before committing the back; a sketch alone doesn't create a centering guarantee.
Check fabric width and orientation separately
Two 23-inch-wide panels cannot sit side by side across 40 usable inches of cloth: they need 46 inches before any allowance for the fabric's edges. That simple check prevents a drawing from becoming an accidental yardage promise.
Measure the actual usable fabric and consider print direction and grain before deciding how panels come from it. Our backing seam-direction guide and backing fabric calculation guide address those separate choices.
Your next step is a measured inventory and a provider-approved sketch. Recalculate using the real strip, confirm that its edges tolerate the planned joins, and record the completed backing size before cutting the surrounding fabric.
Plan your next quilt
Lay out blocks and try colors in QuiltLab's grid editor before you cut.
Free forever, no card needed.
Get quilting tips by email
QuiltLab updates, tips and quilting inspiration. Unsubscribe anytime.
Related posts
Plan a Small Sewing Room Around One Quilt
Draw a measured small sewing room with machine, chair, cutting and pressing footprints, then check door swing, movement and storage.
Mark the Top of a Directional Quilt Backing
Label the physical top of both quilt layers, compare two ways of turning the quilt, and give your quilter a clear directional backing note.
Check Batting Against Your Wall Quilt's Requirements
Write a wall-quilt batting brief, reject mismatches, check an exact spacing limit and keep unresolved material and support questions visible.