


Sawtooth Star Color Placement: Which Part Should Be Dark?
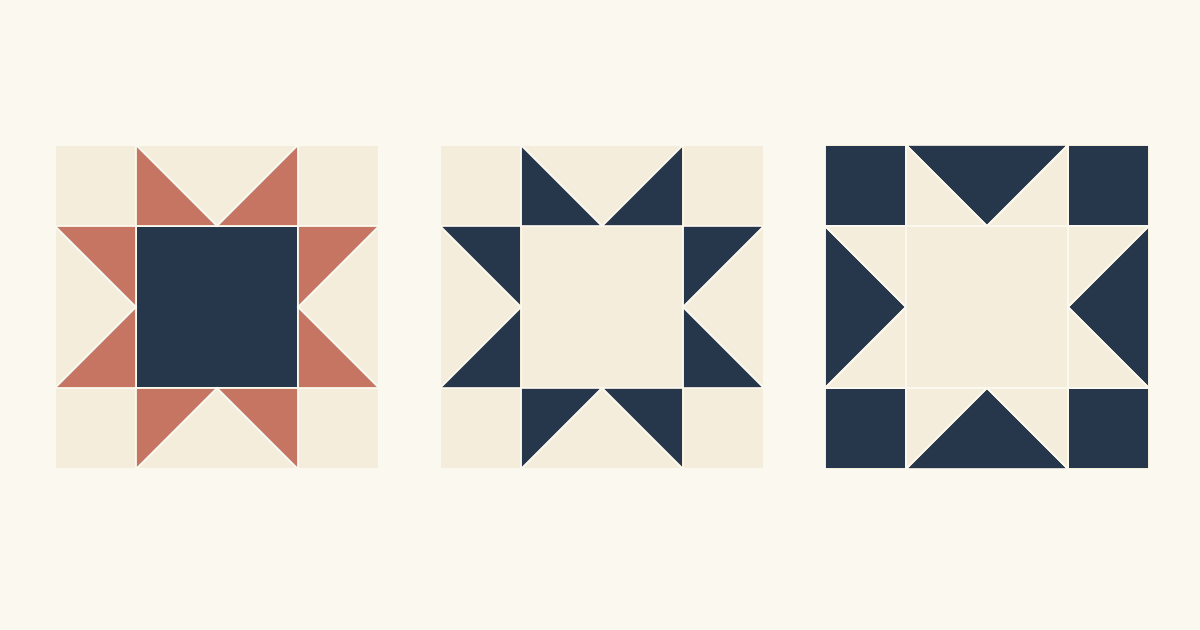
Most Sawtooth Star patterns use two fabrics: one for the center square and all eight points, and a contrasting background for everything else. That's the basic recipe in Elizabeth LePage's Connecting Threads tutorial, and Amy Smart at Diary of a Quilter calls the result a "solid" star. For a first star, start there and make sure the star and background differ clearly in value.
Move the dark fabric when you want something else to lead: a center that stands out on its own, or a ring of points around a quiet middle. Below, one 12-inch star gets three color maps. The block never changes; only the fabric roles move. We drew these diagrams for this article and haven't sewn them.
Name the three fabric roles
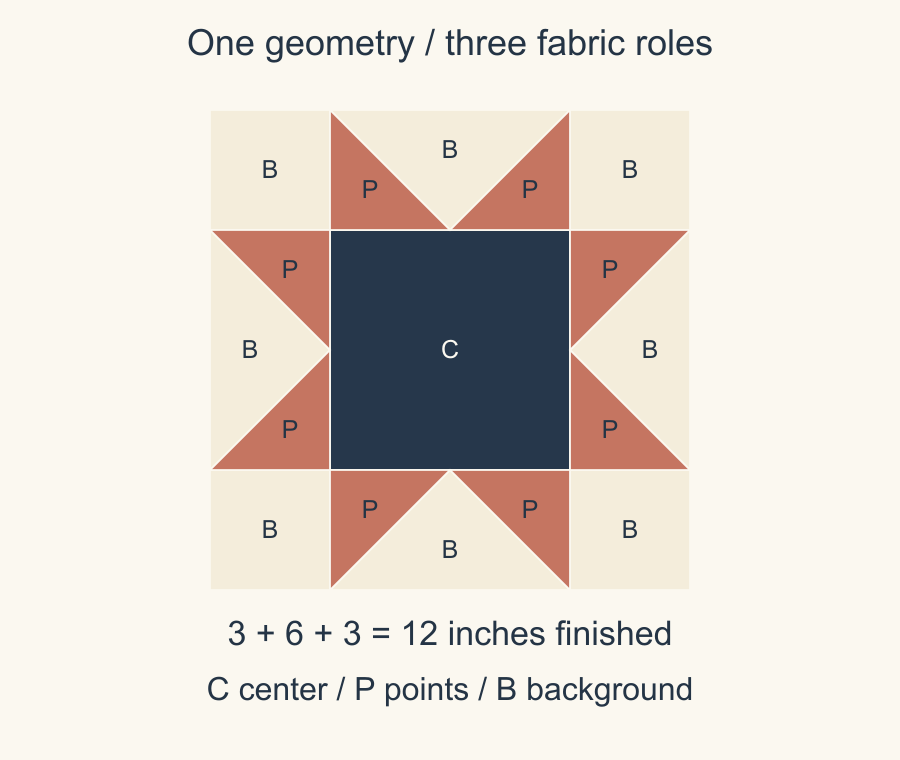
Before you pull fabric, give each part of the block a job:
- C, center: the 6-inch square in the middle.
- P, points: the eight triangles that point outward.
- B, background: the four corner squares, plus the large triangle in each flying-geese unit.
Each flying-geese unit holds two roles. Its two small side triangles are star points, and its big middle triangle is background. If you color a whole goose with one fabric, the points disappear.
How much of the block each role covers
Each side of the block divides 3 + 6 + 3 = 12 inches. Sara Buscaglia's Farm & Folk tutorial builds the same 12-inch star from one center, four corner squares and four flying geese. Here's how much of the finished block each role covers:
| Role | Calculation | Area | Share of block |
|---|---|---|---|
| Center | 6 x 6 | 36 square inches | 25% |
| Eight points | 8 x (3 x 3 / 2) | 36 square inches | 25% |
| Background | Four 3-inch corners + four triangles | 72 square inches | 50% |
Each point is a right triangle with 3-inch legs, so it covers 4 1/2 square inches. Each background triangle in a goose has a 6-inch base and a 3-inch height, so it covers 9 square inches. The four corners add 36 more. The total, 36 + 36 + 72 = 144, is the full 12-inch square.
So the background is half the block, and the center and points are a quarter each. These are the areas you see in the finished block. Your yardage will be larger, because seam allowances and your cutting method add fabric.
Equal area doesn't mean equal pull on the eye, either. The center is one big square. The points are the same amount of fabric spread across eight small triangles.
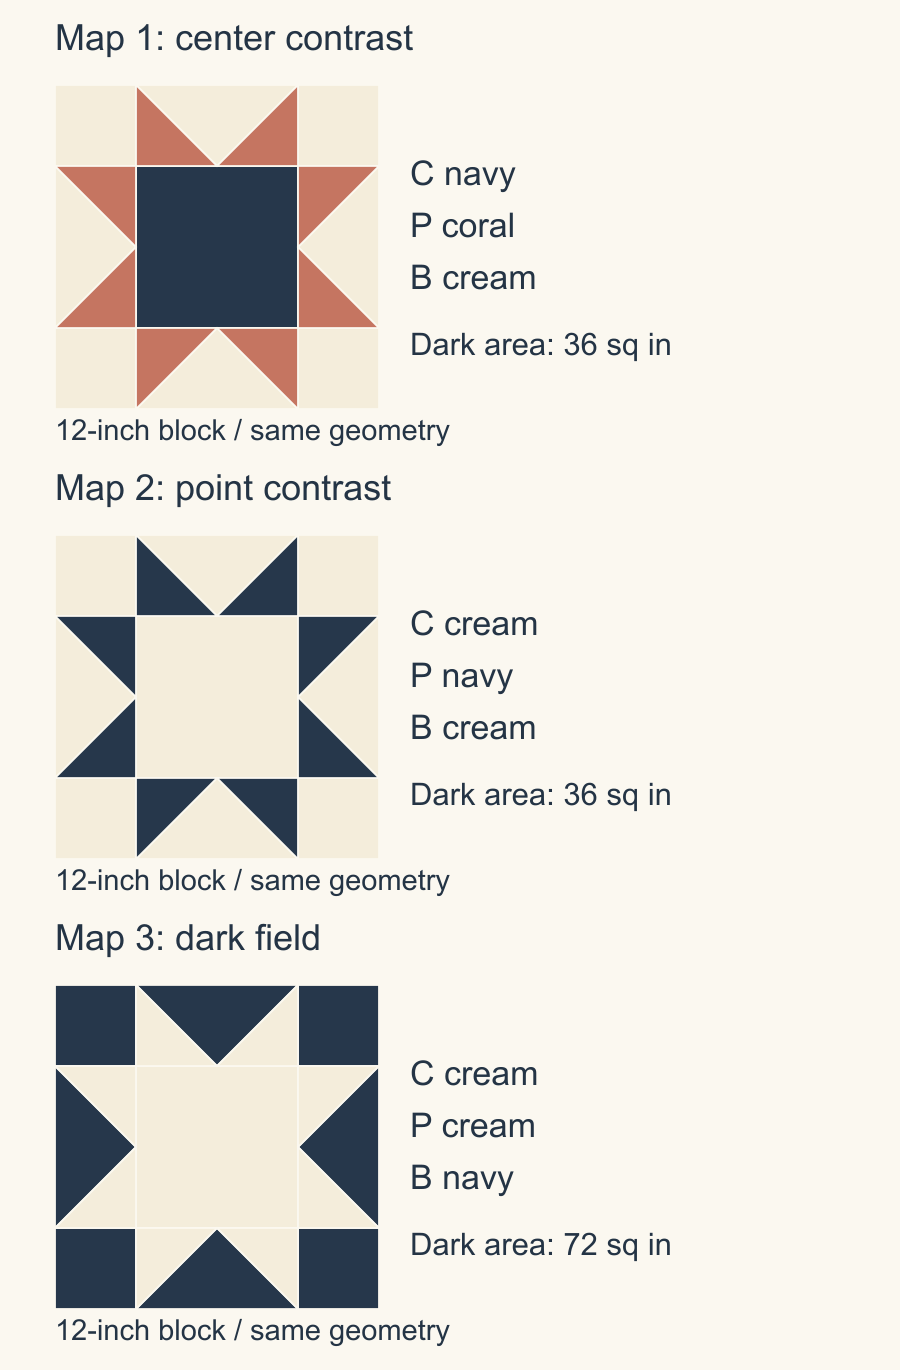
Map 1: a dark center with middle-value points
Put navy in the center, coral in the points and cream in the background. The navy covers only a quarter of the block, but it sits in the middle with the strongest contrast, so you see it first. Coral falls between navy and cream in value, so both edges stay visible: center to points, and points to background.
Choose this map when the center fabric is the reason you picked the star, such as a favorite print or a fussy-cut motif. Check that the motif fits the 6-inch finished window. The Connecting Threads and Farm & Folk tutorials both cut the center at 6 1/2 inches, and the outer quarter inch on each side goes into the seams.
The three colors stand in for roles. To compare your actual fabrics, use the value checks in our color theory guide for quilters. If your center and point fabrics end up close in value, the center stops reading as a separate square, even when the hues differ.
Map 2: let the points carry the contrast
Put navy in the points and cream in both the center and background. The dark area is still 36 square inches, the same as Map 1. Now it's split into eight triangles around a light center that matches the background. The star reads as a ring of sharp points with an open middle, lighter and airier than a solid star.
That's the lesson of this pair: the same amount of dark fabric, moved to a different role, gives a different block.
This map suits scrappy points. Pull eight darks and check each one against the cream. A point that's too light melts into the center or background and breaks the ring.
It also changes how much cream you see: 108 square inches, three quarters of the block. When you audition fabrics, lay out much more cream than navy. Two equal folded pieces would make the navy look like far more of the block than it is.
Map 3: the solid star on a dark field
Put cream in the center and points, and navy in the background. The center and points share one fabric, so the star reads as one shape. That's Amy Smart's solid star, here as a light star on a dark field. Swap the values for a dark star on a light background and you're back to the basic two-fabric recipe.
Navy now covers 72 square inches, half the block. That's twice the dark of Maps 1 and 2, so this map changes how much dark there is as well as where it sits.
If you want the center and points to merge, audition the two fabrics side by side. Two "cream" fabrics can differ enough in print or value to redraw the center square. That can look good too, but it's a different star.
Check the repeat with four blocks
One star on its own can fool you. Sketch four copies in a 2 x 2 layout with no sashing. That makes a 24 x 24-inch center with 4 star centers, 32 point triangles, 16 corner squares and 16 goose units.
Then look at the shared edges. Where the four blocks meet, their corners form a 6-inch square of background. Along each shared edge, two goose triangles meet to form a background square on point. In Map 3, both shapes are navy and frame the stars. In Maps 1 and 2 they're cream, and the stars float on one light field.
So the background shapes the spaces between your stars as much as the stars themselves. If you're setting the star with other blocks in a sampler, our sampler quilt layout comparison covers that next step.
Audition real fabric at real size
A screen sketch shows the plan; your fabric decides how it reads. Before you cut:
- Use windows. Cut a 6-inch square window for the center and a right-triangle window with 3-inch legs for a point. Lay them over each candidate fabric.
- Watch large prints. A big floral can put a dark petal in one point and a pale patch in the next. Keep the variation on purpose, or choose a print that reads more evenly in small shapes.
- Take two photos. Photograph your audition in color and in grayscale. The grayscale photo checks value; the color photo shows whether a bright print steals attention from the role you meant to lead.
- Write it down. Note which fabric fills C, P and B, and which roles share a fabric.
Try the placements in QuiltLab
You can test all three maps on screen before cutting. Draw the 12-inch star once in the Block Editor. Then select the eight point pieces together and change their fabric in one step, and do the same for the center and background. Save the block, open a Grid quilt in the Quilt Editor and place it in a 2 x 2 layout to check the repeat.
Block Editor guide →Draw pieces, assign fabrics and save blocks for your quilt layoutsOnce you've picked a map, follow your pattern's cutting instructions and sew one test star. If the points and center read the way your sketch did, cut the rest.
Related posts
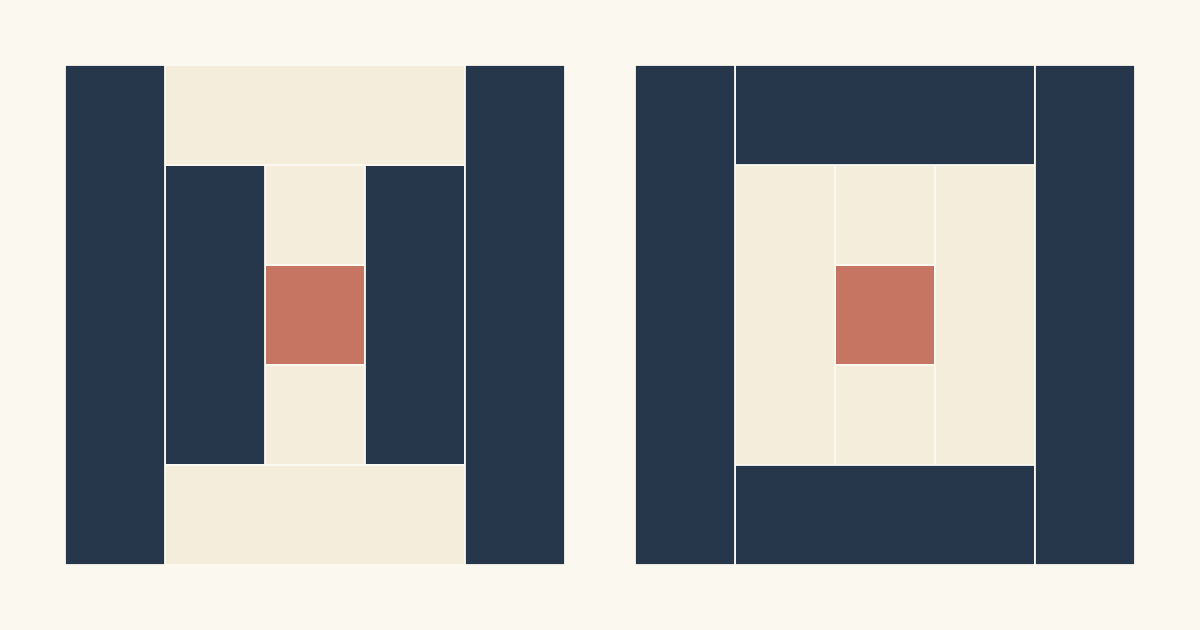
Courthouse Steps Color Placement: Where Do Lights and Darks Go?
Put light fabric on one pair of opposite sides and dark on the other, or color by rounds for framed squares. Two 10-inch maps show how each one repeats.
How Secondary Patterns in Quilts Form
Compare two alternating-block studies and trace the corner pieces that create a larger motif across four block boundaries.
Improv Quilt Design Constraints: Three Limits
Start an improv study with a shape vocabulary, three fabric roles and a finished envelope, then explore several original compositions.