


How Secondary Patterns in Quilts Form
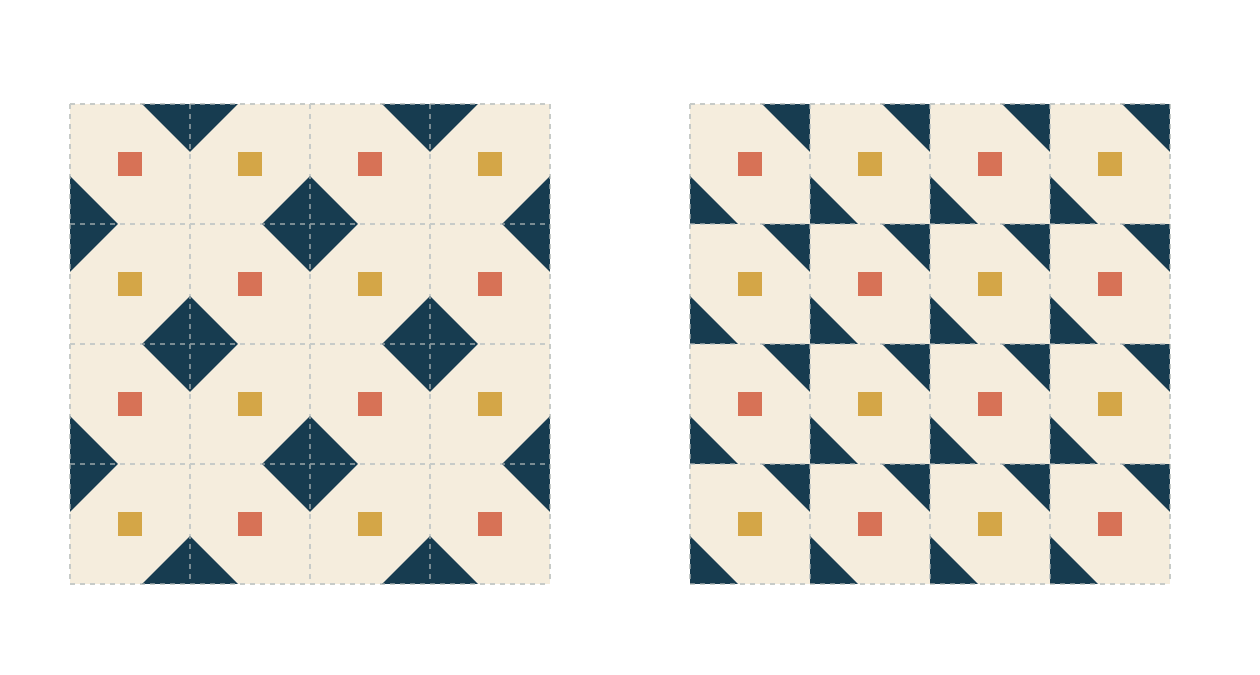
Secondary patterns in quilts appear when elements from neighboring blocks read as a larger shape. A motif may cross a seam or gather around the point where four blocks meet, even though no individual block contains the whole motif. Look at those joins before deciding what the finished quilt will emphasize.
Our two studies use the same sixteen 10-inch finished blocks, alternating two types in a 4 x 4 grid. Both centers measure 40 x 40 inches, with no sashing or border. Only the orientation of the B blocks changes.
Read the block and the join as separate views
Start by identifying the outline of one block. Then trace what its edge pieces do beside the next block. You may find a shape that belongs to the arrangement rather than to any single unit.
Carolyn Gibbs's discussion of Jack-in-a-Box describes a secondary design that draws attention to where four blocks meet. It is also a useful reminder that an apparent strip in the larger composition may be part of a block rather than sashing. Try that viewing approach on your own sketch.
Draw light block-boundary lines over a sketch, or put small labels beside the blocks on a design wall. Compare the view with and without those guides. The purpose is to learn which pieces contribute to the larger shape, not to force the eye to see the seams forever.
For a broader setting decision, sampler quilt layouts compares direct, sashed and alternate-block arrangements. This study keeps the setting fixed and examines the edges of two deliberately designed blocks.
Define the two blocks and the viewing direction
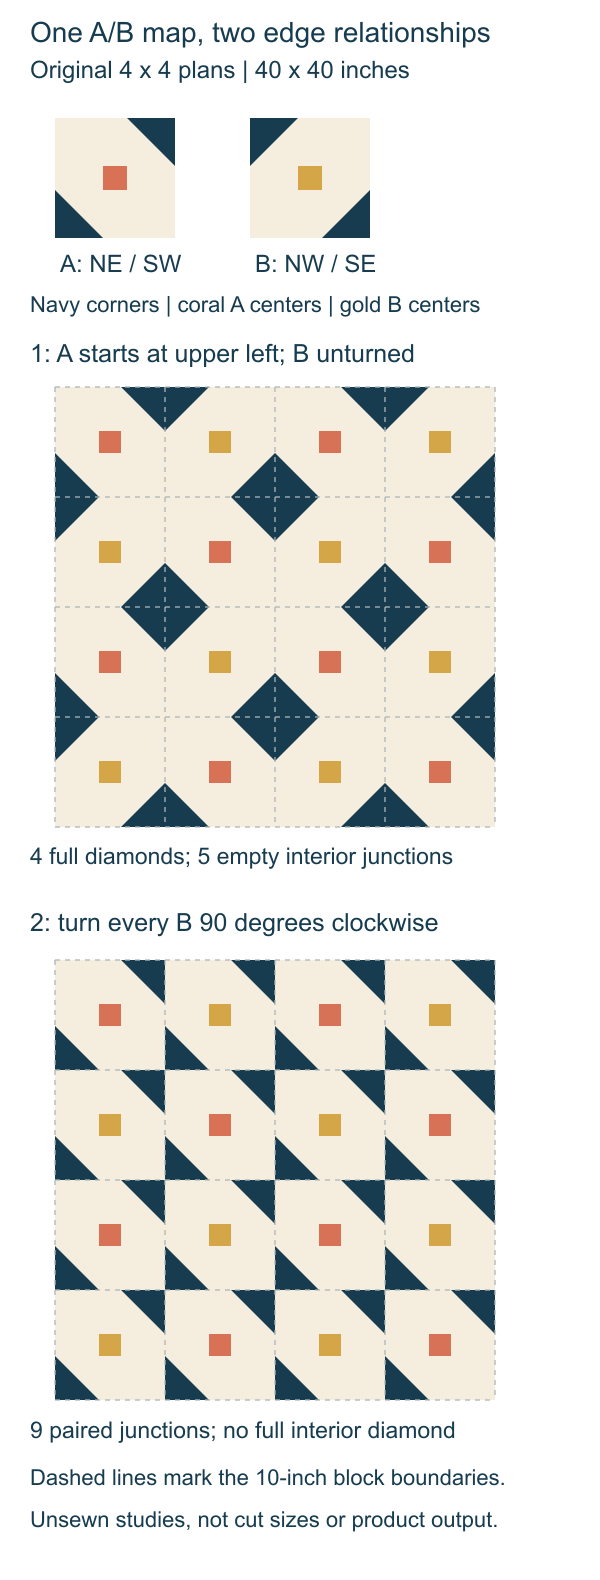
Each block is a 10-inch finished square with a cream field and two navy right triangles in opposite corners. Each triangle has 4-inch legs along the block edges. A 2-inch center square distinguishes the two types:
- A: coral center; navy corners at NE and SW, meaning upper right and lower left.
- B: gold center; navy corners at NW and SE, meaning upper left and lower right.
Keep the top edge of the drawing at the top while using those labels. A block turned over or viewed from another side is not the same orientation reference.
Deanne Eisenman's secondary-design article at Snuggles Quilts explains several ways block combinations and edge elements produce another design. Start with the pieces that touch the block edges, then see which neighbors let them connect.
Start A in the upper-left position and alternate the types:
A B A B
B A B A
A B A B
B A B A
There are eight A blocks and eight B blocks. Coral and gold centers keep that assignment visible, while the common navy value lets the corner triangles read together. The center squares are identifiers and accents; they are not the pieces that form the larger diamonds.
Trace one complete diamond across four blocks
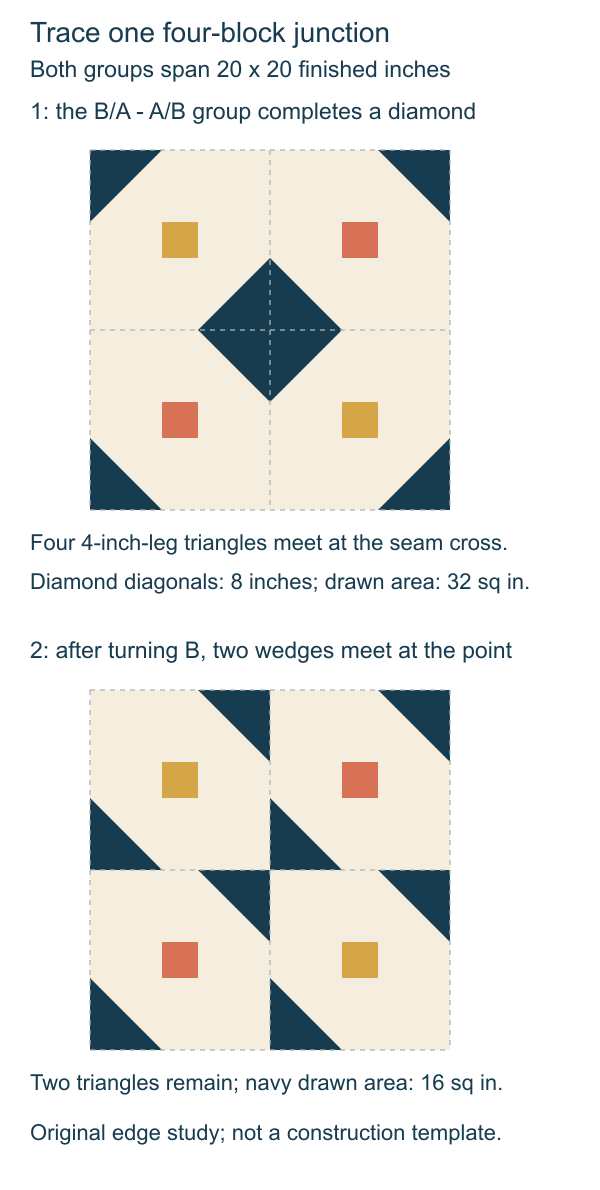
In the first map, examine the junction 20 inches from the left and 10 inches from the top. The four surrounding blocks read B/A in the upper row and A/B below. Each supplies one navy triangle toward that seam intersection.
The four triangles meet to form a complete diamond. Its horizontal and vertical diagonals each span 8 inches: 4 inches to either side of the intersection. That diamond is assembled visually from four block corners; it was not drawn as one piece inside a block.
Each triangle's drawn area is (4 x 4) / 2 = 8 square inches. Four contribute 32 square inches. Checking the diamond directly gives the same result: (8 x 8) / 2 = 32.
These are finished-shape measurements. Use a verified construction plan for triangle cut sizes, grain direction, allowances and trimming.
Check every interior intersection
Four block columns have three internal dividing lines, and four rows have three. They meet at 3 x 3 = 9 interior four-block junctions.
For this exact A-first map and corner key, four junctions receive all four navy triangles. The other five receive none. The incomplete motifs along the outside edge are not counted as complete interior diamonds.
That count depends on the specified map. Swapping the A and B corner pairs while retaining A at upper left changes which junctions fill. A 4 x 4 grid does not guarantee four diamonds by itself; the participating corners determine the result.
Mark each of the nine intersections on your own drawing and inspect all four surrounding corners. A repeated motif near the middle can look convincing while a different rotation near an edge interrupts the intended arrangement.
Turn B and inspect the changed contributions
In the second study, turn every B block 90 degrees clockwise. Its navy corners move from NW/SE to NE/SW. The gold center stays centered. A remains unturned, and the alternating assignment remains the same.
Now all blocks place their navy triangles at NE/SW. At each interior junction, two opposing corners contribute navy triangles and the other two remain cream. The result is nine paired-wedge junctions and no complete interior diamond.
At the detailed junction, the two remaining triangles have a combined drawn area of 2 x 8 = 16 square inches. They touch at the intersection rather than filling all four quadrants. Both large studies are still 40-inch squares and still use the same sixteen blocks.
The rotation is a design option, not an error unless it contradicts your chosen plan. Compare whether you prefer the closed diamonds or the more interrupted corner rhythm. Save the selected orientation key so that a later turn does not quietly change the composition.
Separate orientation from color continuity
Geometry decides which pieces can meet. Color and value influence whether the eye reads those pieces as one shape. A matching outline may become less obvious when neighboring corner fabrics contrast strongly.
The American Quilter's Society's two-block design discussion compares color continuity with contrasting colors that emphasize the separate blocks. That distinction is useful when a secondary motif is present geometrically but difficult to see in the fabric arrangement.
First compare orientations with the corner color held constant, as our drawings do. Then audition fabrics without also changing the map. Our color and value guide helps distinguish light/dark relationships from color names and print scale.
These maps join blocks directly. Inserting sashing would separate the corner contributions and change this exact diamond geometry. It would be another setting to inspect, rather than a harmless gap added to the same study.
Keep the contribution map with the design
Record the block outlines, A/B assignments, top edge, corner key and chosen rotations. Add a close-up sketch of one complete join and mark any partial motifs at the perimeter. Those notes preserve why the larger pattern appears.
Draw a two-by-two group and mark the top of each block. Trace the four corners at its center, turn one block and compare the shape. Save the orientation key you prefer before repeating it across the quilt. If you want to draw your own measured units in QuiltLab, the block-design walkthrough shows the editor steps.
Related posts
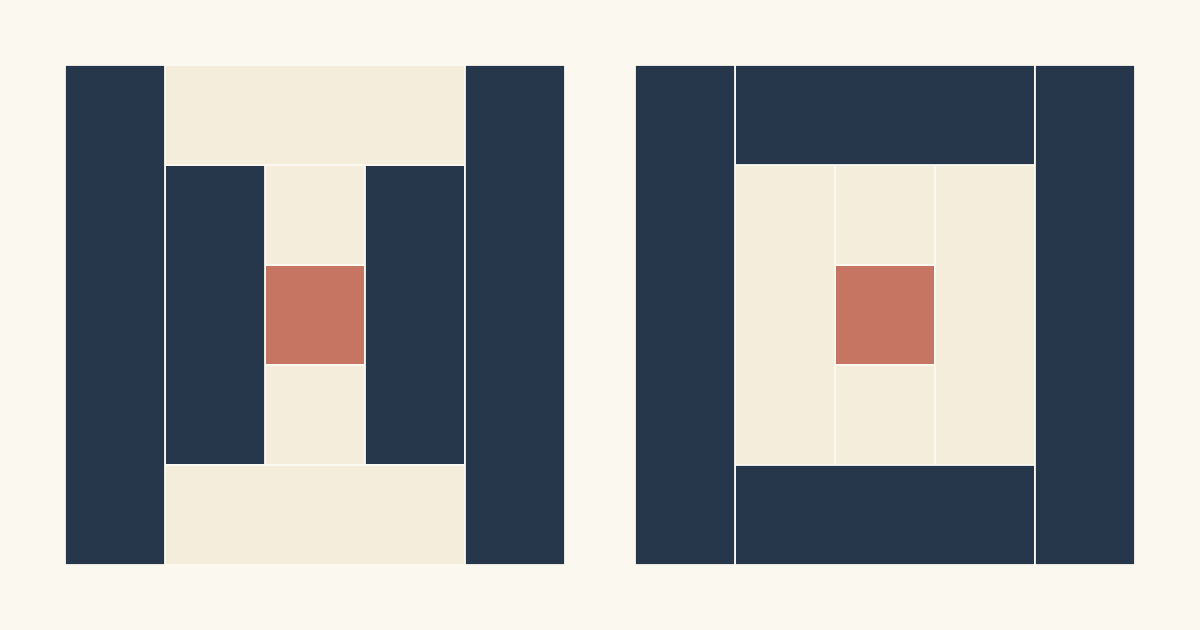
Courthouse Steps Color Placement: Where Do Lights and Darks Go?
Put light fabric on one pair of opposite sides and dark on the other, or color by rounds for framed squares. Two 10-inch maps show how each one repeats.
Sawtooth Star Color Placement: Which Part Should Be Dark?
Most Sawtooth Stars use one fabric for the center and points on a contrasting background. See three placements on one 12-inch star and what each changes.
Improv Quilt Design Constraints: Three Limits
Start an improv study with a shape vocabulary, three fabric roles and a finished envelope, then explore several original compositions.