


Joining Batting Scraps: Zigzag, Tape or Hand Stitch?
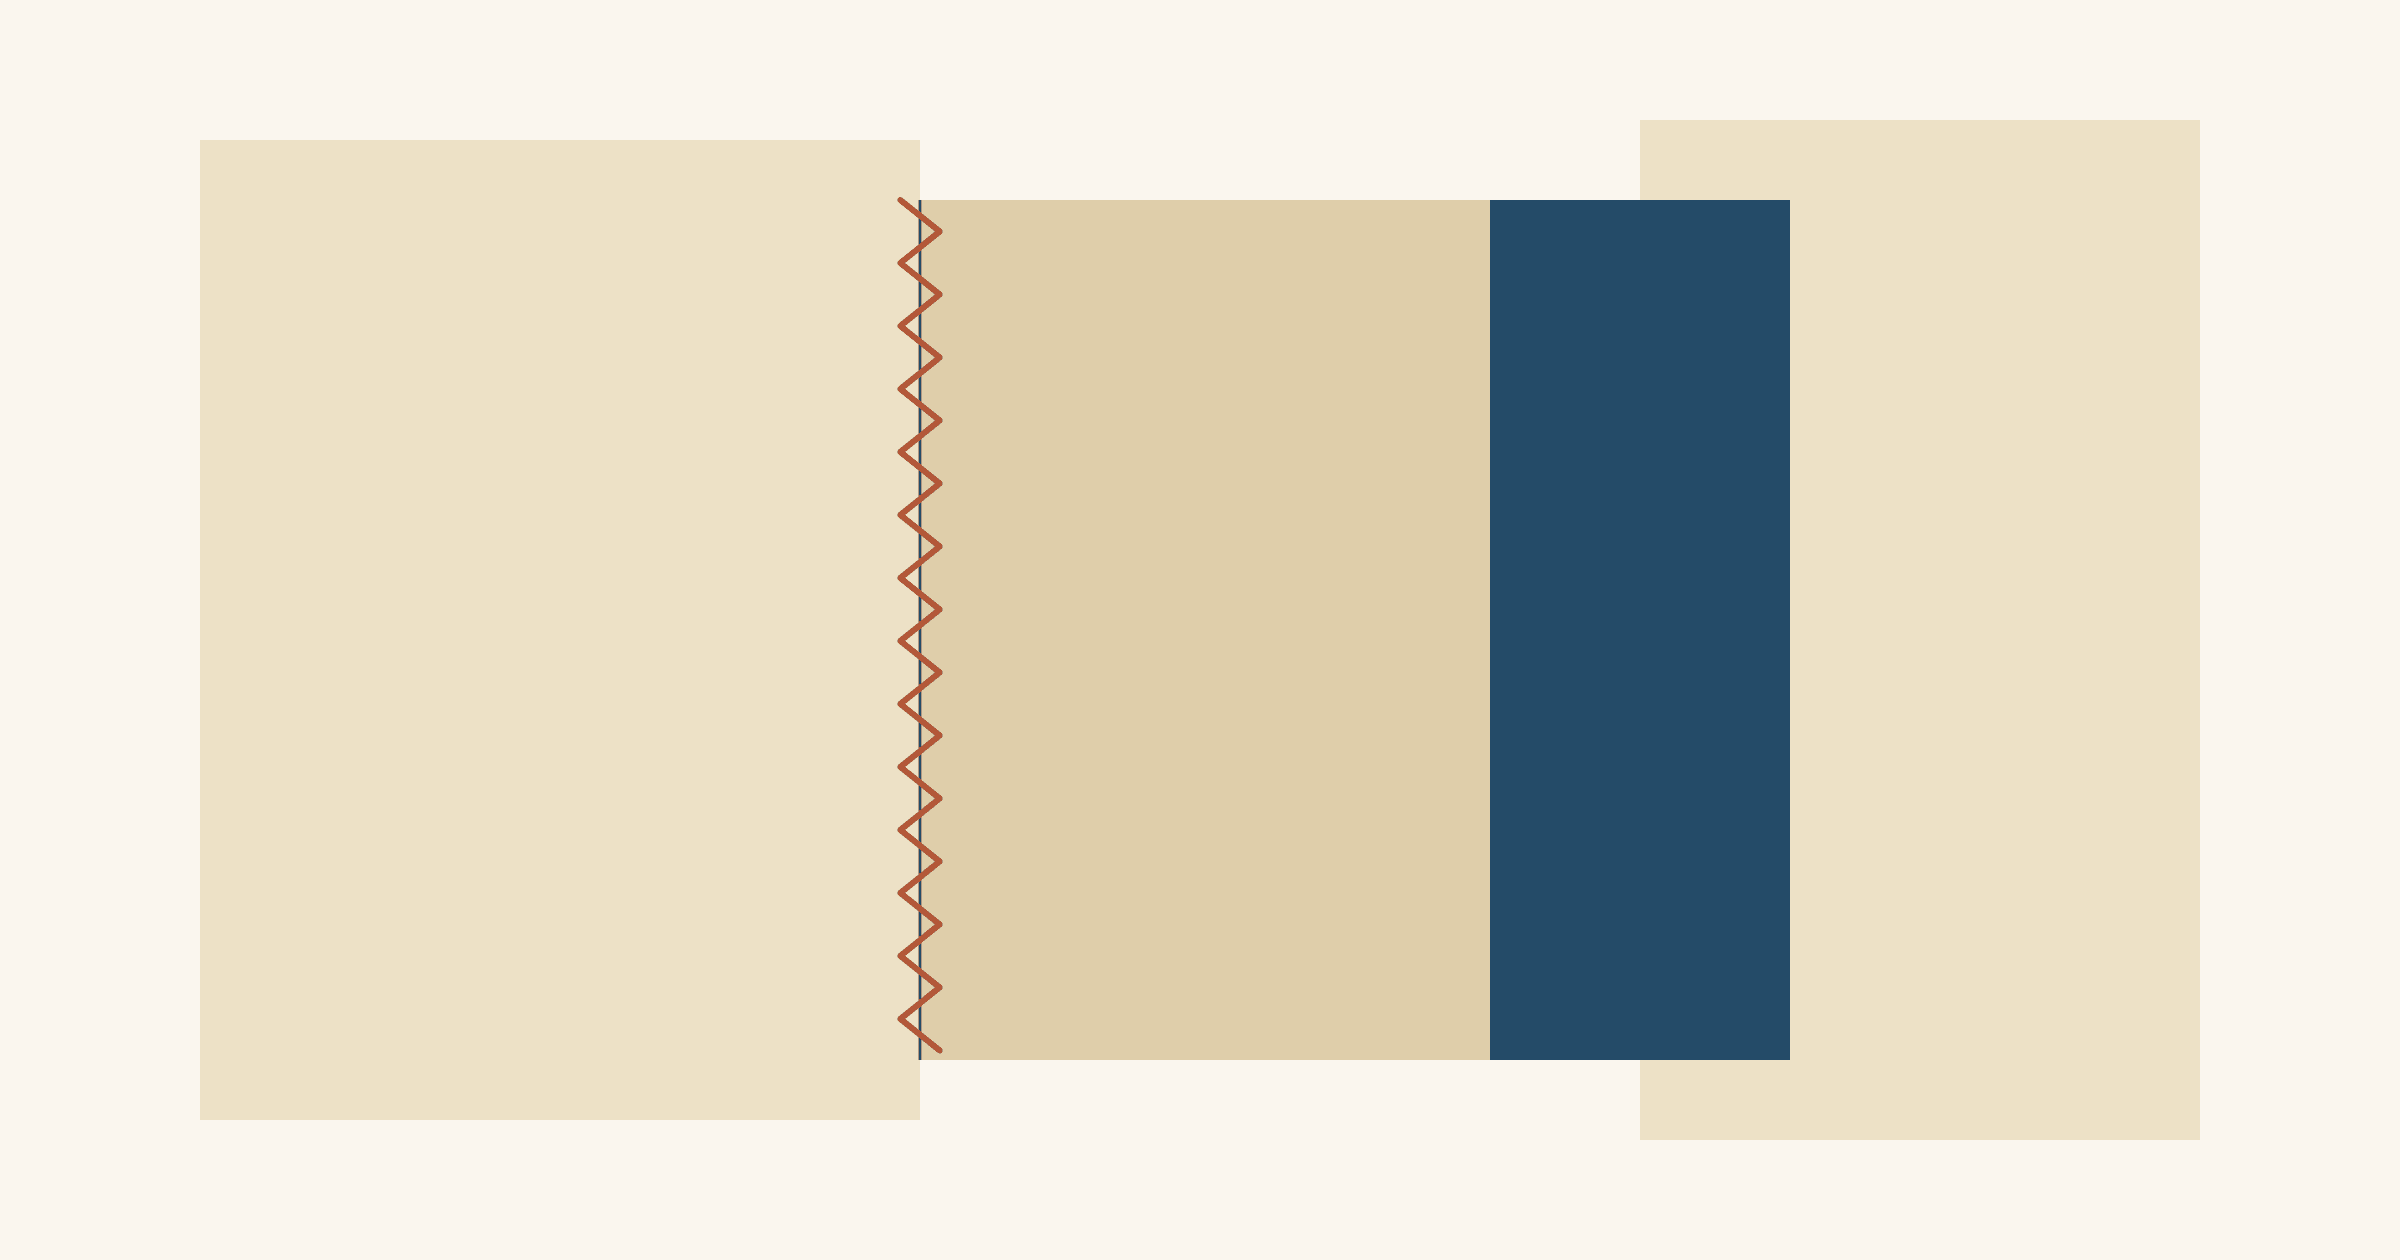
To join batting scraps, cut the joining edges so they match, butt them together with no overlap and no gap, and join them with a wide zigzag stitch or a fusible batting tape. Erin Kroeker teaches the zigzag version in her frankenbatting tutorial for OLFA, and Brittany Lloyd covers both zigzag and tape at Lo & Behold Stitchery. Both recommend joining only pieces of the same kind of batting. For most scraps, start with the zigzag. It needs no extra supplies and no heat, and you can test it on trimmings before you join anything that matters.
Tape leaves no stitching in the join, but the right iron setting depends on your batting and your iron. The worked example below builds a 68 x 80 inch batting from three scraps.
Which joining method suits your batting?
Choose by the fiber in your scraps. A zigzag adds no heat, so it works on any batting your machine can feed. Tape has to be ironed at the right setting for the fiber, so you need to know what the fiber is.
| Your scraps | Start with | Why |
|---|---|---|
| Cotton or 80/20 cotton/poly | Wide zigzag; tape works too | Both methods suit it, and the zigzag needs no supplies |
| 100% polyester, any loft | Zigzag or hand stitches | Heat can melt polyester, so tape only after a sample |
| Wool, bamboo or silk | Zigzag | The tape directions cover polyester and blends, not these |
| Unknown fiber, or two battings | Keep them apart | You can't pick a heat setting or match the loft |
Kroeker sorts her scraps by thickness and type before joining anything, and says pieces of similar thickness and material lie flat once quilted. Lloyd warns that mixing types, such as wool and bamboo, makes the join harder and can leave the quilt with an uneven texture. A scrap that has lost its label belongs with small projects. When you cut a batting, write its name on the bag you store the leftovers in; our quilt materials record shows how to keep that information with the project.
Lloyd also lists hand stitching. She suggests big basting stitches, an inch or two long, in a Z shape across the join, and says hand stitching gives you more control than a machine. Try it when a scrap is too lofty to feed evenly under the presser foot.
What do the batting tape directions say?
Heat Press Batting Together is a common batting tape, and the one Julie Cefalu of The Crafty Quilter used for her taped joins. It comes in white or black, in 3/4-inch and 1 1/2-inch widths. Lloyd has seen batting tapes from 3/4 to 2 1/2 inches wide and suggests at least 1 1/2 inches for a first try, so your placement doesn't have to be exact.
The directions on the American Quilter's Society shop listing for Heat Press start with the iron:
- An iron with a Teflon plate can fuse the tape on low cotton.
- For 100% polyester batting, use a low setting (the listing says high synthetic) and slide the iron across quickly. On high-loft polyester, put an appliqué sheet over the tape if you need to.
- Synthetic blends usually fuse at a wool setting. Test each one.
- Lay the tape over the cut edges and slide the iron over it "without any pressure."
- The batting may look flat after ironing and fluff up again as it cools.
The Fabric Depot listing for the same tape prints a different version: an up-and-down motion until the glue sets, then a light shot of steam to finish. Both versions call themselves the new instructions. Follow the sheet that came with your roll. If you've lost it, start your sample at the lowest setting and turn the heat up only if the tape won't hold.
Lloyd goes further than either version. She says not to use batting tape on polyester at all, because the heat could melt the batting. The tape's directions give a polyester setting anyway. With polyester scraps, a zigzag avoids the question; if you'd rather tape, let a sample decide.
Two more details from Lloyd: put the tape bumpy side down, since the bumps are the adhesive, and let each section cool before you move the batting.
Make a sample join from your trimmings
Join two trimmings of the same batting before you join a whole quilt's worth. Use the exact zigzag settings, or the exact iron setting, you plan to use on the real seams. This sample uses two 6 x 10 inch pieces.
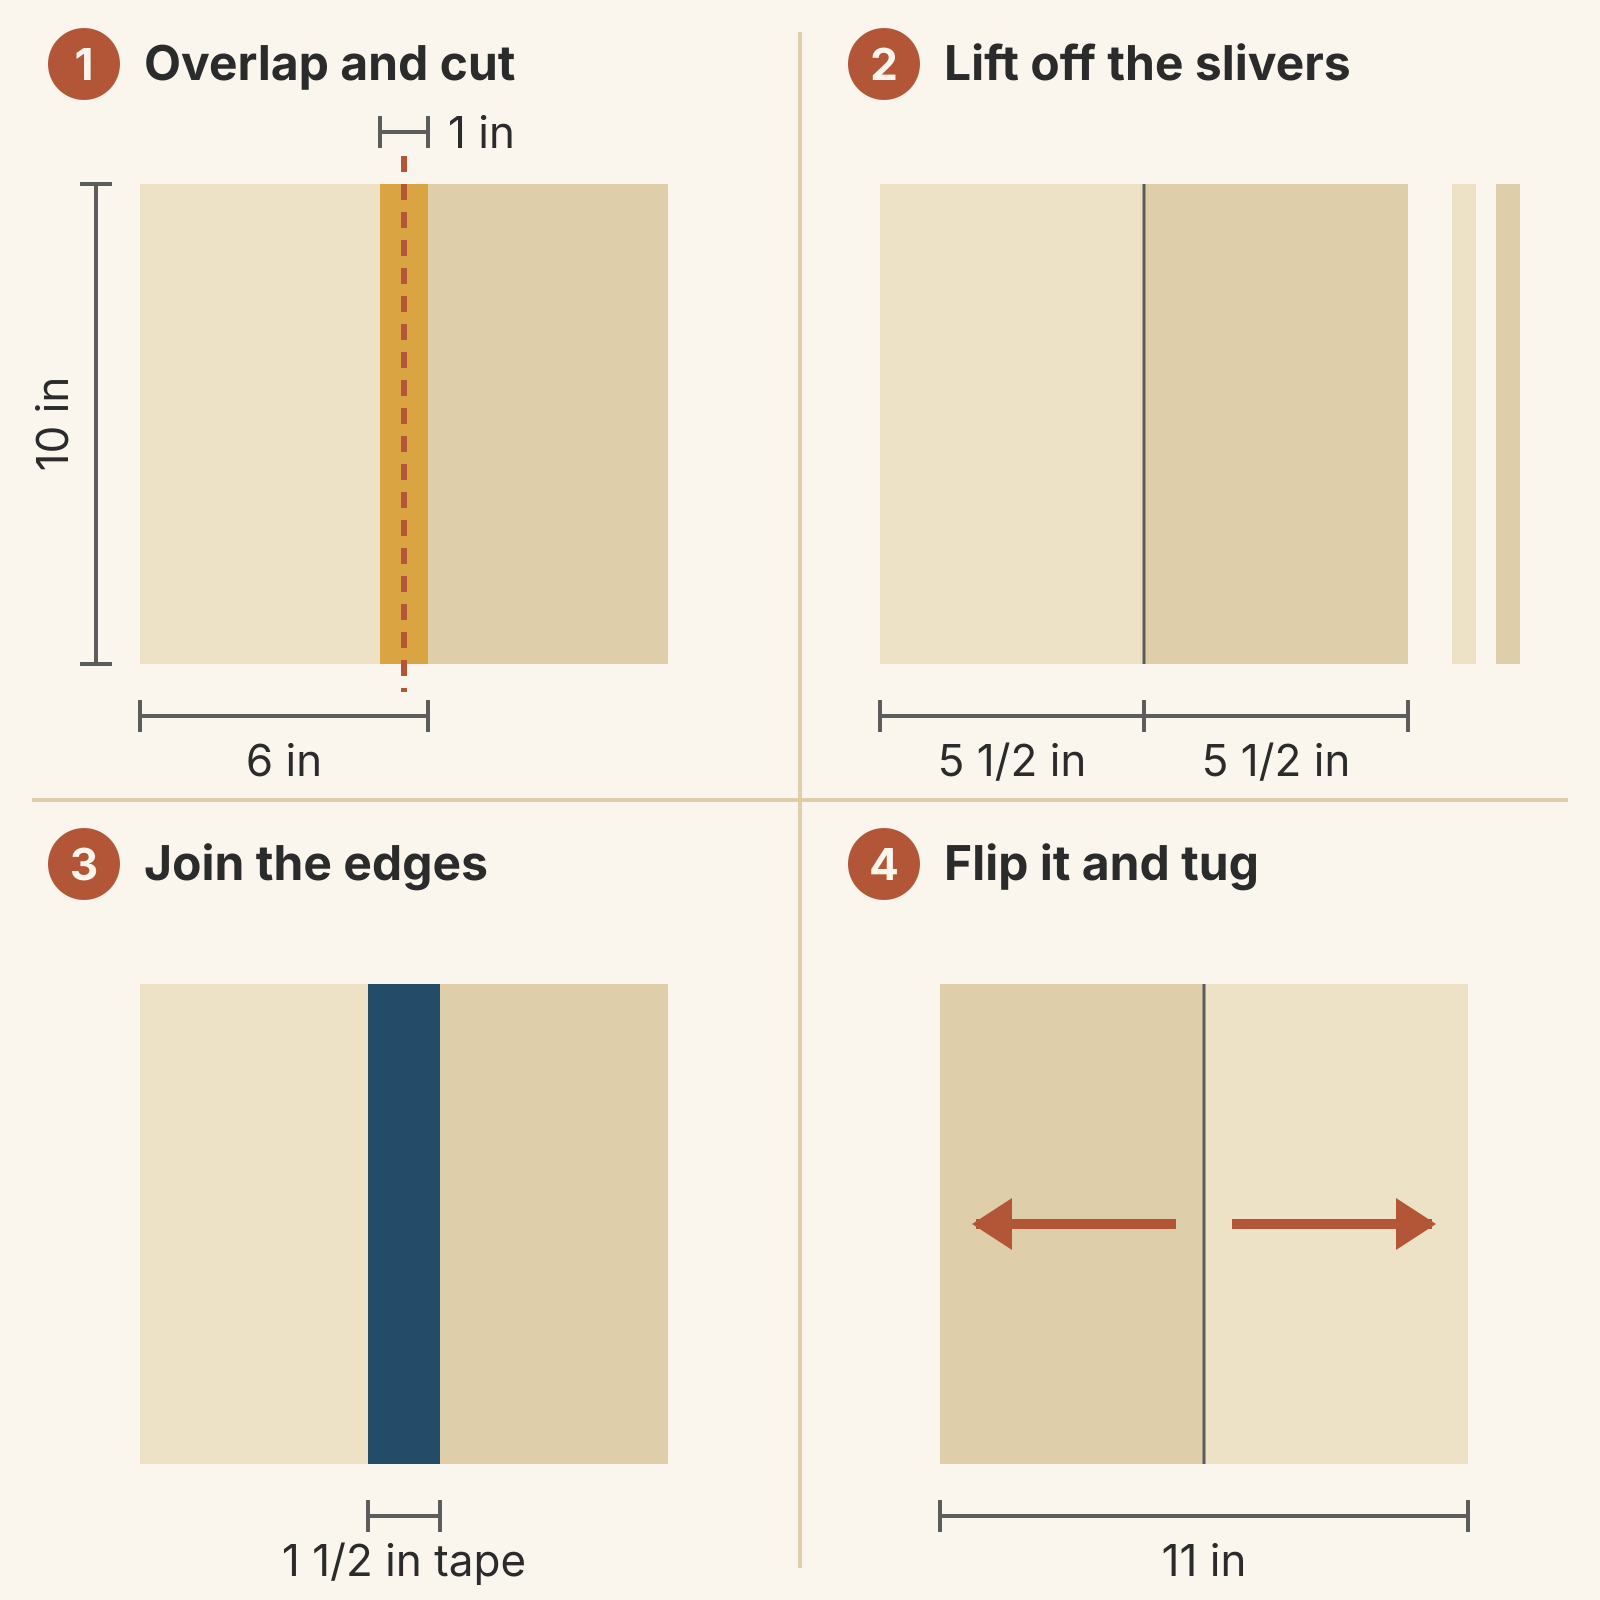
- Overlap and cut. Overlap the two 10-inch edges by 1 inch, then cut down the middle of the overlap with a rotary cutter and ruler. Cefalu overlaps about 1/2 inch or more in her zigzag tutorial; 1 inch leaves room to cut.
- Lift off the slivers and butt the edges. Lift off the two 1/2-inch slivers, one from the top and one from underneath. The edges now fit each other even if neither started straight. Push them together until they touch, with no overlap and no gap.
- Join the edges. Zigzag down the line, or center the tape over it so 3/4 inch of a 1 1/2-inch tape lands on each piece, and iron it at your setting.
- Let it cool, then flip it and tug. Run your hand across the front and the back. Hold the sample up to a window: a bright line along the seam means the edges didn't meet. Tug gently across the seam. On a taped join, look for shiny or stiff fibers.
- Lay your top's lightest fabric over the join. Lloyd says to match thread or interfacing to the batting, because dark thread can show under light fabric. Pick the tape color closer to your batting.
- Change one thing at a time. If the sample fails, adjust one setting and make another.
A ridge on the back is the problem to look for with tape. Lloyd's steps don't mention the back. In part 2 of Cefalu's tutorial, she taped one side and found a ridge on the underside, so she taped the back as well and the ridge was gone. Your sample tells you whether your batting needs that second strip.
With a zigzag, watch for a seam stitched too tight. Cefalu writes that close, tight stitches can compact the seam, and she uses a multi-step zigzag, which she says keeps a tunnel from forming.
If you want to see how the join looks once quilted, layer the sample with your top fabric and backing and quilt across it. Keep the gaps within your batting's spacing limit; our spacing check shows how to measure them. Write the settings that passed on a scrap of paper and pin it to the sample.
Plan where the seams go
Work out the batting size first. Say your top finishes at 60 x 72 inches. The Crafty Quilter's batting and backing guide suggests 3 to 4 inches beyond each side of the top, the allowance our backing guide uses too. With 4, you need 68 x 80 inches. If someone else is quilting it, use your quilter's number. Our longarm prep checklist lists the questions to ask about batting.
Your scraps are a large offcut, 70 x 56 inches, and two smaller pieces, 38 x 28 and 34 x 28, all from the same batting.
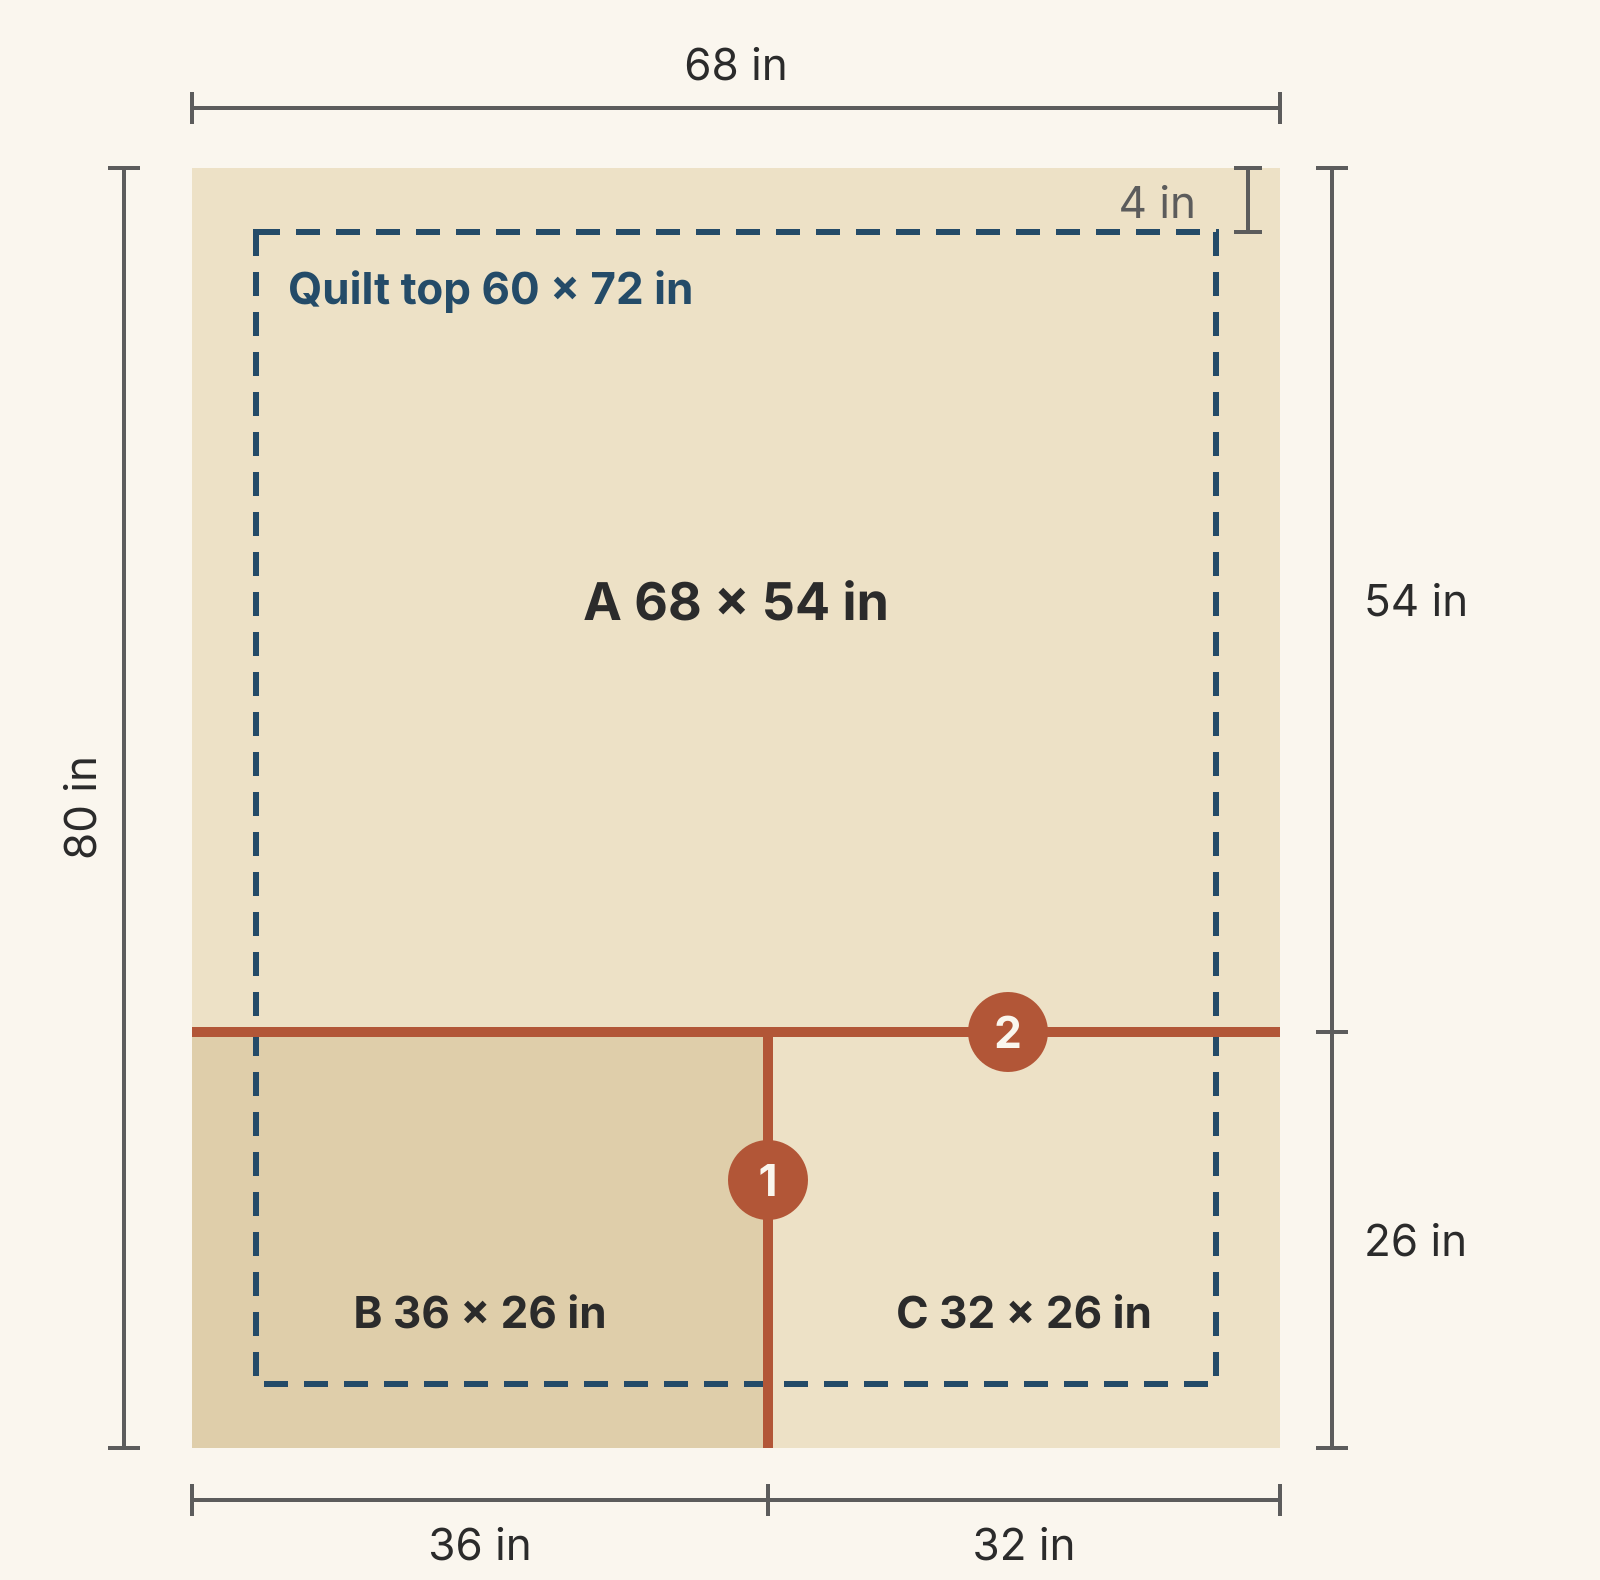
- Put the largest piece where it covers the most. A becomes a 68 x 54 inch section across the top.
- Join the small pieces to each other first. Lloyd suggests this order for one large and two small pieces: sew the small ones together, then join them to the big one. B and C make a band 26 inches tall.
- Let the seams meet in a T. Seam 1 stops at seam 2, so you never have four cut corners to line up at one point.
- Keep the pieces facing the same way. Lloyd notes that most batting has a grain and some has a right and wrong side. If you know which way each scrap ran on the roll, lay them all the same way.
Check that the pieces are big enough. The overlap cut takes 1/2 inch off each joining edge, so each seam uses 1 inch:
- B and C side by side: 38 + 34 - 1 = 71 inches, 3 more than the 68 you need.
- A over the band: 56 + 28 - 1 = 83 inches, 3 more than the 80 you need.
Trim the outside edges to 68 x 80 after joining. Take the spare evenly from opposite edges, and the sections finish at the sizes in the diagram: A 68 x 54, B 36 x 26, C 32 x 26.
Then check where the seams land under the top. Seam 2 runs 50 inches below the top's upper edge and 22 inches above its lower edge. Seam 1 sits 32 inches in from the top's left edge, under its bottom 22 inches. If seam 2 would fall under a large pale area, where a thread or ridge would show first, trim all 3 spare inches from one edge instead. That moves the seam 1 1/2 inches up or down.
Join the full batting
Sew or tape seam 1 before seam 2, using the settings that passed your sample.
For a zigzag, Kroeker uses her machine's widest zigzag at a normal stitch length; Lloyd uses the widest zigzag with a stitch length of at least 4.0 mm. A walking foot helps the batting feed evenly, and both suggest going slowly, since batting stretches. Check that your walking foot accepts a zigzag first, as Lloyd advises. Use matching or neutral thread. Fold or roll the big piece so its weight doesn't drag on the seam.
For tape, work on a big ironing board, or on a table or floor protected with cotton towels, as Lloyd suggests. Cut many short lengths rather than one long strip; they're easier to center without wrinkles. Before trimming, the example's seams run about 98 inches (28 for seam 1 and 70 for seam 2), just under 2 3/4 yards of tape. Taping both sides takes 196 inches, about 5 1/2 yards. A 15-yard roll of the white 1 1/2-inch tape holds 540 inches.
To layer the joined batting with your top and backing, our pin vs spray basting comparison helps you choose a method by quilt size and room. Once the batting is in the quilt, the quilting holds the join too. Lloyd adds that denser quilting keeps pieced batting from shifting and helps hide the seams.
Your next step
Before your next quilt, cut two pieces from the trimmings of the batting you'll use and make the sample join. When it passes on both sides, draw the full batting on paper with the seams marked, and join the small pieces first.
If you designed the top in QuiltLab, the status bar under the Quilt Editor canvas shows the quilt's size. Once you add a border, it shows an Overall size that includes the borders (see the Quilt Editor guide). Start from the Overall size when there is one, and add your margin to get the batting size. QuiltLab doesn't work out batting amounts or plan scrap joins, so the scrap map stays on paper. When you buy the next batting, our guide helps you compare fibers.
Compare batting materials →Cotton, polyester, wool, bamboo and silk batting by loft, warmth, shrinkage and useRelated posts
Pin Basting vs Spray Basting: Which Fits Your Quilt and Room?
Pins 3 to 4 inches apart hold until you remove them; spray is faster but lasts only as long as its label says. Choose by quilt size, surface and can.
How to Prepare a Quilt for Longarm Quilting
The checklist longarm quilters ask for, with the reason behind each step, then one 64 x 80 inch top checked against two real service sheets.

Should You Prewash Quilt Fabric? Decide by Precuts, Yardage and Color
Most quilters can skip prewashing good quilting cotton as long as every fabric in the quilt gets the same treatment. Here's when precuts, flannel, a wide backing or a deep red change the answer.