How to Balance an Asymmetrical Quilt Design
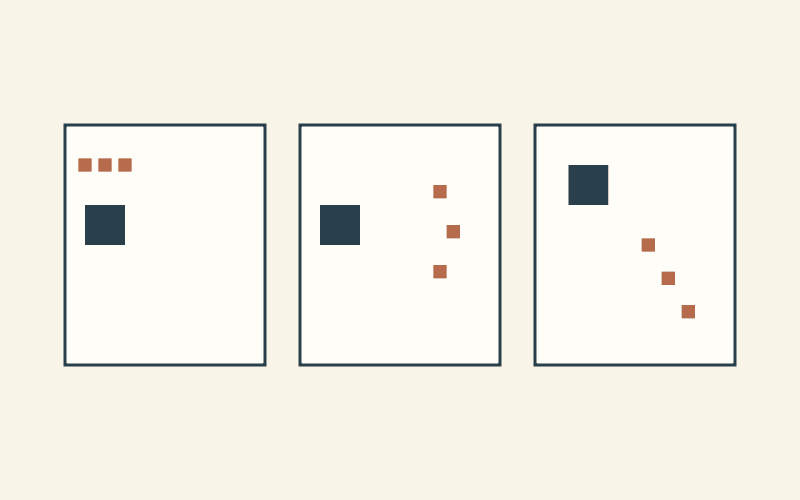
Start with the large patch you want people to notice, then arrange the smaller patches as a group. Try moving or spreading that group before adding more colors or pieces. An asymmetrical quilt design can feel connected without putting equal shapes on opposite sides of a centerline.
For a first comparison, keep the patch sizes and colors the same. That makes it easier to see what grouping changes. You can choose a composition for its quiet space, movement or emphasis instead of trying to make every version feel alike.
Look at the whole group, not just the largest patch
A single large patch and several small patches give you different choices. The small pieces can read as one cluster, separate interruptions or a path across the quilt. Their spacing helps determine which relationship you notice first.
The Canadian Quilters Association's elements and principles of design describes balance through the distribution and characteristics of visual elements. Size matters, but so do color, texture and density. Counting square inches alone cannot tell you which arrangement will feel settled to you.
Begin by naming the intended relationship: "The navy patch is the main stop, and the rust pieces lead toward it." Another useful aim might be, "The rust cluster should hold my attention before I notice the navy." Those aims can produce different successful arrangements.
Give the comparison one fixed set of patches
Our example uses a 60-by-72-inch finished field with one 12-inch navy square and three 4-inch rust squares. The surrounding field is cream. We drew these compositions for this article and have not sewn them.
| Part | Number | Finished size | Combined area |
|---|---|---|---|
| Navy square | 1 | 12 x 12 inches | 144 square inches |
| Rust squares | 3 | 4 x 4 inches | 48 square inches |
| Colored patches | 4 | Sizes above | 192 square inches |
The whole field covers 4,320 square inches. Colored patches occupy about 4.44 percent; cream occupies the remaining 4,128 square inches. Those amounts stay the same in all three drawings.
The navy area is three times the combined rust area. That is a geometric comparison, not an equation for visual weight. A warm rust cluster may attract attention in a way its area does not predict.
Compare a cluster, a spread group and a diagonal sequence
In A, the navy square sits on the left and the three rust squares form a compact row above it. The pieces gather into one side of the quilt, leaving a broad open area to the right. Ask whether that concentration is the feature you want.
In B, the navy square stays in the same place. The rust squares move to three separated positions across the field. This comparison isolates the change from clustering to dispersal without moving the largest patch.
In C, both parts take a new arrangement. The navy square sits higher, while the rust squares descend toward the lower right. This gives you a sequence to inspect rather than a single compact rust group.
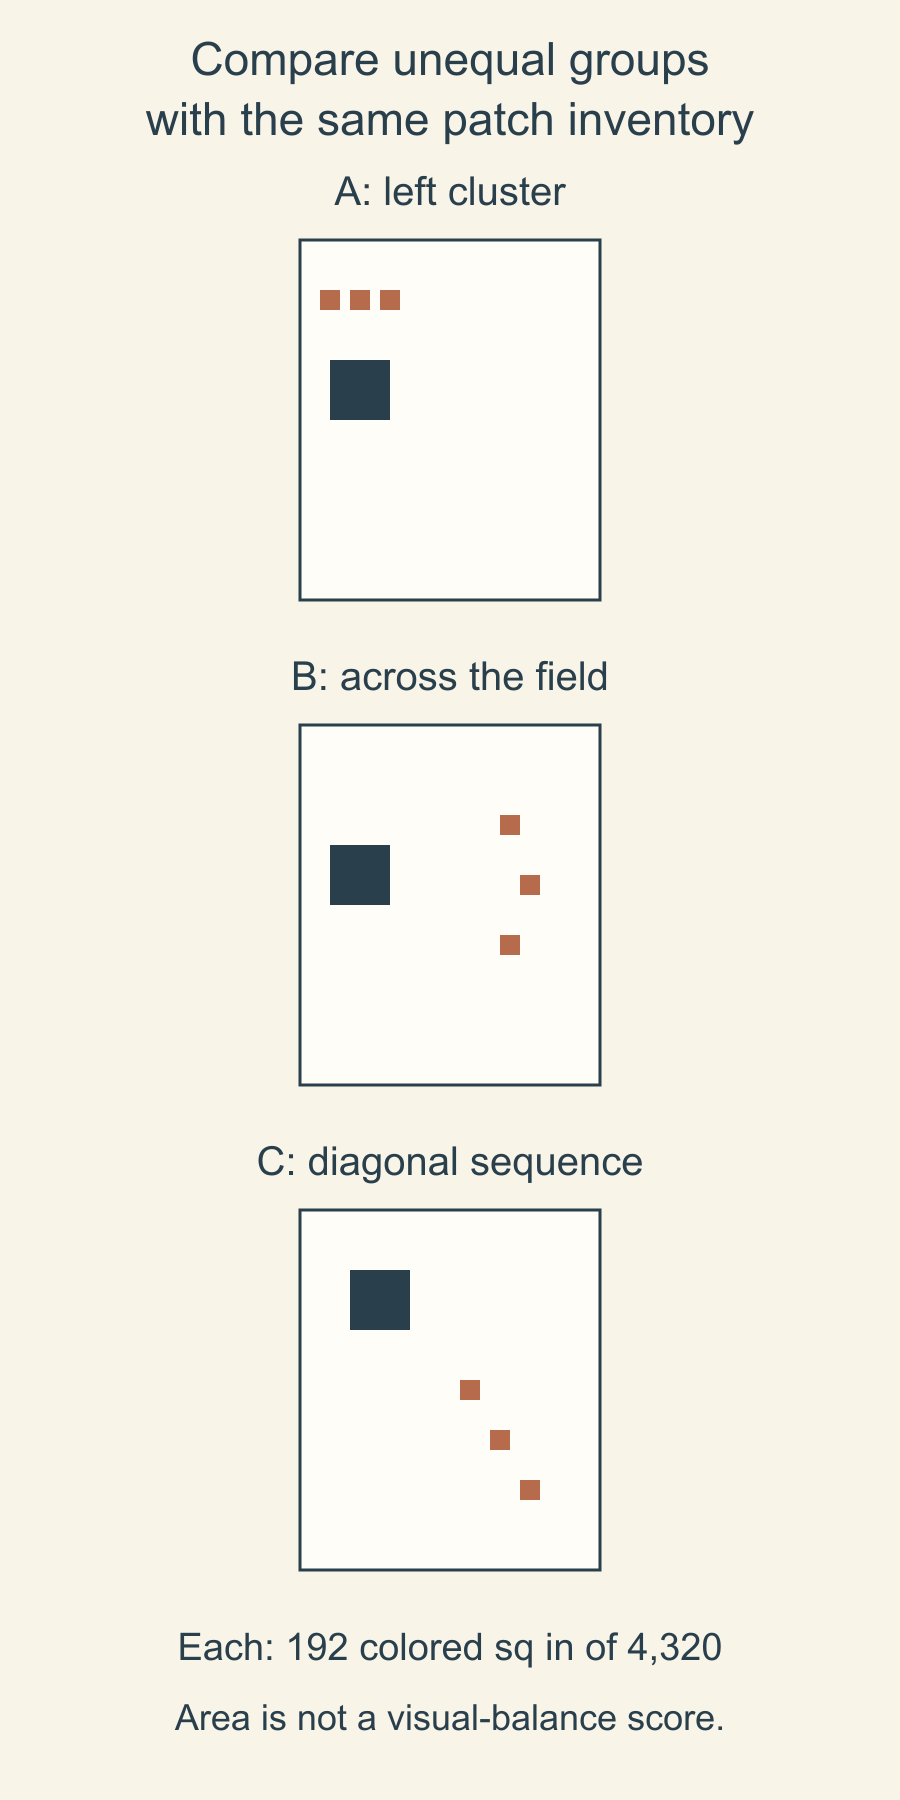
All coordinates below describe the top-left corner of a finished patch, measured from the field's top-left corner. They let you reconstruct the drawings on graph paper.
| Drawing | Navy square: x, y | Rust squares: x, y |
|---|---|---|
| A: left cluster | 6, 24 | 4, 10; 10, 10; 16, 10 |
| B: across the field | 6, 24 | 40, 18; 44, 30; 40, 42 |
| C: diagonal sequence | 10, 12 | 32, 34; 38, 44; 44, 54 |
Each patch fits inside the same field, and none overlaps another. Start by comparing A and B because the navy position is fixed. Then compare the more extensive change in C.
Ask what the smaller pieces are doing together
Cover the navy patch briefly and look at the rust pieces. Do they seem like one unit, three separate stops or a direction across the quilt? Uncover the navy and ask how that relationship changes.
Next, follow the spaces between patches. A narrow gap can connect two pieces; a long stretch of cream can make them feel separate. The gap beside a quilt edge is part of that comparison too.
The Inland Empire Modern Quilt Guild's modern-quilt series recap discusses alternate grids and negative space as ways to organize a composition. Open areas can connect shapes or help them stand apart. If the amount of open field is your main question, our negative-space design guide explores that separate decision.
For this exercise, keep the amount fixed and change the relationships inside it. That is how you can learn something from a comparison without redesigning the whole quilt each time.
Check the arrangement at its intended size
View the three drawings at the same scale. A tiny thumbnail can hide the gaps that matter on a larger quilt, while enlarging only one version makes its patches seem more forceful.
Use a paper outline or measured design-wall space to imagine the finished footprint. Look from the place where the quilt will normally be seen. Then move closer and check whether the smaller pieces still deserve their positions.
When you bring in real fabric, audition the prints at the intended patch sizes. A 4-inch window may reveal a light ground in one place and a dense dark motif in another. Keep the placement map nearby so a fabric change does not quietly become an arrangement change too.
Asymmetry also does not require a particular style label. The Modern Quilt Guild's description of modern quilting includes asymmetry among possible characteristics. Our modern and traditional design comparison explains why a label alone does not settle your layout choices.
Choose the version that answers your first question
Make a short note beside each drawing: what you notice first, how the rust pieces relate and what you would change next. Prefer concrete observations such as "the rust cluster reads before the navy" to a score that suggests the choice is objective.
Keep one version and change only one relationship next: the distance between rust pieces, their distance from the navy or the group's distance from an edge. Save a different palette for a later comparison.
Sketch one large patch and three smaller accents now. Compare a compact group with a spread group while holding the large patch still. Choose the relationship you want to develop, then audition the actual fabrics in those positions.
Free patterns to try
Printable PDF patterns with cutting charts and diagrams, free to download.
Hidden Picture Advent
Quilt patternBeginner · 40 x 28 in wall quilt
24 Little Doors
Quilt patternIntermediate · 41 x 33 1/2 in wall quilt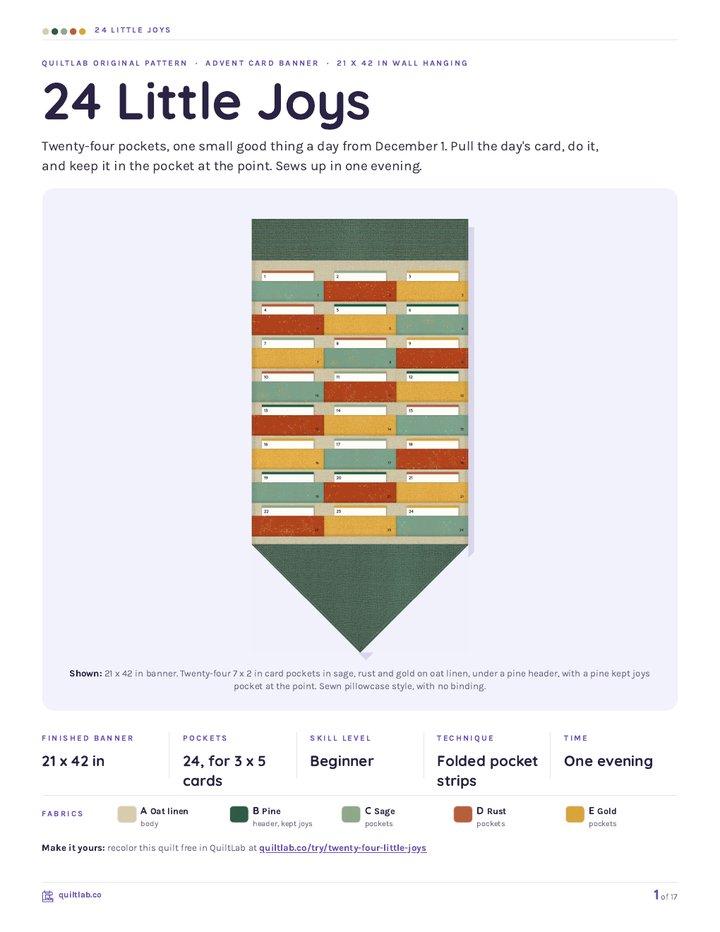
24 Little Joys
Quilt patternBeginner · 21 x 42 in wall hanging
Plan your next quilt
Lay out blocks and try colors in QuiltLab's grid editor before you cut.
Free forever, no card needed.
Get quilting tips by email
QuiltLab updates, tips and quilting inspiration. Unsubscribe anytime.
Related posts

When Is an Improv Quilt Finished?
Stop changing a composition when it answers your current design question. A before-and-after study helps separate necessary fixes from new ideas.

Build an Abstract Quilt Design from Three Shapes
Turn a sketch you own into a clear patchwork plan. Three colored rectangles show how to preserve a composition while extending a few straight seams.

Start a Damaged Quilt Assessment Before Repair
Record what you see, what you were told and what remains unknown before changing a damaged quilt. A simple condition map organizes the questions.