Carry Improv Quilt Accents Across a Section Join
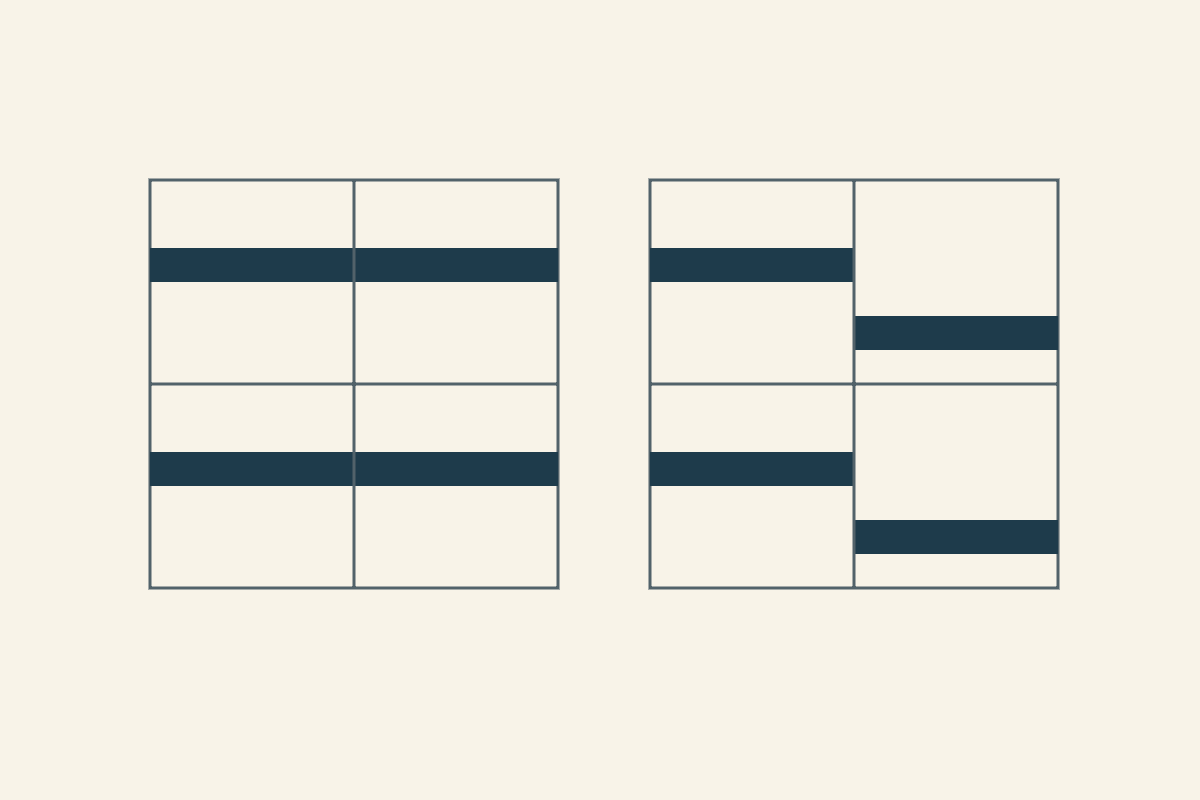
To carry improv quilt accents across a section join, compare the exact intervals where the accent reaches each edge. Match both ends of the interval when you want the line to continue; offset them deliberately when you want it to stop. Equal section sizes alone won't tell you which will happen.
Start with one join and one fabric role. Keep the accent count, size and background fixed while you compare matching and shifted positions. That lets you study the junction without changing everything around it.
Decide what the accent should do at the join
An accent can continue across a seam, pause before it or meet a different shape. Choose which relationship serves this part of your quilt before treating every mismatch as a problem.
Cindy Grisdela's account of her Blue Totem design describes how lime insets relate to her focal block and surrounding space. Her particular choices show why an accent deserves a job within its composition.
Our exercise asks a narrower question: does a bar continue across a section edge? You can check that location precisely while still deciding for yourself whether the continuous or interrupted version is more interesting.
Write one sentence about the join you intend. For example: "The upper pair of bars should meet, while the lower pair may stop." That is more useful than asking whether every accent is in the right place.
Hold the four sections and bar sizes steady
Use four six-inch-square sections, arranged two across and two down. The finished field measures 12 by 12 inches. Give each section one navy bar that is six inches long and one inch high.
Every bar covers six square inches. Four bars cover 24 square inches, leaving 120 square inches of cream in the 144-square-inch field. Navy occupies one sixth of the drawn area in both versions.
We drew these finished-space comparisons and haven't sewn them. The bar dimensions locate color in a composition; they are not raw strip sizes or a complete construction pattern.
Use the same palette and outside dimensions for both studies. If you also make the right-hand bars wider or change the background, it becomes harder to tell which difference changed your response.
Mark the matching intervals
Measure from the upper-left corner of the whole twelve-inch field. The main vertical section join is at six inches across. The horizontal section join is at six inches down.
For version A, place the upper bars between two and three inches down. Place the lower bars between eight and nine inches down. Each left-hand bar ends at the center join, where its right-hand neighbor begins.
| Bar | Across | Down |
|---|---|---|
| Upper left | 0-6 inches | 2-3 inches |
| Upper right | 6-12 inches | 2-3 inches |
| Lower left | 0-6 inches | 8-9 inches |
| Lower right | 6-12 inches | 8-9 inches |
At the center join, the upper edges meet at two inches and the lower edges at three. The lower pair likewise shares eight and nine. Version A therefore has two matching accent intervals across that join.
Keep a two-line junction note with the drawing: "upper pair: 2 to 3 inches" and "lower pair: 8 to 9 inches." Each pair must be measured from the same top reference. Measuring one section from its bottom edge would describe a different location.
Shift the right-hand bars without adding color
For version B, leave both left-hand bars in place. Move the upper right bar to four through five inches down, and the lower right bar to ten through eleven inches down.
The moved bars stay inside their six-inch-square sections. Their lengths and heights remain the same. The colored area is still 24 square inches, and the cream area is still 120.
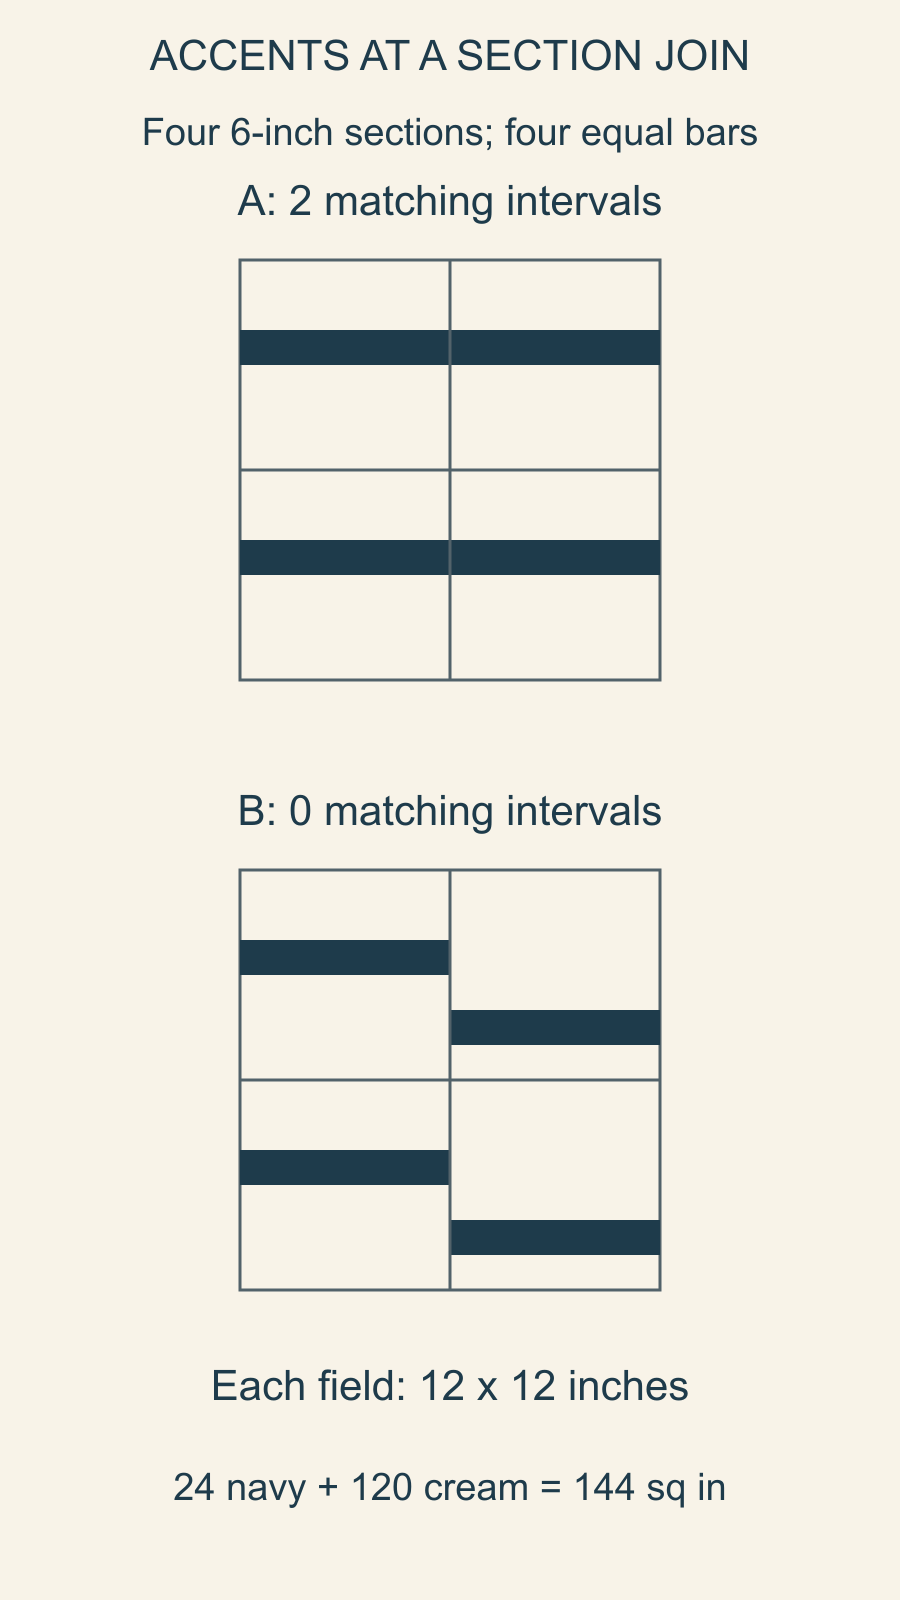
The upper left interval of two through three no longer meets the upper right interval of four through five. The lower intervals are also separate. Version B has zero matching intervals at the center join.
| Pair at the center join | Left interval | Right interval in B | Result |
|---|---|---|---|
| Upper | 2-3 inches down | 4-5 inches down | No match |
| Lower | 8-9 inches down | 10-11 inches down | No match |
Both right-hand bars move down two inches. Keep that offset beside the same junction note, so you can compare A and B without recounting or redrawing the whole field.
Neither version adds an accent or changes its total area. The difference is where a line continues or stops, rather than how often a shape appears or how much color the quilt contains.
Read the gap before calling it an error
Step back from both drawings and describe the relationships you notice. Does the interruption support the pause you wanted? Does a continuous pair make two sections feel more connected to you?
The Canadian Quilters' Association's design-elements guide discusses line, rhythm and repetition. Those terms help describe the choice; they don't prove how every viewer's eye will travel through a quilt.
Our negative-space article looks more broadly at open areas around piecing. Here, the cream space stays fixed in total while the bar positions change at a specific boundary.
Choose which intervals you want to match and which may stay separate. A deliberate interruption can be a completed decision instead of something to correct at the machine.
Transfer the decision to the actual sections
Before joining cloth, identify the intended finished seamline on each section. Compare the accents at that line, keeping the top and left orientation clear. Raw edges and visible seamline positions answer different questions.
Check both ends of a bar's interval. Matching only its center can hide a thickness difference, while matching only one edge can leave the other edge stepped. Mark the intended top and the seamline, then pair upper edge with upper edge and lower with lower before sewing.
After pressing, compare the actual join with the note: continue, interrupt or revise. If a bar has moved because you changed the section's outside size, update its interval before extending that line into another section.
Sherri Lynn Wood's public Mod Mood section-joining lesson describes adding to or subtracting from sections so they can fit together. If you change a section's size while solving that fit, recheck the accent location too.
Keep the chosen join orientation marked until the seam is sewn and pressed. Inspect the actual result before extending the same relationship through more sections.
Make one junction decision now
Choose a single section edge in your current layout. Mark the accent intervals, compare a continuous and interrupted arrangement, and write which one you intend to keep.
Our improv-constraints exercise can help you narrow the shape and color jobs if the comparison grows too complicated. Keep the count and area steady for this pass, then take the chosen junction into a measured construction sample.
Free patterns to try
Printable PDF patterns with cutting charts and diagrams, free to download.
Plan your next quilt
Lay out blocks and try colors in QuiltLab's grid editor before you cut.
Free forever, no card needed.
Explore freeform quilt designGet quilting tips by email
QuiltLab updates, tips and quilting inspiration. Unsubscribe anytime.
Related posts

When Is an Improv Quilt Finished?
Stop changing a composition when it answers your current design question. A before-and-after study helps separate necessary fixes from new ideas.

Build an Abstract Quilt Design from Three Shapes
Turn a sketch you own into a clear patchwork plan. Three colored rectangles show how to preserve a composition while extending a few straight seams.

Start a Damaged Quilt Assessment Before Repair
Record what you see, what you were told and what remains unknown before changing a damaged quilt. A simple condition map organizes the questions.