How to Review a Collaborative Quilt Design
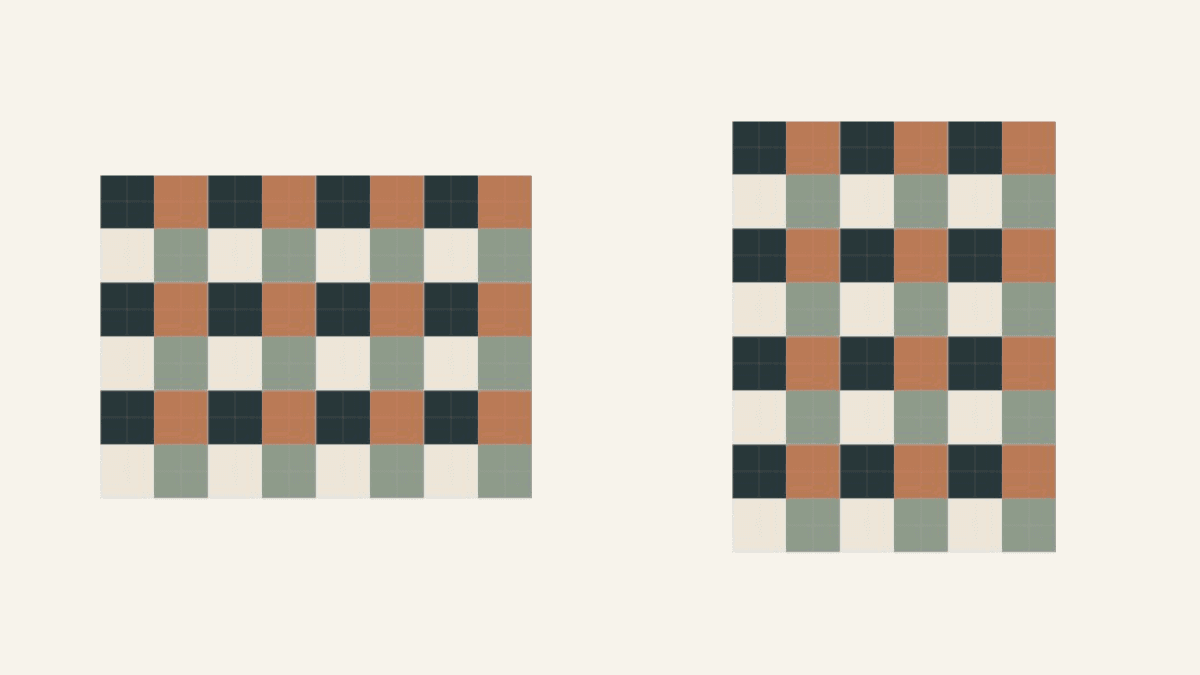
Review one proposed change against the group's agreed size, block count and design before replacing a shared quilt layout. Choose someone to make the edit, compare complete before-and-after views, and record the group's decision. Then check the shared result. A private save alone doesn't tell the other makers which arrangement to follow.
Keep the first review small. “Should these twelve blocks make a wider or taller quilt?” is easier to answer than “Does everyone like the latest version?” Label the review pictures in your notes as the shared baseline and the proposal, with their dates and dimensions.
Name the decision before changing the layout
Write down what the group is trying to preserve and what it may change. That might be the finished footprint, a fixed block count, a donated fabric or the direction of a motif.
The Quilt Museum's group-quilt planning guide starts with the group's purpose, contributions and plan. Those answers give reviewers something firmer than personal preference to check. Our one-page quilt design brief can hold the starting decisions.
A real collaboration can leave room for several makers while keeping clear constraints. In Four Greater Than One, Yvonne describes the Blue Moon Quilters agreeing on Storm at Sea, four block sizes and a four-color palette. Different members then handled parts of the making. A shared direction didn't require everyone to do the same job.
For your review, name the proposed change in one sentence. Add the choices it must leave intact. If the group hasn't chosen a format yet, begin with our group quilt ideas; this review starts once you have one design to discuss.
Compare the footprint as well as the block count
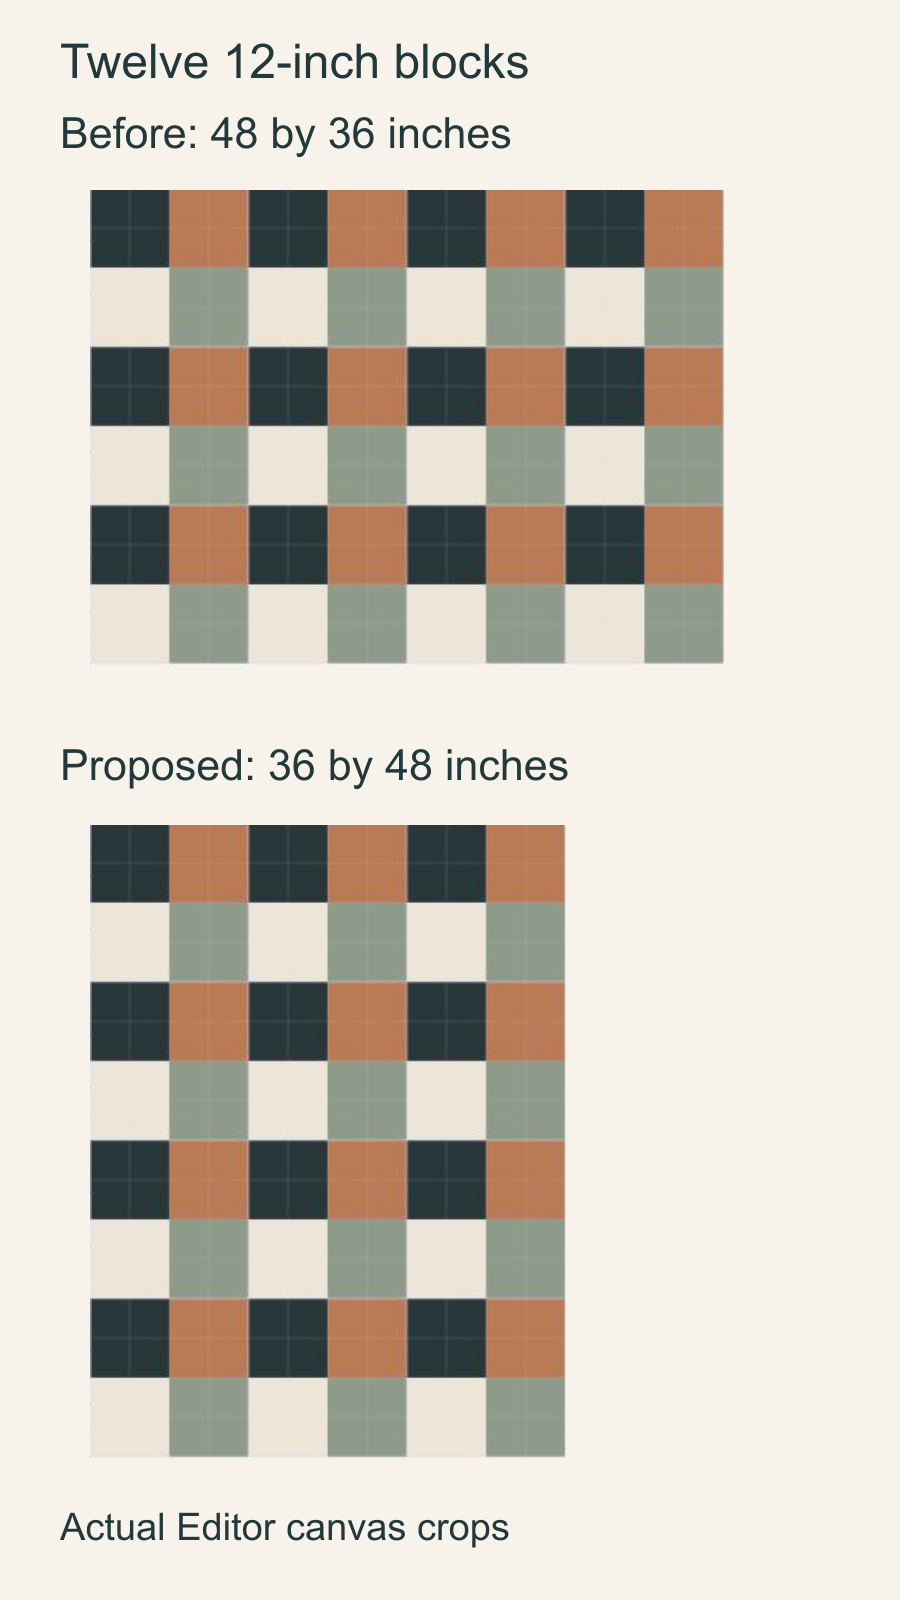
Our October 24, 2026 development check used three ordinary test accounts and an owned digital quilt. Its twelve identical four-patch blocks each occupied a 12-inch square. The shared baseline had four columns and three rows; the proposal had three columns and four rows.
| Check | Shared baseline | Proposal |
|---|---|---|
| Columns by rows | 4 by 3 | 3 by 4 |
| Block placements | 12 | 12 |
| Field width by height | 48 by 36 inches | 36 by 48 inches |
| Field area | 1,728 square inches | 1,728 square inches |
The arithmetic is simple: four blocks across at 12 inches make 48 inches; three make 36 inches. Swapping the row and column counts changes the proportions while keeping the area and block count.
That doesn't settle which version suits the quilt's job. A group needing a 48-inch-wide piece cannot accept the taller proposal just because all twelve blocks still fit. These are digital finished-space dimensions, without a cutting list or a sewn sample.
Count occupied cells after the grid changes
A grid with room for twelve blocks can still contain fewer than twelve placements. Inspect the whole layout after changing its row and column counts.
In our check, changing four columns to three removed three blocks outside the new grid. We placed three copies of the same project block in the empty bottom row. Nine original placements remained and three were newly placed copies. The final layout had twelve occupied positions; it wasn't an automatic rearrangement of all twelve original placements.
For a quilt with different blocks, count each expected design as well as the total. Look for an empty cell, a duplicated motif, a missing contribution or a directional block facing the wrong way. A total of twelve won't reveal that one maker's block appears twice while another is missing.
Review the outer edges too. A new arrangement may put a strong color or directional print against a different neighbor. Make those choices visible before someone starts joining rows.
Keep a short record of this decision
Use a few lines in the group's agreed notes or message thread. You don't need a second project handbook for every layout change.
For the twelve-block example, the review record could be:
- Baseline: four columns, three rows, 48 by 36 inches.
- Proposal: three columns, four rows, 36 by 48 inches.
- Keep fixed: the four-patch block design, 12-inch block size and twelve placements.
- Check before agreeing: whether the taller footprint suits the intended place, and whether every position is filled.
- Decision: keep the baseline, accept the proposal or revise a named detail.
- Next action: the designated editor updates the shared quilt only after the group settles that decision.
Karen Womack's Group Quilt Projects handout invites participants to adjust the original plan and emphasizes communicating changes to color, block size and theme. Give people a specific proposal to respond to, then keep the accepted decision easy to find.
For this example, accept the taller proposal only if the group chooses the 36-inch width, every expected block is accounted for, and the editor reopens that same shared result. A missing contribution or a 48-inch minimum width sends the proposal back for revision. Until the group settles the change, keep the last accepted layout as the making reference.
Separate a private save from the shared update
QuiltLab's Saving, Recovery and Projects guide explains the distinction for project Quilts: autosave keeps an editor's changes in a private draft. Saved privately doesn't mean the group can see that proposal.
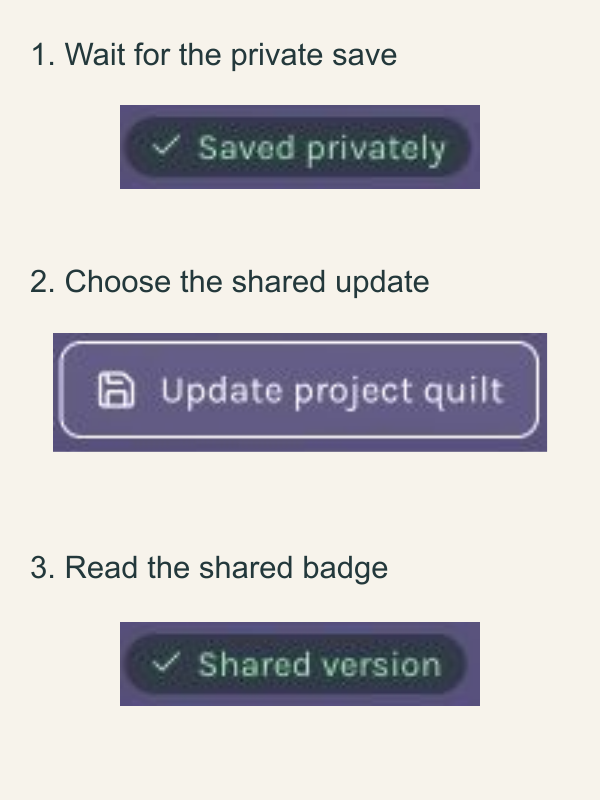
In our development check, the Editor account saved and reopened the 36-by-48-inch proposal. The badge read Saved privately. Separate shared-data checks under the Owner, Editor and Viewer roles still returned the 48-by-36-inch baseline.
That is a useful pause for a human review. Compare the proposal against the agreed size and count before choosing the control that changes the shared quilt. QuiltLab isn't collecting votes or approving the design for the group; use the review process your makers chose.
This private-draft step applies to the project Quilt used here. Project Canvases and Patterns save directly to their shared documents, as the guide explains.
Check the view your reviewers actually have
Give editing access to people changing the design, and agree who will review the proposal. An app role and a human design responsibility are different things.
Our Viewer check had a precise limit. The project card showed a placeholder before the update and the new three-by-four thumbnail afterward, but opening the full Quilt Editor as Viewer returned a 404 page. The separate role-based data checks confirmed the shared layout; they didn't demonstrate a full Viewer editor preview.
If a reviewer's available view is too small, share a dated export with the intended dimensions stated beside it. Use a view that lets the person inspect the actual question. A thumbnail may show the proportions, while checking a particular contribution or directional print needs a closer look.
Update deliberately and verify the shared result
Once the group agrees, the editor chooses Update project quilt. In our session that action updated the shared quilt and changed the badge to Shared version. No separate confirmation dialog appeared, so finish the human review before choosing the button.
We checked the result afterward. Separate data checks under all three roles showed 36 by 48 inches and twelve occupied positions. The Editor's active private draft had cleared, and the Viewer's project-card thumbnail showed the taller arrangement. The Quilt Editor guide covers the editor's saving and reopening controls.
For your group, close the review with the agreed layout, its dimensions and the result you actually reopened. If something differs, name that detail and pause the handoff. Start the next sewing step from one clearly identified shared design, rather than several pictures that all look nearly right.
Free patterns to try
Printable PDF patterns with cutting charts and diagrams, free to download.
Plan your next quilt
Lay out blocks and try colors in QuiltLab's grid editor before you cut.
Free forever, no card needed.
Explore shared quilt planningGet quilting tips by email
QuiltLab updates, tips and quilting inspiration. Unsubscribe anytime.
Related posts
Move a Quilt Layout to Pattern Builder
Carry a saved quilt layout into Pattern Builder with checked dimensions, a block inventory and a row map. See what the exported PDF still needs.
Check an EQ8 Quilt Import Into QuiltLab
Check blocks, fabric choices, finished size and downloads after importing an EQ8 project into QuiltLab. A small project shows what to inspect.
Make Your Quilt Pattern PDF Fit Letter and A4
Check both paper formats, margins and every exported page. A real two-page example shows why changing page size differs from shrinking the print.