Choose One Piecing Skill for Mini Quilt Practice
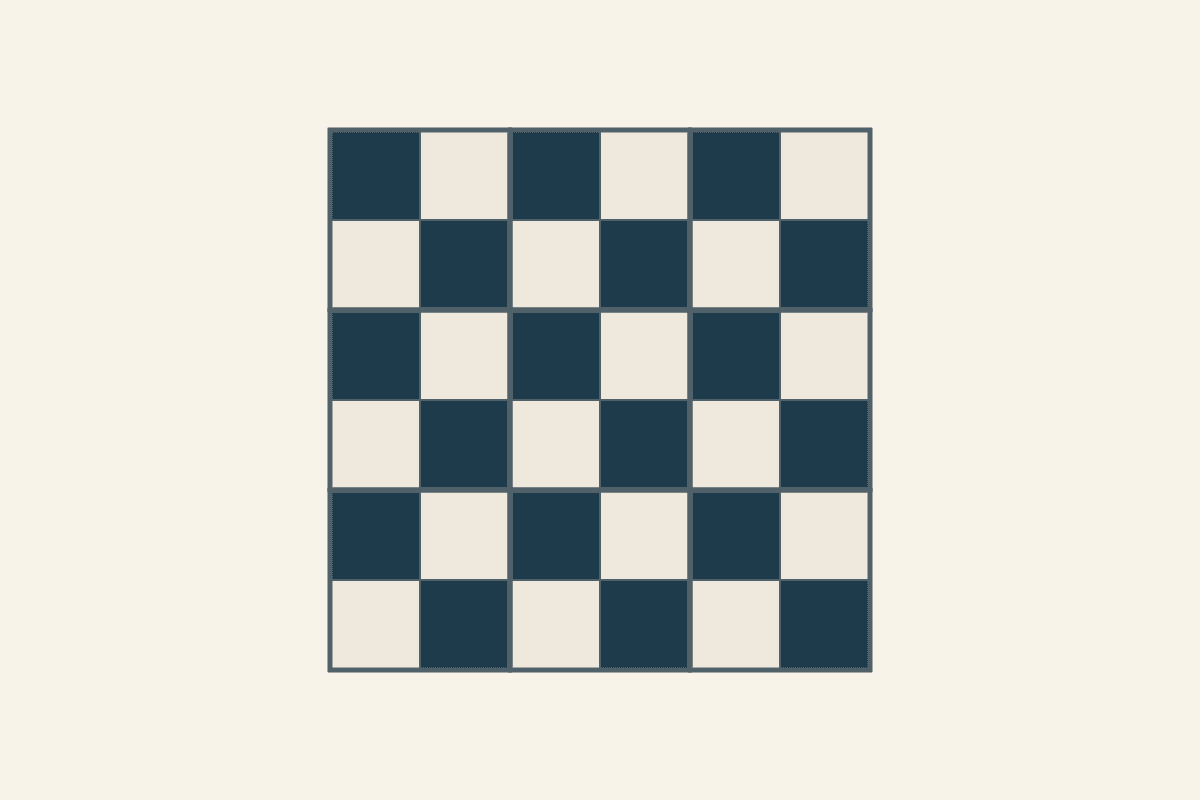
For mini quilt practice, choose one piecing skill and repeat it in a simple layout. Try matching four-patch intersections in an 18-inch mini made from nine six-inch finished blocks. The squares are large enough to handle, and each block gives you another center join to inspect.
Keep the new technique in the foreground. A first practice mini doesn't also need curved seams, tiny borders and unfamiliar quilting if those choices distract from the intersection you wanted to understand.
Decide what you want to learn
Write an observable goal, such as "Join four-patch rows while keeping the center intersection aligned." You can inspect that after each block. "Become better at quilting" is too broad to tell you what to check next.
Daisi Toegel's mini-quilt lesson for OLFA uses a small project to explore basic skills. You can borrow that idea of a manageable practice area while choosing a different layout and one specific learning question.
Name the check before you choose the fabrics. For our study, inspect both the center intersection and the pressed block's raw measurement. Keep a ruler and a short record beside the machine so you can compare those two checks from block to block.
Keep the first layout straightforward
Our proposed study uses nine four-patch blocks, set three across and three down. Each block finishes at six inches, giving an 18-by-18-inch finished-space field without borders.
We drew this practice brief and haven't sewn it. Its measurements assume quarter-inch seam allowances; confirm the pressed result with one sample before cutting the whole project.
Choose two fabrics whose edges are easy to see. A quiet light and dark keep the center join visible without the extra task of matching a directional motif or managing several materials.
Keep those fabrics consistent for the first few blocks. If every block changes fabric type, thread and pressing method, differences in the result become harder to interpret.
Check the square and block arithmetic
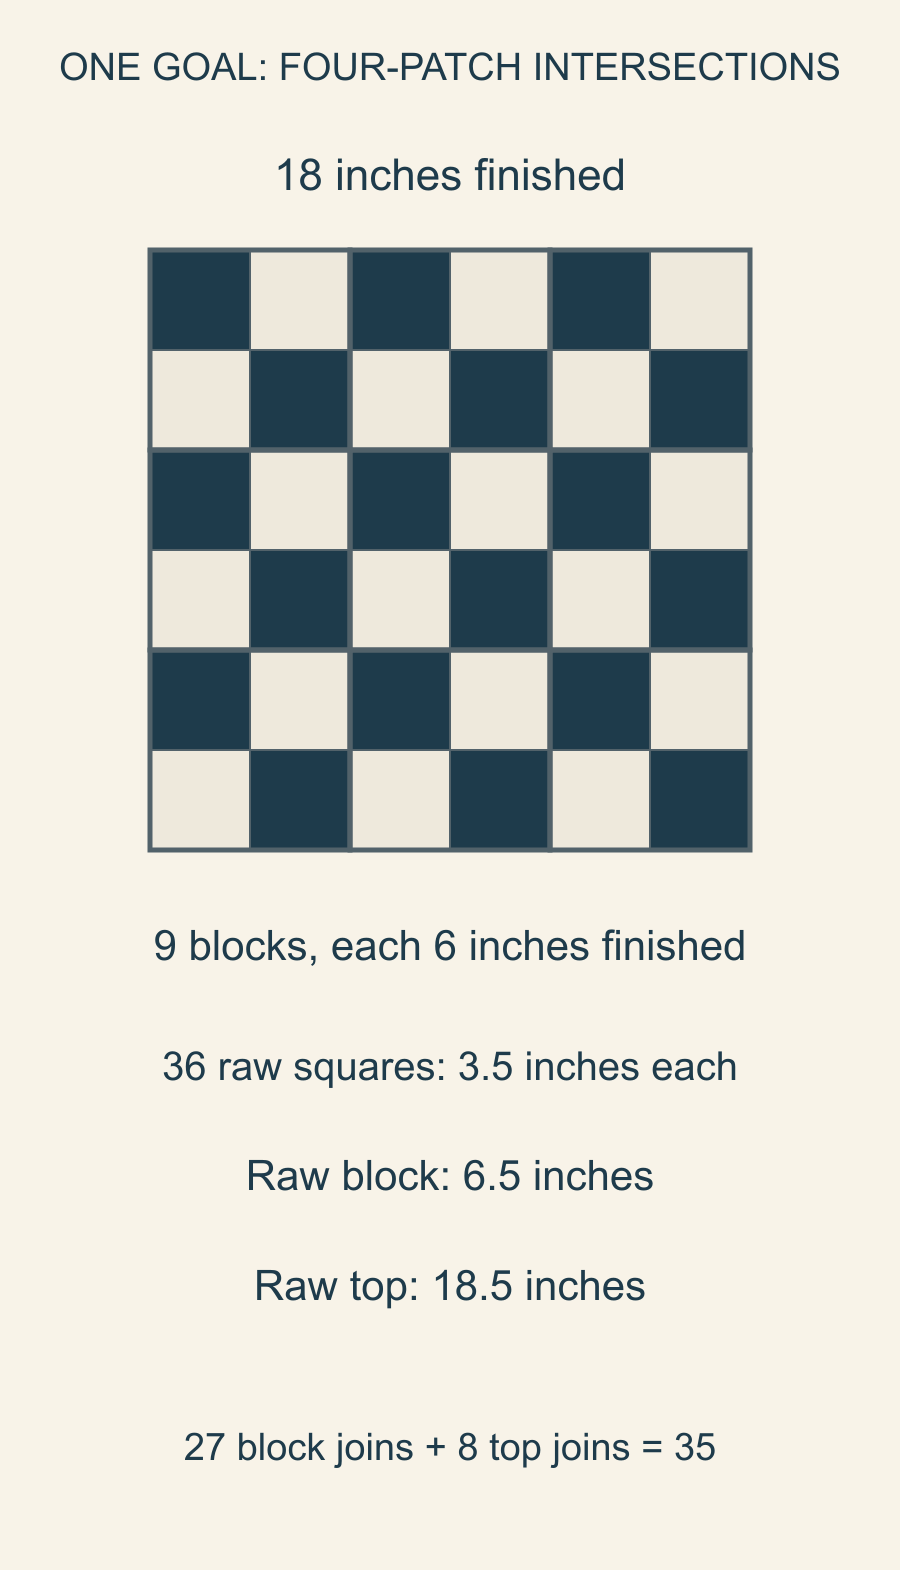
Each four-patch contains two rows of two equal squares. For a three-inch finished patch with quarter-inch outside seams, the nominal raw square is 3.5 inches.
Two 3.5-inch squares total seven inches. Their joining seam consumes half an inch across the pair, leaving a row 6.5 inches wide. Joining two such rows leaves a four-patch 6.5 inches raw, or six inches after its outside allowances are consumed.
Julie Baird's block-design guide explains this straight-edged finished-to-cut relationship. It doesn't extend automatically to oversized triangle methods or curved templates.
The nine-block plan therefore calls for 36 raw squares: nine blocks times four squares per block. In the drawn two-role arrangement, each block has two dark and two light patches, for 18 of each.
Give the first block three checkpoints
Check the cut squares, the two pressed rows and the joined block. Keep these nominal measurements beside the sample:
| Checkpoint | Expected raw measurement | Look at this too |
|---|---|---|
| Each cut square | 3.5 by 3.5 inches | All four sides and corners |
| Each pressed two-square row | 6.5 by 3.5 inches | The join and both outer edges |
| Joined four-patch | 6.5 by 6.5 inches | Whether the center seam lines meet |
If a row is already too narrow, the later center join cannot restore the lost width. Check it before joining the rows, while the source of the difference is easier to find.
Christine Mann's quarter-inch seam lesson at New Quilters encourages checking a sample rather than trusting a marking alone. Our scant-quarter-inch test gives a focused way to check the seam before beginning the block study.
For this practice goal, record what you can see at the center as well as the raw measurement. A block can reach the expected size while its intersection shifts, or show a neat intersection while measuring smaller than planned.
To practice nesting, press each square-pair seam toward the dark square. With the rows arranged as a checkerboard, those allowances face opposite ways at the center. Match the seam lines when bringing the rows together. Our pressing comparison explains that choice; keep your chosen pressing method consistent while comparing blocks.
Avoid turning every observation into a diagnosis. "Center shifted slightly left" is an observation. "The pressing caused it" is an explanation to investigate with the next controlled attempt.
Repeat a useful comparison
Keep the first block and its notes. Before the second, choose one change related to the goal: a different way to hold the rows together, a more careful alignment check or a corrected seam position.
Use the same short entry for each attempt: block number; pressed row sizes; pressed block size; center-join observation; one change for next time. Fill in the measurements after sewing. If you change how you hold the center, keep the fabric, seam setting and pressing method steady for that comparison.
Write the change down before sewing, then compare the actual result with the first block.
When a block reaches both checks, make the next one without another change. A second consistent block gives you a reason to keep that approach as you finish the set.
If the first block meets the checks and belongs in the mini, it counts toward the nine: eight blocks and 32 squares remain, with 16 squares of each fabric role. Keep an unsuitable block as a learning sample and make a replacement for the top. Don't stretch neighboring blocks to absorb a size difference.
Check the three-by-three top
Three raw 6.5-inch blocks total 19.5 inches. Two joining seams consume one inch altogether, leaving an 18.5-inch raw row. Joining three rows follows the same calculation for an 18.5-by-18.5-inch raw top.
For a simple work count, each four-patch has three joining seams: two square-pair joins and one row join. Nine blocks have 27 such joins. The top adds six within-row block joins and two row joins, for eight more, or 35 fabric joins altogether.
That count isn't a time estimate or a count of machine starts. Chain piecing may combine several joins into one continuous sewing pass. The value of the count is seeing where the practice happens and where larger assembly begins.
Our block-size planning guide helps if you want a different finished footprint. Change the unit sizes deliberately and repeat the raw/finished calculations before cutting.
Finish the learning record with the mini
Keep the quilting and edge finish manageable enough that the piecing lesson remains clear. Follow the actual materials and chosen finishing method, including any sample checks they need.
At the end, photograph one early and one later intersection if you have useful comparisons. Record what changed, what the measurements showed and which habit you want to repeat. If the result stayed inconsistent, name the next question rather than claiming the mini proved mastery.
Choose the skill now and write its first checkpoint. Make one sample block, measure it, and decide what the second block should test. Let that real result shape the rest of the practice mini.
Plan your next quilt
Lay out blocks and try colors in QuiltLab's grid editor before you cut.
Free forever, no card needed.
Get quilting tips by email
QuiltLab updates, tips and quilting inspiration. Unsubscribe anytime.
Related posts
Group Memory Quilt Instructions Contributors Can Use
Tell contributors what to send, what may be shared and how their materials will be returned. A sixteen-entry map keeps each memory tied to its maker.
Documenting a Group Quilt from Contributions to Credits
Connect contribution IDs, makers, design decisions and care notes in one record. A sixteen-unit example keeps credits separate from the head count.
Build a Quilt Along Schedule from the Unit Count
Count the work in each release and leave time after the last block. A twenty-four-block example separates six block weeks from assembly and finish.