Choose Quilting Needle and Thread for Your Materials
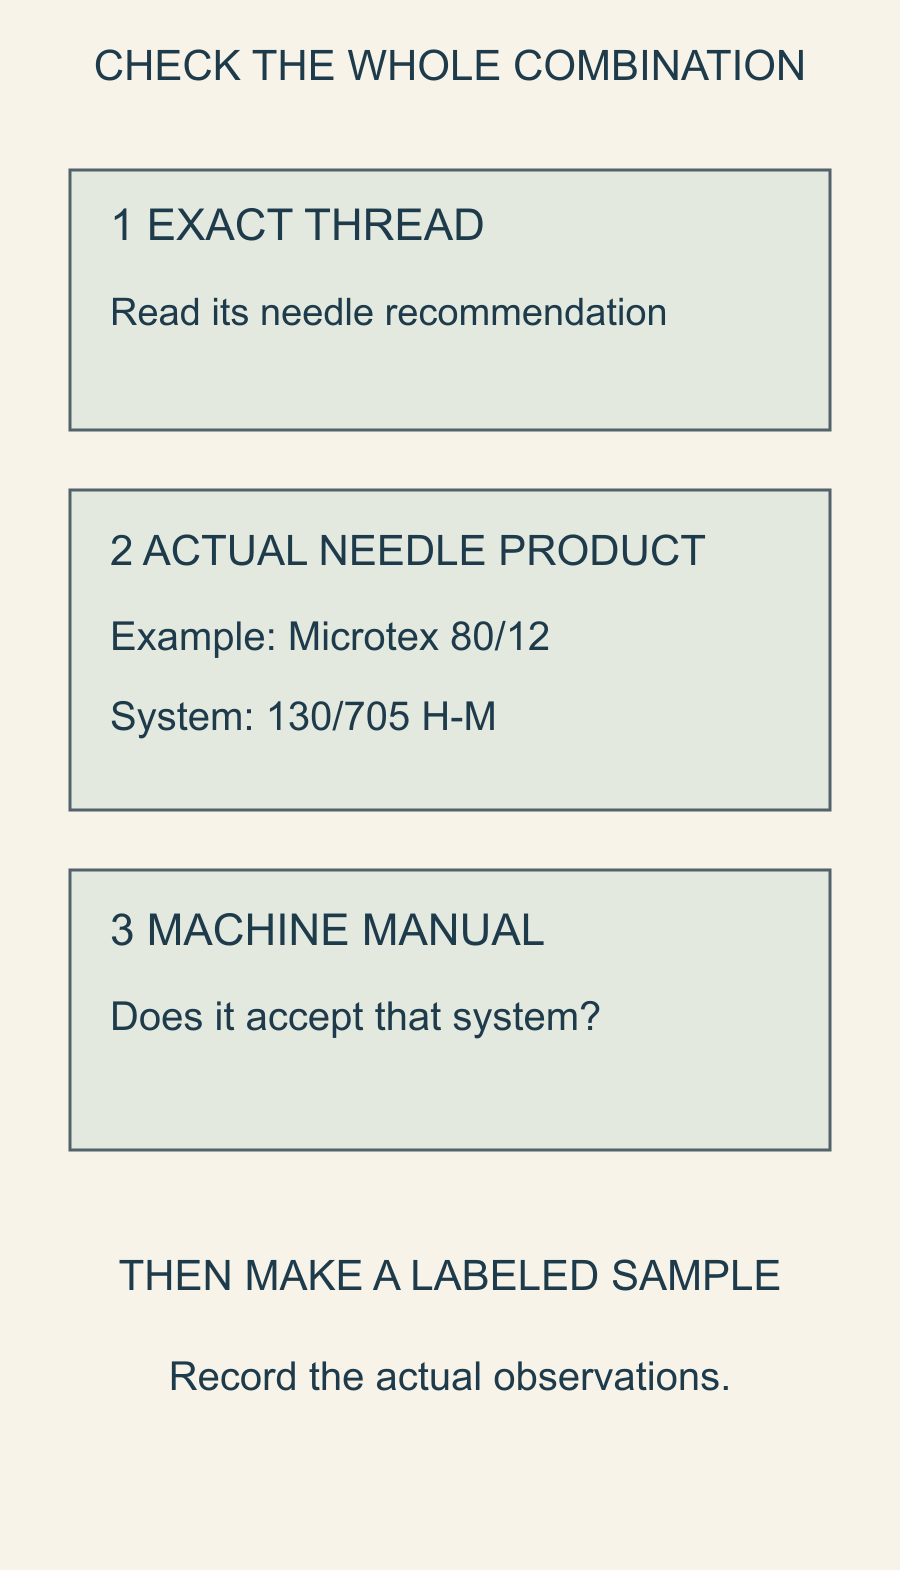
Choose quilting needle and thread together: check the thread maker's recommendation, the actual needle product and the needle system your machine accepts. Then try that candidate on the intended fabric layers. A needle's size number alone doesn't tell you whether its point, eye and system suit the job.
For a sound woven-cotton project, begin with the exact thread you plan to use and narrow the needle choices from there. Keep the machine manual beside the packages so a useful recommendation doesn't become a guess about compatibility.
Write down the whole combination
Record the top fabric, backing, batting if used, thread product and sewing task. Piecing two layers and quilting a sandwich are different jobs even when the top fabric is the same.
Then copy the needle description from its package: maker, type, size and system. "An 80 needle" leaves out information you need when repeating a setup.
SCHMETZ's needle-selection guidance connects needle type and size with the material and thread. Its FAQ also distinguishes needle systems. Check the manual for the machine in front of you rather than assuming a domestic or longarm label settles the question.
If you don't yet know the machine's accepted system, leave that field open. The combination is still a candidate, not something ready to install.
Read the thread maker's actual recommendation
Use the current page for the exact product, not a general statement about all cotton thread. For example, Aurifil Cotton 50wt is a two-ply cotton thread whose domestic recommendations include 80/12 Microtex/Sharp and several other needle categories.
That gives you a shortlist to investigate. It doesn't establish that every needle maker sells every named category in that size. The quilting thread guide puts several makers' needle advice for their threads side by side.
The number 50 also belongs to that thread's specifications. Don't use it to calculate the diameter of another brand's thread or assume that two unrelated numbering systems can be compared as a simple ratio.
Keep the top and bobbin recommendations together. If the thread maker lists a particular bobbin pairing, record it before the sample so a later change is visible.
Check that the needle product actually exists
Here is a useful distinction in the current maker pages. SCHMETZ's Quilting Needle is system 130/705 H-Q and lists 75/11 and 90/14 sizes. That page doesn't establish an 80/12 version of this particular needle.
Its Microtex Needle is a different product, system 130/705 H-M, and does list 80/12. The maker describes a slim acute point and uses that type for fine or densely woven materials, including a specific batik example.
So an 80/12 Microtex candidate can be checked against the actual product page. An imagined "80/12 SCHMETZ Quilting" cannot be created by combining words from two different recommendation lists.
You don't need to memorize every model. Keep the product page or package beside the thread recommendation and compare the full descriptions.
Work two candidate records
For a planning example, compare these current maker-supported possibilities:
| Thread product | Candidate needle | What still needs checking |
|---|---|---|
| Aurifil Cotton 50wt | SCHMETZ Microtex 80/12, 130/705 H-M | Machine system, actual cloth and sample |
| Aurifil Cotton 40wt | SCHMETZ Quilting 75/11, 130/705 H-Q | Machine system, actual cloth and sample |
The second row comes from Aurifil Cotton 40wt's recommendations, which separately name Quilting sizes. It isn't a direction to substitute that row blindly for the first.
Keep the bobbin choice with each row. Aurifil lists 50wt in the bobbin for its Cotton 50wt. For its Cotton 40wt with a domestic Quilting needle, it lists 40wt or 50wt in the bobbin. Record which of those you actually use. These are two possible setups to investigate, rather than a controlled test of needle size alone: both the upper thread and the needle differ.
The useful outcome is a complete record with a clear next check. If the machine manual doesn't accept the candidate system, stop that candidate there. If the system is appropriate, the actual materials and trial stitching decide whether to keep it.
This is a source-based decision example. We haven't stitched samples or supplied a tested winning combination for an unknown quilt.
Make the sample answer one question
Use offcuts of the intended materials and the actual number of layers. Keep the first trial simple enough to inspect clearly. Label its top and back and record the thread, needle and machine setup before sewing.
Give the first sample an ID, such as A, and keep this record beside it:
| Field | What to write before stitching |
|---|---|
| Task and layers | Piecing or quilting; exact top, batting if used, and backing |
| Top and bobbin threads | Separate product names, stated weights and color numbers |
| Needle | Maker, type, size and full system from the package |
| Machine | Model and manual page confirming that system |
| Starting setup | Foot, stitch and the relevant settings from your manual |
After stitching, add observations from both sides and the decision: keep this candidate, investigate one change, or stop and check the manual. Leave the result unwritten until you've made the sample.
Choose what you want to observe: stitch formation on both sides, thread damage, skipped stitches, visible holes or the way the fabric handles the seam. Write observations rather than a broad verdict such as "bad needle."
If the first line doesn't work, check threading and the needle's condition before making several changes. Give a replacement needle or a new thread its own sample row. Keeping the other conditions steady makes the difference easier to understand.
Our quilting-tension guide explains why a thread showing on one side needs careful identification. Its named machine settings stay with that model; the observation method can help you organize your own sample.
Separate a material question from a setup question
If the exact needle and thread combination is plausible but the stitches are poor, don't assume a heavier thread will solve it. The issue may involve threading, a damaged needle, feeding or another manual-specific setup detail.
Conversely, a well-threaded machine doesn't prove every point type suits every fabric. A candidate that damages the material needs a different decision, not a more flattering tension result.
Keep these questions separate in the log. "Upper path rethreaded" describes a setup change. "Needle changed from one type to another" describes a different material contact. Recording both under one unexplained adjustment loses useful information.
Stop and consult the manual or a qualified technician if the machine jams, makes an unusual noise or needs an adjustment beyond its user instructions.
Keep the successful record with the project
When a trial gives a result you want, save the actual sample and its settings. Include the product names and package details in your quilt materials record, so an empty spool or mixed needle case doesn't erase the information.
Repeat the check when a meaningful part of the combination changes. A new batting or backing can make a previous note less useful even though the spool stayed the same.
Start with the thread you intend to use. Find one current needle recommendation, confirm the real needle product and check the machine system. Fill those three fields before making a small labeled sample, then let the actual stitching supply the result.
Free patterns to try
Printable PDF patterns with cutting charts and diagrams, free to download.
Plan your next quilt
Lay out blocks and try colors in QuiltLab's grid editor before you cut.
Free forever, no card needed.
Get quilting tips by email
QuiltLab updates, tips and quilting inspiration. Unsubscribe anytime.
Related posts

When Is an Improv Quilt Finished?
Stop changing a composition when it answers your current design question. A before-and-after study helps separate necessary fixes from new ideas.

Build an Abstract Quilt Design from Three Shapes
Turn a sketch you own into a clear patchwork plan. Three colored rectangles show how to preserve a composition while extending a few straight seams.

Start a Damaged Quilt Assessment Before Repair
Record what you see, what you were told and what remains unknown before changing a damaged quilt. A simple condition map organizes the questions.