Simplify Applique Shapes Without Losing the Subject
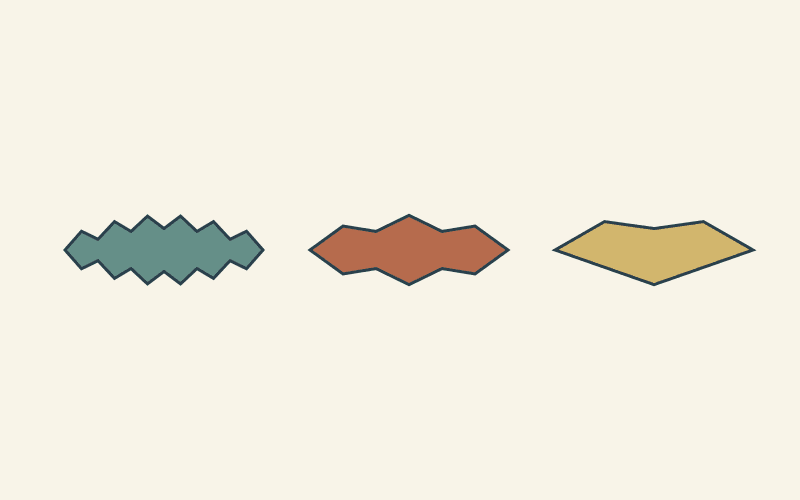
Keep the tip and broad outline that identify your subject, then smooth the small turns that add work without adding much meaning. For a first hand-applique design, start with broad shapes and gentle curves. Move fine veins, tiny centers or similar interior details into a separate stitching decision.
When simplifying applique shapes, compare paper silhouettes at the size you intend to use. A contour that looks generous on a screen can become crowded on a three-inch leaf. Then try the most demanding remaining section in fabric using your chosen edge method.
Name what makes the subject recognizable
Write two or three features beside the source image. A leaf might need a pointed tip, a long narrow body and an off-center bend. A flower may depend on its broad petal arrangement and dark center rather than every scallop along its edge.
Those features become your keep list. Everything else is a candidate for smoothing, merging or leaving out. Use a photograph you own or have permission to adapt, or begin with a drawing. Keep the source beside your alternatives so simplification doesn't become a series of guesses from memory.
In Sylvia Pippen's applique design lesson, she traces again over a first outline to soften tight curves and serrated edges. She then checks whether the drawing still conveys the plant. That is a useful question at every edit: what did this change remove, and does the subject still read?
Our photo-to-applique guide covers choosing and tracing broad regions from a photograph. This step comes afterward, when you can see which individual contours need another pass.
Separate the outside edge from interior detail
Fill the outline with a solid color on paper. Hide the veins, highlights, shading and printed fabric texture. Can you still identify the broad form?
If you can, the silhouette is doing useful work on its own. Restore only the interior details you want to carry into the textile. A vein could be an embroidery line rather than a narrow fabric strip. A tiny highlight could be omitted while the larger value relationship stays intact.
DMC's applique-layering lesson, featuring Georgie K. Emery's work, describes adding embroidery details after the fabric layers are attached. That supports keeping an interior-detail plan separate from the fabric outline. It doesn't mean every drawn line needs a stitch.
Mark those jobs differently on your master: a solid line for the fabric boundary and a different style for optional interior stitching. Put a key on the sheet. Otherwise, a later tracing can accidentally turn a decorative line into a cutting boundary.
Compare three versions at one scale
Our drawn leaf studies compare 12 small edge projections, six broader projections and three broad projections. Each drawing keeps a six-inch tip-to-base span. We drew these alternatives for this article and haven't sewn them; they aren't printing templates.
Before choosing an edge count, lay your actual-size paper alternatives side by side. Keep the tip, base and central direction visible while comparing the edges. The version with fewer projections gives each one more room, but it also changes the character. You may prefer six because it retains a more visibly serrated outline. You may keep twelve if that edge is the feature you want to emphasize.
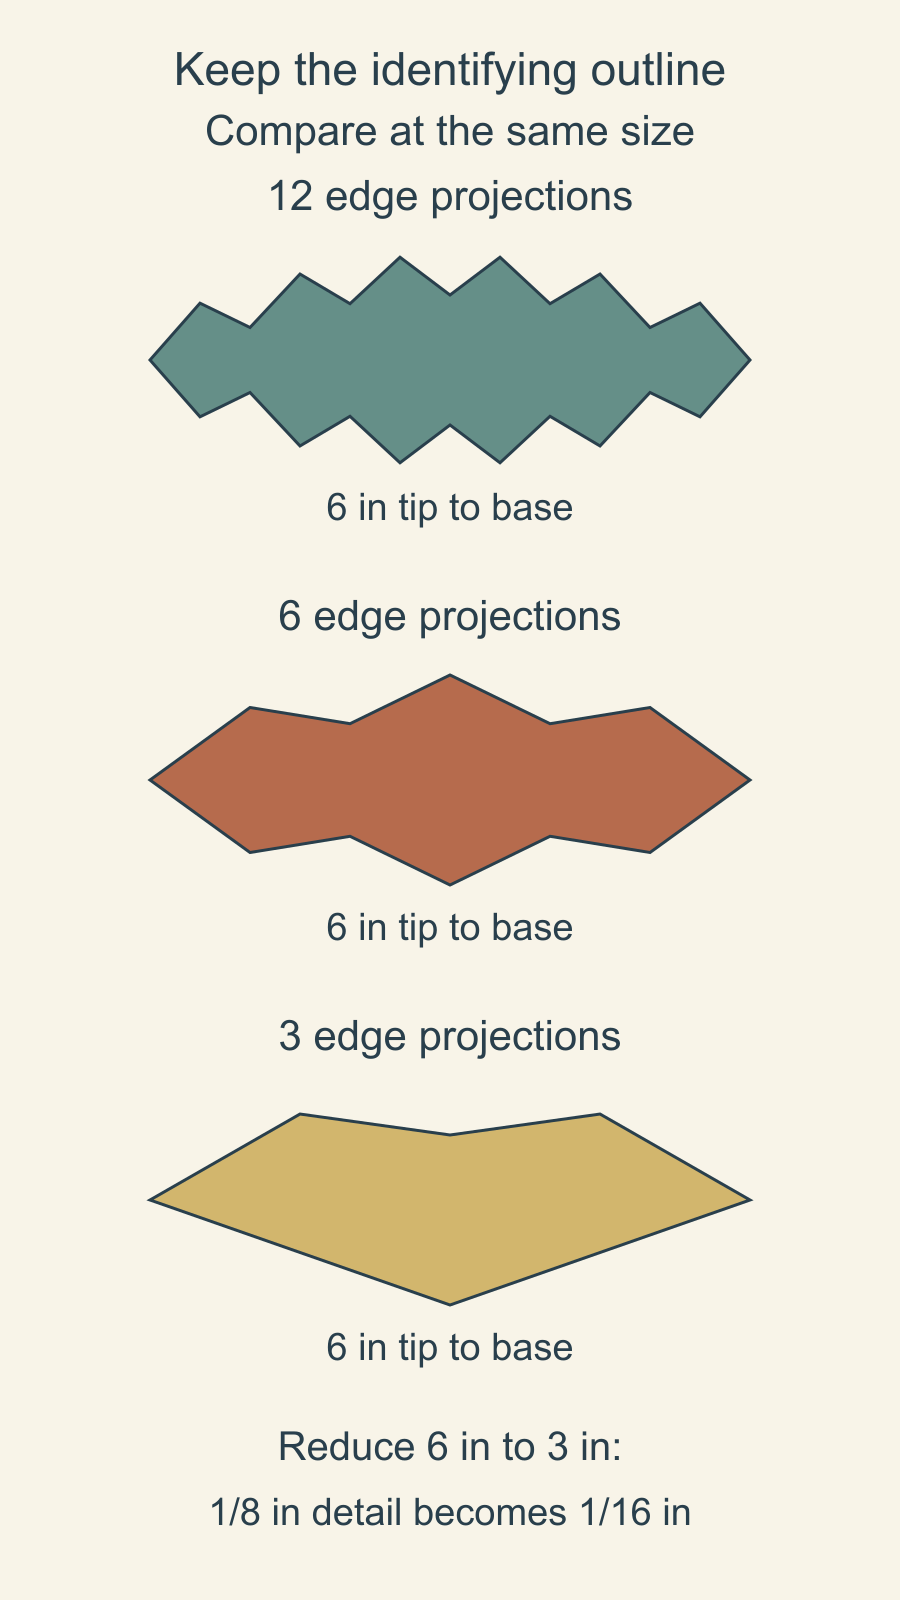
Don't choose by counting alone. Cover the alternatives' labels and look from the distance the quilt will usually be seen. Then inspect each contour closely for abrupt inward turns, thin connections or isolated tiny pieces. These are places to examine during the material trial, rather than proof that one version will fail.
Make edits on copies. That lets you restore a characteristic notch if the smoother version stops looking like the subject. It also prevents the most recent version from becoming the default merely because the earlier drawing is gone.
Recheck every detail after resizing
Reducing a six-inch drawing to three inches uses a scale factor of 3 / 6 = 0.5. Every distance becomes half as large. A drawn detail that spans 1/8 inch at six inches spans only 1/16 inch after the reduction.
| Drawn measurement | At the six-inch size | At the three-inch size |
|---|---|---|
| Tip-to-base length | 6 in | 3 in |
| A quarter-inch feature | 1/4 in | 1/8 in |
| An eighth-inch feature | 1/8 in | 1/16 in |
Those numbers describe scale. They don't set a universal minimum that every fabric, allowance and quilter can handle. The important step is noticing the smaller feature before cutting it many times.
Print or draw the intended size and measure it. If you are working from a supplied full-size sheet, our actual-size printing guide covers scale checks. A correct percentage in a print dialog still needs a ruler check on the page.
Let the edge method guide the final contour
Sarah Ashford's needle-turn lesson for The Quilter's Planner recommends beginning with a large shape, straight lines or gentle curves. More demanding points and inward curves can come later. That is a sensible starting choice if learning the edge treatment is already part of this project.
A turned edge needs room for its chosen allowance and for turning that allowance around the contour. A raw edge still needs controlled cutting and a suitable attachment plan. Our edge-method comparison introduces those differences; the final shape and allowance need to work together.
Choose one difficult feature from the version you prefer: perhaps the sharp tip and its neighboring notch. Prepare that section in the actual fabric using the intended method. Record what you changed. If you enlarge a notch or round a point, make the same correction on the master before tracing more copies.
Finish with one clear master
Keep the selected silhouette, its intended physical size and its optional stitching notes on one labeled master. Save the discarded alternatives separately. Your template sheet should show the chosen boundary clearly, without faint earlier lines that compete with it.
Before preparing the full set, check three things: the outline still conveys the subject, its smallest feature makes sense at the final size, and your material trial supports the edge method. Then use that checked master for the next piece. Fewer details are useful only when the remaining ones say what you wanted the picture to say.
Free patterns to try
Printable PDF patterns with cutting charts and diagrams, free to download.
Plan your next quilt
Lay out blocks and try colors in QuiltLab's grid editor before you cut.
Free forever, no card needed.
Get quilting tips by email
QuiltLab updates, tips and quilting inspiration. Unsubscribe anytime.
Related posts

When Is an Improv Quilt Finished?
Stop changing a composition when it answers your current design question. A before-and-after study helps separate necessary fixes from new ideas.

Build an Abstract Quilt Design from Three Shapes
Turn a sketch you own into a clear patchwork plan. Three colored rectangles show how to preserve a composition while extending a few straight seams.

Start a Damaged Quilt Assessment Before Repair
Record what you see, what you were told and what remains unknown before changing a damaged quilt. A simple condition map organizes the questions.