


Fussy Cutting Hexagons: Plan Repeats for a Rosette
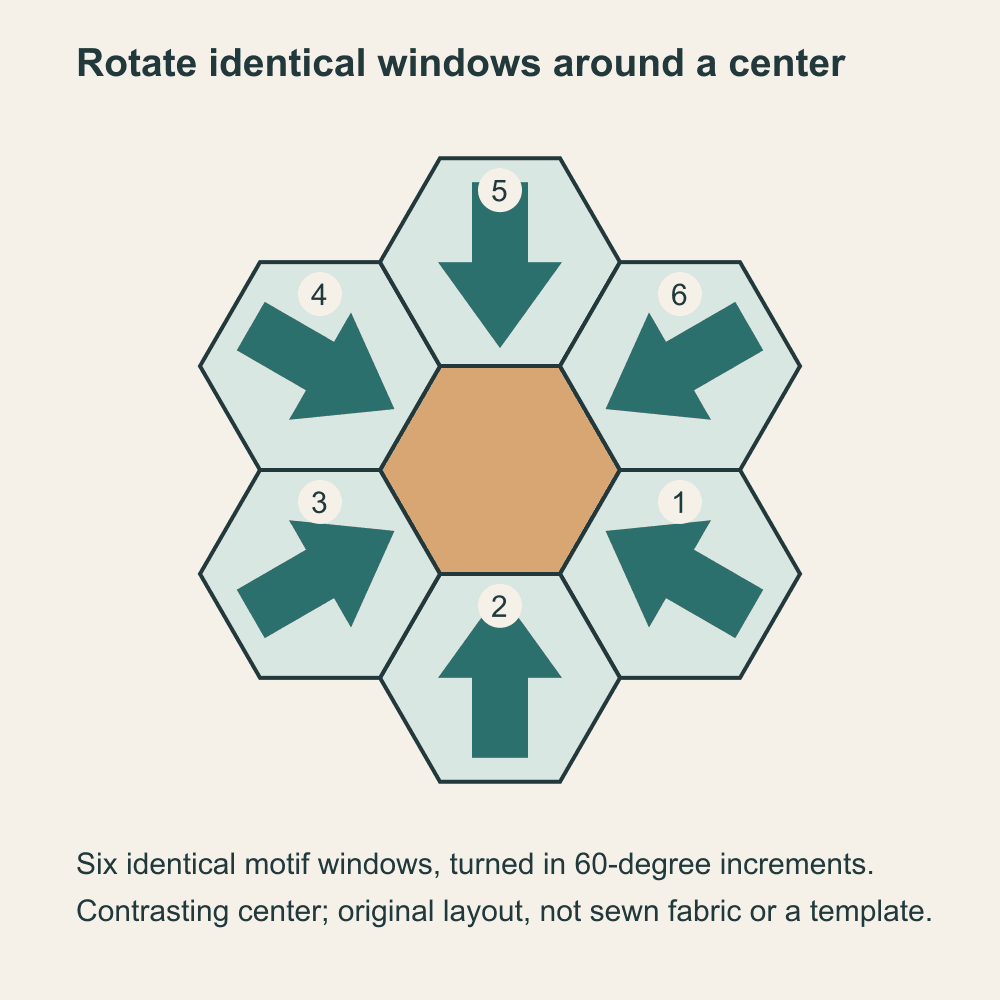
Fussy cutting hexagons becomes easier when you plan the whole ring before cutting its first piece. A simple flower-shaped rosette has one center hexagon and six surrounding hexagons. If the outer ring repeats the same framing of a print, you need six usable occurrences of that framing, plus a separate plan for the center.
The important words are "usable" and "framing." Six flowers printed somewhere on the fabric do not necessarily provide six matching hexagons. Each flower needs enough fabric around it for the complete cut shape, and each window must capture the same part of the print. This guide builds an original repeat map and orientation plan; it does not supply cutting templates or an EPP assembly pattern.
Decide what the six outer pieces should repeat
Choose one of three starting arrangements:
| Arrangement | Outer ring needs | Center choice |
|---|---|---|
| Repeated framed motif | Six identical windows | A contrasting fabric or another motif |
| Rotational design | Six identical windows, turned around the center | Usually a distinct focal or quiet piece |
| Six different images | Six deliberately different windows | A center that ties them together |
A repeated ring is a manageable first study because the job is measurable: reproduce one chosen window six times. The windows can show whole flowers, a stripe and leaf, or an off-center section that becomes interesting when rotated. You do not need six different fussy-cut placements to get six different positions in the ring.
Jinny Beyer's hexagon border-print lesson uses a marked template to reproduce a chosen placement five more times. Her examples also show that turning the same patches changes whether the selected striped area faces inward or outward. Use the principle with your own fabric; the diagrams below are original artwork, not copies of her fabric designs.
If you need the basic distinction between a finished window and its outer cut boundary, begin with our fussy-cutting overview. Here the additional task is coordinating six windows and their rotation.
Identify the finished window and cut boundary
For EPP, a hexagon's stated size usually refers to the length of one side, as Sew & Quilt explains for its paper pieces. A regular 1-inch-side hexagon is 2 inches across opposite points and approximately 1.73 inches across opposite flat sides. It is not a 1-inch-wide patch. Measure the actual paper shape and cutting template you intend to use.
The paper shape represents the visible hexagon after the fabric wraps around it. The cutting template includes the fabric needed outside that shape. Follow the chosen pattern or template maker's allowance; do not remove it to fit an attractive motif into a smaller scrap.
Mark two things on a transparent preview window: a reference line for orientation and two recognizable details in the printed motif. One detail might be the tip of a leaf; the other might be the edge of a colored band. Repeating both positions catches small shifts that centering a single flower cannot detect.
Sarah Griffiths's fussy-cutting lesson at Simply Quilting explains selecting a print through a template window and checking placements before basting the pieces. The same habit helps you keep the intended visible area separate from the surrounding allowance.
Map the fabric repeat before assigning cuts
Lay the fabric flat and find a recognizable detail that repeats in both directions. Measure from that detail to the same detail at the next occurrence. Check that the color and surrounding artwork also repeat: similar flowers may alternate with different leaves or backgrounds.
For an original, deliberately simple example, imagine a 15 x 10-inch usable rectangle with a motif repeating every 5 inches horizontally and vertically. The chosen motif centers lie at these positions, measured from the usable rectangle's left and top edges:
| Fabric row | Center positions across | Available windows |
|---|---|---|
| 2 1/2 inches down | 2 1/2, 7 1/2 and 12 1/2 inches | 3 |
| 7 1/2 inches down | 2 1/2, 7 1/2 and 12 1/2 inches | 3 |
| Total | Two rows of three | 6 |
Suppose the actual cutting template fits inside a 3 x 3-inch envelope, centered on each chosen window. Each envelope extends 1 1/2 inches from its center, so the leftmost starts at 1 inch and the rightmost ends at 14 inches. Vertically, the envelopes extend from 1 to 9 inches. They fit inside the stated usable rectangle and do not overlap.
This is a location check, not a new template dimension. Your own template may be larger or the chosen window may sit off-center relative to its motif. Lay the real cut outline over the fabric before counting that occurrence.
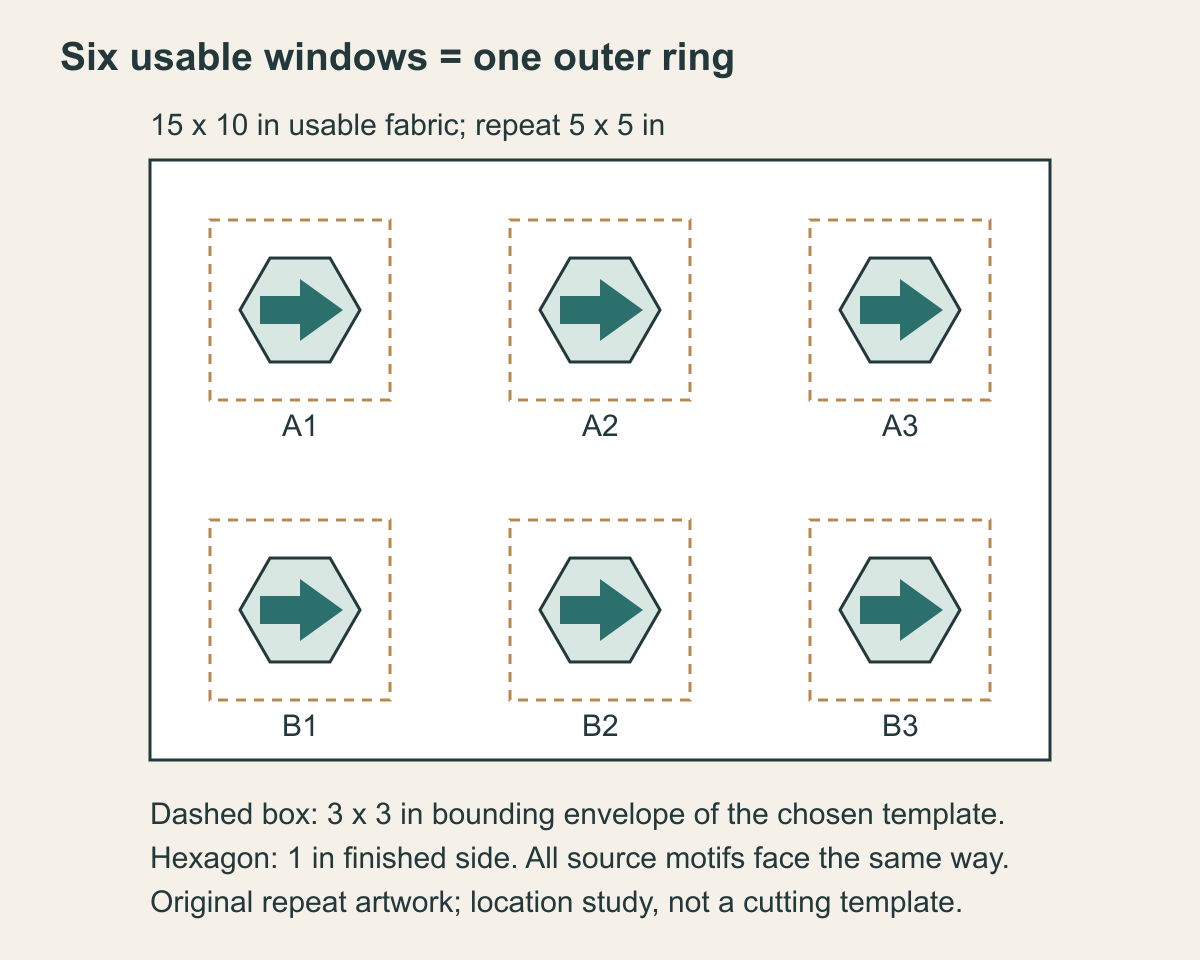
Six usable windows supply one six-piece ring with no spare. If the center uses the same framed motif, the complete seven-hexagon rosette needs one additional occurrence elsewhere. If you want two identical outer rings, you need twelve usable windows, so this rectangle supplies only half the ring pieces required.
Linda Franz's Inklingo discussion of fussy-cut fabric requirements shows why the repeat and the number of identical shapes matter. A simple area estimate cannot tell you whether your fabric supplies the matching set you need.
Make a six-position orientation plan
Number the outer positions clockwise from 1 to 6 and mark a recognizable "top" on the first framed window. Keep that same top mark on every selected occurrence in the fabric map. All six source windows should capture the same print before any patch is rotated into the ring.
For a rotational plan, place the first piece in its chosen position, then rotate the next identical piece by 60 degrees relative to it. Continue in 60-degree increments around the center: 0, 60, 120, 180, 240 and 300 degrees relative to the first placement. A 360-degree turn returns to the beginning.
The arrow in our original motif makes that relationship easy to inspect. Pointing all six arrows toward the center creates a radial arrangement; reversing each piece sends them outward. A fabric with a symmetrical stripe may hide a reversed piece, so use the reference marks even when the design appears forgiving.
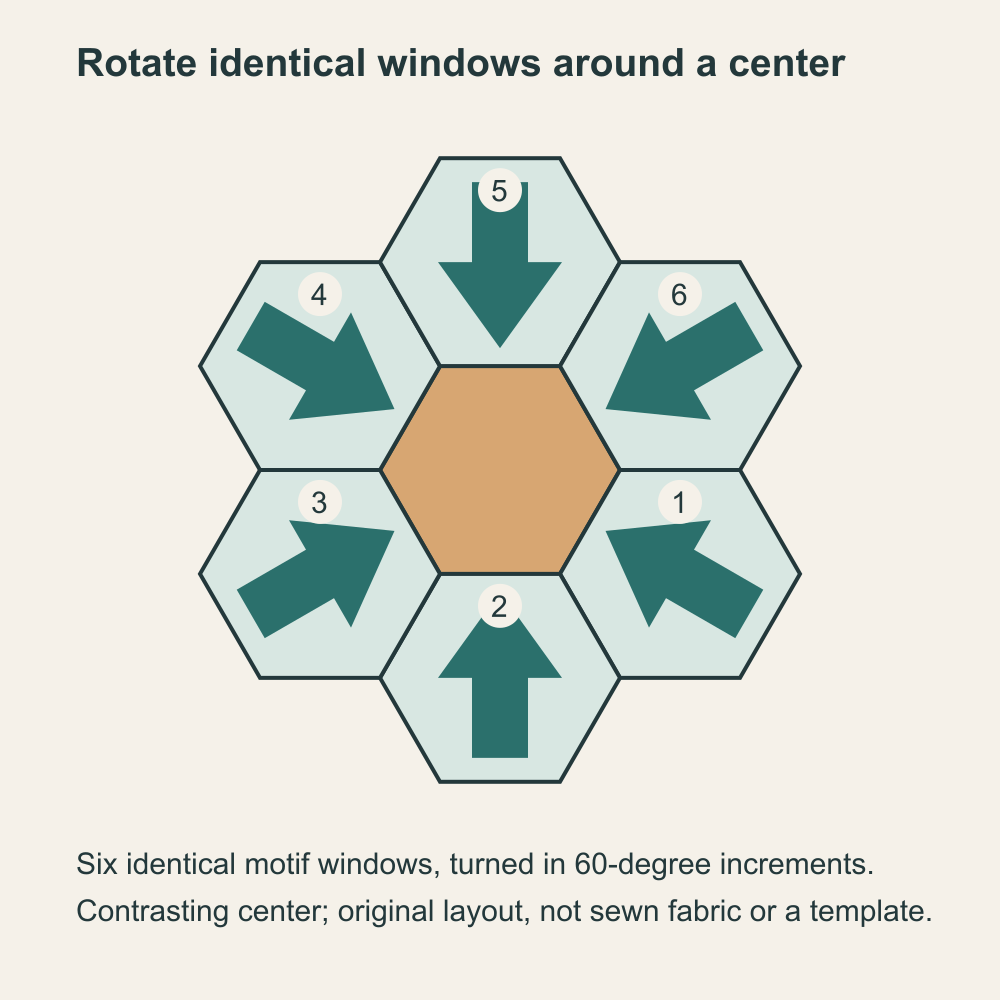
Rotation and reflection are different. Turning cloth rotates the printed artwork. Flipping a digital preview horizontally does not manufacture a mirror-image print on the right side of your real fabric. If your planned design requires reflected motifs, locate those mirrored motifs in the actual print or revise the arrangement.
Check the plan before cutting the whole set
Take a photograph of the chosen window and record its two reference details. Move the template to each repeat and check the finished window and the full cut boundary. Give every occurrence a number matching your map, so you can find it again without relying on memory.
Before committing all six cuts, verify one representative piece with the paper and template system you will use. Check whether wrapping or basting changes which details sit near the finished edges. This is a test you perform on your fabric; the original diagrams here have not been sewn.
If you are making more than one rosette, reserve the matching sets before taking convenient scraps from between them. Keep the six ring pieces together and label the center separately. A leftover with enough area may still lack the exact framing needed to replace a lost ring piece.
Check direction at both scales: one hexagon may look right alone while its motif points the wrong way in the ring. Compare the numbered arrangement with your chosen layout before joining the pieces. EPP basting and assembly belong to the instructions for your particular shape system and project.
Use a digital preview for composition
A preview can help compare a motif's placement and scale, provided its source image represents a measured area of your fabric. The Swatch Editor guide explains preparing and sizing a swatch; the Block Editor guide explains drawing and applying fabric.
In the Block Editor, Fabric > Tools > Fussy Cut moves a print within a fabric-filled piece. Our fussy-cutting overview walks through a measured square example. Use that workflow to compare framing, while keeping your physical hexagon paper and cutting template beside you.
The digital preview does not count repeats on your cloth, prove that mirrored motifs exist or supply a cutting template. Your repeat map answers how many usable windows you have; your physical template establishes the cut boundary; your orientation plan determines how the six pieces work together. When all three agree, you can begin the chosen project's construction steps with a defined set of motifs.
For a different print-matching task, see matching a printed motif across a pieced seam. That guide checks the seam-line join and the separate repeat positions needed for overlapping cut windows.
Related posts
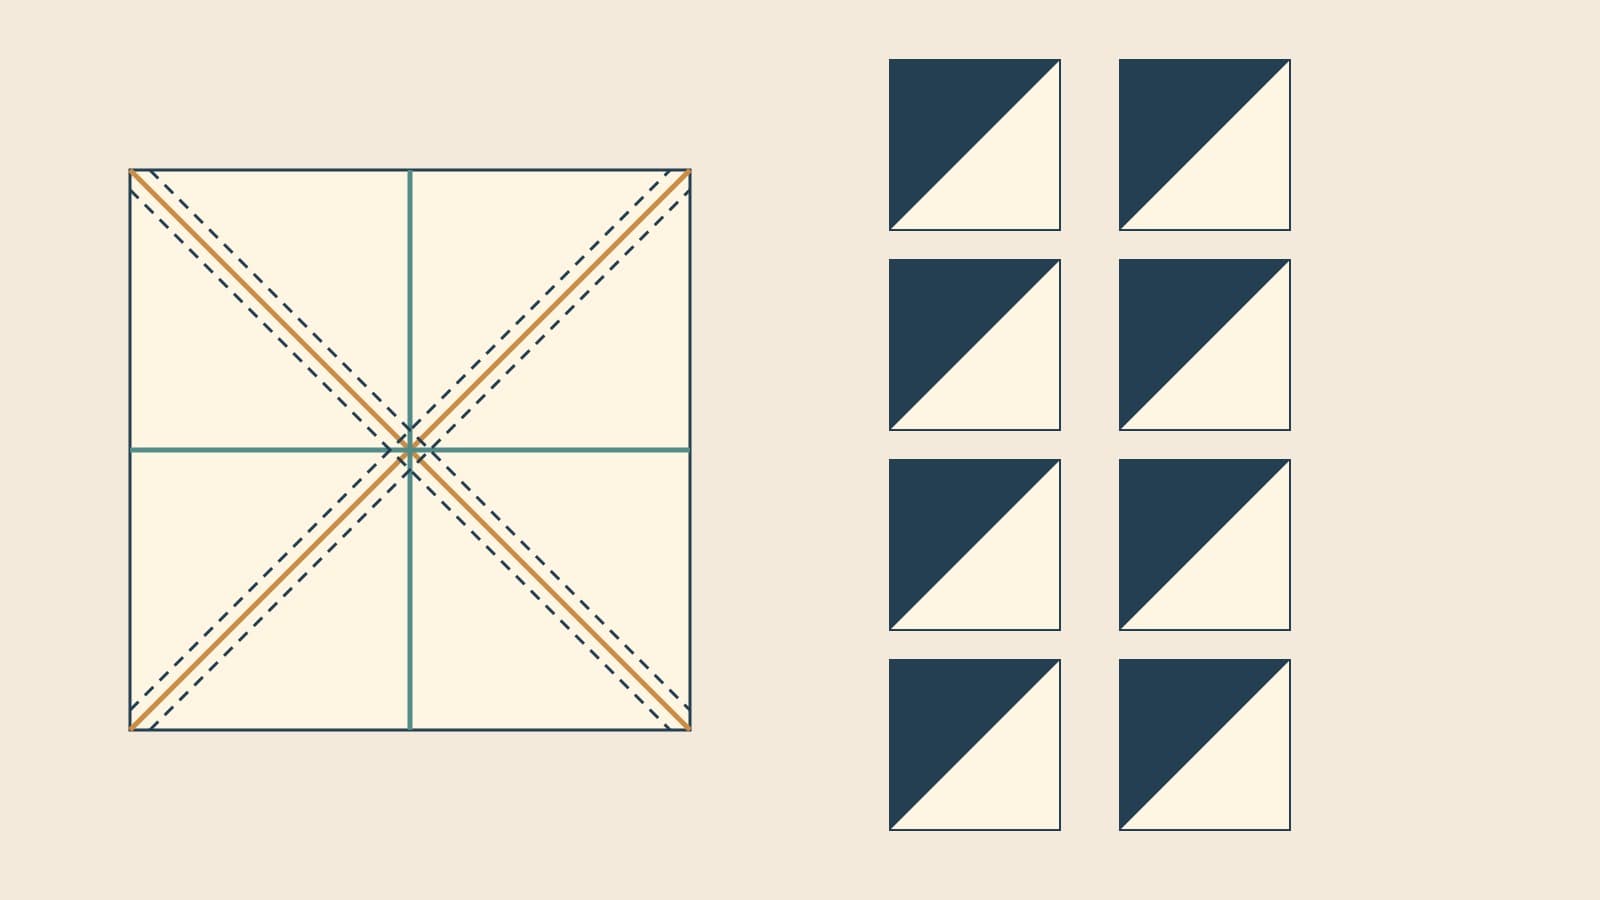
Eight at a Time Half Square Triangles: Batch Math
Plan eight-at-a-time half-square triangles with an oversized starting-square rule, a clear cutting sequence, and a 54-unit color-pair example.
Fussy Cutting: Plan the Motif Before You Cut
Frame the print, protect the seam allowance and count usable repeats. A four-inch square example, plus a QuiltLab preview before you cut.
How to Write a Quilt Pattern: Pages, Diagrams and Testing
Turn a quilt design into a clear pattern with a page plan, checked quantities, useful diagrams and a testing process.