Keep Pixel Quilt Pieces in Order Before Sewing
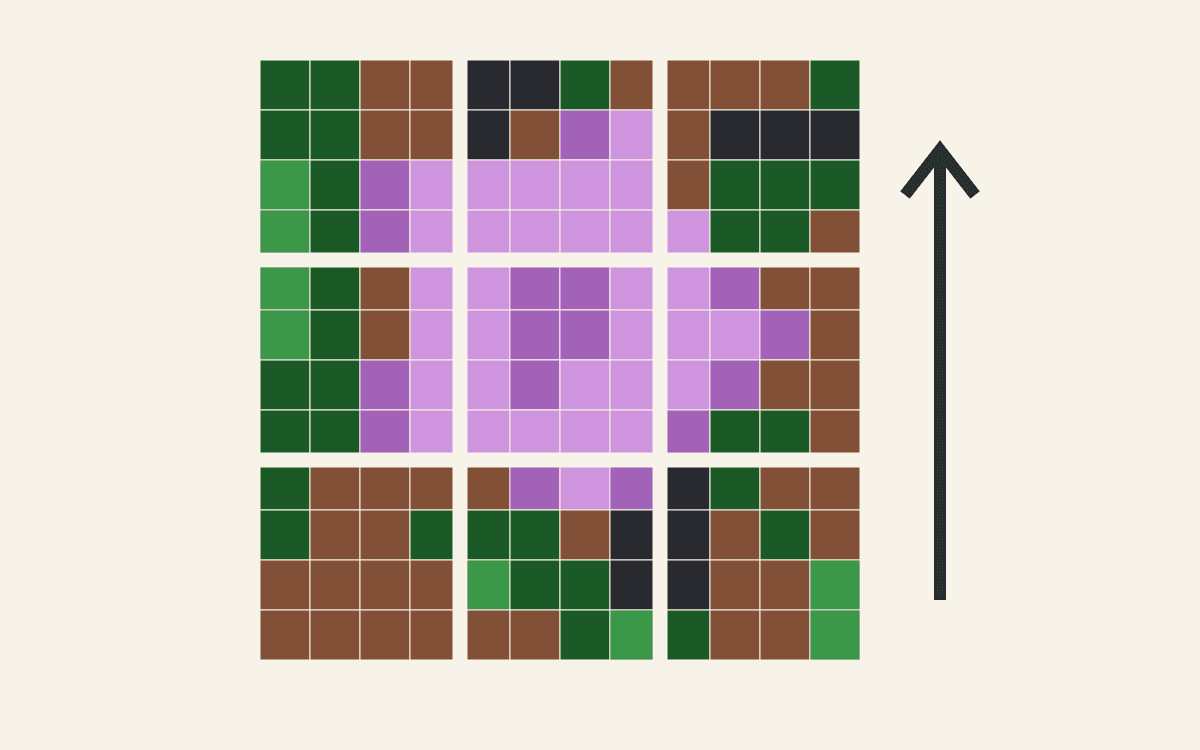
When organizing pixel quilt pieces, give every stack two kinds of information: which fabric it contains and where its pieces belong. Keep a master layout with a marked top edge, then label rows or small sections from that same view. A color number alone can't tell you where a square goes.
For a large picture, work in manageable sections while preserving the full layout. Choose a section size you can check comfortably; don't let a convenient tray become an unrecorded change to the design.
Choose one layout as the master
Use one saved guide for the whole preparation session. Add a version name and a clear top mark to the working copy. Keep an untouched copy separately so that notes, check marks or an accidental spill don't erase the design.
Our example follows the real QuiltLab square-layout guide saved October 16: 12 rows, 12 columns and 144 square patches. It comes from the CC0 photograph Morning Flower. The current file page credits Velatrix; the original upload and structured creator record name Nicolas M. Perrault.

We added the section addresses and worksheet for this article; they are a drawn organization plan, not a handling method we tested in cloth. The photo-quilt tutorial covers generating and checking a guide before this step.
If you revise a color or crop, put the new version beside the old one and identify what changed. Don't quietly replace the map after part of the fabric has been sorted.
Keep fabric identity separate from position
The fabric key answers, "Which cloth does Color 5 mean?" The layout answers, "Where does this Color 5 square go?" Both records matter.
Give each chosen fabric a card with its guide identifier and an attached sample when you have the cloth. Add the actual fabric name or your own inventory description. Keep that card with the source stack when you take pieces away for a section.
In Shirley's mosaic study at Mystery Bay Quilt Design, numbered fabric piles correspond to numbers in a value grid. That is the useful distinction: a pile identifies the fabric; the numbered map directs its placement.
Our flower's dark green occurs in 32 cells scattered through the picture. Thirty-two correctly cut green squares can still make a wrong picture if they land in the wrong positions. Keep a location record even for colors that look obvious.
Divide the picture without rotating its parts
Divide this 12-by-12 grid into nine sections, each four rows by four columns. Number section rows from top to bottom and section columns from left to right. Section 1,1 is at the upper left; section 3,3 is at the lower right.
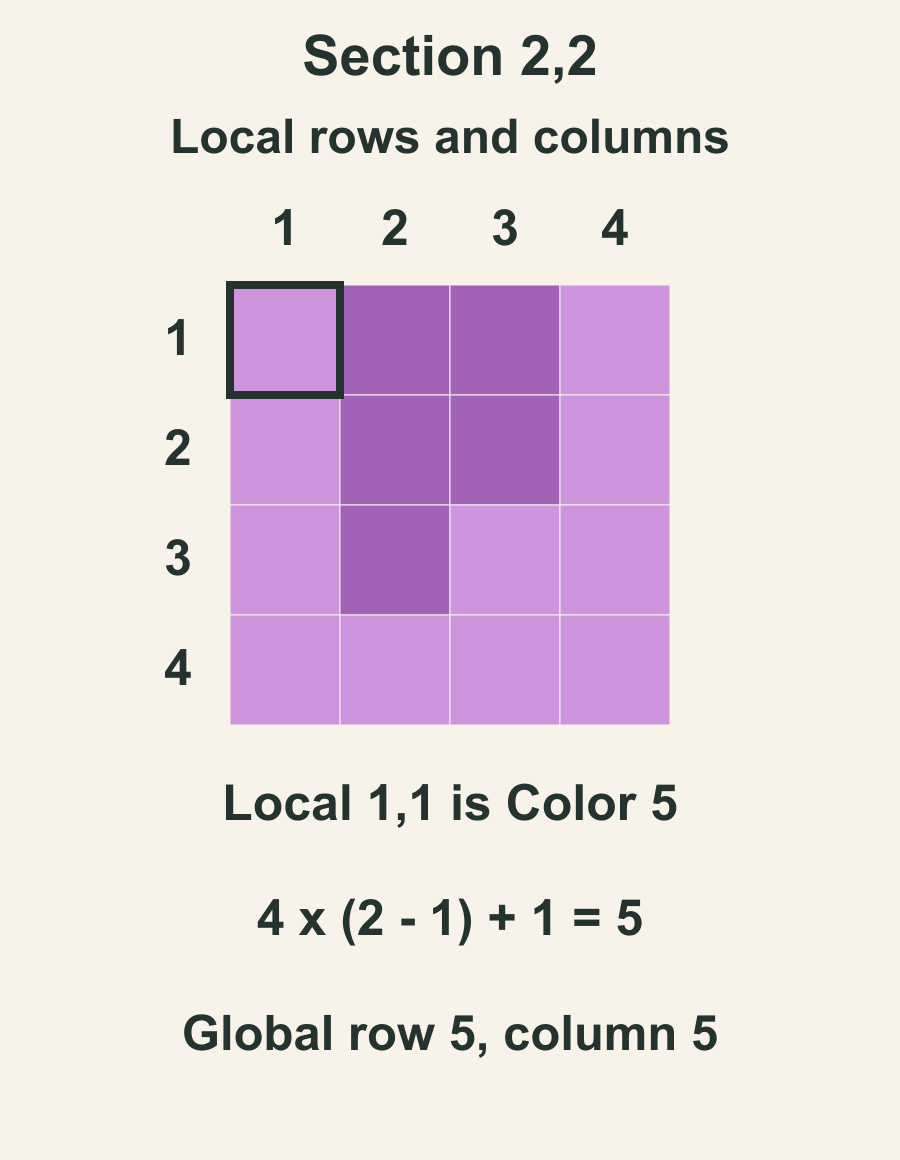
Inside every section, number local rows and columns from the same upper-left corner. Local 1,1 always means that section's top-left square.
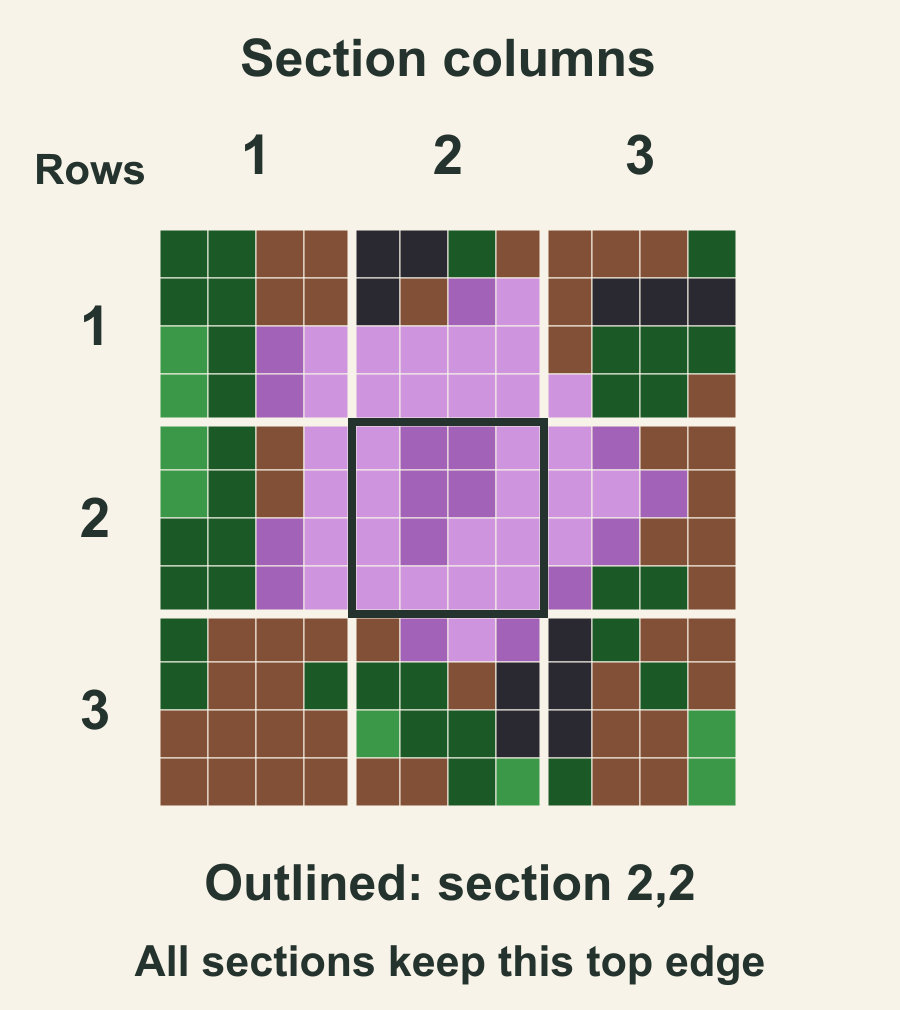
Jenn Thorsen's pixel-quilt article works section by section and checks color placement before moving on. Her illustrated construction uses a fusible grid; the addressing plan here can be written beside an ordinary loose-square layout without borrowing her fusing steps.
An arrow on each section card helps preserve that shared view. A square section can turn a quarter-turn and still fit its neighbor physically. Its picture will be wrong even though the outside dimensions agree.
Translate a section address back to the whole picture
Use this four-cell section size to translate an address:
Global row = 4 times (section row minus 1) plus local row.
Global column = 4 times (section column minus 1) plus local column.
For section 2,2, local row 1, column 1, both calculations give 4 times 1 plus 1 = 5. The piece belongs at global row 5, column 5. In the actual guide that cell is Color 5, pale purple.
The lower-right cell of the same section is local 4,4. Its global address is 8,8, also pale purple in this guide. The equal colors don't make those addresses interchangeable; other cells between them have different neighbors.
Check the two outside corners as well: global 1,1 is dark green, and 12,12 is the brighter green. These four checkpoints give you a quick way to catch a flipped master or a misplaced section.
Build a section packet before carrying it
Write a card with the guide version, section address and top arrow. Add a four-by-four working copy showing the sixteen positions. Then gather the pieces for that section against the copy.
Count sixteen pieces, but check their positions too. A total of sixteen won't reveal that two colors were exchanged. Start at local 1,1 and read each row across in order, comparing each square with its map.
Missouri Star's written row-organization tips recommend keeping rows ordered and adding numbered paper labels before carrying them to the machine. Apply that idea within the section: keep its row labels with the actual row stacks, not in an unattached pile beside the tray.
Before moving a stack, write down which end you intend to pick up first. If that choice is unclear after a break, lay the pieces out against the map again rather than guessing.
Use a worksheet that records what actually happened
One line per section makes unfinished checks visible:
| Section | Guide and orientation | Placement check | State |
|---|---|---|---|
| 1,1 | Record version and top mark | Compare all sixteen cells | Fill after checking |
| 2,2 | Same version and top mark | Check 5,5 through 8,8 | Fill after checking |
| Other seven | One separate line each | Check their own cells | Leave open until done |
Use states that distinguish sorted, laid out, sewn and checked. "Done" can otherwise mean four different things. Mark a section sewn only after it is sewn, and checked only after comparing the result with the guide.
Our chain-piecing organization guide covers keeping repeated units in sequence. A photograph adds a stricter requirement: every position belongs to a particular picture, so preserve its location as well as the sewing order.
Make a restart easy
At the end of a session, leave one clear restart note: the guide version, section address, row in progress and first unchecked position. Keep completed and unchecked pieces physically separated in a way you can explain later.
You can also work backward from a position on the master. Suppose your first unchecked square is global row 9, column 6. Row 9 falls in section row 3, which covers rows 9 through 12; column 6 falls in section column 2, which covers columns 5 through 8. Within section 3,2, that is local row 1, column 2. The actual guide calls for Color 4, darker purple, at that position. Write both addresses on the restart note so you can check the section against the full picture before picking up another stack.
Begin with section 1,1 and verify its sixteen positions against the master. Once the card, top mark and pickup order make sense, use the same system for the remaining sections. Keep their addresses attached through sewing so that the later joining stage starts with identifiable, correctly oriented work.
Free patterns to try
Printable PDF patterns with cutting charts and diagrams, free to download.
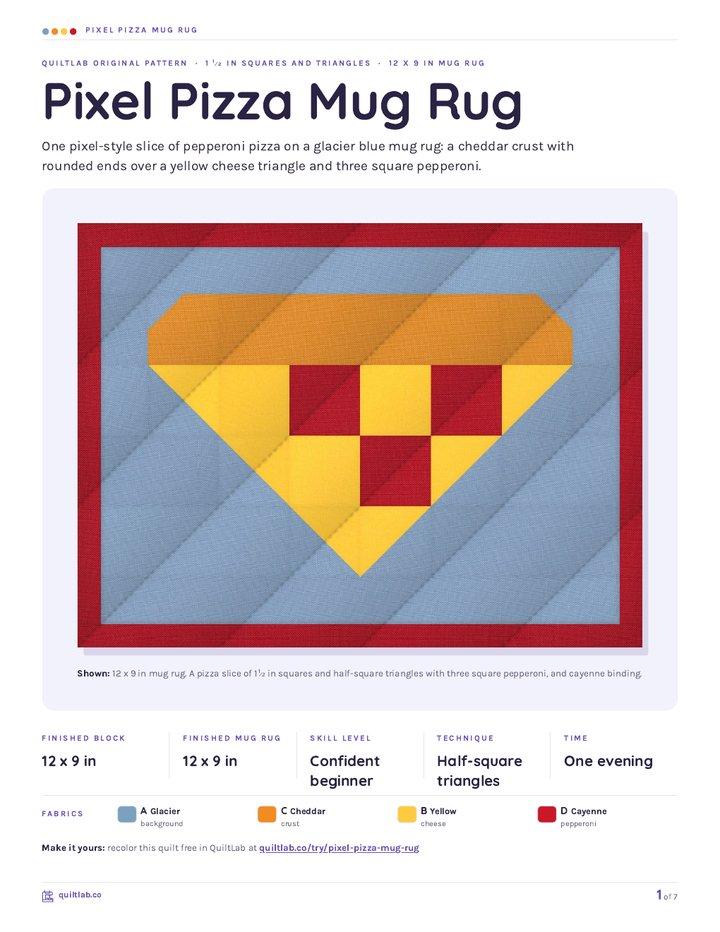
Pixel Pizza Mug Rug
Quilt patternBeginner · 12 x 9 in mug rug
Family Photo Quilt
Quilt patternBeginner · 54 x 62 in lap quilt
Every Little Piece
Quilt patternBeginner · 65 x 77 in throw
Plan your next quilt
Lay out blocks and try colors in QuiltLab's grid editor before you cut.
Free forever, no card needed.
Get quilting tips by email
QuiltLab updates, tips and quilting inspiration. Unsubscribe anytime.
Related posts
How to Change Photo Quilt Background Contrast
Compare two saved background edits at one fixed grid. Check shared colors, inspect a tree edge and keep the matching PDF guide before choosing cloth.
Photo Quilt Contrast: Keep Useful Detail
Compare three source-photo adjustments at one quilt grid. See where highlights disappear and check the applied image before choosing a mosaic.
Plan a Printed Photo Memory Quilt Layout
Give one photo room to lead, add separate captions and compare two measured drawings using provider-listed panel sizes.